ReAct 框架实战:50 行代码实现一个最小 Agent Loop
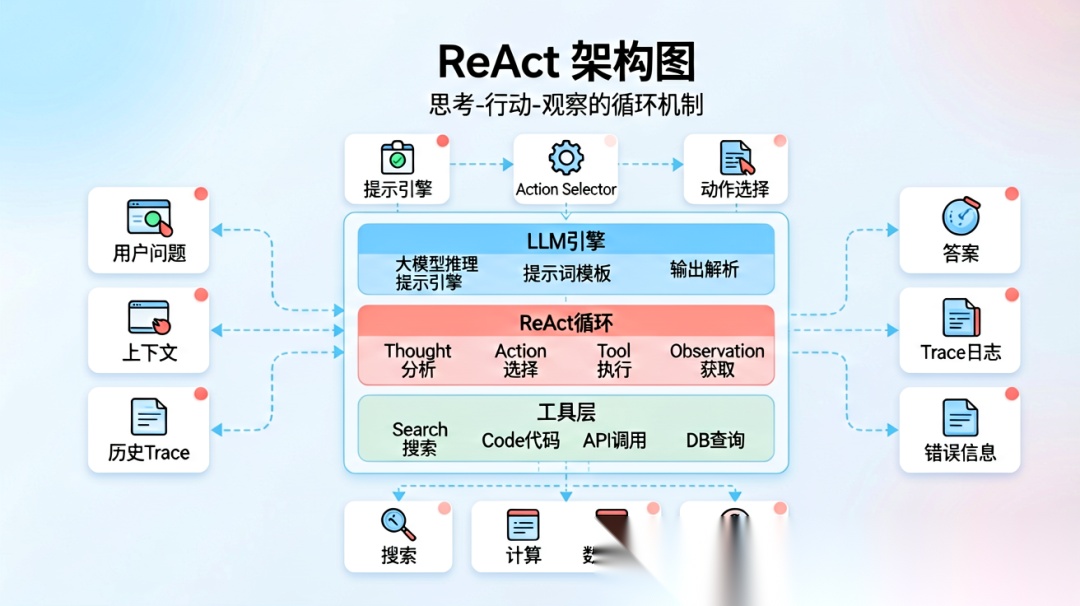
一、ReAct 到底是什么
ReAct = Reasoning + Acting
它让模型在推理和行动之间交替:先判断下一步该做什么,再调用工具,再根据观察结果继续。
说实话,ReAct 是理解 Agent loop 的入门框架。但工程里不要迷信"让模型一直想"——你真正要设计的是工具、状态、停止条件、错误恢复和 trace。
二、基本模式
经典的 ReAct 格式是这样的:
Question: ...

Thought: I need to search for evidence.

Action: search(query="...")

Observation: ...

Thought: The evidence is enough.

Final Answer: ...
但真实系统建议不要存完整的 Thought,而是存可审计的摘要。不然模型想太多,不仅费 token,还容易跑偏。
2.1 可审计的 Trace 格式
{ "step": 2, "action": "search", "args": {"query": "agentic rag evaluation"}, "reason_summary": "Need external evidence before comparing methods.", "observation_summary": "Found 5 papers from 2024-2025."}
这样既保留了可追溯性,又不会让模型的思考过程膨胀到失控。
三、50 行代码实现一个最小 Agent
话不多说,直接上代码。这段代码能让你看清 Agent loop 的完整过程。
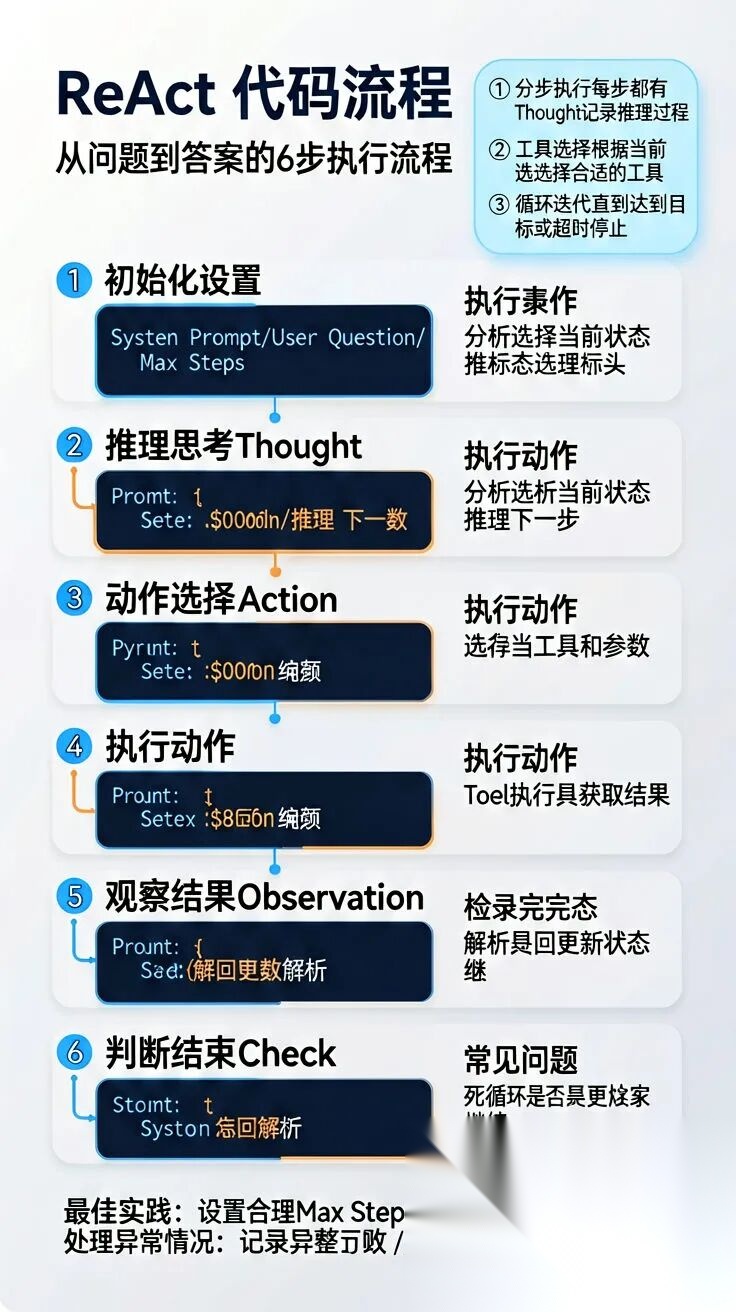
3.1 最小实现
def reacttask, model, tools, max_steps=6 for in range if"type" "final" return "answer""answer" "trace" "status" "completed""tool" if not in"ok" False "error" "unknown_tool" else"args" "step" 1 "tool" "args""args" "observation" return "answer" None "trace" "status" "max_steps_exceeded"
3.2 代码深度解读
这段代码虽然短,但包含了 Agent 的核心逻辑:
初始化阶段:
- •
trace = []:记录每一步的决策,用于调试和审计 - •
observations = []:保存工具返回的结果,用于上下文构建
循环阶段:
- •
for step in range(max_steps):最多执行 max_steps 步,防止无限循环 - •
build_prompt(task, tools, observations):构建 prompt,包含任务、工具、历史观察 - •
model.generate_json(prompt):模型根据当前状态生成下一步决策
决策分支:
- •
if decision["type"] == "final":模型决定结束,返回答案和 trace - •
else:模型决定调用工具,执行工具调用
工具调用:
- •
if tool_name not in tools:工具不存在,返回错误 - •
else:工具存在,执行工具调用,获取观察结果
记录阶段:
- •
observations.append(obs):保存观察结果,用于后续上下文 - •
trace.append({...}):记录这一步的决策和结果
异常处理:
- • 超过最大步数,返回
max_steps_exceeded状态 - • 工具不存在,返回错误信息
3.3 数据流分析
Task (用户任务)

  ↓

Prompt Builder (构建 prompt)

  ├─ Task

  ├─ Tools (工具列表)

  └─ Observations (历史观察)

  ↓

Model (模型决策)

  ├─ Type: tool_call | final

  ├─ Tool: 工具名称

  ├─ Args: 工具参数

  └─ Answer: 最终答案

  ↓

Tool Executor (执行工具)

  ├─ Tool Name

  ├─ Args

  └─ Observation (观察结果)

  ↓

Trace Recorder (记录 trace)

  ├─ Step

  ├─ Tool

  ├─ Args

  └─ Observation Summary

  ↓

Return (返回结果)

  ├─ Answer

  ├─ Trace

  └─ Status
3.4 关键设计决策
为什么用 JSON 格式?
- • 结构化输出,容易解析
- • 类型明确,减少错误
- • 易于扩展,可以添加新字段
为什么限制最大步数?
- • 防止无限循环
- • 控制成本
- • 强制模型在有限步数内完成任务
为什么记录 trace?
- • 调试:出问题时可以查看每一步的决策
- • 审计:可以追踪 Agent 的行为
- • 优化:可以分析哪些步骤可以优化
为什么 summarize observation?
- • 控制上下文长度
- • 提取关键信息
- • 减少干扰
四、Prompt 设计技巧
Prompt 是 Agent 的灵魂。好的 Prompt 能让模型更聪明,坏的 Prompt 能让模型发疯。
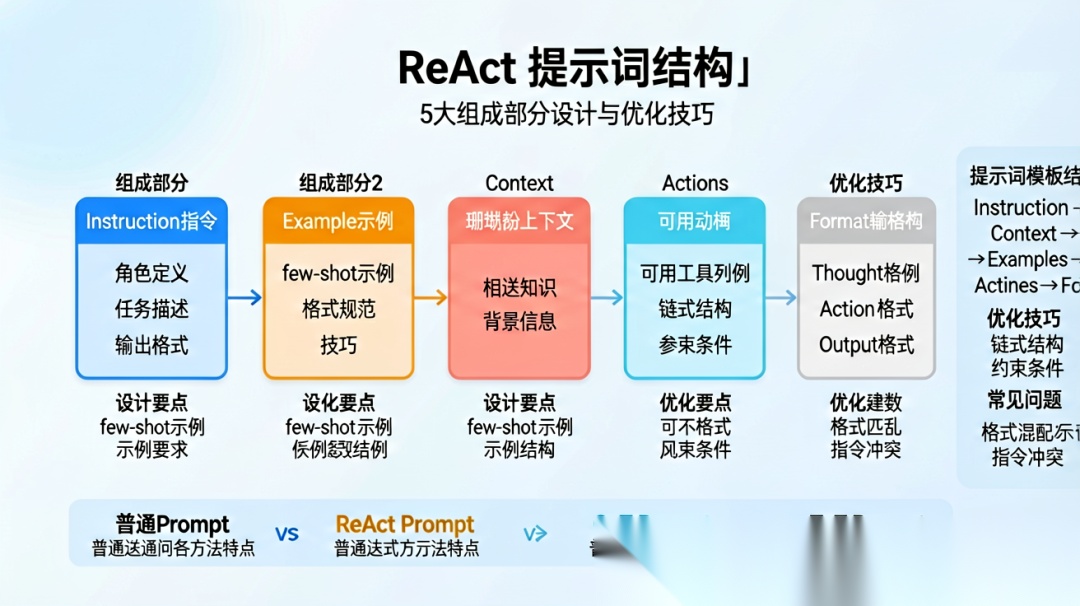
4.1 推荐的 Prompt 结构
You are an agent that solves the task by calling tools.

Rules:

- Use only the listed tools.

- Stop when enough evidence is collected.

- If evidence is missing, say what is missing.

- Never fabricate tool results.

Task:

{task}

Tools:

{tool_cards}

Previous observations:

{observations}

Return JSON:

{

  "type": "tool_call | final",

  "tool": "tool name or null",

  "args": {},

  "answer": "final answer or null",

  "reason_summary": "short auditable reason"

}
4.2 Prompt 各部分深度解析
System Role(系统角色)
You are an agent that solves the task by calling tools.
- • 明确 Agent 的角色:一个通过调用工具解决问题的智能体
- • 设定 Agent 的行为模式:调用工具、观察结果、推进任务
Rules(规则)
- Use only the listed tools.

- Stop when enough evidence is collected.

- If evidence is missing, say what is missing.

- Never fabricate tool results.
- • 限制工具使用:只能使用列出的工具,不能编造工具
- • 明确停止条件:收集到足够证据就停止
- • 处理缺失信息:如果证据缺失,明确说明缺失什么
- • 禁止编造:不能编造工具结果,必须基于真实观察
Task(任务)
{task}
- • 清晰描述任务目标
- • 包含任务约束(如预算、时间)
- • 明确成功标准
Tools(工具列表)
{tool_cards}
每个工具卡片包含:
- • 工具名称:清晰、具体、无歧义
- • 工具描述:能做什么,不能做什么
- • 参数定义:参数类型、范围、默认值
- • 返回值:返回什么,格式是什么
- • 示例:如何调用,返回什么
Previous Observations(历史观察)
{observations}
- • 记录之前的工具调用和结果
- • 用于上下文构建
- • 帮助模型理解当前状态
Return JSON(返回格式)
{

  "type": "tool_call | final",

  "tool": "tool name or null",

  "args": {},

  "answer": "final answer or null",

  "reason_summary": "short auditable reason"

}
- •
type:决策类型,工具调用或结束 - •
tool:工具名称,如果 type 是 final 则为 null - •
args:工具参数,如果 type 是 final 则为空 - •
answer:最终答案,如果 type 是 tool_call 则为 null - •
reason_summary:简短的可审计理由
4.3 关键设计原则
1. 规则要明确
别写"尽量不要…“这种模糊的话,直接写"禁止…”、“必须…”。
反例:
- Try to use the listed tools.

- Stop when you think you have enough evidence.
正例:
- Use only the listed tools.

- Stop when enough evidence is collected.
2. 工具描述要具体
别写"查数据",要写清楚:
- • 工具能做什么
- • 参数是什么,类型是什么
- • 返回什么
- • 举个例子
反例:
search: 查数据
正例:
search: 搜索互联网上的信息

参数:

  query: 搜索关键词(字符串,必需)

  num_results: 返回结果数量(整数,可选,默认 5)

返回:

  results: 搜索结果列表,每个结果包含 title、url、snippet

示例:

  输入: {"query": "AI Agent", "num_results": 3}

  输出: {"results": [{"title": "...", "url": "...", "snippet": "..."}]}
3. 格式要严格
让模型返回 JSON,并且明确每个字段的含义。最好给个示例,模型更容易理解。
反例:
Return your decision.
正例:
Return JSON:

{

  "type": "tool_call | final",

  "tool": "tool name or null",

  "args": {},

  "answer": "final answer or null",

  "reason_summary": "short auditable reason"

}

Example:

{

  "type": "tool_call",

  "tool": "search",

  "args": {"query": "AI Agent"},

  "answer": null,

  "reason_summary": "Need to search for information about AI Agent."

}
4. 限制思考长度
不要让模型写长篇大论的思考,只让它写 reason_summary——一句话说明为什么选这个工具。
反例:
thought: I need to search for information about AI Agent. Let me think about what keywords to use. Maybe "AI Agent" or "autonomous agent". I'll start with "AI Agent" and see what I get.
正例:
reason_summary: Need to search for information about AI Agent.
4.4 Prompt 优化技巧
技巧 1:使用 Few-Shot Examples
给模型几个示例,让它理解如何调用工具。
Example 1:

Task: What is the weather in Beijing tomorrow?

Decision:

{

  "type": "tool_call",

  "tool": "search_weather",

  "args": {"city": "Beijing", "date": "tomorrow"},

  "answer": null,

  "reason_summary": "Need to check weather forecast for Beijing tomorrow."

}

Example 2:

Task: Summarize the latest news about AI.

Decision:

{

  "type": "tool_call",

  "tool": "search_news",

  "args": {"query": "AI", "num_results": 5},

  "answer": null,

  "reason_summary": "Need to search for latest AI news to summarize."

}
技巧 2:使用 Chain-of-Thought
让模型先思考,再行动。
Think step by step:

1. What do I need to do?

2. Which tool can help?

3. What parameters does the tool need?

4. What do I expect the tool to return?

Then make your decision.
技巧 3:使用 Reflection
让模型反思之前的决策。
After each tool call, reflect:

- Did the tool return what I expected?

- Do I have enough information to answer the question?

- What should I do next?

If the tool failed or returned unexpected results, try a different approach.
技巧 4:使用 Self-Correction
让模型自我纠正错误。
If you make a mistake:

1. Acknowledge the mistake.

2. Explain why it was a mistake.

3. Propose a correction.

4. Execute the correction.

Example:

Mistake: I called the wrong tool.

Correction: I should have called search_weather instead of search_news.

Action: Call search_weather with the correct parameters.
五、工程化注意事项
上面的代码只是一个最小实现。真实项目中,你还需要考虑这些问题:
5.1 状态持久化
长任务需要持久化状态,不然 Agent 重启后就忘了之前做了什么。
我之前做过一个代码修复 Agent,改到第三步就忘了第一步改了什么——因为状态只存在内存里,重启后全丢了。后来用 LangGraph 的持久执行,问题就解决了。
5.2 错误恢复
工具调用可能失败,网络可能超时,模型可能返回格式错误。你需要:
- • 重试机制
- • 超时控制
- • 格式校验
- • 降级方案
5.3 人工介入
有些高风险操作需要人工确认,比如发邮件、删文件、付款。你需要:
- • 权限分级
- • human-in-the-loop 机制
- • 审核日志
5.4 成本控制
模型调用和工具调用都要花钱。你需要:
- • Token 预算控制
- • 缓存机制
- • 成本监控
六、常见坑
坑一:让模型想太多
模型的思考过程会消耗大量 token,而且不一定有用。建议只记录 reason_summary,而不是完整的 chain-of-thought。
坑二:工具返回值太长
工具返回 10MB 的原始数据,模型根本处理不过来。建议:
- • 返回摘要
- • 分页返回
- • 只返回关键信息
坑三:没有停止条件
Agent 可能无限循环搜索信息。建议:
- • 设置最大步数
- • 设置时间限制
- • 让模型自己判断是否停止
坑四:没有 trace
出问题时不知道模型做了什么,根本无法调试。一定要记录完整的 trace。
七、从 50 行代码到生产级系统
上面的代码只是一个起点。要做成生产级系统,你需要:
- 状态管理:用 LangGraph 或类似框架管理复杂状态流
- 持久化:把状态和 trace 存到数据库
- 安全:权限分级、审计日志、数据脱敏
- 评测:构造 eval case,持续评估 Agent 效果
- 监控:监控延迟、成本、成功率
- 运维:部署、扩容、故障恢复
学AI大模型的正确顺序,千万不要搞错了
🤔2026年AI风口已来!各行各业的AI渗透肉眼可见,超多公司要么转型做AI相关产品,要么高薪挖AI技术人才,机遇直接摆在眼前!
有往AI方向发展,或者本身有后端编程基础的朋友,直接冲AI大模型应用开发转岗超合适!
就算暂时不打算转岗,了解大模型、RAG、Prompt、Agent这些热门概念,能上手做简单项目,也绝对是求职加分王🔋
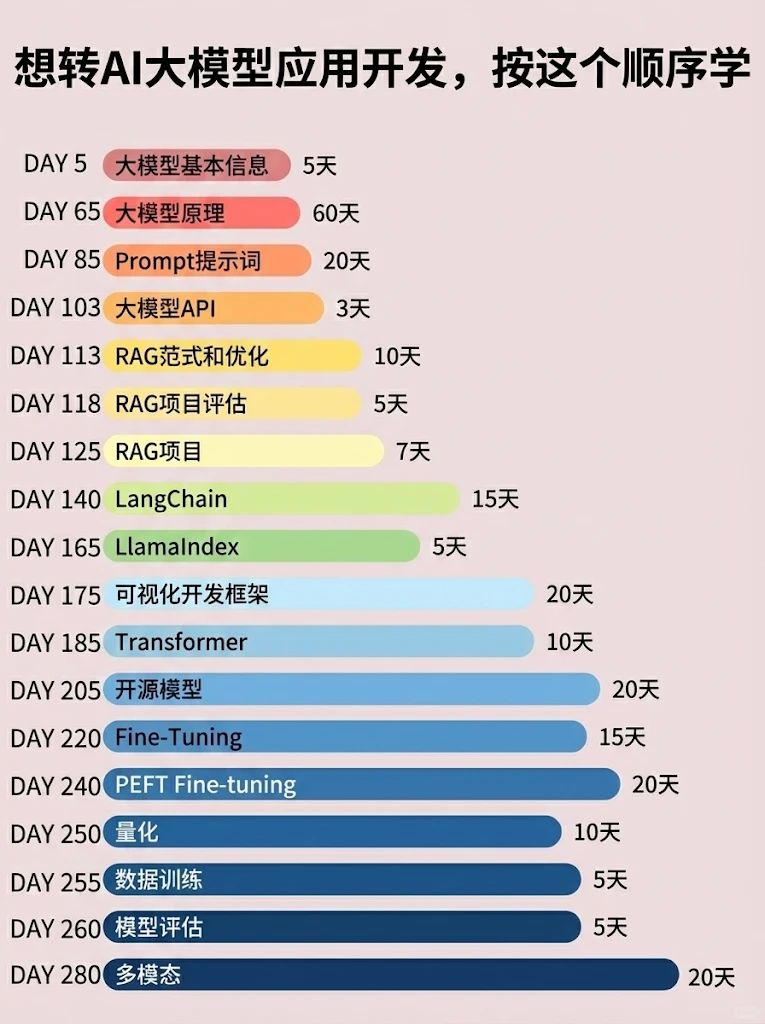
📝给大家整理了超全最新的AI大模型应用开发学习清单和资料,手把手帮你快速入门!👇👇
学习路线:
✅大模型基础认知—大模型核心原理、发展历程、主流模型(GPT、文心一言等)特点解析
✅核心技术模块—RAG检索增强生成、Prompt工程实战、Agent智能体开发逻辑
✅开发基础能力—Python进阶、API接口调用、大模型开发框架(LangChain等)实操
✅应用场景开发—智能问答系统、企业知识库、AIGC内容生成工具、行业定制化大模型应用
✅项目落地流程—需求拆解、技术选型、模型调优、测试上线、运维迭代
✅面试求职冲刺—岗位JD解析、简历AI项目包装、高频面试题汇总、模拟面经
以上6大模块,看似清晰好上手,实则每个部分都有扎实的核心内容需要吃透!
我把大模型的学习全流程已经整理📚好了!抓住AI时代风口,轻松解锁职业新可能,希望大家都能把握机遇,实现薪资/职业跃迁~
这份完整版的大模型 AI 学习资料已经上传CSDN,朋友们如果需要可以微信扫描下方CSDN官方认证二维码免费领取【保证100%免费】


Agent 垂直技术社区,欢迎活跃、内容共建。
更多推荐



 8
8 0
0- 0


 已为社区贡献214条内容

所有评论(0)