Java+Selenium+Junit5对个人博客进行自动化测试(包含代码和视频)
本篇文章将记录作者和带领读者,使用Java+Selenium+Junit5测试框架,对个人博客系统进行自动化测试。作者的个人博客系统分为前台系统和后台系统,这次测试主要测试前台的注册、首页、详情页、个人中心界面,后台的登录和标签管理界面。下图是整个系统测试用例的设计。

由于掘金上传视频不方便,本篇文章中把视频转为gif展示了,有一点点糊🥲
想看视频的朋友点这里👉 【Java+Selenium+Junit5对个人博客进行自动化测试(包含代码和视频) - CSDN App】t.csdnimg.cn/Xevqv
后台系统
后台指的是:管理个人博客的后台系统
登录界面测试
1、编写测试用例

2、准备工作
(1)新建maven工程

(2)引入依赖
Selenium、Junit5、用于截图的工具包
-
<dependency> -
<groupId>org.seleniumhq.selenium</groupId> -
<artifactId>selenium-java</artifactId> -
<version>4.18.1</version> -
</dependency> -
<!-- 保存屏幕截图文件需要用到的包 --> -
<dependency> -
<groupId>commons-io</groupId> -
<artifactId>commons-io</artifactId> -
<version>2.6</version> -
</dependency> -
<dependency> -
<groupId>org.junit.jupiter</groupId> -
<artifactId>junit-jupiter</artifactId> -
<version>5.8.2</version> -
<scope>test</scope> -
</dependency> -
<dependency> -
<groupId>org.junit.platform</groupId> -
<artifactId>junit-platform-suite</artifactId> -
<version>1.8.2</version> -
<scope>test</scope> -
</dependency>
(3)在test包下创建包的结构

(4)准备一个工具类,用于创建driver驱动和隐式等待

- selenium浏览器驱动安装不再赘述,网上有很多资料
- 隐式等待的原因是:我们在自动化测试的时候要频繁获取页面中的元素,很多时候页面元素的加载速度赶不上自动化代码的执行速度,会导致找不到元素的情况。为避免这种情况,我们进行隐式等待,让程序等我们一会。注意:隐式等待作用于WebDriver整个生命周期,只要没有执行driver.quit,即没有退出浏览器,隐式等待都是一直存在的。
-
public class AutoTestUtils { -
public static ChromeDriver driver; -
-
public static ChromeDriver createDriver() { -
if(driver == null){ -
System.setProperty("webdriver.chrome.driver","D:\JavaSet\jdk\myjdk8\bin\chromedriver.exe"); -
ChromeOptions options = new ChromeOptions(); -
options.addArguments("--remote-allow-origins=*"); -
driver = new ChromeDriver(options); -
// 设置隐式等待时间 -
driver.manage().timeouts().implicitlyWait(Duration.ofSeconds(10)); -
System.out.println("ChromeDriver创建完毕......"); -
} -
return driver; -
} -
}
3、测试页面显示是否正确

- @TestMethodOrder注解使用
OrderAnnotation方法排序器,它会按照@Order注解中指定的顺序来执行测试方法。数字越小越先执行。 - 在执行之后的测试方法之前,我们要先打开博客后台登录页面。
- 通过页面的一些元素定位,加上断言进行验证页面显示是否正确。
4、测试登录失败的情况

- @ParameterizedTest + @CsvSource 注解用于参数化测试。减少重复的测试代码,提高测试的可维护性。
- 由于WebDriver只能在一个页面上对元素识别与定位,而错误提示信息是隐藏弹窗,无法定位无法获取。这里采用强制等待+Js代码来定位隐藏的div弹窗。这里不用隐式等待的原因是: 作用不了非HTML页面的元素的,所以弹窗无法等待,看下是否在切换到弹窗之前弹窗还没有出现,终端报的错误是不是noalert。这里不用显示等待的原因是: 我们的登录界面测试类继承了AutoTestUtils类,这个类实现了隐式等待,隐式等待和显示等待十分不推荐共同使用,会带来意想不到的错误!
5、测试登录正常的情况

- 通过保存屏幕截图,可以更直观地了解测试执行时页面的状态,有助于定位问题和进行故障排查。
6、测试代码和视频
-
package BlogAdmin; -
-
import common.AutoTestUtils; -
import org.apache.commons.io.FileUtils; -
import org.junit.jupiter.api.*; -
import org.junit.jupiter.params.ParameterizedTest; -
import org.junit.jupiter.params.provider.CsvSource; -
import org.openqa.selenium.*; -
import org.openqa.selenium.chrome.ChromeDriver; -
import java.io.File; -
import java.io.IOException; -
import java.time.Duration; -
-
/** -
* @author 3A87 -
* @description 后台登录界面测试 -
*/ -
@TestMethodOrder(MethodOrderer.OrderAnnotation.class) // 说明当前该类下面的测试方法要按一定的顺序执行 -
public class LoginTest extends AutoTestUtils { -
public static ChromeDriver driver = createDriver(); -
@Test -
@BeforeAll // 被@BeforeAll修饰的方法要是静态的 -
static void init() { -
// 跳转到博客登录页面 -
driver.get("http://123.xx.xx.xxx:xxxx/"); -
} -
/** -
* 检查登录页面是否正常显示 -
*/ -
@Test -
@Order(1) -
void loginPageTest(){ -
// 隐式等待--// 隐式等待,更加丝滑——》作用于下面的整个作用领域,这个方法中的所有元素,在这3秒内不断轮询 -
driver.manage().timeouts().implicitlyWait(Duration.ofSeconds(3)); -
// 利用断言判断登录的文本内容显示是否正确 -
String expect = "Login Form"; -
String actual = driver.findElement(By.cssSelector(".title")).getText(); // 检查登录页面的登录文本是否存在 -
//System.out.println(actual); -
Assertions.assertEquals(expect, actual); -
// 检查提交按钮是否存在 -
driver.findElement(By.cssSelector("[type='button']")); -
} -
-
/** -
* 检查登录失败的情况,每写一个测试用例就测试一下 -
*/ -
@Order(2) -
@ParameterizedTest // 多个参数,不用加@Test -
@CsvSource({"mie,666666","admin, 1234"}) -
void loginFailTest(String username, String password) throws InterruptedException { -
// 把之前默认填充内容清空 -
driver.findElement(By.cssSelector("[name='userName']")).clear(); -
driver.findElement(By.cssSelector("[name='password']")).clear(); -
//输入用户名和密码 -
driver.findElement(By.cssSelector("[name='userName']")).sendKeys(username); -
driver.findElement(By.cssSelector("[name='password']")).sendKeys(password); -
//点击登录 -
driver.findElement(By.cssSelector("[type='button']")).click(); -
Thread.sleep(2000); -
// 使用 JavascriptExecutor 执行 JavaScript 代码来操作隐藏的 div 弹窗 -
JavascriptExecutor js = driver; -
WebElement hiddenDiv = (WebElement) js.executeScript("return document.querySelector("div[role='alert'][class='el-message el-message--error']")"); -
-
System.out.println(hiddenDiv.getText()); -
} -
-
-
/** -
* 检查正常登录的情况 -
*/ -
@Order(3) -
@ParameterizedTest -
@CsvSource({"mie, 1234"}) -
void loginRightTest(String username, String password) throws InterruptedException, IOException { -
// 把之前的输入的内容清空 -
driver.findElement(By.cssSelector("[name='userName']")).clear(); -
driver.findElement(By.cssSelector("[name='password']")).clear(); -
//输入用户名和密码 -
driver.findElement(By.cssSelector("[name='userName']")).sendKeys(username); -
driver.findElement(By.cssSelector("[name='password']")).sendKeys(password); -
//点击登录 -
driver.findElement(By.cssSelector("[type='button']")).click(); -
Thread.sleep(1000); -
// 上述步骤只是说明输入了账号和密码,但还不知道点击提交后是否会跳转到博客列表页 -
String expect = "http://123.56.154.146:8094/#/dashboard"; -
String actual = driver.getCurrentUrl(); -
Assertions.assertEquals(expect, actual); // 查看当前的url是否在博客详情页面 -
// 进行截图,看当前是否跳转到了登录界面 -
File srcFile = driver.getScreenshotAs(OutputType.FILE); -
String fileName = "loginRightTest.png"; -
FileUtils.copyFile(srcFile, new File(fileName)); -
} -
// 这里我们不关闭driver驱动,因为我们要保证登录状态 -
}

标签模块功能测试
我们测试方法的顺序是增、改、查、删,这样保证最后不对已上线的博客系统造成影响
1、准备工作
(1)测试用例
增加标签:

修改标签:

查询标签:

删除标签:

(2)添加测试套件
通过测试套件可以同时执行多个类的测试用例。
在测试标签模块功能前,必须先进行登录,才可以进行对标签的增删改查,这里可以使用测试套件确保先登录。
junit5测试套件注解有两种:
-
// 第一种方法: @Suite && @SelectClasses -
// 第二种方法: @Suite && @SelectPackages -- 指定包名类运行包下所有的测试用例

(3)进入标签页面

- 在定位
标签管理的时候,直接用driver定位,定位不到,这里采用js的方式。在前面登录界面测试中提到过。

2、测试新增标签功能

- AutoTestUtils类里增加一个检查页面是否存在标签名为tag的标签的方法,在后面测试修改标签功能也会用到。

- 在上面这个方法,我采用的方法是定位页面中标签名的位置,提取出所有标签名,再遍历是否包含我新增的标签名。
3、测试修改标签功能

- 要定位上个新增标签测试方法增加的标签,需要知道该标签所在的行数。在AutoTestUtils类增加一个查询tag所在的行号的方法,因为后面删除测试方法也要用到。

- 修改tag的名字为tag+“——修改了”,便于后面做断言。
4、测试搜索标签功能

5、测试删除标签功能

6、测试代码和视频
-
package BlogAdmin; -
-
import common.AutoTestUtils; -
import org.apache.commons.io.FileUtils; -
import org.junit.jupiter.api.*; -
import org.junit.jupiter.params.ParameterizedTest; -
import org.junit.jupiter.params.provider.CsvSource; -
import org.openqa.selenium.*; -
-
import java.io.File; -
import java.io.IOException; -
-
/** -
* @author 3A87 -
* @description 测试标签模块的增删改查功能 -
*/ -
@TestMethodOrder(MethodOrderer.OrderAnnotation.class) -
public class TagTest extends AutoTestUtils { -
@Test -
@BeforeAll -
static void init() { -
driver.get("http://123.xx.xxx.xxx:xxxx/?#/dashboard"); -
//点击内容管理 -
driver.findElement(By.xpath("//*[@id="app"]/div/div[1]/div/div[1]/div/ul/div[13]/li/div[1]")).click(); -
//点击标签管理 -
//driver.findElement(By.xpath("//*[@id="app"]/div/div[2]/div/div[1]/div/ul/div[13]/li/ul/div[4]")).click(); -
JavascriptExecutor js = driver; -
WebElement tagDiv = (WebElement) js.executeScript("return document.querySelector("#app > div > div.sidebar-container > div > div.scrollbar-wrapper.el-scrollbar__wrap > div > ul > div:nth-child(13) > li > ul > div:nth-child(4)")"); -
tagDiv.click(); -
} -
-
-
@Order(1) -
@ParameterizedTest -
@CsvSource({"测试tag1,测试remark"}) -
void addTagTest(String tag,String remark) throws InterruptedException { -
//点击新增按钮 -
driver.findElement(By.xpath("//*[@id="app"]/div/div[2]/section/div/div[1]/div[1]/button")).click(); -
-
Thread.sleep(100); -
String expect = "添加标签"; -
String actual = driver.findElement(By.xpath("/html/body/div[2]/div/div[1]/span")).getText(); -
Assertions.assertEquals(expect,actual); -
-
driver.findElement(By.xpath("/html/body/div[2]/div/div[2]/form/div[1]/div/div/input")).sendKeys(tag); -
driver.findElement(By.xpath("/html/body/div[2]/div/div[2]/form/div[2]/div/div/textarea")).sendKeys(remark); -
-
driver.findElement(By.xpath("/html/body/div[2]/div/div[3]/div/button[1]")).click(); -
-
//刷新页面 -
driver.navigate().refresh(); -
Thread.sleep(300); -
-
//检查页面是否新增成功 -
boolean result = AutoTestUtils.containsTag(tag); -
Assertions.assertTrue(result); -
} -
-
@Order(2) -
@ParameterizedTest -
@CsvSource({"测试tag1,测试remark"}) -
void updateTagTest(String tag,String remark) throws InterruptedException { -
//查找新增的标签对应的行数 -
int count = AutoTestUtils.getTagCount(tag); -
-
//System.out.println(count); -
-
//点击修改 -
driver.findElement(By.xpath("//tbody/tr["+count+"]/td[5]/div/button[1]")).click(); -
//定位tag输入框和remark输入框 -
WebElement tagElement = driver.findElement(By.xpath("/html/body/div[2]/div/div[2]/form/div[1]/div/div/input")); -
WebElement remarkElement = driver.findElement(By.xpath("/html/body/div[2]/div/div[2]/form/div[2]/div/div/textarea")); -
//清空输入框的内容 -
tagElement.clear(); -
remarkElement.clear(); -
//修改tag和remark -
tagElement.sendKeys(tag+"——修改了"); -
remarkElement.sendKeys(remark+"——修改了"); -
//点击修改 -
driver.findElement(By.xpath("/html/body/div[2]/div/div[3]/div/button[1]")).click(); -
-
Thread.sleep(300); -
//检查是否修改成功 -
boolean result = AutoTestUtils.containsTag(tag+"——修改了"); -
Assertions.assertTrue(result); -
} -
-
-
@Order(3) -
@ParameterizedTest -
@CsvSource({"测试tag1——修改了"}) -
void searchTagByTagNameTest(String tag) throws IOException, InterruptedException { -
driver.findElement(By.xpath("//*[@id="app"]/div/div[2]/section/div/form/div[1]/div/div/input")).clear(); -
driver.findElement(By.xpath("//*[@id="app"]/div/div[2]/section/div/form/div[1]/div/div/input")).sendKeys(tag); -
driver.findElement(By.xpath("//*[@id="app"]/div/div[2]/section/div/form/div[2]/div/button")).click(); -
-
//等搜索界面加载一会 -
Thread.sleep(300); -
// 进行截图,看当前是否搜索到了名字为tag的标签记录 -
File srcFile = driver.getScreenshotAs(OutputType.FILE); -
String fileName = "searchTagTest.png"; -
FileUtils.copyFile(srcFile, new File(fileName)); -
} -
-
@Order(4) -
@ParameterizedTest -
@CsvSource({"测试tag1——修改了"}) -
void deleteTagTest(String tag) throws InterruptedException { -
//查找新增的标签对应的行数 -
int count = AutoTestUtils.getTagCount(tag); -
//点击删除 -
driver.findElement(By.xpath("//tbody/tr["+count+"]/td[5]/div/button[2]")).click(); -
-
JavascriptExecutor js = driver; -
WebElement confirmButton = (WebElement) js.executeScript("return document.querySelector("body > div.el-message-box__wrapper > div > div.el-message-box__btns > button.el-button.el-button--default.el-button--small.el-button--primary")"); -
confirmButton.click(); -
-
Thread.sleep(1000); -
boolean result = AutoTestUtils.containsTag(tag); -
Assertions.assertFalse(result); -
} -
-
-
@Test -
@AfterAll -
static void exit() { -
driver.quit(); -
} -
} -

前台系统
前台指的是:展示个人博客的前台系统
注册界面测试
1、编写测试用例

2、测试页面显示是否正常

3、测试注册成功的情况

- 注册成功后会跳转到登录页面,这里添加一个断言。
- 跳转到登录页面后,为继续测试注册失败的情况,我们需要再跳转回注册页面。
driver.navigate.back()类似于浏览器中点击浏览器的“后退”按钮。
4、测试注册失败的情况

-
因为注册失败的测试用例较多,我们将测试用例写在csv文件下,采用
@CsvFileSource注解把它们拿过来。
-
这里测试出来我的前台注册功能的两个bug
- 两次输入不一致的密码,仍可注册成功!大漏洞!
- 邮箱后缀不加.仍可以注册成功
-
这里遇到了一个小问题:当我测试密码为空的用例时,浏览器好像会复用上一个用例的123123密码,导致注册成功
5、测试代码和视频
-
import common.AutoTestUtils; -
import org.apache.commons.io.FileUtils; -
import org.junit.jupiter.api.*; -
import org.junit.jupiter.params.ParameterizedTest; -
import org.junit.jupiter.params.provider.CsvFileSource; -
import org.junit.jupiter.params.provider.CsvSource; -
import org.openqa.selenium.By; -
import org.openqa.selenium.OutputType; -
import org.openqa.selenium.chrome.ChromeDriver; -
-
import java.io.File; -
import java.io.IOException; -
-
/** -
* 注册界面的自动化测试 -
*/ -
@TestMethodOrder(MethodOrderer.OrderAnnotation.class) -
public class regTest extends AutoTestUtils { -
public static ChromeDriver driver = new ChromeDriver(); -
@Test -
@BeforeAll // 带有BeforeAll注解的方法会在当前类下的所有测试用例之前(方法)执行一次,注意只是执行一次 -
public static void init() { -
// 既然是对注册界面的测试,自然要先跳转到该界面 -
driver.get("http://www.hello3a87.com/#/Login?login=0"); -
} -
-
/** -
* 对页面内容的完整性进行测试 -
*/ -
@Test -
@Order(1) -
public void regPageTest() { -
// 利用断言验证页面显示的文本是否正确 -
String expect = "注册"; -
String actual = driver.findElement(By.xpath("//*[@id="app"]/div/div/div/div/div[1]/h1")).getText(); -
Assertions.assertEquals(expect, actual); -
-
// 检查博客登录页的主页超链接是否存在 -
driver.findElement(By.xpath("//*[@id="app"]/div/div/div/div/div[1]/p/a")); -
// 检查提交按钮是否存在 -
driver.findElement(By.xpath("//*[@id="app"]/div/div/div/div/div[12]")); -
} -
-
/** -
* 正常注册 -
*/ -
@Order(2) -
@ParameterizedTest -
@CsvSource({"懒羊羊,lyy,3390997000@qq.com,123123,123123"}) -
public void regRightTest(String username,String nickname,String email,String password1, String password2) throws InterruptedException, IOException { -
// 每次都要提前把之前输入框的内容给清除(不管有没有内容) -
driver.findElement(By.xpath("//*[@id="app"]/div/div/div/div/div[3]/input")).clear(); //用户名 -
driver.findElement(By.xpath("//*[@id="app"]/div/div/div/div/div[5]/input")).clear(); //昵称 -
driver.findElement(By.xpath("//*[@id="app"]/div/div/div/div/div[6]/input")).clear(); //邮箱 -
driver.findElement(By.xpath("//*[@id="app"]/div/div/div/div/div[8]/input")).clear(); //用户密码 -
driver.findElement(By.xpath("//*[@id="app"]/div/div/div/div/div[10]/input")).clear(); //确认密码 -
-
// 将信息填入输入框 -
driver.findElement(By.xpath("//*[@id="app"]/div/div/div/div/div[3]/input")).sendKeys(username); //用户名 -
driver.findElement(By.xpath("//*[@id="app"]/div/div/div/div/div[5]/input")).sendKeys(nickname); //昵称 -
driver.findElement(By.xpath("//*[@id="app"]/div/div/div/div/div[6]/input")).sendKeys(email); //邮箱 -
driver.findElement(By.xpath("//*[@id="app"]/div/div/div/div/div[8]/input")).sendKeys(password1); //用户密码 -
driver.findElement(By.xpath("//*[@id="app"]/div/div/div/div/div[10]/input")).sendKeys(password2); //确认密码 -
// 找到提交按钮,并点击提交 -
driver.findElement(By.xpath("//*[@id="app"]/div/div/div/div/div[12]")).click(); -
// 注册成功后,应该会跳转到登录页面 -
Thread.sleep(100); -
String expectURL = "http://www.hello3a87.com/#/Login?login=1"; -
String actualURL = driver.getCurrentUrl(); // 获取当前页面的URL -
Assertions.assertEquals(expectURL, actualURL); -
// 获取此时的屏幕截图,此时应该以及跳转到了登录页面 -
File srcFile = driver.getScreenshotAs(OutputType.FILE); -
String fileName = "regRightTest.png"; -
FileUtils.copyFile(srcFile, new File(fileName)); -
// 因为注册成功会跳转到登录界面,所以但接下来我们还有在注册界面测试,所以要回退到注册界面 -
driver.navigate().back(); -
} -
/** -
* 测试注册失败的情况 -
*/ -
@ParameterizedTest -
@Order(3) -
@CsvFileSource(resources = "/regUsers.csv") -
public void regFailTest(String username,String nickname,String email,String password1, String password2) throws InterruptedException { -
// 每次都要提前把之前输入框的内容给清除(不管有没有内容) -
driver.findElement(By.xpath("//*[@id="app"]/div/div/div/div/div[3]/input")).clear(); //用户名 -
driver.findElement(By.xpath("//*[@id="app"]/div/div/div/div/div[5]/input")).clear(); //昵称 -
driver.findElement(By.xpath("//*[@id="app"]/div/div/div/div/div[6]/input")).clear(); //邮箱 -
driver.findElement(By.xpath("//*[@id="app"]/div/div/div/div/div[8]/input")).clear(); //用户密码 -
driver.findElement(By.xpath("//*[@id="app"]/div/div/div/div/div[10]/input")).clear(); //确认密码 -
-
// 将信息填入输入框 -
driver.findElement(By.xpath("//*[@id="app"]/div/div/div/div/div[3]/input")).sendKeys(username); //用户名 -
driver.findElement(By.xpath("//*[@id="app"]/div/div/div/div/div[5]/input")).sendKeys(nickname); //昵称 -
driver.findElement(By.xpath("//*[@id="app"]/div/div/div/div/div[6]/input")).sendKeys(email); //邮箱 -
driver.findElement(By.xpath("//*[@id="app"]/div/div/div/div/div[8]/input")).sendKeys(password1); //用户密码 -
driver.findElement(By.xpath("//*[@id="app"]/div/div/div/div/div[10]/input")).sendKeys(password2); //确认密码 -
// 找到提交按钮,并点击提交 -
driver.findElement(By.xpath("//*[@id="app"]/div/div/div/div/div[12]")).click(); -
Thread.sleep(100); -
} -
-
/** -
* 关闭注册弹窗 -
*/ -
@Test -
@AfterAll // 带有AfterAll注解的方法会在当前类下的所有测试用例(方法)执行之后 执行一次,注意只是执行一次 -
public static void close() { -
driver.quit(); -
} -
-
} -

博客首页
1、编写测试用例

2、测试首页页面的完整性

3、测试代码和视频
-
import common.AutoTestUtils; -
import org.junit.jupiter.api.AfterAll; -
import org.junit.jupiter.api.Assertions; -
import org.junit.jupiter.api.BeforeAll; -
import org.junit.jupiter.api.Test; -
import org.openqa.selenium.By; -
import org.openqa.selenium.chrome.ChromeDriver; -
-
import java.time.Duration; -
-
/** -
* @author 3A87 -
* @description 测试博客首页 -
*/ -
public class PageTest extends AutoTestUtils { -
public static ChromeDriver driver = new ChromeDriver(); -
@Test -
@BeforeAll -
static void init() { -
driver.get("http://www.hello3a87.com/#/Home"); -
} -
@Test -
void pageTest() { -
// 隐式等待--// 隐式等待,更加丝滑——》作用于下面的整个作用领域,这个方法中的所有元素,在这3秒内不断轮询 -
driver.manage().timeouts().implicitlyWait(Duration.ofSeconds(3)); -
// 测试右侧的用户名是否能正常显示 -
String expect = "3A87"; -
String actual = driver.findElement(By.cssSelector("#app > div > div.container > div > div.el-col.el-col-24.el-col-sm-24.el-col-md-8 > div > section:nth-child(1) > div.r1-body > p")).getText(); -
Assertions.assertEquals(expect,actual); -
// 测试博客主页格言是否能正常显示 -
String expect1 = "人生人山人海人来人往,自己自尊自爱自由自在"; -
String actual1 = driver.findElement(By.cssSelector("#app > div > div:nth-child(1) > div.headImgBox > div.h-information > h2")).getText(); -
Assertions.assertEquals(expect1, actual1); -
// 测试菜单栏的首页、分类、赞赏、友链是否能正常显示 -
String expect2 = "首页"; -
String actual2 = driver.findElement(By.xpath("//*[@id="app"]/div/div[1]/div[1]/div/div/div/ul/li[1]")).getText(); -
Assertions.assertEquals(expect2, actual2); -
String expect3 = "分类"; -
String actual3 = driver.findElement(By.xpath("//*[@id="app"]/div/div[1]/div[1]/div/div/div/ul/li[2]/div")).getText(); -
Assertions.assertEquals(expect3, actual3); -
String expect4 = "赞赏"; -
String actual4 = driver.findElement(By.xpath("//*[@id="app"]/div/div[1]/div[1]/div/div/div/ul/li[3]")).getText(); -
Assertions.assertEquals(expect4, actual4); -
String expect5 = "友链"; -
String actual5 = driver.findElement(By.xpath("//*[@id="app"]/div/div[1]/div[1]/div/div/div/ul/li[4]")).getText(); -
Assertions.assertEquals(expect5, actual5); -
// 测试热门文章是否能正常显示 -
String expect6 = "热门文章"; -
String actual6 = driver.findElement(By.xpath("//*[@id="app"]/div/div[2]/div/div[2]/div/section[2]/h2")).getText(); -
Assertions.assertEquals(expect6,actual6); -
} -
@Test -
@AfterAll -
static void exit() { -
driver.quit(); -
} -
}
文章详情页
1、编写测试用例

2、测试文章详情页面的完整性

3、测试代码和视频
-
import common.AutoTestUtils; -
import org.junit.jupiter.api.Assertions; -
import org.junit.jupiter.api.BeforeAll; -
import org.junit.jupiter.api.Test; -
import org.openqa.selenium.By; -
import org.openqa.selenium.chrome.ChromeDriver; -
-
/** -
* @author 3A87 -
* @description 测试博客文章详情页 -
*/ -
public class ArticleTest extends AutoTestUtils { -
public static ChromeDriver driver = new ChromeDriver(); -
@Test -
@BeforeAll -
static void init() { -
driver.get("http://www.hello3a87.com/#/DetailArticle?aid=16"); -
} -
-
@Test -
void pageTest(){ -
//查看文章标题显示内容是否和期待的一致 -
String expect = "Jmeter实战——编写博客标签模块增删改查自动化脚本和压测"; -
String actual = driver.findElement(By.xpath("//*[@id="detail"]/div/div[1]/div[1]/header/h1/a")).getText(); -
Assertions.assertEquals(expect,actual); -
-
//评论区是否正常显示 -
String expect1 = "发表评论"; -
String actual1 = driver.findElement(By.xpath("//*[@id="detail"]/div/div[1]/div[2]/div[1]/h3")).getText(); -
Assertions.assertEquals(expect1,actual1); -
} -
}

个人中心页面
1、编写测试用例

2、准备工作 - 测试前台登录功能

- 若无等待,程序会找不到页面元素
3、测试个人中心页面的完整性

- 进入个人中心时鼠标悬浮,选择个人中心

4、测试编辑功能

-
强制等待,等upload.exe文件执行完,要不然程序太快,exe还没执行完就点击提交了
-
这里上传头像采用的方式是AutoIt3工具,此外
-
如果上传图片的前端代码是用input时,可以使用sendKeys的方式,注意路径名必须是绝对路径! (亲测)
driver.findElement(By.xpath("定位index的xpath的路径")).sendKeys("图片的绝对路径");AI写代码
-
还有使用Robot类的方式,但是我觉得过于繁琐。
-
其他方式的具体使用可以参考我放在文末的文章链接。
-
利用AutoIt3工具上传头像使用步骤:
(1)官网下载AutoIt3工具AutoIt Downloads - AutoIt (autoitscript.com)
(2)下载完成后,解压,双击exe文件,安装
(3)打开SciTE Script Editor编写脚本
(4)设置字符集
File→Encoding→UTF-8
防止中文乱码问题
(5)编写脚本
;是注释


-
; 等待 "打开" 对话框出现 -
WinWait("打开", "") -
-
; 将焦点设置在 "打开" 对话框中的 "Edit1" 控件上 -
ControlFocus("打开","","Edit1") -
-
; 在 "打开" 对话框中的 "Edit1" 控件中设置文本,即文件路径 -
ControlSetText("打开", "", "Edit1", "D:\picture\美羊羊.png") -
-
; 在 "打开" 对话框中点击 "Button1" 控件,即确定按钮 -
ControlClick("打开", "", "Button1")
我编写脚本的办法有两种:1、和chatgpt对话 2、查阅api文档
打开AutoIt Help File,用好查找的功能
(6)保存为au3格式的脚本
File -> save
(7)将au3格式转为exe文件
打开Compile Script to .exe
(8)在测试代码中用引入
Runtime.getRuntime().exec("C:\Users\liuxi\Desktop\upload.exe");AI写代码


5、测试代码和视频
-
import common.AutoTestUtils; -
import org.apache.commons.io.FileUtils; -
import org.junit.jupiter.api.*; -
import org.junit.jupiter.params.ParameterizedTest; -
import org.junit.jupiter.params.provider.CsvSource; -
import org.openqa.selenium.By; -
import org.openqa.selenium.OutputType; -
import org.openqa.selenium.chrome.ChromeDriver; -
import org.openqa.selenium.interactions.Actions; -
-
import java.io.File; -
import java.io.IOException; -
import java.time.Duration; -
-
/** -
* @author 3A87 -
* @description 测试个人中心功能 -
*/ -
@TestMethodOrder(MethodOrderer.OrderAnnotation.class) -
public class MyPageTest extends AutoTestUtils { -
public static ChromeDriver driver = new ChromeDriver(); -
@Test -
@BeforeAll -
static void init() { -
driver.get("http://www.hello3a87.com/#/Home"); -
} -
-
@Order(1) -
@ParameterizedTest -
@CsvSource({"美羊羊,123123"}) -
void LoginTest(String username,String pwd){ -
driver.findElement(By.xpath("//*[@id="app"]/div/div[1]/div[1]/div/div/div/ul/div/div[1]/a[1]")).click(); -
// 隐式等待--// 隐式等待,更加丝滑——》作用于下面的整个作用领域,这个方法中的所有元素,在这3秒内不断轮询 -
driver.manage().timeouts().implicitlyWait(Duration.ofSeconds(3)); -
driver.findElement(By.xpath("//*[@id="app"]/div/div/div/div/div[3]/input")).sendKeys(username); -
driver.findElement(By.xpath("//*[@id="app"]/div/div/div/div/div[4]/input")).sendKeys(pwd); -
-
driver.findElement(By.xpath("//*[@id="app"]/div/div/div/div/div[5]")).click(); -
} -
-
@Order(2) -
@Test -
void MyPageTest() throws InterruptedException { -
// 隐式等待--// 隐式等待,更加丝滑——》作用于下面的整个作用领域,这个方法中的所有元素,在这3秒内不断轮询 -
driver.manage().timeouts().implicitlyWait(Duration.ofSeconds(3)); -
//鼠标悬浮在 小头像 元素上面 -
Actions action = new Actions(driver); -
action.moveToElement(driver.findElement(By.xpath("//div[@class='haslogin']"))).perform(); -
Thread.sleep(100); -
//进入个人中心 -
driver.findElement(By.linkText("个人中心")).click(); -
-
Thread.sleep(300); -
//检查页面显示是否完整 -
String expect1 = "编辑"; -
String button = driver.findElement(By.xpath("//*[@id="app"]/div/div[2]/div[2]/header/h1/span")).getText(); -
Assertions.assertEquals(expect1,button); -
String expect2 = "电子邮件"; -
String email = driver.findElement(By.xpath("//*[@id="app"]/div/div[2]/div[2]/section/ul/li[3]/span[1]")).getText(); -
Assertions.assertEquals(expect2,email); -
} -
-
-
@Order(3) -
@Test -
void editMyPageTest() throws IOException, InterruptedException { -
// 隐式等待--// 隐式等待,更加丝滑——》作用于下面的整个作用领域,这个方法中的所有元素,在这3秒内不断轮询 -
driver.manage().timeouts().implicitlyWait(Duration.ofSeconds(3)); -
//点击编辑按钮 -
driver.findElement(By.xpath("//*[@id="app"]/div/div[2]/div[2]/header/h1/span")).click(); -
//上传图片 -
driver.findElement(By.xpath("//*[@id="app"]/div/div[2]/div[1]/section/ul/li[1]/div/div[1]")).click(); -
Runtime.getRuntime().exec("C:\Users\liuxi\Desktop\upload.exe"); -
Thread.sleep(3000); -
//修改昵称 -
driver.findElement(By.xpath("//*[@id="app"]/div/div[2]/div[1]/section/ul/li[2]/div/input")).clear(); -
driver.findElement(By.xpath("//*[@id="app"]/div/div[2]/div[1]/section/ul/li[2]/div/input")).sendKeys("美羊羊"); -
//点击提交 -
driver.findElement(By.xpath("//*[@id="app"]/div/div[2]/div[1]/section/div/a[2]")).click(); -
-
Thread.sleep(300); -
// 进行截图,看是否更新了头像和昵称 -
File srcFile = driver.getScreenshotAs(OutputType.FILE); -
String fileName = "MyPageEditTest.png"; -
FileUtils.copyFile(srcFile, new File(fileName)); -
-
} -
-
@Test -
@AfterAll -
static void exit() { -
driver.quit(); -
} -
-
} -

总结
通过这次对我的个人博客系统进行自动化测试,
-
我上手了Junit5测试框架
- 套件的使用
- 执行顺序的控制
- 参数化(单值,批量,多个测试用例)
-
我熟悉了selenium的使用
- 对等待的理解更深,隐式等待、显示等待、强制等待
- 元素定位的方法,xpath,css
- 隐藏元素的定位,弹窗的定位
- 断言的使用
- 截图的使用
- 鼠标悬浮
- 刷新、回退页面
-
我接触了新工具AutoIt3
感谢每一个认真阅读我文章的人,礼尚往来总是要有的,虽然不是什么很值钱的东西,如果你用得到的话可以直接拿走:
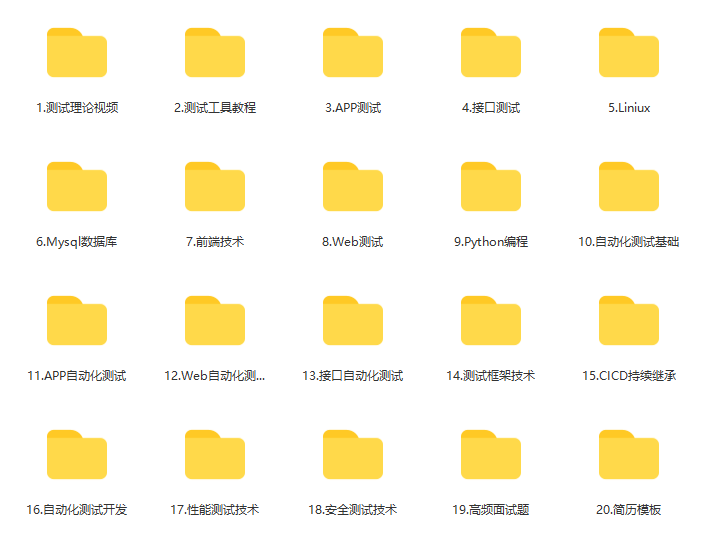
这些资料,对于【软件测试】的朋友来说应该是最全面最完整的备战仓库,这个仓库也陪伴上万个测试工程师们走过最艰难的路程,希望也能帮助到你!有需要的小伙伴可以点击下方小卡片领取


Agent 垂直技术社区,欢迎活跃、内容共建。
更多推荐

 27
27 0
0- 0


 已为社区贡献11条内容

所有评论(0)