YOLOv26改进 | 网络结构代码逐行解析(四) | 手把手带你理解YOLOv26检测头输出到损失函数计算(新手入门必读系列)
·
👑欢迎大家订阅YOLOv26有效涨点专栏👑
一、本文介绍
本文给大家带来的是YOLOv26中从检测头结构分析到损失函数各种计算的详解,本文将从检测头的网络结构讲起,同时分析其中的原理(包括代码和网络结构图对比),最重要的是分析检测头的输出,因为检测头的输出是需要输出给损失函数的计算不同阶段的输出不一样所以我们在讲损失函数计算的时候需要先明白检测头的输出和其中的一些参数的定义,本文内容为我独家整理和分析,手打每一行的代码分析并包含各种举例分析对于小白来说绝对有所收获,全文共1万1千字。
专栏回顾:YOLOv26有效涨点专栏包含:Conv、注意力机制、主干/Backbone、损失函数、优化器、后处理等改进机制
目录
二、YOLOv26解耦头代码分析
YOLOv26检测头的代码在项目仓库的'ultralytics/nn/modules/head.py'路径下可以找到。
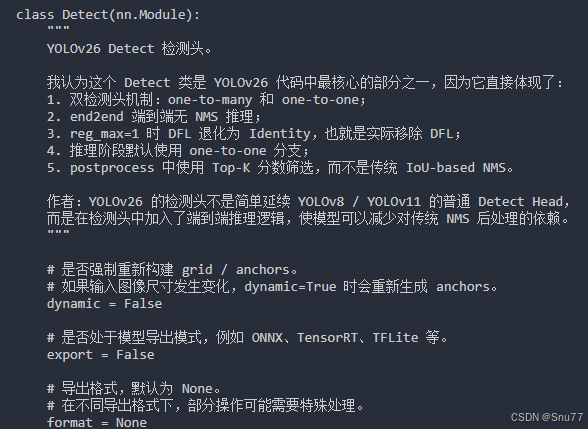
class Detect(nn.Module): """ YOLOv26 Detect 检测头。 我认为这个 Detect 类是 YOLOv26 代码中最核心的部分之一,因为它直接体现了: 1. 双检测头机制:one-to-many 和 one-to-one; 2. end2end 端到端无 NMS 推理; 3. reg_max=1 时 DFL 退化为 Identity,也就是实际移除 DFL; 4. 推理阶段默认使用 one-to-one 分支; 5. postprocess 中使用 Top-K 分数筛选,而不是传统 IoU-based NMS。 作者:YOLOv26 的检测头不是简单延续 YOLOv8 / YOLOv11 的普通 Detect Head, 而是在检测头中加入了端到端推理逻辑,使模型可以减少对传统 NMS 后处理的依赖。 """ # 是否强制重新构建 grid / anchors。 # 如果输入图像尺寸发生变化,dynamic=True 时会重新生成 anchors。 dynamic = False # 是否处于模型导出模式,例如 ONNX、TensorRT、TFLite 等。 export = False # 导出格式,默认为 None。 # 在不同导出格式下,部分操作可能需要特殊处理。 format = None # 每张图像最多保留的检测框数量。 # YOLOv26 默认最终最多输出 300 个检测结果。 max_det = 300 # 是否使用类别无关的筛选方式。 # False 表示分类别进行分数判断; # True 表示不区分类别,只看最大置信度。 agnostic_nms = False # 保存输入特征图形状,用于判断是否需要重新生成 anchors。 shape = None # 初始化 anchors。 # 注意:这里的 anchors 更准确地说是 anchor points, # YOLOv26 仍然是 anchor-free 风格,不是传统 anchor box。 anchors = torch.empty(0) # 初始化 strides。 # strides 会在模型构建阶段通过一次假输入前向传播计算得到, # 通常为 [8, 16, 32]。 strides = torch.empty(0) # legacy 用于兼容旧版本 YOLO,例如 v3/v5/v8/v9/v11。 # 当 legacy=False 时,分类分支会采用新版轻量化结构。 legacy = False # 控制输出框格式。 # False 时根据 decode_bboxes 中逻辑输出 xywh 或 xyxy; # True 时强制使用 xyxy。 xyxy = False def __init__(self, nc: int = 80, reg_max=16, end2end=False, ch: tuple = ()): """ 初始化 YOLOv26 检测头。 Args: nc: 类别数,例如 COCO 为 80 类。 reg_max: DFL bins 数量。 在 YOLOv8 / YOLOv11 中,reg_max 通常为 16, 表示每个边界方向预测 16 个离散分布值。 在 YOLOv26 中,reg_max=1。 当 reg_max=1 时,后面的 self.dfl 会变成 nn.Identity(), 因此 DFL 实际不再起作用。 end2end: 是否启用端到端无 NMS 模式。 YOLOv26 中通常为 True。 如果 end2end=True,会额外复制一套 one-to-one 检测头。 ch: 来自 Neck 的多尺度特征通道数。 例如三个检测尺度可能对应 [256, 512, 1024]。 """ super().__init__() # 类别数。 self.nc = nc # 检测层数量。 # YOLO 系列一般有 3 个检测尺度,对应小目标、中目标、大目标。 self.nl = len(ch) # DFL bins 数量。 # YOLOv26 中 reg_max=1,因此 DFL 会退化为 Identity。 self.reg_max = reg_max # 每个 anchor point 的输出通道数。 # # box 分支输出:4 * reg_max # cls 分支输出:nc # # 如果是 YOLOv11: # reg_max = 16 # box 输出通道 = 4 * 16 = 64 # # 如果是 YOLOv26: # reg_max = 1 # box 输出通道 = 4 * 1 = 4 # # 所以 YOLOv26 的 box 分支输出明显更简单。 self.no = nc + self.reg_max * 4 # stride 在模型构建阶段计算。 # 初始为全 0,后面 DetectionModel 会通过假输入前向传播计算真实 stride。 self.stride = torch.zeros(self.nl) # c2 是 box 回归分支的中间通道数。 # c3 是 class 分类分支的中间通道数。 # # c2 至少要满足: # 1. 不小于 16; # 2. 不小于 ch[0] // 4; # 3. 不小于 self.reg_max * 4。 # # YOLOv26 中 reg_max=1,所以 self.reg_max * 4 = 4, # box 分支会比 reg_max=16 的版本更轻量。 c2, c3 = max((16, ch[0] // 4, self.reg_max * 4)), max(ch[0], min(self.nc, 100)) # ============================================================ # 1. one-to-many 的 box 回归分支 # ============================================================ # # self.cv2 是边界框回归分支。 # 对每一个检测尺度都会构建一个对应的 box head。 # # 输出通道为 4 * self.reg_max。 # YOLOv26 中 reg_max=1,因此最终输出 4 个 box 回归值。 # # 作者:这里对应传统 YOLO 检测头中的 box 分支, # 在 one-to-many 分支中主要用于训练阶段提供密集监督。 self.cv2 = nn.ModuleList( nn.Sequential( Conv(x, c2, 3), Conv(c2, c2, 3), nn.Conv2d(c2, 4 * self.reg_max, 1) ) for x in ch ) # ============================================================ # 2. one-to-many 的 class 分类分支 # ============================================================ # # self.cv3 是分类分支。 # 它负责输出每个位置对应的类别分数。 # # 如果 legacy=True,使用旧版分类分支: # Conv + Conv + Conv2d # # 如果 legacy=False,使用新版轻量化分类分支: # DWConv + 1x1 Conv # DWConv + 1x1 Conv # Conv2d # # 我认为这里体现了新版 YOLO 检测头的轻量化思路: # 用深度可分离卷积降低分类分支计算量。 self.cv3 = ( nn.ModuleList( nn.Sequential( Conv(x, c3, 3), Conv(c3, c3, 3), nn.Conv2d(c3, self.nc, 1) ) for x in ch ) if self.legacy else nn.ModuleList( nn.Sequential( nn.Sequential(DWConv(x, x, 3), Conv(x, c3, 1)), nn.Sequential(DWConv(c3, c3, 3), Conv(c3, c3, 1)), nn.Conv2d(c3, self.nc, 1), ) for x in ch ) ) # ============================================================ # 3. DFL 模块 # ============================================================ # # 这里是判断 YOLOv26 是否真正使用 DFL 的关键代码。 # # 如果 reg_max > 1: # self.dfl = DFL(self.reg_max) # 表示启用 DFL 分布式回归。 # # 如果 reg_max = 1: # self.dfl = nn.Identity() # 表示 DFL 不起作用,只是一个空操作。 # # YOLOv26 的 yaml 中 reg_max=1, # 因此这里实际执行的是: # self.dfl = nn.Identity() # # 所以虽然代码里仍然保留 DFL 兼容写法, # 但 YOLOv26 中 DFL 实际已经被移除。 self.dfl = DFL(self.reg_max) if self.reg_max > 1 else nn.Identity() # ============================================================ # 4. one-to-one 检测头 # ============================================================ # # 如果 end2end=True,则复制一份 cv2 和 cv3, # 分别作为 one-to-one 的 box 分支和 cls 分支。 # # one-to-many: # 训练阶段提供密集监督,一个 GT 可以匹配多个正样本。 # # one-to-one: # 推理阶段默认使用,一个 GT 尽量对应一个预测结果, # 从而减少重复框,支持无 NMS 推理。 # # 作者:这部分就是 YOLOv26 双检测头机制的代码基础。 if end2end: self.one2one_cv2 = copy.deepcopy(self.cv2) self.one2one_cv3 = copy.deepcopy(self.cv3) @property def one2many(self): """ 返回 one-to-many 分支。 one-to-many 分支由: box_head = self.cv2 cls_head = self.cv3 组成。 我认为 one-to-many 分支的主要作用是在训练阶段提供密集监督。 它更接近传统 YOLO 的检测头形式,一个真实目标可以匹配多个预测位置。 """ return dict(box_head=self.cv2, cls_head=self.cv3) @property def one2one(self): """ 返回 one-to-one 分支。 one-to-one 分支由: box_head = self.one2one_cv2 cls_head = self.one2one_cv3 组成。 作者:one-to-one 分支主要服务于端到端无 NMS 推理, 目标是让一个真实目标尽量对应一个明确预测框, 从源头上减少重复预测。 """ return dict(box_head=self.one2one_cv2, cls_head=self.one2one_cv3) @property def end2end(self): """ 判断当前检测头是否处于 end2end 模式。 这里不是简单返回 self._end2end, 而是还要判断是否存在 one2one 分支。 只有同时满足: 1. self._end2end 为 True; 2. 当前模块具有 one2one 分支; 才认为真正启用了 end2end。 """ return getattr(self, "_end2end", True) and hasattr(self, "one2one") @end2end.setter def end2end(self, value): """ 设置 end2end 模式。 这个 setter 主要用于外部控制是否启用端到端检测模式。 """ self._end2end = value def forward_head( self, x: list[torch.Tensor], box_head: torch.nn.Module = None, cls_head: torch.nn.Module = None ) -> dict[str, torch.Tensor]: """ 执行某一个检测分支的前向传播。 Args: x: Neck 输出的多尺度特征列表。 通常包含 P3、P4、P5 三个尺度。 box_head: box 回归分支,可以是 one-to-many 的 cv2, 也可以是 one-to-one 的 one2one_cv2。 cls_head: 分类分支,可以是 one-to-many 的 cv3, 也可以是 one-to-one 的 one2one_cv3。 Returns: dict: boxes: 边界框回归输出。 shape 大致为 [B, 4 * reg_max, num_points] scores: 分类分数输出。 shape 大致为 [B, nc, num_points] feats: 原始多尺度特征 x。 后续生成 anchors 和计算 stride 时会用到。 """ # 如果 box_head 或 cls_head 为空,说明该分支不存在。 # 例如 fuse 后删除 one2many 分支时,可能会走到这里。 if box_head is None or cls_head is None: return dict() # batch size。 bs = x[0].shape[0] # 对每个尺度分别进行 box 回归预测, # 然后 reshape 成 [B, 4 * reg_max, H*W], # 最后在最后一维拼接所有尺度。 boxes = torch.cat( [ box_head[i](x[i]).view(bs, 4 * self.reg_max, -1) for i in range(self.nl) ], dim=-1 ) # 对每个尺度分别进行分类预测, # reshape 成 [B, nc, H*W], # 最后拼接所有尺度。 scores = torch.cat( [ cls_head[i](x[i]).view(bs, self.nc, -1) for i in range(self.nl) ], dim=-1 ) # 返回当前检测分支的 box、score 和原始多尺度特征。 return dict(boxes=boxes, scores=scores, feats=x) def forward( self, x: list[torch.Tensor] ) -> dict[str, torch.Tensor] | torch.Tensor | tuple[torch.Tensor, dict[str, torch.Tensor]]: """ Detect 检测头前向传播。 这里是 YOLOv26 双检测头和端到端推理的核心逻辑。 训练阶段: 返回 one2many 和 one2one 两个分支的预测结果。 推理阶段: 如果 end2end=True,则默认只使用 one2one 分支进行推理; 然后通过 Top-K 置信度筛选得到最终检测结果。 """ # 先计算 one-to-many 分支。 # 这个分支更接近传统 YOLO 检测头, # 主要用于训练阶段提供密集监督。 preds = self.forward_head(x, **self.one2many) # 如果启用 end2end 模式,则再计算 one-to-one 分支。 if self.end2end: # detach 表示对输入特征停止梯度回传。 # 这样 one-to-one 分支不会直接影响 Backbone / Neck 的梯度, # 可以减少两个分支之间的梯度干扰。 x_detach = [xi.detach() for xi in x] # 计算 one-to-one 分支预测。 one2one = self.forward_head(x_detach, **self.one2one) # 将两个分支预测都保存下来。 preds = { "one2many": preds, "one2one": one2one } # 训练阶段直接返回原始预测结果。 # # 此时损失函数会分别计算: # one2many loss # one2one loss # # 后续再通过 ProgLoss 动态平衡两个分支的损失权重。 if self.training: return preds # 推理阶段: # 如果 end2end=True,则只使用 one2one 分支。 # # 这就是 YOLOv26 端到端无 NMS 推理的关键: # 推理时不再使用 one2many 分支产生大量候选框, # 而是使用 one2one 分支输出更干净的预测结果。 y = self._inference(preds["one2one"] if self.end2end else preds) # 如果是 end2end 模式,执行 postprocess。 # # 注意: # 这里的 postprocess 不是传统 NMS。 # 它不会计算框与框之间的 IoU, # 而是根据分类置信度进行 Top-K 筛选。 if self.end2end: y = self.postprocess(y.permute(0, 2, 1)) # 如果是导出模式,只返回最终结果。 # 如果不是导出模式,则返回最终结果和原始预测。 return y if self.export else (y, preds) def _inference(self, x: dict[str, torch.Tensor]) -> torch.Tensor: """ 推理阶段解码预测框,并拼接分类分数。 Args: x: 某一个检测分支的输出字典。 在 YOLOv26 end2end=True 时,这里通常是 preds["one2one"]。 Returns: tensor: 拼接后的预测结果: [decoded_boxes, class_scores] """ # 解码边界框。 dbox = self._get_decode_boxes(x) # 对分类分数做 sigmoid,并和解码后的 box 拼接。 return torch.cat((dbox, x["scores"].sigmoid()), 1) def _get_decode_boxes(self, x: dict[str, torch.Tensor]) -> torch.Tensor: """ 根据 anchor points 和 strides 解码预测框。 这里需要注意: YOLOv26 虽然移除了 DFL,但并不是完全不需要框解码。 它只是省去了 DFL 的“分布转距离”过程, 后面仍然需要通过 dist2bbox 将距离转换成实际边界框坐标。 """ # 获取第一个尺度特征图的 shape。 # 用于判断输入尺寸是否变化。 shape = x["feats"][0].shape # 如果 dynamic=True,或者输入 shape 发生变化, # 则重新生成 anchor points 和 strides。 if self.dynamic or self.shape != shape: self.anchors, self.strides = ( a.transpose(0, 1) for a in make_anchors(x["feats"], self.stride, 0.5) ) self.shape = shape # 解码边界框。 # # self.dfl(x["boxes"]) 是关键: # # 如果 reg_max > 1: # self.dfl 是 DFL 模块,会执行分布式回归解码。 # # 如果 reg_max = 1: # self.dfl 是 nn.Identity(),不做任何处理。 # # YOLOv26 中 reg_max=1, # 因此这里相当于: # self.dfl(x["boxes"]) = x["boxes"] # # 然后通过 decode_bboxes / dist2bbox 转换成实际框坐标。 dbox = self.decode_bboxes( self.dfl(x["boxes"]), self.anchors.unsqueeze(0) ) * self.strides return dbox def bias_init(self): """ 初始化 Detect 检测头偏置。 偏置初始化对检测模型训练初期很重要, 尤其是分类分支的初始置信度。 """ # 初始化 one-to-many 分支的 box 和 cls 偏置。 for i, (a, b) in enumerate(zip(self.one2many["box_head"], self.one2many["cls_head"])): # box 分支偏置初始化。 a[-1].bias.data[:] = 2.0 # cls 分支偏置初始化。 # 这里假设 640 输入尺度下每个类别初始目标概率较低。 b[-1].bias.data[: self.nc] = math.log( 5 / self.nc / (640 / self.stride[i]) ** 2 ) # 如果启用 end2end,还需要初始化 one-to-one 分支。 if self.end2end: for i, (a, b) in enumerate(zip(self.one2one["box_head"], self.one2one["cls_head"])): a[-1].bias.data[:] = 2.0 b[-1].bias.data[: self.nc] = math.log( 5 / self.nc / (640 / self.stride[i]) ** 2 ) def decode_bboxes(self, bboxes: torch.Tensor, anchors: torch.Tensor, xywh: bool = True) -> torch.Tensor: """ 将预测的边界框距离解码为真实边界框坐标。 Args: bboxes: 模型预测的 l/t/r/b 距离。 anchors: anchor points。 xywh: 是否输出 xywh 格式。 注意: 在 end2end=True 时,decode_bboxes 中会输出 xyxy 格式, 因为后续 postprocess 期望格式为 [x1, y1, x2, y2, class_probs]。 """ return dist2bbox( bboxes, anchors, xywh=xywh and not self.end2end and not self.xyxy, dim=1, ) def postprocess(self, preds: torch.Tensor) -> torch.Tensor: """ YOLOv26 end2end 模式下的后处理。 这里非常容易误解: 这个 postprocess 不是传统 NMS。 传统 NMS: 需要计算预测框之间的 IoU; 如果两个框重叠度过高,就删除低分框。 YOLOv26 这里: 不计算框与框之间的 IoU; 不执行重叠框抑制; 只根据分类置信度做 Top-K 筛选。 Args: preds: 原始预测结果,shape 为: [batch_size, num_anchors, 4 + nc] 最后一维格式为: [x1, y1, x2, y2, class_probs] Returns: 处理后的预测结果,shape 为: [batch_size, max_det, 6] 每个检测结果格式为: [x1, y1, x2, y2, max_class_score, class_index] """ # 拆分边界框和类别分数。 boxes, scores = preds.split([4, self.nc], dim=-1) # 根据分类置信度获取 Top-K 结果。 # # scores: # Top-K 分数。 # # conf: # Top-K 对应类别索引。 # # idx: # Top-K 对应预测框索引。 scores, conf, idx = self.get_topk_index(scores, self.max_det) # 根据 Top-K 索引取出对应的预测框。 boxes = boxes.gather(dim=1, index=idx.repeat(1, 1, 4)) # 拼接最终输出: # [box, score, class_id] return torch.cat([boxes, scores, conf], dim=-1) def get_topk_index(self, scores: torch.Tensor, max_det: int) -> tuple[torch.Tensor, torch.Tensor, torch.Tensor]: """ 根据分类分数获取 Top-K 预测结果索引。 这一步是 YOLOv26 替代传统 NMS 的重要组成部分。 它的核心思想是: 不计算预测框之间的 IoU; 只根据类别置信度排序; 保留分数最高的前 K 个预测结果。 Args: scores: 分类分数,shape 为: [batch_size, num_anchors, num_classes] max_det: 每张图最多保留多少个检测结果。 默认是 300。 Returns: scores: Top-K 预测分数。 labels: Top-K 预测类别索引。 idx: Top-K 预测框索引。 """ # batch_size: 批大小。 # anchors: 预测点数量。 # nc: 类别数量。 batch_size, anchors, nc = scores.shape # 如果是导出模式,k 直接使用 max_det。 # 这是为了兼容 TensorRT,因为 TensorRT 通常要求 topk 的 k 是常量。 # # 如果是普通 PyTorch 推理,则取 min(max_det, anchors), # 防止 anchors 数量小于 max_det。 k = max_det if self.export else min(max_det, anchors) # 类别无关模式。 # 每个预测点只取最大类别分数,不区分类别做筛选。 if self.agnostic_nms: scores, labels = scores.max(dim=-1, keepdim=True) scores, indices = scores.topk(k, dim=1) labels = labels.gather(1, indices) return scores, labels, indices # 第一步: # 对每个 anchor,先取最大类别分数。 # 然后从所有 anchor 中选出分数最高的 Top-K anchor。 ori_index = scores.max(dim=-1)[0].topk(k)[1].unsqueeze(-1) # 第二步: # 根据 Top-K anchor 索引,取出这些 anchor 对应的所有类别分数。 scores = scores.gather(dim=1, index=ori_index.repeat(1, 1, nc)) # 第三步: # 在 Top-K anchor 的所有类别分数中再次展开并选 Top-K。 # # 这样可以得到最终的: # 最高分类分数; # 对应类别; # 对应 anchor。 scores, index = scores.flatten(1).topk(k) # 根据展开后的 index,恢复原始 anchor 索引。 idx = ori_index[ torch.arange(batch_size)[..., None], index // nc ] # 返回: # scores[..., None]:Top-K 分数; # (index % nc):类别索引; # idx:对应预测框索引。 return scores[..., None], (index % nc)[..., None].float(), idx def fuse(self) -> None: """ 推理优化函数。 训练阶段: 需要 one-to-many 分支提供密集监督。 推理阶段: YOLOv26 默认使用 one-to-one 分支进行端到端无 NMS 推理。 因此,在推理优化时可以删除 one-to-many 分支, 也就是将 self.cv2 和 self.cv3 置空,减少冗余结构。 """ self.cv2 = self.cv3 = None
三、本文总结
到此本文的正式分享内容就结束了,在这里给大家推荐我的YOLOv26改进有效涨点专栏,本专栏目前为新开的平均质量分98分,后期我会根据各种最新的前沿顶会进行论文复现,也会对一些老的改进机制进行补充,目前本专栏免费阅读(暂时,大家尽早关注不迷路~),如果大家觉得本文帮助到你了,订阅本专栏,关注后续更多的更新~
专栏回顾:YOLOv26有效涨点专栏包含:Conv、注意力机制、主干/Backbone、损失函数、优化器、后处理等改进机制


Agent 垂直技术社区,欢迎活跃、内容共建。
更多推荐



 8
8 0
0- 0


 已为社区贡献8条内容

所有评论(0)