Gemini CLI 与 Repomix
·
LLM应用系列文章目录
第一章 Gemini CLI 与 Repomix 应用工具
文章目录
前言
本文主要整理 Gemini CLI 与 Repomix 两个应用工具的基本概念、安装方法、常用命令、配置方式以及输出格式说明,便于在 AI 编程、代码仓库整理和大模型上下文构建场景中使用。
提示:以下是本篇文章正文内容,下面案例可供参考
一、Gemini CLI
1.Gemini CLI
- Gemini CLI是Google官方推出的一款命令行界面(Command-Line Interface)工具,类似于Claude Code。它允许用户直接在终端中与Gemini人工智能模型进行交互,支持提问、辅助编程、编辑文件等多种功能。20250701
- GitHub地址:https://github.com/google-gemini/gemini-cli
- Gemini CLI优势
- 免费额度高:对于非重度用户,其免费额度基本能满足日常开发和学习需求。
- 超长上下文能力:支持长篇对话,最长达10M个token,确保交互的连贯性。
- 跨平台兼容:完美支持Windows、macOS和Linux系统,灵活性强。
- 强大的社区与调试支持:虽然官方文档有限,但工具自带的调试模式(如-d选项)能有效帮助我们定位和解决问题。
2.安装Gemini CLI
- 前提条件
- Node.js环境:确保你的电脑已安装Node.js(推荐v20.x或更高版本)。
- 网络环境:需要能够访问Google服务,通常需要配置代理或VPN。
- 安装步骤
- 打开终端(Windows使用CMD或PowerShell,macOS/Linux使用终端)。
- 全局安装Gemini CLI命令:npm install -g @google/gemini-cli
- 执行完成后,会在npm的执行命令文件夹中增加一个可执行的命令gemini。
- 如果在其他工具如trae需要使用gemini,需要使用完整路径执行。
- 如:/usr/local/lib/nodejs/node-v22.17.0-linux-x64/bin/gemini
- 验证安装是否成功:gemini --version
- 如果终端返回版本号,则说明安装成功。
3.Gemini CLI基本使用
-
命令行启动交互模式:gemini
-
启动后,选中使用Google账号登录
- 在Windows中会直接调用本地浏览器,登录即可
- 在Linux中会提示一个地址,可以使用远端的Windows浏览器登录即可。
-
启动后,也可以使用GEMINI_API_KEY登录。但需要在Google账号申请Google AI Studio的账号。
-
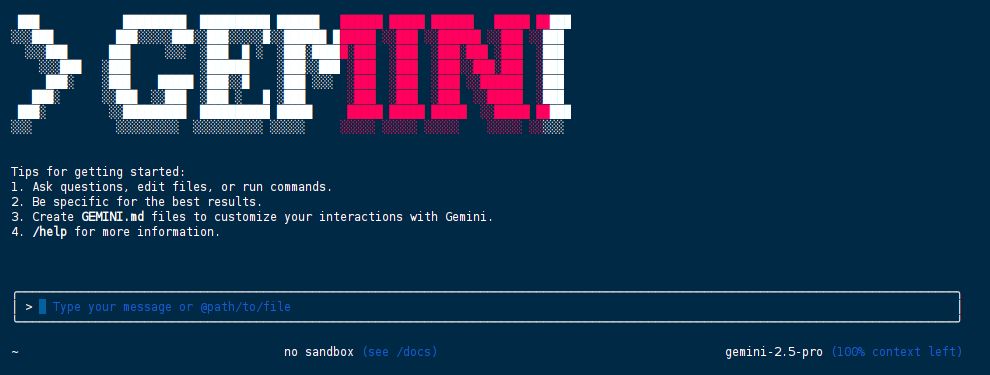
登录后,将进入一个交互式界面,可以直接输入问题或命令。
-
常用选项:
- -d或–debug:启用调试模式,输出详细的连接和错误信息,用于排查问题。
- -h:查看更多命令。
-
退出:在交互模式下,按Esc键或输入exit退出。
-
第一次登录可能会因为账号授权不了或者账号没有申请使用API而导致失败
4.解决登录授权问题
- 需要为当前终端会话设置https_proxy环境变量,将Gemini CLI的网络请求指向本地代理端口。
- 设置代理
- Windows (CMD)设置代理:
set https_proxy=http://127.0.0.1:7890
- Windows (PowerShell)设置代理:
$env:https_proxy="http://127.0.0.1:7890"
- macOS/Linux (Bash/Zsh)设置代理:
export https_proxy=http://127.0.0.1:7890
5.解决google云服务账号API申请问题
- 登录google云服务:https://console.cloud.google.com/
- 选择或者创建一个项目。复制项目ID。如:probable-sprite-4************
- 在google云服务中,搜索Gemini for Google Cloud服务并启用。
- 将项目ID设置到环境变量中,命名为 GOOGLE_CLOUD_PROJECT。
- Windows (CMD)设置环境变量:
set GOOGLE_CLOUD_PROJECT=你的项目ID
- Windows (PowerShell)设置环境变量(建议使用Powershell,不用CMD):
$env:GOOGLE_CLOUD_PROJECT="项目ID"
- macOS/Linux (Bash/Zsh)设置环境变量:
export GOOGLE_CLOUD_PROJECT=项目ID
二、Repomix
1.Repomix
- Repomix是将一整个github项目打包成一个AI模型可阅读的文件的工具。
- 当需要将github代码库提供给大型语言模型 (LLM) 或其他AI工具(如 Claude、ChatGPT、DeepSeek、Perplexity、Gemini、Gemma、Llama、Grok等)时,Repomix可将整个github库打包成一个AI模型可阅读的文件。
2.Linux安装Repomix
- 需要先安装nodejs和npm,nodejs版本需要在16或以上。
- 使用npm安装repomix:npm install -g repomix
3.Repomix配置(可不需要)
- 初始化新的配置文件(repomix.config.json):
repomix --init
- 会在项目根目录中创建一个用于自定义配置的文件,配置选项的解释
| 选项 | 描述 | 默认 |
|---|---|---|
| output.filePath | 输出文件的名称 | “repomix-output.txt” |
| output.style | 输出的样式(plain,xml,markdown) | “plain” |
| output.parsableStyle | 是否根据所选样式架构转义输出。会增加标记数量。 | false |
| output.headerText | 包含在文件头中的自定义文本 | null |
| output.instructionFilePath | 包含详细自定义说明的文件路径 | null |
| output.fileSummary | 是否在输出开头包含摘要部分 | true |
| output.directoryStructure | 是否在输出中包含目录结构 | true |
| output.removeComments | 是否从支持的文件类型中删除评论 | false |
| output.removeEmptyLines | 是否从输出中删除空行 | false |
| output.showLineNumbers | 是否为输出的每一行添加行号 | false |
| output.copyToClipboard | 除了保存文件之外,是否还将输出复制到系统剪贴板 | false |
| output.topFilesLength | 摘要中显示的顶级文件数。如设为0,不会显示摘要 | 5 |
| output.includeEmptyDirectories | 是否在存储库结构中包含空目录 | false |
| include | 要包含的文件的模式(使用glob 模式) | [] |
| ignore.useGitignore | 是否使用项目.gitignore文件中的模式 | true |
| ignore.useDefaultPatterns | 是否使用默认忽略模式 | true |
| ignore.customPatterns | 要忽略的其他模式(使用glob 模式) | [] |
| security.enableSecurityCheck | 是否对文件进行安全检查 | true |
| tokenCount.encoding | AI模型上下文限制的标记计数编码(如o200k_base) | “o200k_base” |
- 示例配置
repomix.config.json代码
{
  "output": {
    "filePath": "repomix-output.xml",
    "style": "xml",
    "parsableStyle": true,
    "headerText": "Custom header information for the packed file.",
    "fileSummary": true,
    "directoryStructure": true,
    "removeComments": false,
    "removeEmptyLines": false,
    "showLineNumbers": false,
    "copyToClipboard": true,
    "topFilesLength": 5,
    "includeEmptyDirectories": false
  },
  "include": [
    "**/*"
  ],
  "ignore": {
    "useGitignore": true,
    "useDefaultPatterns": true,
    // Patterns can also be specified in .repomixignore
    "customPatterns": [
      "additional-folder",
      "**/*.log"
    ]
  },
  "security": {
    "enableSecurityCheck": true
  },
  "tokenCount": {
    "encoding": "o200k_base"
  }
}
4.Repomix使用
- 打包本地github目录(github项目需要先git clone下载并解压的目录):
repomix path/to/directory
- 打包指定文件或目录(使用glob模式):
repomix --include "src/**/*.ts,**/*.md"
- 要排除特定文件或目录:
repomix --ignore "**/*.log,tmp/"
- 打包远程github项目(url为项目地址,不需要有.git):
repomix --remote https://github.com/78/xiaozhi-esp32
5.输出文件格式
- 纯文本格式(默认)
代码
This file is a merged representation of the entire codebase, combining all repository files into a single document.

================================================================
File Summary
================================================================
(Metadata and usage AI instructions)

================================================================
Directory Structure
================================================================
src/
  cli/
    cliOutput.ts
    index.ts
  config/
    configLoader.ts

(...remaining directories)

================================================================
Files
================================================================

================
File: src/index.js
================
// File contents here

================
File: src/utils.js
================
// File contents here

(...remaining files)

================================================================
Instruction
================================================================
(Custom instructions from `output.instructionFilePath`)
- XML格式
- 当提示涉及上下文、说明和示例等多个组件时,XML标签会起到决定性作用。可以帮助Claude更准确地解析提示,从而获得更高质量的输出。
- 要生成 XML 格式的输出,使用–style xml选项:
repomix --style xml
- XML 格式以分层方式构造内容:
代码
This file is a merged representation of the entire codebase, combining all repository files into a single document.

<file_summary>
  (Metadata and usage AI instructions)
</file_summary>

<directory_structure>
src/
cli/
cliOutput.ts
index.ts

(...remaining directories)
</directory_structure>

<files>
<file path="src/index.js">
  // File contents here
</file>

(...remaining files)
</files>

<instruction>
(Custom instructions from `output.instructionFilePath`)
</instruction>
- Markdown格式
- 要生成 Markdown 格式的输出,请使用以下–style markdown选项:repomix --style markdown
- Markdown 格式以分层方式构建内容:
代码
This file is a merged representation of the entire codebase, combining all repository files into a single document.

# File Summary

(Metadata and usage AI instructions)

# Repository Structure

```
src/
  cli/
    cliOutput.ts
    index.ts
```

(...remaining directories)

# Repository Files

## File: src/index.js

```
// File contents here
```

(...remaining files)

# Instruction

(Custom instructions from `output.instructionFilePath`)
总结
本文整理了 Gemini CLI 与 Repomix 的基础使用方法。Gemini CLI 适合在终端中直接调用 Gemini 模型进行问答、编程辅助和文件编辑;Repomix 适合将代码仓库整理成大模型可阅读的单文件上下文,方便与 Claude、ChatGPT、DeepSeek、Gemini 等模型配合使用。实际使用时,需要注意代理、Google 账号授权、API/项目环境变量配置,以及根据模型需求选择 plain、xml 或 markdown 等输出格式。

Agent 垂直技术社区,欢迎活跃、内容共建。
更多推荐


 19
19 0
0- 0


 已为社区贡献3条内容

所有评论(0)