【开发心得】SpringBoot Oauth2授权登录
前言
oauth2相关学术概念网上一抓一大把,我们这里通过案例讲述实际对接。基于SpringBoot2.x后端方式实现oauth2授权登录。
博主对接的时间为2024年3月份,当时 AppleID JustAuth1.16.6版本是不支持的,刚跟进了下,发现1.16.7在2024年9月已经更新了,可以直接拿来用。
免责声明: 非具体业务代码,仅指导性代码用来学术交流。
执行过程
1. 提供一个接口,构建一个三方授权界面。
2. 前端/移动端渲染授权界面。
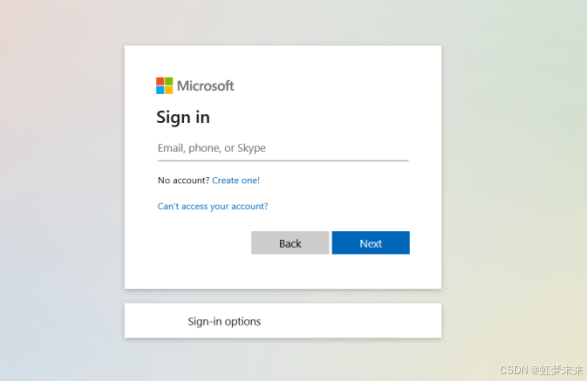
3. 中间token换取openId
4. 拿到openId与自定义的认证鉴权系统做比对。
实现步骤
1. 引入依赖(截止2024-12-30 最新版是1.16.7)
<dependency>
	<groupId>me.zhyd.oauth</groupId>
	<artifactId>JustAuth</artifactId>
	<version>1.16.6</version>
</dependency>
2. Service层的实现
定义oauthService(省略自定义业务代码部分及包名)
-
getAuthUrl 您自定义的接口,根据用户传递的source来区分OauthService的实现,根据其他参数请求授权页面。
-
registerOrGet 当用户同意授权,三方校验拿到token,换取id后,和本地的用户认证鉴权信息对比,如果存在该可用用户,则直接登录,否则进一步进行绑定。
import me.zhyd.oauth.model.AuthCallback;
import me.zhyd.oauth.request.AuthRequest;import javax.servlet.http.HttpServletRequest;
public interface OauthService {
AuthRequest getAuthRequest(String requestId);

String getAuthUrl(String requestId, String source, String deviceId, Boolean fromClient);

User registerOrGet(AuthCallback callback, HttpServletRequest request, String requestId, String productSource);

OauthTypeEnum getOauthType();
}
定义实现类:
CommonJustAuthService 这里的逻辑主要是基于JustAuth,具体的子类可以叫GoogleOauth2Service之类的,只要是JustAuth支持的,基本是可以直接变更下secret、clientId、
redirectUrl即可,这里的redirectUrl其实也可以进一步抽象,根据url拼接实现类的标识来确认。但是要把这个重定向地址正确填到对应能力后台配置。
@Slf4j
@Service
public abstract class CommonJustAuthService implements OauthService {
    @Resource
    private OauthLoginService oauthLoginService;


    @Value("${xxx.proxy.switch:false}")
    private Boolean proxySwitch; // 开关控制代理

    @Value("${xxx.proxy.host:127.0.0.1}")
    private String proxyHost;

    @Value("${xxx.proxy.port:7890}")
    private Integer proxyPort;

    private static final String SESSION_ID_FIELD = "sessionId";

    public abstract AuthRequest getAuthRequest(String requestId);

    @Override
    public String getAuthUrl(String requestId, String source, String deviceId, Boolean fromClient) {
        AuthRequest authRequest = this.getAuthRequest(requestId);
        if (authRequest != null) {
            String oauthState = this.getOauthState(requestId, source, deviceId);
            return authRequest.authorize(oauthState);
        }
        return null;
    }


    protected String getOauthState(String requestId, String source, String deviceId) {
        OauthRequestStateInfo info = new OauthRequestStateInfo();
        info.setRequestId(requestId);
        info.setSource(source);
        info.setDeviceId(deviceId);
        String stateJson = JSON.toJSONString(info);
        String base64State = Base64Util.base64Encode(stateJson);
        return base64State;
    }

    @Override
    public User registerOrGet(AuthCallback callback, HttpServletRequest request, String requestId, String productSource) {
        AuthRequest authRequest = this.getAuthRequest(requestId);
        if (authRequest != null) {
            OauthTypeEnum oauthTypeEnum = this.getOauthType();
            AuthResponse<AuthUser> response = authRequest.login(callback);
            if (response.ok()) {
                AuthUser remoteAuthUser = response.getData();
                if (remoteAuthUser != null) {
                    User user = oauthLoginService.registerOrGet(remoteAuthUser, oauthTypeEnum, productSource);
                    return user;
                }
            } else {
                throw new AmamDefaultException(ErrorCodeEnum.FAILED, "user.login.oauth-login-failed");
            }
        }
        return null;
    }

    protected HttpConfig getHttpConfig() {
        HttpConfig config = HttpConfig.builder()
                .timeout(15000)
                .build();
        if (proxySwitch) {
            config.setProxy(new Proxy(Proxy.Type.HTTP, new InetSocketAddress(proxyHost, proxyPort)));
        }
        return config;
    }
}
AppleOauth2Service
@Slf4j
@Service
public class AppleOauth2Service implements OauthService {
    @Value("${xxx.oauth.apple.tokenUrl:https://appleid.apple.com/auth/token}")
    private String tokenUrl;

    @Value("${xxx.oauth.apple.publicKeyUrl:https://appleid.apple.com/auth/keys}")
    private String publicKeyUrl;

    @Value("${xxx.oauth.apple.redirectUrl:【你的回调地址】}")
    private String redirectUrl;

    @Value("${xxx.oauth.apple.issUrl:https://appleid.apple.com}")
    private String issUrl;

    @Value("${xxx.oauth.apple.clientId:【苹果开发者群组id】}") // 一般是域名反写
    private String clientId;

    @Value("${xxx.oauth.apple.teamId:【苹果开发者团队id】}")
    private String teamId;

    @Value("${xxx.oauth.apple.keyId:【苹果开发者keyId】}")
    private String keyId;

    @Value("${xxx.oauth.apple.keyPath:classpath:key/AuthKey_【你的p8文件名】.p8}")
    private String keyPath;

    private static final String ID_TOKEN_FIELD = "id_token";
    private static final String NONCE_STR = "20B20D-0S8-1K8";
    @Resource
    private OauthLoginService oauthLoginService;

    @Resource
    private AppleUtilsService appleUtilsService;

    @Override
    public AuthRequest getAuthRequest(String requestId) {
        return null;
    }

    // https://appleid.apple.com/auth/authorize?client_id=【省略】
// &redirect_uri=https://example.com/test&response_type=code&scope=name email&response_mode=form_post&state=12312
    @Override
    public String getAuthUrl(String requestId, String source, String deviceId, Boolean fromClient) {
        StringBuilder sb = new StringBuilder();
        sb.append("https://appleid.apple.com/auth/authorize"); // 应该不变
        sb.append("?client_id=");
        sb.append(clientId);
        sb.append("&redirect_uri=");
        sb.append(redirectUrl);
        sb.append("&nonce=");
        sb.append(NONCE_STR);   // 安全校验字段,后续有需要动态获取
        sb.append("&response_type=code id_token"); // "code id_token"
        sb.append("&scope=name email");
        sb.append("&response_mode=form_post");
        String state = this.getOauthState(requestId, source, deviceId, fromClient);
        sb.append("&state=");
        sb.append(state);
        return sb.toString();
    }

    private String getOauthState(String requestId, String source, String deviceId, Boolean fromClient) {
        OauthRequestStateInfo info = new OauthRequestStateInfo();
        info.setRequestId(requestId);
        info.setSource(source);
        info.setDeviceId(deviceId);
        info.setFromClient(fromClient);
        String stateJson = JSON.toJSONString(info);
        String base64State = Base64Util.base64Encode(stateJson);
        return base64State;
    }

    @Override
    public User registerOrGet(AuthCallback callback, HttpServletRequest request, String requestId, String productSource) {
        String idToken = request.getParameter(ID_TOKEN_FIELD);
        String code = request.getParameter("code");
        if (StringUtils.isBlank(idToken)) {
            log.error("can not get id token, please check!");
            throw new AmamDefaultException(ErrorCodeEnum.FAILED, "UNKOWN");
        }
        String clientSecret = this.getAppleClientSecret(idToken);
        TokenResponse tokenResponse = this.requestCodeValidations(clientSecret, code, null);
        if (tokenResponse != null) {
            String finalToken = tokenResponse.getId_token();
            String accessToken = tokenResponse.getAccess_token();
            if (StringUtils.isNotBlank(finalToken)) {
                JSONObject jsonObject = appleUtilsService.parserIdentityToken(finalToken);
                if (jsonObject != null) {
                    IdentifyResult identifyResult = JSONObject.parseObject(jsonObject.toJSONString(), IdentifyResult.class);
                    if (this.checkOauthApple(identifyResult)) {
                        AuthUser authUser = new AuthUser();
                        String email = identifyResult.getEmail();
                        authUser.setEmail(email);
                        String nickName = PubUtil.getNickName(email);
                        authUser.setUsername(nickName);
                        authUser.setNickname(nickName);
                        String userId = identifyResult.getSub();
                        authUser.setUuid(userId);
                        if (StringUtils.isBlank(authUser.getNickname())) {
                            authUser.setNickname(userId);
                        }

                        OauthTypeEnum oauthTypeEnum = this.getOauthType();
                        User user = oauthLoginService.registerOrGet(authUser, oauthTypeEnum, productSource);
                        return user;
                    } else {
                        throw new AmamDefaultException(ErrorCodeEnum.FAILED, "user.login.oauth-login-failed-apple");
                    }
                }
            }
        }
        return null;
    }

    private boolean checkOauthApple(IdentifyResult identifyResult) {
        if (identifyResult != null && identifyResult.getSub() != null) {
            return true;
        }
        return false;
    }

    @Override
    public OauthTypeEnum getOauthType() {
        return OauthTypeEnum.APPLE;
    }

    public String getAppleClientSecret(String idToken) {

        if (appleUtilsService.verifyIdentityToken(idToken, issUrl, clientId, publicKeyUrl)) {
            return appleUtilsService.createClientSecret(keyId, teamId, issUrl, clientId, keyPath);
        }
        return null;
    }

    public TokenResponse requestCodeValidations(String clientSecret, String code, String refresh_token) {

        TokenResponse tokenResponse = new TokenResponse();

        if (clientSecret != null && code != null && refresh_token == null) {
            tokenResponse = appleUtilsService.validateAuthorizationGrantCode(clientSecret, code, clientId, redirectUrl, tokenUrl);
        } else if (clientSecret != null && code == null && refresh_token != null) {
            tokenResponse = appleUtilsService.validateAnExistingRefreshToken(clientSecret, refresh_token, clientId, tokenUrl);
        }

        return tokenResponse;
    }
}
TwitterOauth2Service(近期twitter的授权登录变更还挺频繁的,而且收费有些恶心)
/**
 * @description: 改名后的社交软件x的实现
 */
@Slf4j
@Service
public class TwitterOauth2Service extends CommonJustAuthService {
    @Value("${xxx.oauth.twitter.clientId:【你的clientId】}")
    private String clientId;
    @Value("${xxx.oauth.twitter.secret:【你的sk】}")
    private String secret;
    @Value("${xxx.oauth.twitter.redirectUrl:【你的重定向地址】}")
    private String redirectUrl;
    @Value("${xxx.proxy.switch:false}")
    private Boolean proxySwitch; // 是否开启代理

    @Value("${xxx.proxy.host:127.0.0.1}")
    private String proxyHost;

    @Value("${xxx.proxy.port:7890}")
    private Integer proxyPort;


    private static final String codeChallenge = Base64.getUrlEncoder().encodeToString(RandomUtil.randomString(48).getBytes(StandardCharsets.UTF_8));

    @Resource
    private OauthLoginService oauthLoginService;

    @Override
    public AuthRequest getAuthRequest(String requestId) {
        return null;
    }


    @Override
    public String getAuthUrl(String requestId, String source, String deviceId, Boolean fromClient) {
        String state = this.getOauthState(requestId, source, deviceId);
        return "https://twitter.com/i/oauth2/authorize?response_type=code&scope=tweet.read%20users.read%20follows.read%20" +
                "like.read%20offline.access&client_id=" + clientId + "&redirect_uri=" + redirectUrl + "&state=" + state
                + "&code_challenge=" + codeChallenge + "&code_challenge_method=plain";

    }


    @Override
    public User registerOrGet(AuthCallback callback, HttpServletRequest request, String requestId, String productSource) {
        String code = request.getParameter("code");
        String state = request.getParameter("state");
        String url = "https://api.twitter.com/2/oauth2/token";
        String clientCredentials = clientId + ":" + secret;
        Map<String, Object> paramMap = new HashMap<>();
        paramMap.put("grant_type", "authorization_code");
        paramMap.put("code", code);
        paramMap.put("state", state);
        paramMap.put("code_verifier", codeChallenge);
        paramMap.put("redirect_uri", redirectUrl);
        HttpRequest authRequest = HttpRequest.post(url).form(paramMap)
                .auth("Basic " + Base64.getUrlEncoder().encodeToString(clientCredentials.getBytes(StandardCharsets.UTF_8)));
        if (proxySwitch) {
            authRequest.setHttpProxy(proxyHost, proxyPort);
        }
        HttpResponse response = authRequest.execute();
        if (response.getStatus() == HttpStatus.HTTP_OK) {
            JSONObject body = JSONObject.parseObject(response.body());
            String tokenType = body.getString("token_type");
            String accessToken = body.getString("access_token");
            String refreshToken = body.getString("refresh_token");
            //通过accessToken获取用户信息
            HttpResponse rep = HttpRequest.get("https://api.twitter.com/2/users/me").setHttpProxy("localhost", 7890).bearerAuth(accessToken).execute();
            if (rep.getStatus() == HttpStatus.HTTP_OK) {
                JSONObject userBody = JSONObject.parseObject(rep.body());
                JSONObject userData = userBody.getJSONObject("data");
                if (userData != null) {
                    log.info(JSON.toJSONString(userData));
                    String id = userData.getString("id");
                    String name = userData.getString("name");
                    String username = userData.getString("username");
                    String email = userData.getString("email");

                    AuthUser authUser = new AuthUser();
                    authUser.setEmail(email);
                    authUser.setUsername(name);
                    authUser.setNickname(username);
                    authUser.setUuid(id);
                    OauthTypeEnum oauthTypeEnum = this.getOauthType();

                    User user = oauthLoginService.registerOrGet(authUser, oauthTypeEnum, productSource);
                    return user;
                }
            } else {
                log.error(rep.body());
            }

        } else {
            log.error(response.body());
        }
        return null;
    }

    @Override
    public OauthTypeEnum getOauthType() {
        return OauthTypeEnum.TWITTER;
    }
}
3. 回调接口实现,统一的实现
 /***
     * @description: oauth平台中配置的授权回调地址,以本项目为例,在创建github授权应用时的回调地址应为:${ip:port}/api/xxx/callback/github
     * 后续最好加一下来源的判断
     * 直接重定向到某个子页面,方便iframe获取参数
     * @param source
     * @param callback
     * @param request
     * @return
     */
    @RequestMapping("/callback/{source}")
    public String login(@PathVariable("source") String source, AuthCallback callback, HttpServletRequest request) {
        ErrorCodeEnum errorCode = ErrorCodeEnum.SUCCESS;
        String message = i18nService.get("errorCode.0");
        UserLoginInfo info = null;
        Boolean fromClient = false;
        try {
            OauthTypeEnum oauthTypeEnum = OauthTypeEnum.getOauthTypeByType(source);
            OauthService oauthService = routingService.getOauthService(oauthTypeEnum);
            OauthRequestStateInfo requestInfo = this.getRequestInfo(callback);
            if (requestInfo == null) {
                throw new AmamDefaultException(ErrorCodeEnum.FAILED, "error.oauth.request-info-error");
            }
            String requestId = requestInfo.getRequestId();
            String oauthClientSource = requestInfo.getSource();
            String deviceId = requestInfo.getDeviceId();
            if (requestInfo.getFromClient() != null) {
                fromClient = requestInfo.getFromClient();
            }
            User user = oauthService.registerOrGet(callback, request, requestId, oauthClientSource);
            if (user != null) {
                if (!user.getEnabled()) {
                    throw new AmamDefaultException(ErrorCodeEnum.FAILED, "user.login.disabled");
                }
                info = new UserLoginInfo();
                info.setSource(oauthClientSource); // 客户端的来源
                info.setLoginType(LoginType.OAUTH);
                info.setLoginName(user.getEmail());
                info.setToken(userSecurityService.generateToken(user.getEmail()));
                info.setDeviceId(deviceId);
                this.checkLimitedLogin(info, user);
                userSecurityService.saveTokenToRedis(info.getToken(), this.buildOnlineUser(user));
                info.setUserId(user.getId());
                info.setRequestId(requestId);
                this.completeClientRequestTask(requestId, oauthTypeEnum, true, info);
            } else {
                this.completeClientRequestTask(requestId, oauthTypeEnum, false, null);
                throw new AmamDefaultException(ErrorCodeEnum.FAILED, "user.login.unknown");
            }
        } catch (AmamDefaultException amamException) {
            errorCode = amamException.getErrorCode();
            message = i18nService.get(amamException);
            log.error(amamException.getMessage(), amamException);
        } catch (Exception e) {
            errorCode = ErrorCodeEnum.FAILED;
            message = i18nService.get("user.login.unknown");
            log.error(e.getMessage());
        }
        String redirectPage = this.buildRedirectPage(errorCode, message, info, fromClient);
        return redirectPage;
    }
三方授权平台设置
参考:https://www.wenjiangs.com/doc/justauth-oauth-google[这里是图片003]http:// https://www.wenjiangs.com/doc/justauth-oauth-google
https://developer.twitter.com/en/apps[这里是图片004]https://developer.twitter.com/en/apps
https://developers.facebook.com/[这里是图片006]https://developers.facebook.com/
参考:
https://www.justauth.cn/guide/oauth/facebook/[这里是图片007]https://www.justauth.cn/guide/oauth/facebook/
apple
参考文档:
apple oauth 三方登录_appleid.auth.init-CSDN博客
Sign in with Apple 苹果登录 在浏览器Web使用 多图攻略 - 简书
https://medium.com/@yl.vic.liu/how-to-sign-in-with-apple-using-a-web-page-1a86f339ca94
https://segmentfault.com/a/1190000020786994
iOS应用集成AppleID第三方登录:JWT验证与流程详解-CSDN博客
Microsoft
Microsoft Graph、outlook 授权 Auth2.0 指北 - 痴者工良的博客
如何通过OAuth2.0完成Microsoft平台登录验证_oauth2 集成微软帐号登录-CSDN博客
官网地址:
结语
1. 微软的授权登录有点特别,justAuth1.16.6的默认实现是有问题的,主要是微软的细节存在变更。
    @Override
    public AuthRequest getAuthRequest(String requestId) {

        List<String> scopes = Arrays.asList(
                AuthMicrosoftScope.EMAIL.getScope(),
                AuthMicrosoftScope.OPENID.getScope(),
                AuthMicrosoftScope.PROFILE.getScope(),
                AuthMicrosoftScope.OFFLINE_ACCESS.getScope(),
                AuthMicrosoftScope.USER_READ.getScope()); // 用户信息必备

        CustomerAuthMicrosoftRequest authMicrosoftRequest = new CustomerAuthMicrosoftRequest(AuthConfig.builder()
                .clientId(clientId)
                .clientSecret(secret)
                .redirectUri(redirectUrl)
                .scopes(scopes)
                .build(), stateRedisCache);
        return authMicrosoftRequest;
    }


import java.util.Map;

/**
 * @description: 重写justAuth实现,处理多scope的情况下,scope转码问题
 */
public class CustomerAuthMicrosoftRequest extends AbstractAuthMicrosoftRequest {
    public CustomerAuthMicrosoftRequest(AuthConfig config) {
        super(config, AuthDefaultSource.MICROSOFT);
    }

    public CustomerAuthMicrosoftRequest(AuthConfig config, AuthStateCache authStateCache) {
        super(config, AuthDefaultSource.MICROSOFT, authStateCache);
    }

    @Override
    protected AuthToken getAccessToken(AuthCallback authCallback) {
        return getToken(accessTokenUrl(authCallback.getCode()));
    }


    private void checkResponse(JSONObject object) {
        if (object.containsKey("error")) {
            throw new AuthException(object.getString("error_description"));
        }
    }

    /**
     * 获取token,适用于获取access_token和刷新token
     *
     * @param accessTokenUrl 实际请求token的地址
     * @return token对象
     */
    private AuthToken getToken(String accessTokenUrl) {
        HttpHeader httpHeader = new HttpHeader();

        Map<String, String> form = MapUtil.parseStringToMap(accessTokenUrl, false);

        String finalAccessTokenUrl = StringUtils.replaceAll(accessTokenUrl, " ", "%20");
        String response = new HttpUtils(config.getHttpConfig()).post(finalAccessTokenUrl, form, httpHeader, false).getBody();
        JSONObject accessTokenObject = JSONObject.parseObject(response);

        this.checkResponse(accessTokenObject);

        return AuthToken.builder()
                .accessToken(accessTokenObject.getString("access_token"))
                .expireIn(accessTokenObject.getIntValue("expires_in"))
                .scope(accessTokenObject.getString("scope"))
                .tokenType(accessTokenObject.getString("token_type"))
                .refreshToken(accessTokenObject.getString("refresh_token"))
                .build();
    }
}
2. 微软中国和微软国际的认证服务器记得是不同的服务商,比如你是国内申请的,在挂vpn方式的时候验证会有问题。Apple好像也是,距离有点久了,记不清了。
3. 如果您向传递自定义的一些参数,可以重写getAuthUrl的时候,自定义state实现。authRequest.authorize(oauthState);是允许自定义的,否则justAuth的默认实现就是一个uuid
    protected String getOauthState(String requestId, String source, String deviceId) {
        OauthRequestStateInfo info = new OauthRequestStateInfo();
        info.setRequestId(requestId);
        info.setSource(source);
        info.setDeviceId(deviceId);
        String stateJson = JSON.toJSONString(info);
        String base64State = Base64Util.base64Encode(stateJson);
        return base64State;
    }

Agent 垂直技术社区,欢迎活跃、内容共建。
更多推荐

 13
13 0
0- 0


 已为社区贡献1条内容

所有评论(0)