magento2:前端如何使用grunt 编译less
1.安装node2.安装grunt3.安装 grunt-cli4.在项目根目录下 把以下文件 替换为 对应文件package.json.sample 替换为 package.jsonGruntfile.js.sample 替换为 Gruntfile.jsgrunt-config.json.sample 替换为 grunt-config.json其他文件不需要改变,只需把grunt-config.j
1.安装node
2.安装grunt
3.安装 grunt-cli
4.在项目根目录下 把以下文件 替换为 对应文件
package.json.sample 替换为 package.json
Gruntfile.js.sample 替换为 Gruntfile.js
grunt-config.json.sample 替换为 grunt-config.json
其他文件不需要改变,只需把grunt-config.js文件中的
{
  "themes": "dev/tools/grunt/configs/local-themes"
 }
“local-themes”改为自己主题的定义的主题配置文件,eg: dev/tools/grunt/configs/orange-theme (theme为orange主题,目录为app/design/frontend/orange/rwd)
5.在dev/tools/grunt/configs/文件夹下 新建 orange-theme.js文件,内容为
"use strict";

module.exports = {
  orange: {
    area: "frontend",
    name: "orange/rwd",
    locale: "en_GB",
    files: [
      "css/styles-m",
      "css/styles-l"
    ],
    dsl: "less"
  }
};
也可到dev/tools/grunt/configs/themes.js文件里看到这样的例子作为参考
6.跑grunt命令
grunt命令:
grunt clean   # Removes the theme related static files in the pub/static and var directories.
grunt exec    # Republishes symlinks to the source files to the pub/static/frontend/ directory.
grunt less    # Compiles .css files using the symlinks published in the pub/static/frontend/ directory.
grunt watch   # Tracks the changes in the source files, recompiles .css files, and reloads the page in the browser.
跑命令的顺序:
grunt clean
grunt exec:orange
grunt less:orange
之后刷新网站,浏览器F12工具栏里style的样式文件就为样式对应的less文件,再也不用为找不到哪个less文件写的而头疼或者全局搜索了哈。如以下图片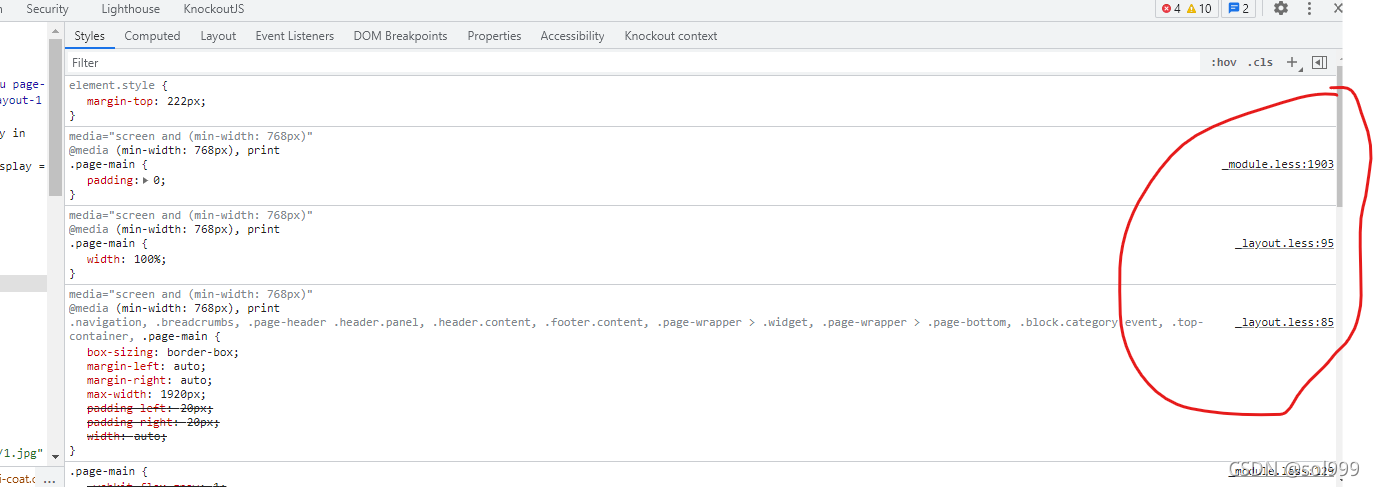
参考 https://devdocs.magento.com/guides/v2.4/frontend-dev-guide/css-topics/css_debug.html

Agent 垂直技术社区,欢迎活跃、内容共建。
更多推荐


 0
0 0
0- 0


 已为社区贡献3条内容

所有评论(0)