分布式智能体|A2A Agent实战
·
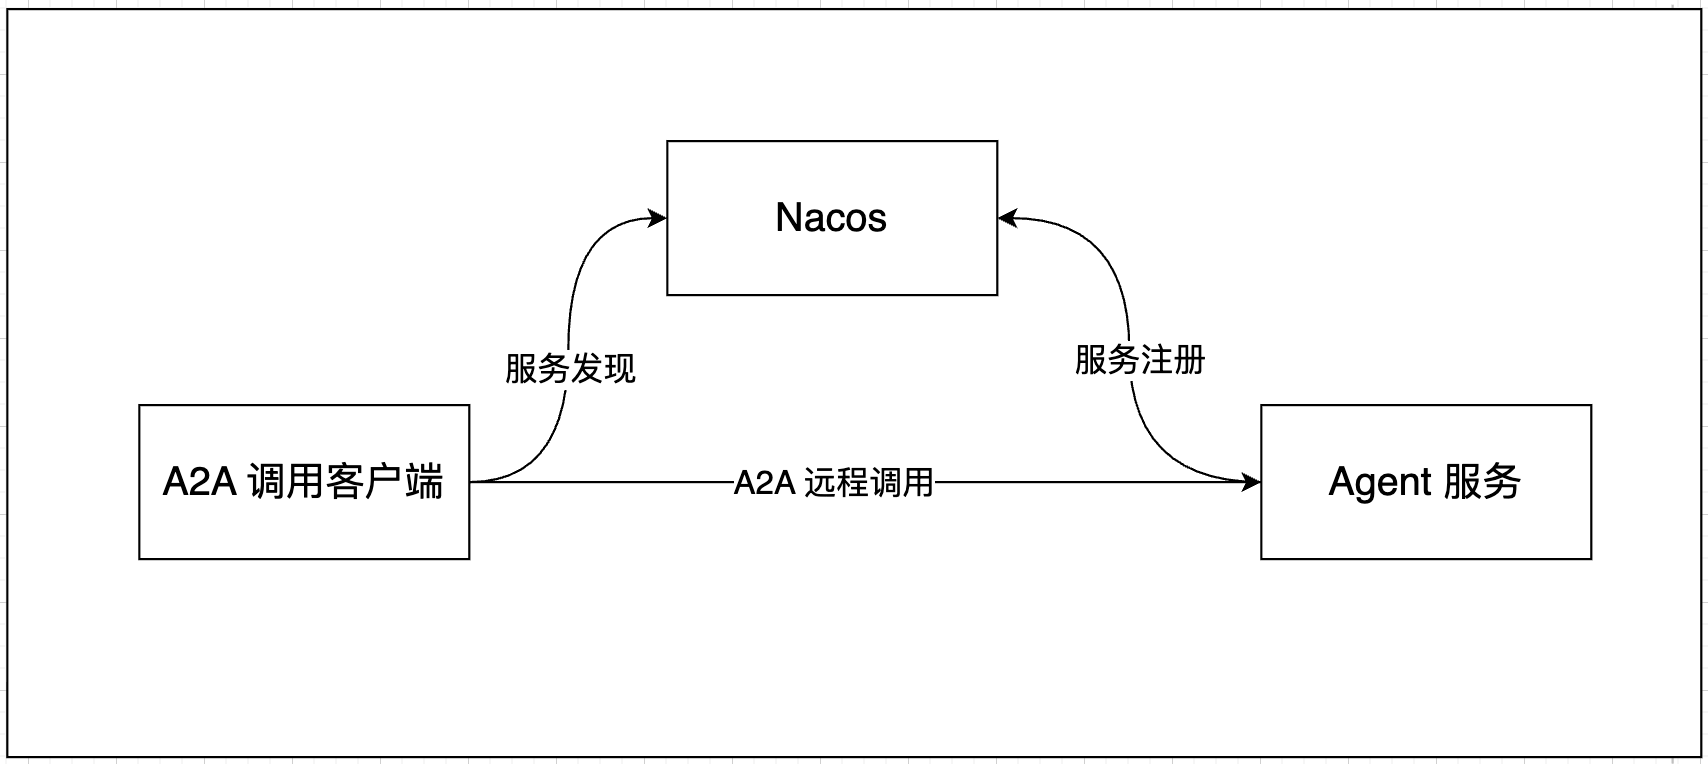
本文基于Spring AI Alibaba框架,使用Nacos作为注册中心,落地完整的分布式智能体方案。
整体架构:
一、Nacos注册中心安装
本次选用的Nacos版本为3.2.0,安装配置流程可参考官方文档,这里不再赘述基础安装步骤。
Nacos官方地址:https://nacos.io/
二、项目依赖引入
使用官方推荐的BOM方式进行依赖管理
<dependencyManagement>
    <dependencies>
        <dependency>
            <groupId>com.alibaba.cloud.ai</groupId>
            <artifactId>spring-ai-alibaba-bom</artifactId>
            <version>1.1.2.0</version>
            <type>pom</type>
            <scope>import</scope>
        </dependency>
        <dependency>
            <groupId>org.springframework.ai</groupId>
            <artifactId>spring-ai-bom</artifactId>
            <version>1.1.2</version>
            <type>pom</type>
            <scope>import</scope>
        </dependency>
        <dependency>
            <groupId>com.alibaba.cloud.ai</groupId>
            <artifactId>spring-ai-alibaba-extensions-bom</artifactId>
            <version>1.1.2.2</version>
            <type>pom</type>
            <scope>import</scope>
        </dependency>
    </dependencies>
</dependencyManagement>

<dependencies>
		<!-- 智能体核心框架 -->
    <dependency>
        <groupId>com.alibaba.cloud.ai</groupId>
        <artifactId>spring-ai-alibaba-agent-framework</artifactId>
    </dependency>
    <!-- 通义千问AI模型依赖 -->
    <dependency>
        <groupId>com.alibaba.cloud.ai</groupId>
        <artifactId>spring-ai-alibaba-starter-dashscope</artifactId>
    </dependency>
    <!-- A2A+Nacos集成依赖 -->
    <dependency>
        <groupId>com.alibaba.cloud.ai</groupId>
        <artifactId>spring-ai-alibaba-starter-a2a-nacos</artifactId>
    </dependency>
</dependencies>
三、Agent服务注册配置
完成依赖引入后,需要将自定义的智能体交由Spring容器管理,同时配置Nacos注册参数,实现智能体的自动注册。
1. 配置Bean对象
本次以讲笑话的智能体jokeAgent为例
@Configuration
public class A2AAgentConfig {

    @Bean(name = "jokeAgent")
    public ReactAgent jokeAgent() {

        // 构建通义千问API对象
        DashScopeApi dashScopeApi = DashScopeApi.builder()
                .apiKey(System.getenv("AliQwen_API"))
                .build();

        // 初始化对话模型
        DashScopeChatModel chatModel = DashScopeChatModel.builder()
                .dashScopeApi(dashScopeApi)
                .defaultOptions(DashScopeChatOptions.builder()
                        .model(DashScopeChatModel.DEFAULT_MODEL_NAME)
                        .temperature(0.5)
                        .maxToken(1000)
                        .build())
                .build();

        // 创建并返回笑话智能体
        return ReactAgent.builder()
                .name("jokeAgent")
                .model(chatModel)
                .description("负责讲笑话。")
                .instruction("你是一个幽默风趣、反应敏捷的笑话智能体。你的任务是根据用户的要求,讲一个轻松、健康、积极向上的短笑话。")
                .build();
    }
}
2. 修改application.yml配置文件
spring:
  application:
    name: spring-ai-alibaba-a2a-server
  ai:
    dashscope:
      api-key: ${AliQwen_API}
    alibaba:
      a2a:
        nacos:
          server-addr: 127.0.0.1:8848
          username: nacos
          password: nacos
          registry:
            enabled: true # 启用服务注册(注册本地 Agent)
        server:
          version: 1.0.0
          card:
            name: jokeAgent  # 必须与Bean名称一致
            description: 专门讲笑话的智能体
3. 注册成功校验
启动项目后,控制台出现如下日志,即代表智能体成功注册到Nacos注册中心:
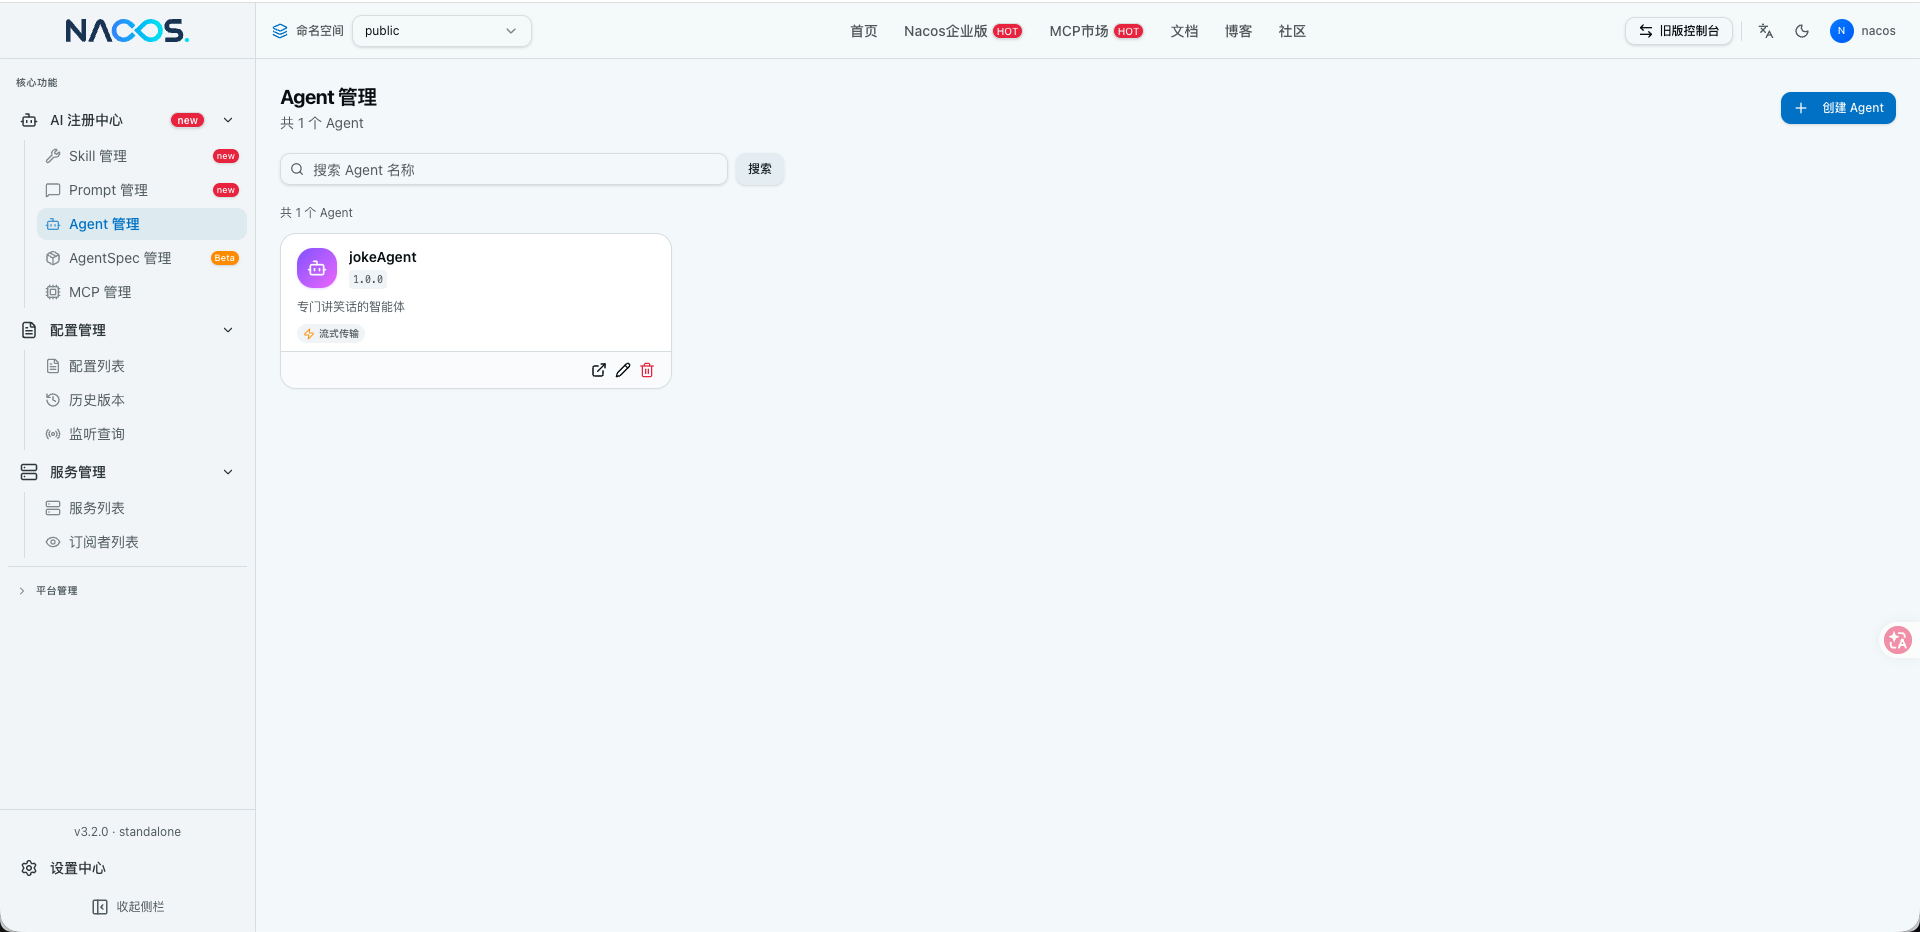
Auto register agent jokeAgent into Registry Nacos[127.0.0.1:8848] successfully.
配置成功后在Nacos Console上面可以看到智能体成功注册
四、Agent远程调用
完成服务端智能体注册后,客户端即可通过A2A协议远程调用注册好的智能体,实现分布式跨服务的智能体协作。
1. 客户端依赖准备
客户端同样需要添加上述的A2A依赖
2. 远程调用代码编写
客户端调用代码如下
@RestController
public class RemoteAgentController {

    @Resource
    private AgentCardProvider agentCardProvider;

    @GetMapping("test")
    public void test() throws GraphRunnerException {

        // 服务发现:通过AgentCardProvider 从注册中心获取Agent
        A2aRemoteAgent remoteAgent = A2aRemoteAgent.builder()
                .name("jokeAgent")
                .agentCardProvider(agentCardProvider)
                .description("可以给我讲笑话")
                .build();

        Optional<OverAllState> result = remoteAgent.invoke("请给我讲一个关于小明的笑话");
        result.ifPresent(state -> System.out.println(state.data().get("output")));
    }
}
Agent 垂直技术社区,欢迎活跃、内容共建。
更多推荐


 4
4 0
0- 0


 已为社区贡献1条内容

所有评论(0)