DeepSeek Harness 震撼发布!一切皆插件的 AI Agent 框架,附 10 分钟上手 Demo
·
导读:2026 年 8 月 13 日,DeepSeek 正式开源 DeepSeek Harness v0.1,主打"一切皆插件"架构,MIT 协议完全开源。本文带你 10 分钟上手,手写第一个 AI Agent 插件!
为什么 DeepSeek Harness 值得关注?
在 AI Agent 框架百花齐放的 2026 年,DeepSeek Harness 凭什么出圈?
| 特性 | DeepSeek Harness | LangGraph | CrewAI |
|---|---|---|---|
| 架构模式 | 插件化 | 图工作流 | 角色协作 |
| 热插拔 | ✅ 支持 | ❌ 不支持 | ❌ 不支持 |
| 开源协议 | MIT | MIT | MIT |
| 多模型 | ✅ 原生支持 | ✅ | ✅ |
| 国产化 | ✅ | ❌ | ❌ |
| 学习成本 | 中 | 高 | 低 |
核心优势:一切皆插件——模型、工具、技能、UI、沙箱全部插件化,自由组合、替换、扩展!
🚀 快速开始:10 分钟上手 Demo
环境准备
# Node.js 版本要求:>= 18.0
node -v  # 建议 v20+

# 克隆仓库
git clone https://github.com/deepseek-ai/deepseek-harness.git
cd deepseek-harness

# 安装依赖
npm install

# 构建核心
npm run build
项目结构速览
deepseek-harness/
├── packages/
│   ├── core/          # 核心框架(Cordis 元框架)
│   ├── plugins/       # 官方插件
│   │   ├── model/     # 模型插件
│   │   ├── tool/      # 工具插件
│   │   └── ui/        # UI 插件
│   └── examples/      # 示例代码
├── docs/              # 文档
└── package.json
💻 实战:手写第一个插件
场景:开发一个「天气查询」工具插件
我们要创建一个简单的 AI Agent 插件,让 AI 能够查询天气信息。
Step 1:创建插件项目
# 创建插件目录
mkdir weather-plugin
cd weather-plugin

# 初始化 npm 项目
npm init -y

# 安装 Harness 核心依赖
npm install @deepseek-harness/core
Step 2:编写插件代码
创建 src/weather-plugin.ts:
// src/weather-plugin.ts
import { Plugin, definePlugin } from '@deepseek-harness/core';

// 定义插件配置接口
interface WeatherPluginConfig {
  apiKey: string;
  defaultCity: string;
}

// 定义插件
export const weatherPlugin = definePlugin<WeatherPluginConfig>({
  name: 'weather-query',
  version: '1.0.0',
  description: '天气查询工具插件',

  // 插件激活时的初始化
  async setup(config) {
    console.log(`[Weather] 插件已激活,默认城市:${config.defaultCity}`);
    return {
      currentCity: config.defaultCity,
      apiKey: config.apiKey,
    };
  },

  // 插件提供的工具函数
  tools: {
    // 查询天气
    async getWeather(ctx, city?: string) {
      const state = ctx.getPluginState<ReturnType<typeof this.setup>>();
      const targetCity = city || state.currentCity;

      // 模拟天气数据(实际使用需调用 API)
      const weatherData = {
        city: targetCity,
        temperature: Math.floor(Math.random() * 35) + '°C',
        condition: ['晴', '多云', '小雨', '阴天'][Math.floor(Math.random() * 4)],
        humidity: Math.floor(Math.random() * 100) + '%',
      };

      return {
        success: true,
        data: weatherData,
      };
    },

    // 设置默认城市
    async setDefaultCity(ctx, city: string) {
      const state = ctx.getPluginState<ReturnType<typeof this.setup>>();
      state.currentCity = city;

      return {
        success: true,
        message: `默认城市已设置为:${city}`,
      };
    },
  },

  // 插件销毁时的清理
  async teardown() {
    console.log('[Weather] 插件已卸载');
  },
});

export default weatherPlugin;
Step 3:创建插件入口
创建 src/index.ts:
// src/index.ts
export { weatherPlugin } from './weather-plugin';
export type { WeatherPluginConfig } from './weather-plugin';
Step 4:编译插件
创建 tsconfig.json:
{
  "compilerOptions": {
    "target": "ES2020",
    "module": "commonjs",
    "lib": ["ES2020"],
    "declaration": true,
    "outDir": "./dist",
    "rootDir": "./src",
    "strict": true,
    "esModuleInterop": true,
    "skipLibCheck": true
  },
  "include": ["src/**/*"],
  "exclude": ["node_modules", "dist"]
}
编译:
npx tsc
Step 5:在 Harness 中注册插件
创建 src/app.ts 主程序:
// src/app.ts
import { Harness } from '@deepseek-harness/core';
import { weatherPlugin } from './weather-plugin';

async function main() {
  // 创建 Harness 实例
  const harness = new Harness({
    name: 'my-first-agent',
    version: '1.0.0',
  });

  // 注册天气插件
  await harness.registerPlugin(weatherPlugin, {
    apiKey: 'your-api-key-here',  // 实际使用需申请天气 API
    defaultCity: '北京',
  });

  console.log('✅ Harness 启动成功!');

  // 获取插件实例
  const weather = harness.getPlugin('weather-query');

  // 调用插件工具
  const result = await weather.tools.getWeather(null, '上海');
  console.log('🌤️ 天气查询结果:', result);

  // 设置默认城市
  await weather.tools.setDefaultCity(null, '广州');

  // 再次查询(使用默认城市)
  const result2 = await weather.tools.getWeather(null);
  console.log('️ 默认城市天气:', result2);
}

main().catch(console.error);
Step 6:运行 Demo
# 编译主程序
npx tsc src/app.ts --outDir dist

# 运行
node dist/app.js
预期输出:
[Weather] 插件已激活,默认城市:北京
✅ Harness 启动成功!
🌤️ 天气查询结果:{
  success: true,
  data: {
    city: '上海',
    temperature: '28°C',
    condition: '多云',
    humidity: '65%'
  }
}
🌤️ 默认城市天气:{
  success: true,
  data: {
    city: '广州',
    temperature: '32°C',
    condition: '晴',
    humidity: '80%'
  }
}
[Weather] 插件已卸载
进阶:多插件协作示例
Harness 的强大之处在于插件自由组合。下面演示模型插件 + 工具插件的协作。
完整示例:AI 天气助手
// src/ai-weather-agent.ts
import { Harness } from '@deepseek-harness/core';
import { deepSeekModelPlugin } from '@deepseek-harness/model-deepseek';
import { weatherPlugin } from './weather-plugin';

async function main() {
  const harness = new Harness({
    name: 'ai-weather-agent',
    version: '1.0.0',
  });

  // 注册模型插件
  await harness.registerPlugin(deepSeekModelPlugin, {
    apiKey: process.env.DEEPSEEK_API_KEY,
    model: 'deepseek-chat',
  });

  // 注册天气插件
  await harness.registerPlugin(weatherPlugin, {
    apiKey: 'your-weather-api-key',
    defaultCity: '北京',
  });

  // 获取插件
  const model = harness.getPlugin('deepseek-model');
  const weather = harness.getPlugin('weather-query');

  // 用户输入
  const userInput = '帮我查一下上海的天气,然后用一句话总结';

  // 第一步:让 AI 理解意图
  const intent = await model.tools.chat({
    messages: [{ role: 'user', content: userInput }],
    tools: ['weather-query.getWeather'],  // 告知可用工具
  });

  // 第二步:调用天气插件
  if (intent.toolCalls?.[0]?.name === 'getWeather') {
    const weatherResult = await weather.tools.getWeather(
      null,
      intent.toolCalls[0].args.city || '上海'
    );

    // 第三步:让 AI 总结
    const summary = await model.tools.chat({
      messages: [
        { role: 'user', content: userInput },
        { role: 'assistant', toolCalls: intent.toolCalls },
        { role: 'tool', content: JSON.stringify(weatherResult.data) },
      ],
    });

    console.log('📝 AI 总结:', summary.content);
  }
}

main().catch(console.error);
运行效果:
📝 AI 总结:上海今天多云,气温 28°C,湿度 65%,适合外出活动。
🎨 插件类型大全
DeepSeek Harness 支持多种插件类型,下面是常见插件的开发模板:
1. 模型插件
export const myModelPlugin = definePlugin({
  name: 'my-model',
  tools: {
    async chat(ctx, messages: Message[]) {
      // 调用 LLM API
      return await callLLM(messages);
    },
  },
});
2. 工具插件
export const filePlugin = definePlugin({
  name: 'file-operations',
  tools: {
    async readFile(ctx, path: string) {
      return await fs.promises.readFile(path, 'utf-8');
    },
    async writeFile(ctx, path: string, content: string) {
      await fs.promises.writeFile(path, content);
      return { success: true };
    },
  },
});
3. UI 插件
export const cliUiPlugin = definePlugin({
  name: 'cli-ui',
  hooks: {
    onOutput(output) {
      console.log('📤 输出:', output);
    },
  },
});
4. 沙箱插件
export const dockerSandboxPlugin = definePlugin({
  name: 'docker-sandbox',
  tools: {
    async execute(ctx, code: string, language: string) {
      // 在 Docker 容器中执行代码
      return await docker.run(code, language);
    },
  },
});
📦 发布你的插件到 NPM
# 完善 package.json
npm pkg set keywords="deepseek-harness,plugin,ai-agent"
npm pkg set repository.github=your-username/your-plugin

# 测试
npm pack

# 发布
npm publish --access public
发布后,其他人可以:
npm install your-weather-plugin
然后在 Harness 中使用:
import { weatherPlugin } from 'your-weather-plugin';
await harness.registerPlugin(weatherPlugin, config);
🎯 实际应用场景
场景 1:AI 代码助手
// 组合:模型 + 文件 + 沙箱 + 代码审查插件
harness.registerPlugin(deepSeekModelPlugin);
harness.registerPlugin(filePlugin);
harness.registerPlugin(dockerSandboxPlugin);
harness.registerPlugin(codeReviewPlugin);

// AI 可以:读写文件 → 生成代码 → 沙箱运行 → 自动审查
场景 2:自动化测试 Agent
// 组合:模型 + 浏览器 + 测试 + 报告插件
harness.registerPlugin(deepSeekModelPlugin);
harness.registerPlugin(playwrightPlugin);
harness.registerPlugin(testGeneratorPlugin);
harness.registerPlugin(reportPlugin);

// AI 可以:分析需求 → 生成测试 → 执行 → 输出报告
场景 3:数据分析助手
// 组合:模型 + SQL + 可视化 + 报告插件
harness.registerPlugin(deepSeekModelPlugin);
harness.registerPlugin(sqlPlugin);
harness.registerPlugin(chartPlugin);
harness.registerPlugin(reportPlugin);

// AI 可以:理解问题 → 查询数据 → 生成图表 → 输出分析
⚠️ 注意事项
| 事项 | 说明 |
|---|---|
| 版本兼容性 | v0.1 预览版,API 可能变动 |
| 生产环境 | 暂不建议用于生产,等待 v1.0 |
| 文档完善度 | 部分文档仍在补充中 |
| 社区支持 | 新框架,遇到问题需自行探索 |
资源链接
| 资源 | 链接 |
|---|---|
| GitHub 仓库 | https://github.com/deepseek-ai/deepseek-harness |
| 官方文档 | https://github.com/deepseek-ai/deepseek-harness/blob/master/docs/development.zh.md |
| Awesome 资源 | https://github.com/0xsline/awesome-deepseek-harness |
| 本文 Demo 代码 | (可关注公众号回复"harness"获取) |
写在最后
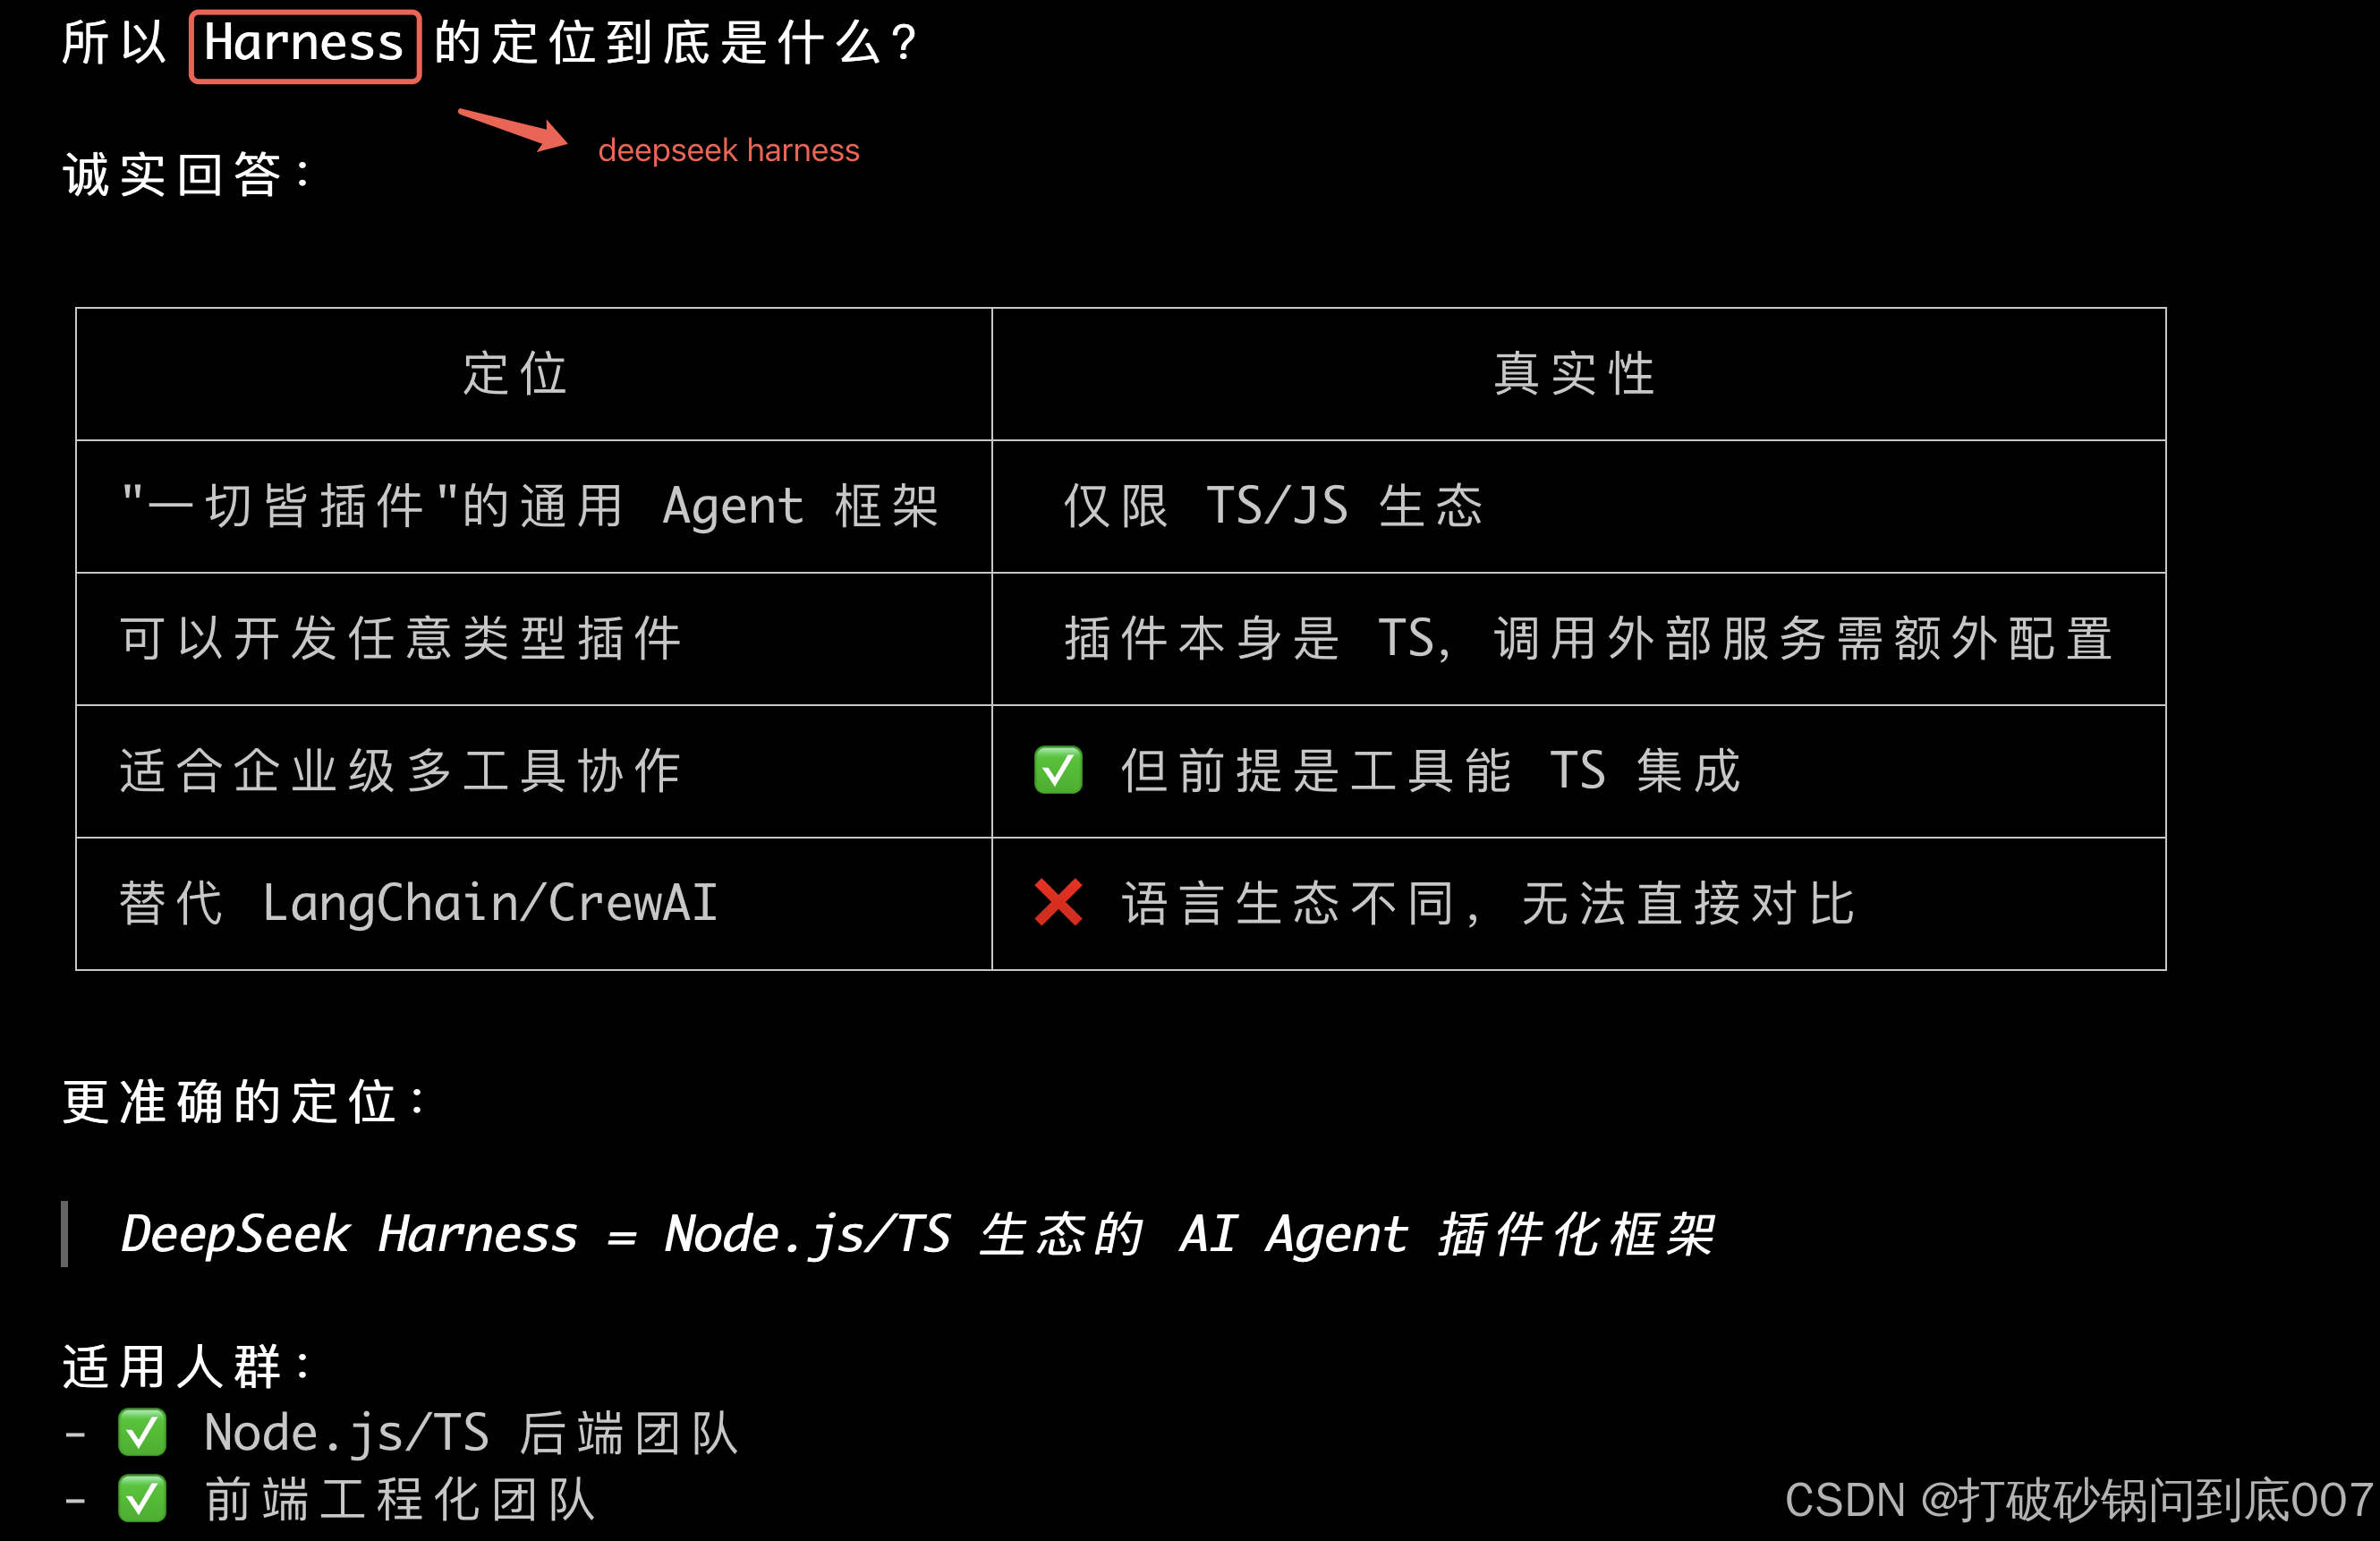
deepseek Harness本质上主要是适用于前端 JS/TS的AI开发框架,方便统一管理插件,并不能直接应用于 Java/Python/Golang 乃至于客户端app的Android, IOS, 鸿蒙开发等

Agent 垂直技术社区,欢迎活跃、内容共建。
更多推荐


 2
2 0
0- 0


 已为社区贡献4条内容

所有评论(0)