TransUNet遥感河流分割项目 pytorch模型
·
TransUNet遥感河流分割项目 pytorch模型
文章目录
代码示例,仅供参考
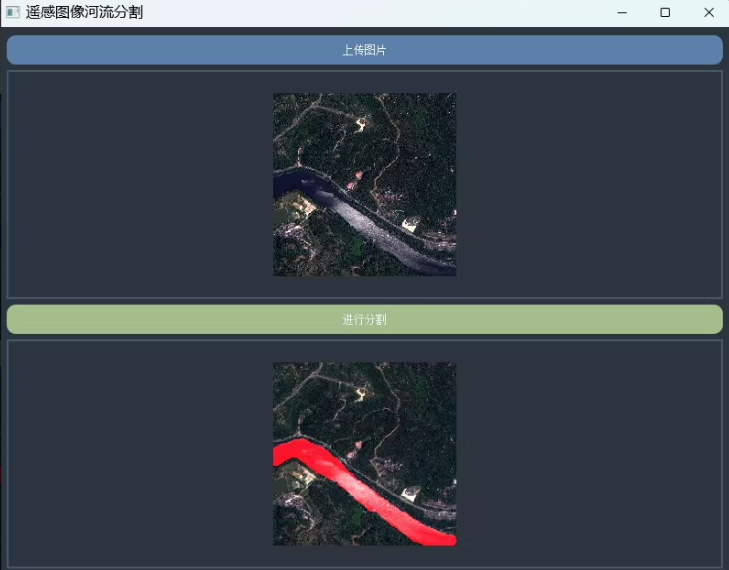
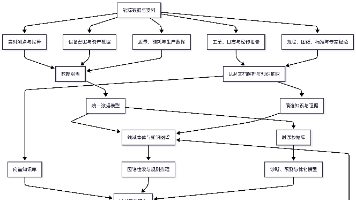
实现原理:
*项目使用数据集,有训练样本共82个,测试样本8个,原图是三通道彩色图像,label是二值化(0与255)掩模图像
代码运行环境
pytorch1.10.0 cpu or gpu都可
python3.8,可用pip install -r命令安装
基于TransUNet的遥感河流分割项目,从环境搭建、数据准备、模型训练到GUI界面开发逐步进行。
代码示例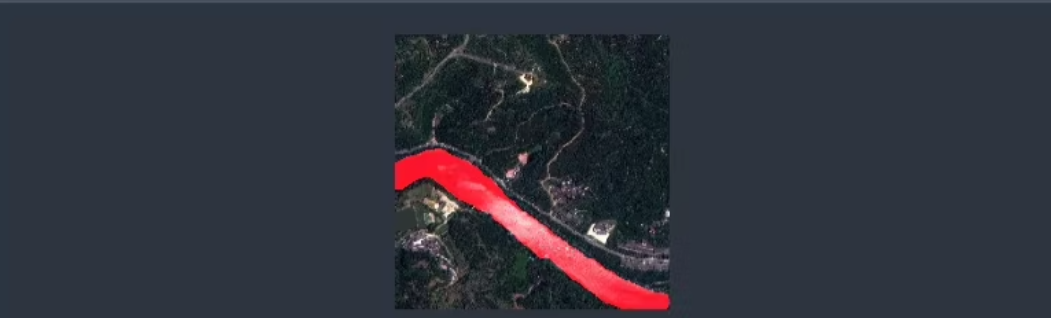
一、环境搭建
1. 安装依赖项
确保你的系统已安装Python 3.8,并使用requirements.txt文件安装必要的依赖项。
pip install -r requirements.txt
2. 确认PyTorch版本
确保你安装了正确的PyTorch版本(1.10.0)。
python -c "import torch; print(torch.__version__)"
二、数据准备
假设你已经有82个训练样本和8个测试样本的数据集,并且这些图像已经按照标准格式组织。
数据集结构
确保数据集按如下结构组织:
river_segmentation_dataset/
├── images/
│   ├── train/
│   └── test/
└── labels/
    ├── train/
    └── test/
数据预处理
编写一个简单的脚本来加载和预处理数据。
import os
import cv2
import numpy as np
from torch.utils.data import Dataset, DataLoader
from torchvision import transforms

class RiverDataset(Dataset):
    def __init__(self, image_dir, label_dir, transform=None):
        self.image_dir = image_dir
        self.label_dir = label_dir
        self.transform = transform
        self.images = os.listdir(image_dir)

    def __len__(self):
        return len(self.images)

    def __getitem__(self, idx):
        img_path = os.path.join(self.image_dir, self.images[idx])
        label_path = os.path.join(self.label_dir, self.images[idx].replace('.jpg', '.png'))

        image = cv2.imread(img_path)
        label = cv2.imread(label_path, cv2.IMREAD_GRAYSCALE)
        label = (label > 0).astype(np.float32)  # Convert to binary mask

        if self.transform:
            image = self.transform(image)
            label = self.transform(label)

        return image, label

# Define transformations
transform = transforms.Compose([
    transforms.ToTensor(),
    transforms.Normalize(mean=[0.485, 0.456, 0.406], std=[0.229, 0.224, 0.225])
])

# Create datasets and dataloaders
train_dataset = RiverDataset('river_segmentation_dataset/images/train', 'river_segmentation_dataset/labels/train', transform=transform)
test_dataset = RiverDataset('river_segmentation_dataset/images/test', 'river_segmentation_dataset/labels/test', transform=transform)

train_loader = DataLoader(train_dataset, batch_size=4, shuffle=True)
test_loader = DataLoader(test_dataset, batch_size=4, shuffle=False)
三、模型训练
TransUNet模型定义
import torch
import torch.nn as nn
import torch.nn.functional as F

class TransUNet(nn.Module):
    def __init__(self):
        super(TransUNet, self).__init__()
        # Define your TransUNet architecture here
        pass

    def forward(self, x):
        # Implement the forward pass
        pass

# Initialize the model
model = TransUNet()
if torch.cuda.is_available():
    model = model.cuda()

# Loss function and optimizer
criterion = nn.BCEWithLogitsLoss()
optimizer = torch.optim.Adam(model.parameters(), lr=0.001)

# Training loop
num_epochs = 100
for epoch in range(num_epochs):
    for i, (images, labels) in enumerate(train_loader):
        if torch.cuda.is_available():
            images = images.cuda()
            labels = labels.cuda()

        outputs = model(images)
        loss = criterion(outputs, labels.unsqueeze(1))

        optimizer.zero_grad()
        loss.backward()
        optimizer.step()

        if (i+1) % 10 == 0:
            print(f'Epoch [{epoch+1}/{num_epochs}], Step [{i+1}/{len(train_loader)}], Loss: {loss.item():.4f}')
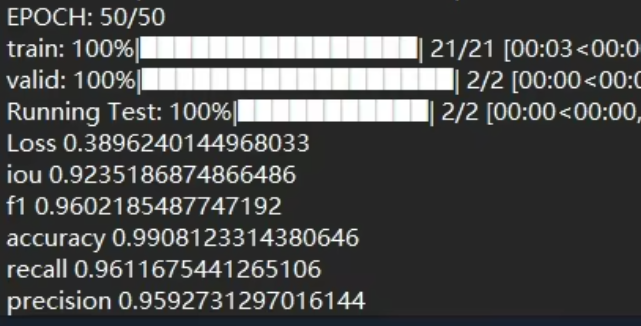
四、构建GUI界面
使用PyQt5创建GUI界面
import sys
from PyQt5.QtWidgets import QApplication, QMainWindow, QLabel, QPushButton, QFileDialog, QVBoxLayout, QWidget
from PyQt5.QtGui import QPixmap
import cv2
import numpy as np
import torch

class MainWindow(QMainWindow):
    def __init__(self):
        super().__init__()
        self.setWindowTitle("Remote Sensing Image River Segmentation")
        self.setGeometry(100, 100, 800, 600)

        self.central_widget = QWidget()
        self.setCentralWidget(self.central_widget)
        self.layout = QVBoxLayout(self.central_widget)

        self.upload_button = QPushButton("Upload Image", self)
        self.upload_button.clicked.connect(self.upload_image)
        self.layout.addWidget(self.upload_button)

        self.image_label = QLabel(self)
        self.layout.addWidget(self.image_label)

        self.segment_button = QPushButton("Perform Segmentation", self)
        self.segment_button.clicked.connect(self.perform_segmentation)
        self.layout.addWidget(self.segment_button)

        self.result_label = QLabel(self)
        self.layout.addWidget(self.result_label)

        self.model = torch.load('path_to_your_trained_model.pth')  # Load your trained model

    def upload_image(self):
        fname, _ = QFileDialog.getOpenFileName(self, 'Open file', '', "Image files (*.jpg *.png)")
        if fname:
            self.image_path = fname
            pixmap = QPixmap(fname)
            self.image_label.setPixmap(pixmap)

    def perform_segmentation(self):
        image = cv2.imread(self.image_path)
        image = cv2.resize(image, (256, 256))  # Resize to match input size of your model
        image = image / 255.0  # Normalize
        image = np.transpose(image, (2, 0, 1))  # Change order from HWC to CHW
        image = torch.tensor(image, dtype=torch.float32).unsqueeze(0)

        if torch.cuda.is_available():
            image = image.cuda()
            self.model = self.model.cuda()

        with torch.no_grad():
            output = self.model(image)
            output = torch.sigmoid(output)
            output = output.cpu().numpy()[0][0]  # Get the first channel of the first batch item
            output = (output > 0.5).astype(np.uint8) * 255  # Threshold and convert to binary mask

        result = cv2.cvtColor(output, cv2.COLOR_GRAY2BGR)
        result = cv2.addWeighted(cv2.imread(self.image_path), 0.7, result, 0.3, 0)  # Overlay on original image

        height, width, channel = result.shape
        bytes_per_line = 3 * width
        q_img = QImage(result.data, width, height, bytes_per_line, QImage.Format_RGB888).rgbSwapped()
        self.result_label.setPixmap(QPixmap.fromImage(q_img))

if __name__ == "__main__":
    app = QApplication(sys.argv)
    window = MainWindow()
    window.show()
    sys.exit(app.exec_())
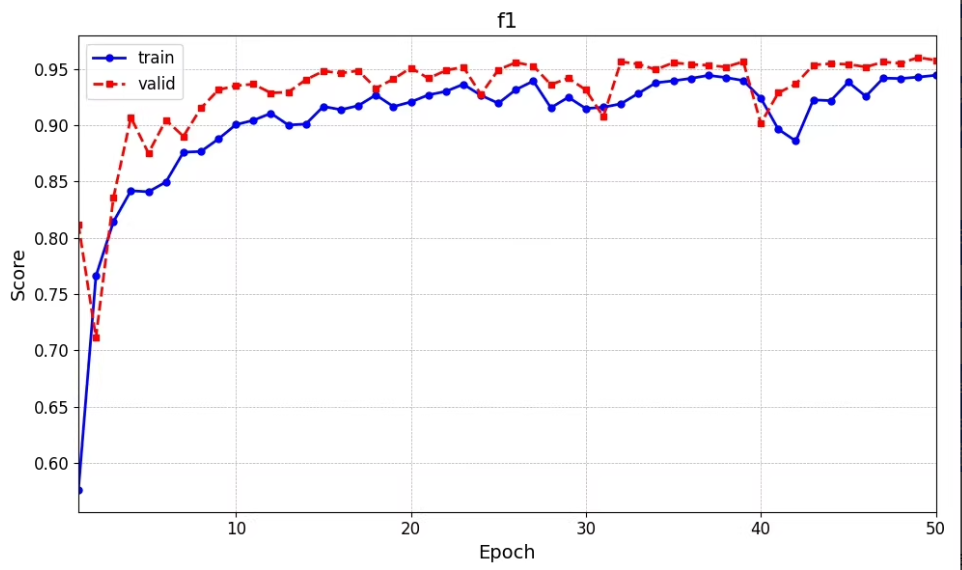
运行项目
保存上述代码为gui.py,然后运行它:
python gui.py
启动一个窗口应用程序,允许用户上传遥感图像并进行河流分割。记得在实际部署前对模型进行充分的测试与调优。

Agent 垂直技术社区,欢迎活跃、内容共建。
更多推荐

 15
15 0
0- 0


 已为社区贡献61条内容

所有评论(0)