用 start-local 脚本在本地运行 Elastic Stack 并创建 AI agents
在今天的文章里,我来为大家来展示如何在自己的电脑使用一个命令来启动 Elastic Stack,并进行 AI Agents 的开发。在我之前的文章 “使用 start-local 脚本在本地运行 Elasticsearch” 有介绍,但是它不含有对 AI 方面的配置。在今天的文章里,我来一步一步地详述如何安装并进行配置。
警告:请勿将这些说明用于生产部署
本页上的说明仅适用于本地开发。请勿将此配置用于生产部署,因为它不安全。请参阅部署选项以获取生产部署选项列表。
使用 start-local 脚本在 Docker 中快速设置 Elasticsearch 和 Kibana 以进行本地开发或测试。
此设置附带一个月的试用许可证,其中包括所有 Elastic 功能。试用期过后,许可证将恢复为免费和开放 - Basic。有关更多信息,请参阅 Elastic 订阅。
更多阅读:Elasticsearch:如何在 Docker 上运行 Elasticsearch 8.x 进行本地开发
先决条件
- 如果你尚未安装 Docker,请下载并安装适用于你的操作系统的 Docker Desktop。
- 如果你使用的是 Microsoft Windows,请安装适用于 Linux 的 Windows 子系统 (WSL)。
运行 start-local
start-local 脚本可以在地址进行下载 GitHub - elastic/start-local: Try Elasticsearch and Kibana locally。要在本地设置 Elasticsearch 和 Kibana,请运行 start-local 脚本。
curl -fsSL https://elastic.co/start-local | sh此脚本创建一个 elastic-start-local 文件夹,其中包含:
- docker-compose.yml:Elasticsearch 和 Kibana 的 Docker Compose 配置
- .env:环境设置,包括 Elasticsearch 密码
- start.sh 和 stop.sh:用于启动和停止 Elasticsearch 和 Kibana 的脚本
- uninstall.sh:用于卸载 Elasticsearch 和 Kibana 的脚本
$ curl -fsSL https://elastic.co/start-local | sh

  ______ _           _   _
 |  ____| |         | | (_)
 | |__  | | __ _ ___| |_ _  ___
 |  __| | |/ _` / __| __| |/ __|
 | |____| | (_| \__ \ |_| | (__
 |______|_|\__,_|___/\__|_|\___|
-------------------------------------------------
🚀 Run Elasticsearch and Kibana for local testing
-------------------------------------------------

ℹ️  Do not use this script in a production environment

⌛️ Setting up Elasticsearch and Kibana v9.4.4-arm64...

- Generated random passwords
- Created the elastic-start-local folder containing the files:
  - .env, with settings
  - docker-compose.yml, for Docker services
  - start/stop/uninstall commands
- Running docker compose up --wait

[+] up 30/30
 ✔ Image docker.elastic.co/elasticsearch/elasticsearch:9.4.4-arm64 Pulled                                    85.3s
 ✔ Image docker.elastic.co/kibana/kibana:9.4.4-arm64               Pulled                                    96.4s
 ✔ Network elastic-start-local_default                             Created                                    0.0s
 ✔ Volume elastic-start-local_dev-kibana                           Created                                    0.0s
 ✔ Volume elastic-start-local_dev-elasticsearch                    Created                                    0.0s
 ✔ Container es-local-dev                                          Healthy                                   22.3s
 ✔ Container kibana-local-settings                                 Exited                                    21.9s
 ✔ Container kibana-local-dev                                      Healthy                                   31.9s

🎉 Congrats, Elasticsearch and Kibana are installed and running in Docker!

🌐 Open your browser at http://localhost:5601

   Username: elastic
   Password: chy08Gig

🔌 Elasticsearch API endpoint: http://localhost:9200
🔑 API key: RUk1Mnk1OEJnUjJZeWxGLXBza3o6TlRKUVpRaHIyLUd0NGpOMk1IbkdUZw==

Learn more at https://github.com/elastic/start-local
上面展示了超级用户 elastic 及其密码。我们可以保存之后使用。我们还可以看到 Elasticsearch API endpoint 及其 API key。这个都可以在我们之后的代码中进行使用。更多信息:GitHub - elastic/start-local: Try Elasticsearch and Kibana locally · GitHub
我们可以查看一下当前目录下的文档:
$ pwd
/Users/liuxg/data/local/elastic-start-local
$ ls -al
total 40
drwxr-xr-x  8 liuxg  staff   256 Aug  4 14:31 .
drwxr-xr-x  3 liuxg  staff    96 Aug  4 14:27 ..
-rw-r--r--  1 liuxg  staff   587 Aug  4 14:29 .env
drwxr-xr-x  3 liuxg  staff    96 Aug  4 14:31 config
-rw-r--r--  1 liuxg  staff  3262 Aug  4 14:27 docker-compose.yml
-rwxr-xr-x  1 liuxg  staff  2099 Aug  4 14:27 start.sh
-rwxr-xr-x  1 liuxg  staff   191 Aug  4 14:27 stop.sh
-rwxr-xr-x  1 liuxg  staff  2014 Aug  4 14:27 uninstall.sh
.env
START_LOCAL_VERSION=0.14.0
ES_LOCAL_VERSION=9.4.4-arm64
ES_LOCAL_CONTAINER_NAME=es-local-dev
ES_LOCAL_PASSWORD=chy08Gig
ES_LOCAL_PORT=9200
ES_LOCAL_URL=http://localhost:${ES_LOCAL_PORT}
ES_LOCAL_DISK_SPACE_REQUIRED=1gb
ES_LOCAL_LICENSE_EXPIRE_DATE=1788416849
ES_LOCAL_JAVA_OPTS="-Xms128m -Xmx2g"
KIBANA_LOCAL_CONTAINER_NAME=kibana-local-dev
KIBANA_LOCAL_SETTINGS_CONTAINER_NAME=kibana-local-settings
KIBANA_LOCAL_PORT=5601
KIBANA_LOCAL_PASSWORD=F0mBEN7D
KIBANA_ENCRYPTION_KEY=Zh1HVQHOiLnQDExLQ4j7fSVbTI5KSCq5
ES_LOCAL_API_KEY=RUk1Mnk1OEJnUjJZeWxGLXBza3o6TlRKUVpRaHIyLUd0NGpOMk1IbkdUZw==
在上面,我们可以看到超级用户 elastic 的密码及 API key 等信息。
我们可以使用浏览器来访问 http://localhost:9200:
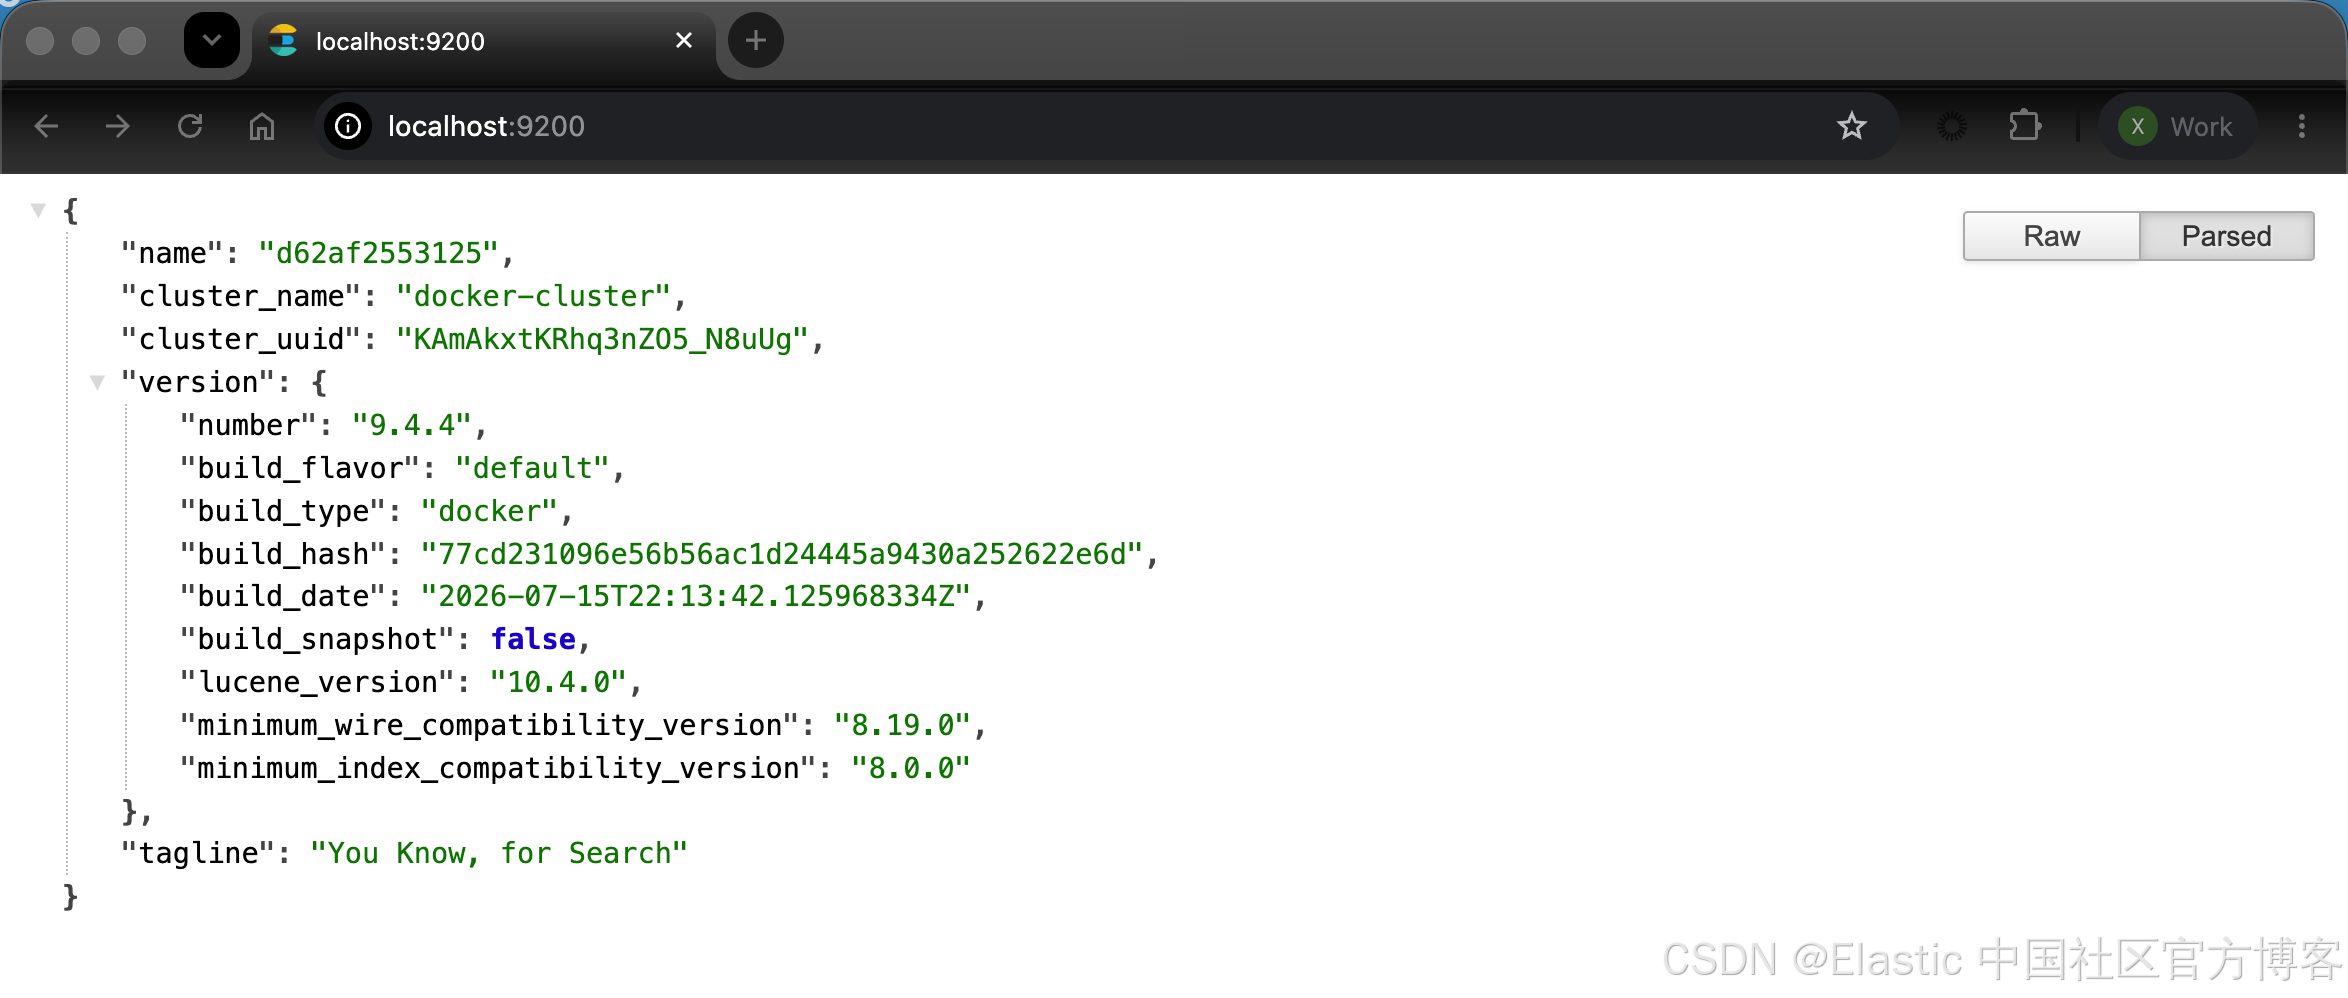
我们必须输入 elastic 及其密码。如果你能看到上面的信息,那么恭喜你:你已经成功地在自己的电脑里创建了一个 Elasticsearch 实例。
我们也可以访问 Kibana 的地址 http://localhost:5601:
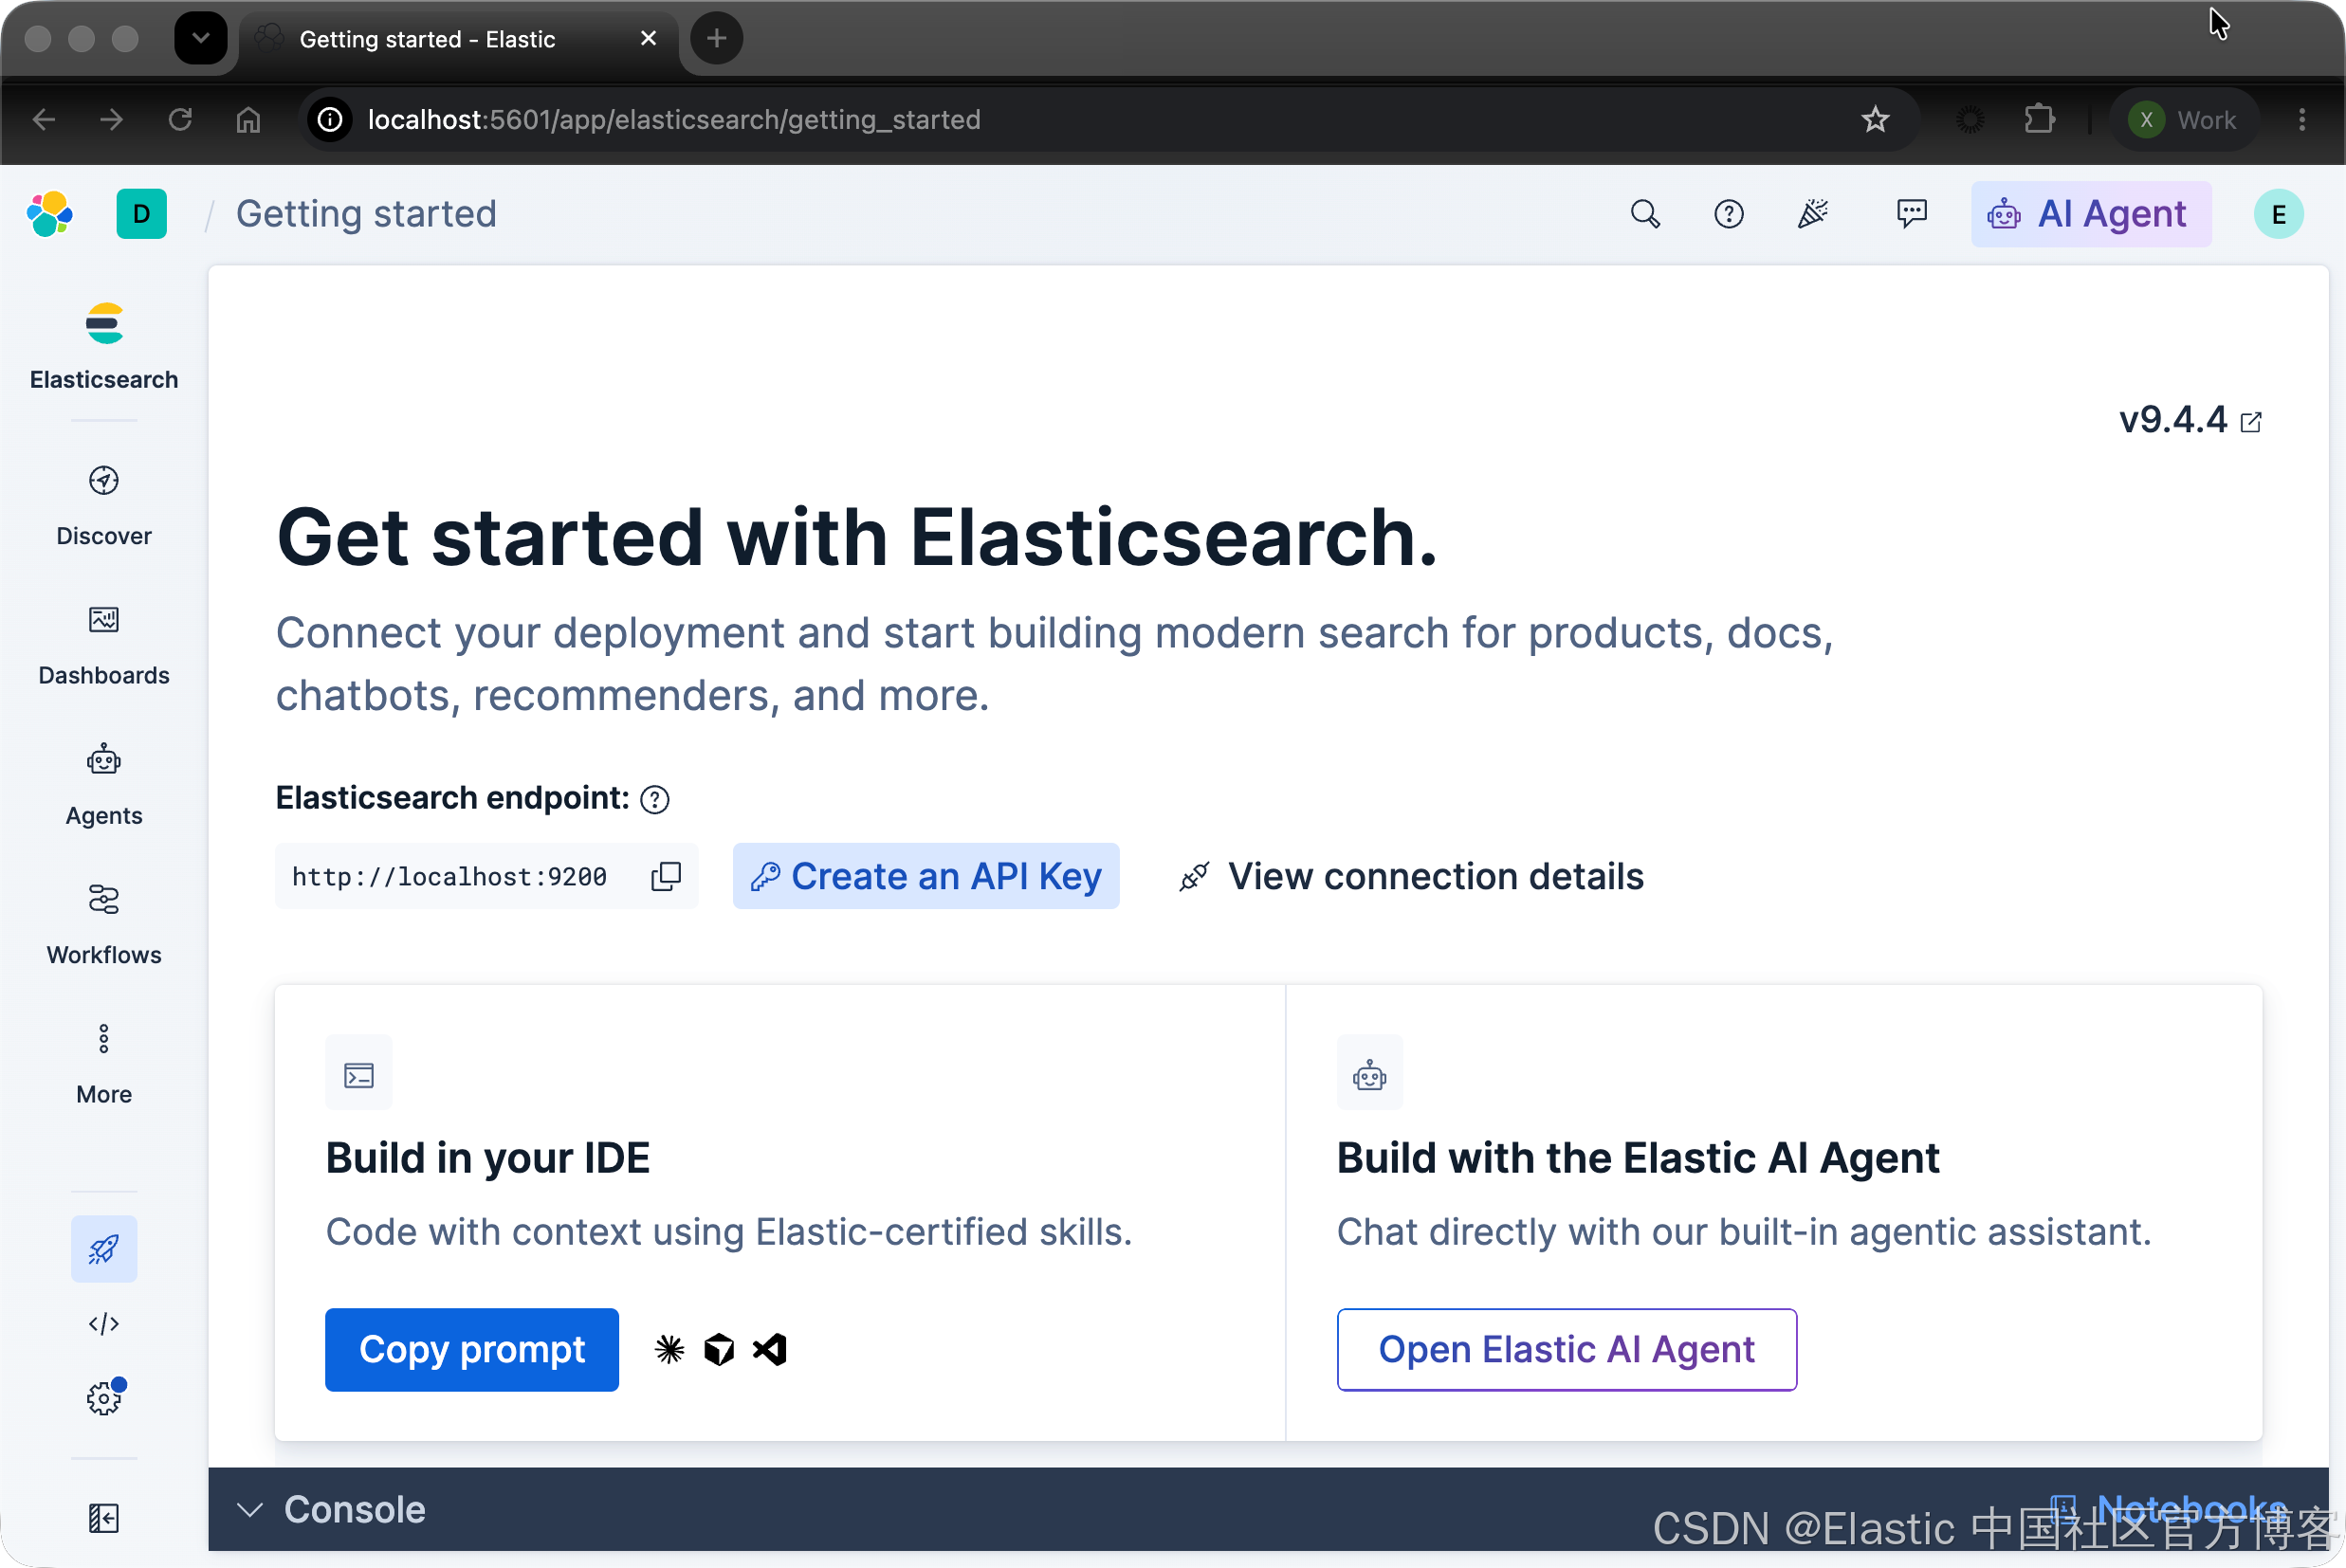
同样地,我们输入 elastic 用户及其密码即可。
我们可以使用脚步 stop.sh 来停止 Elasticsearch 及 Kibana 的运行。
./stop.sh$ ./stop.sh
[+] stop 3/3
✔ Container kibana-local-dev Stopped 0.9s
✔ Container kibana-local-settings Stopped 0.0s
✔ Container es-local-dev Stopped 我们可以使用 start.sh 来重新启动实例的运行:
./start.sh$ ./start.sh
[+] up 3/3
✔ Container es-local-dev Healthy 21.7s
✔ Container kibana-local-settings Exited 1.1s
✔ Container kibana-local-dev Healthy 我们可以使用如下的命令来检查容器的运行情况:
docker ps$ docker ps
CONTAINER ID IMAGE COMMAND CREATED STATUS PORTS NAMES
306e3e0d8923 docker.elastic.co/kibana/kibana:9.4.4-arm64 "/bin/tini -- /usr/l…" 23 hours ago Up 2 minutes (healthy) 127.0.0.1:5601->5601/tcp kibana-local-dev
d62af2553125 docker.elastic.co/elasticsearch/elasticsearch:9.4.4-arm64 "/bin/tini -- /usr/l…" 23 hours ago Up 2 minutes (healthy) 127.0.0.1:9200->9200/tcp es-local-dev配置 AI Agent Builder
我们点击如下的图标:
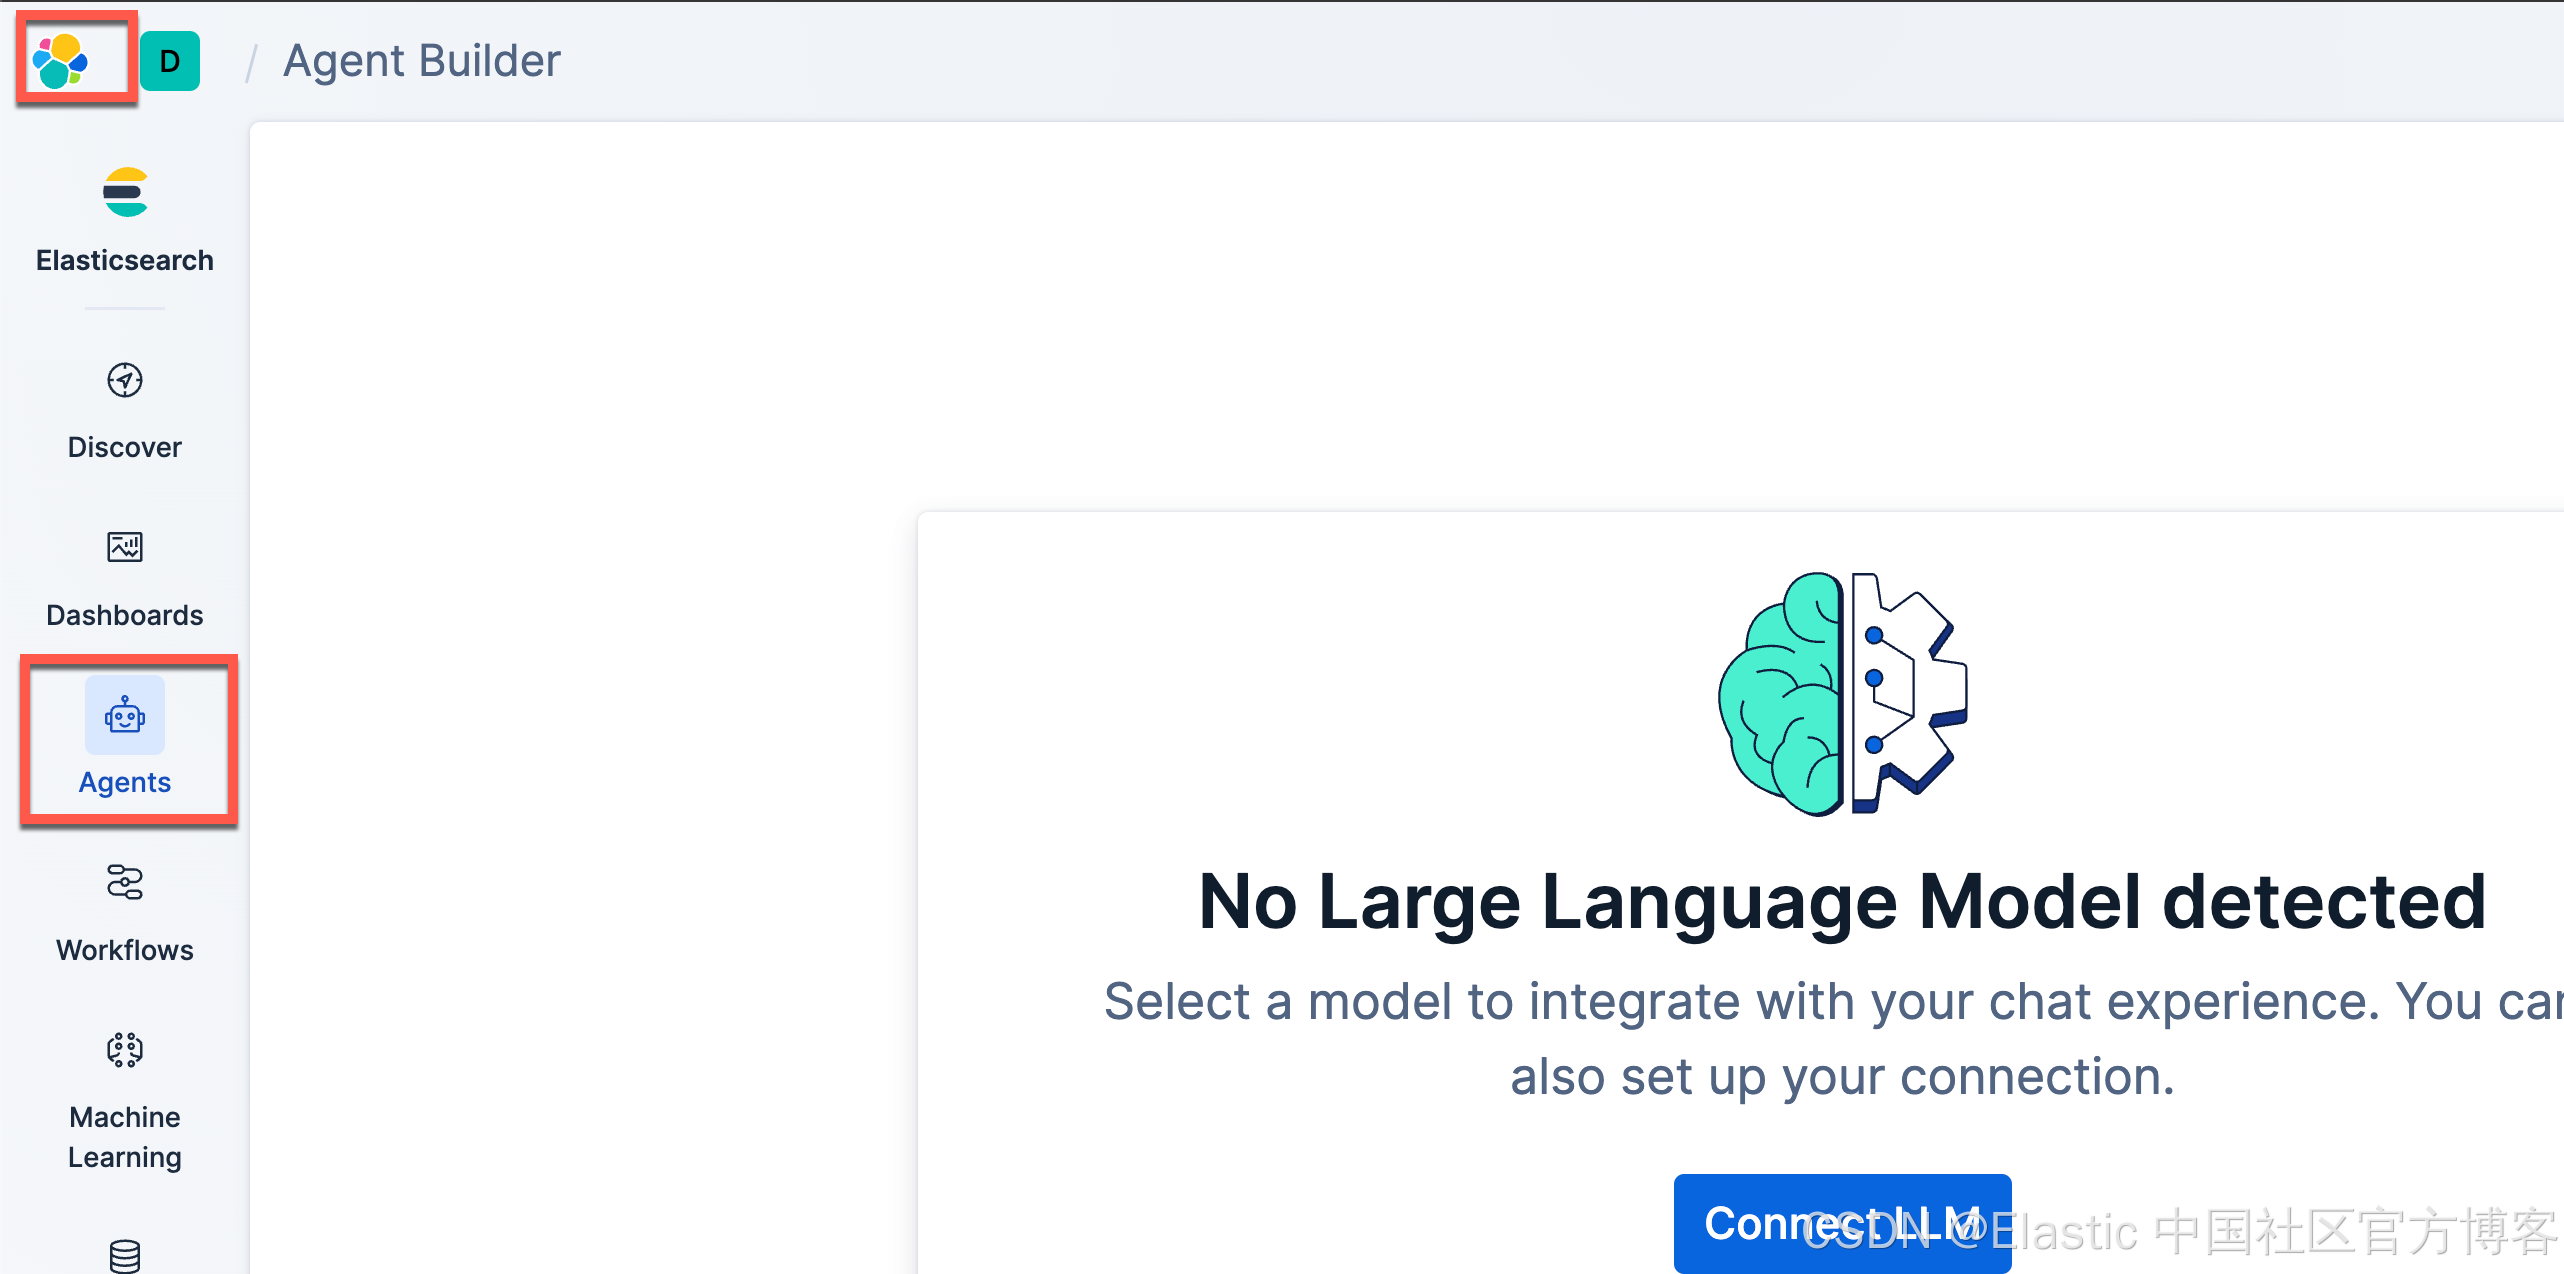
我们可以看到没有现成的 LLM 供我们使用。为了配置这个,我们有如下的几种方式:
1)配置 chat completion endpoint

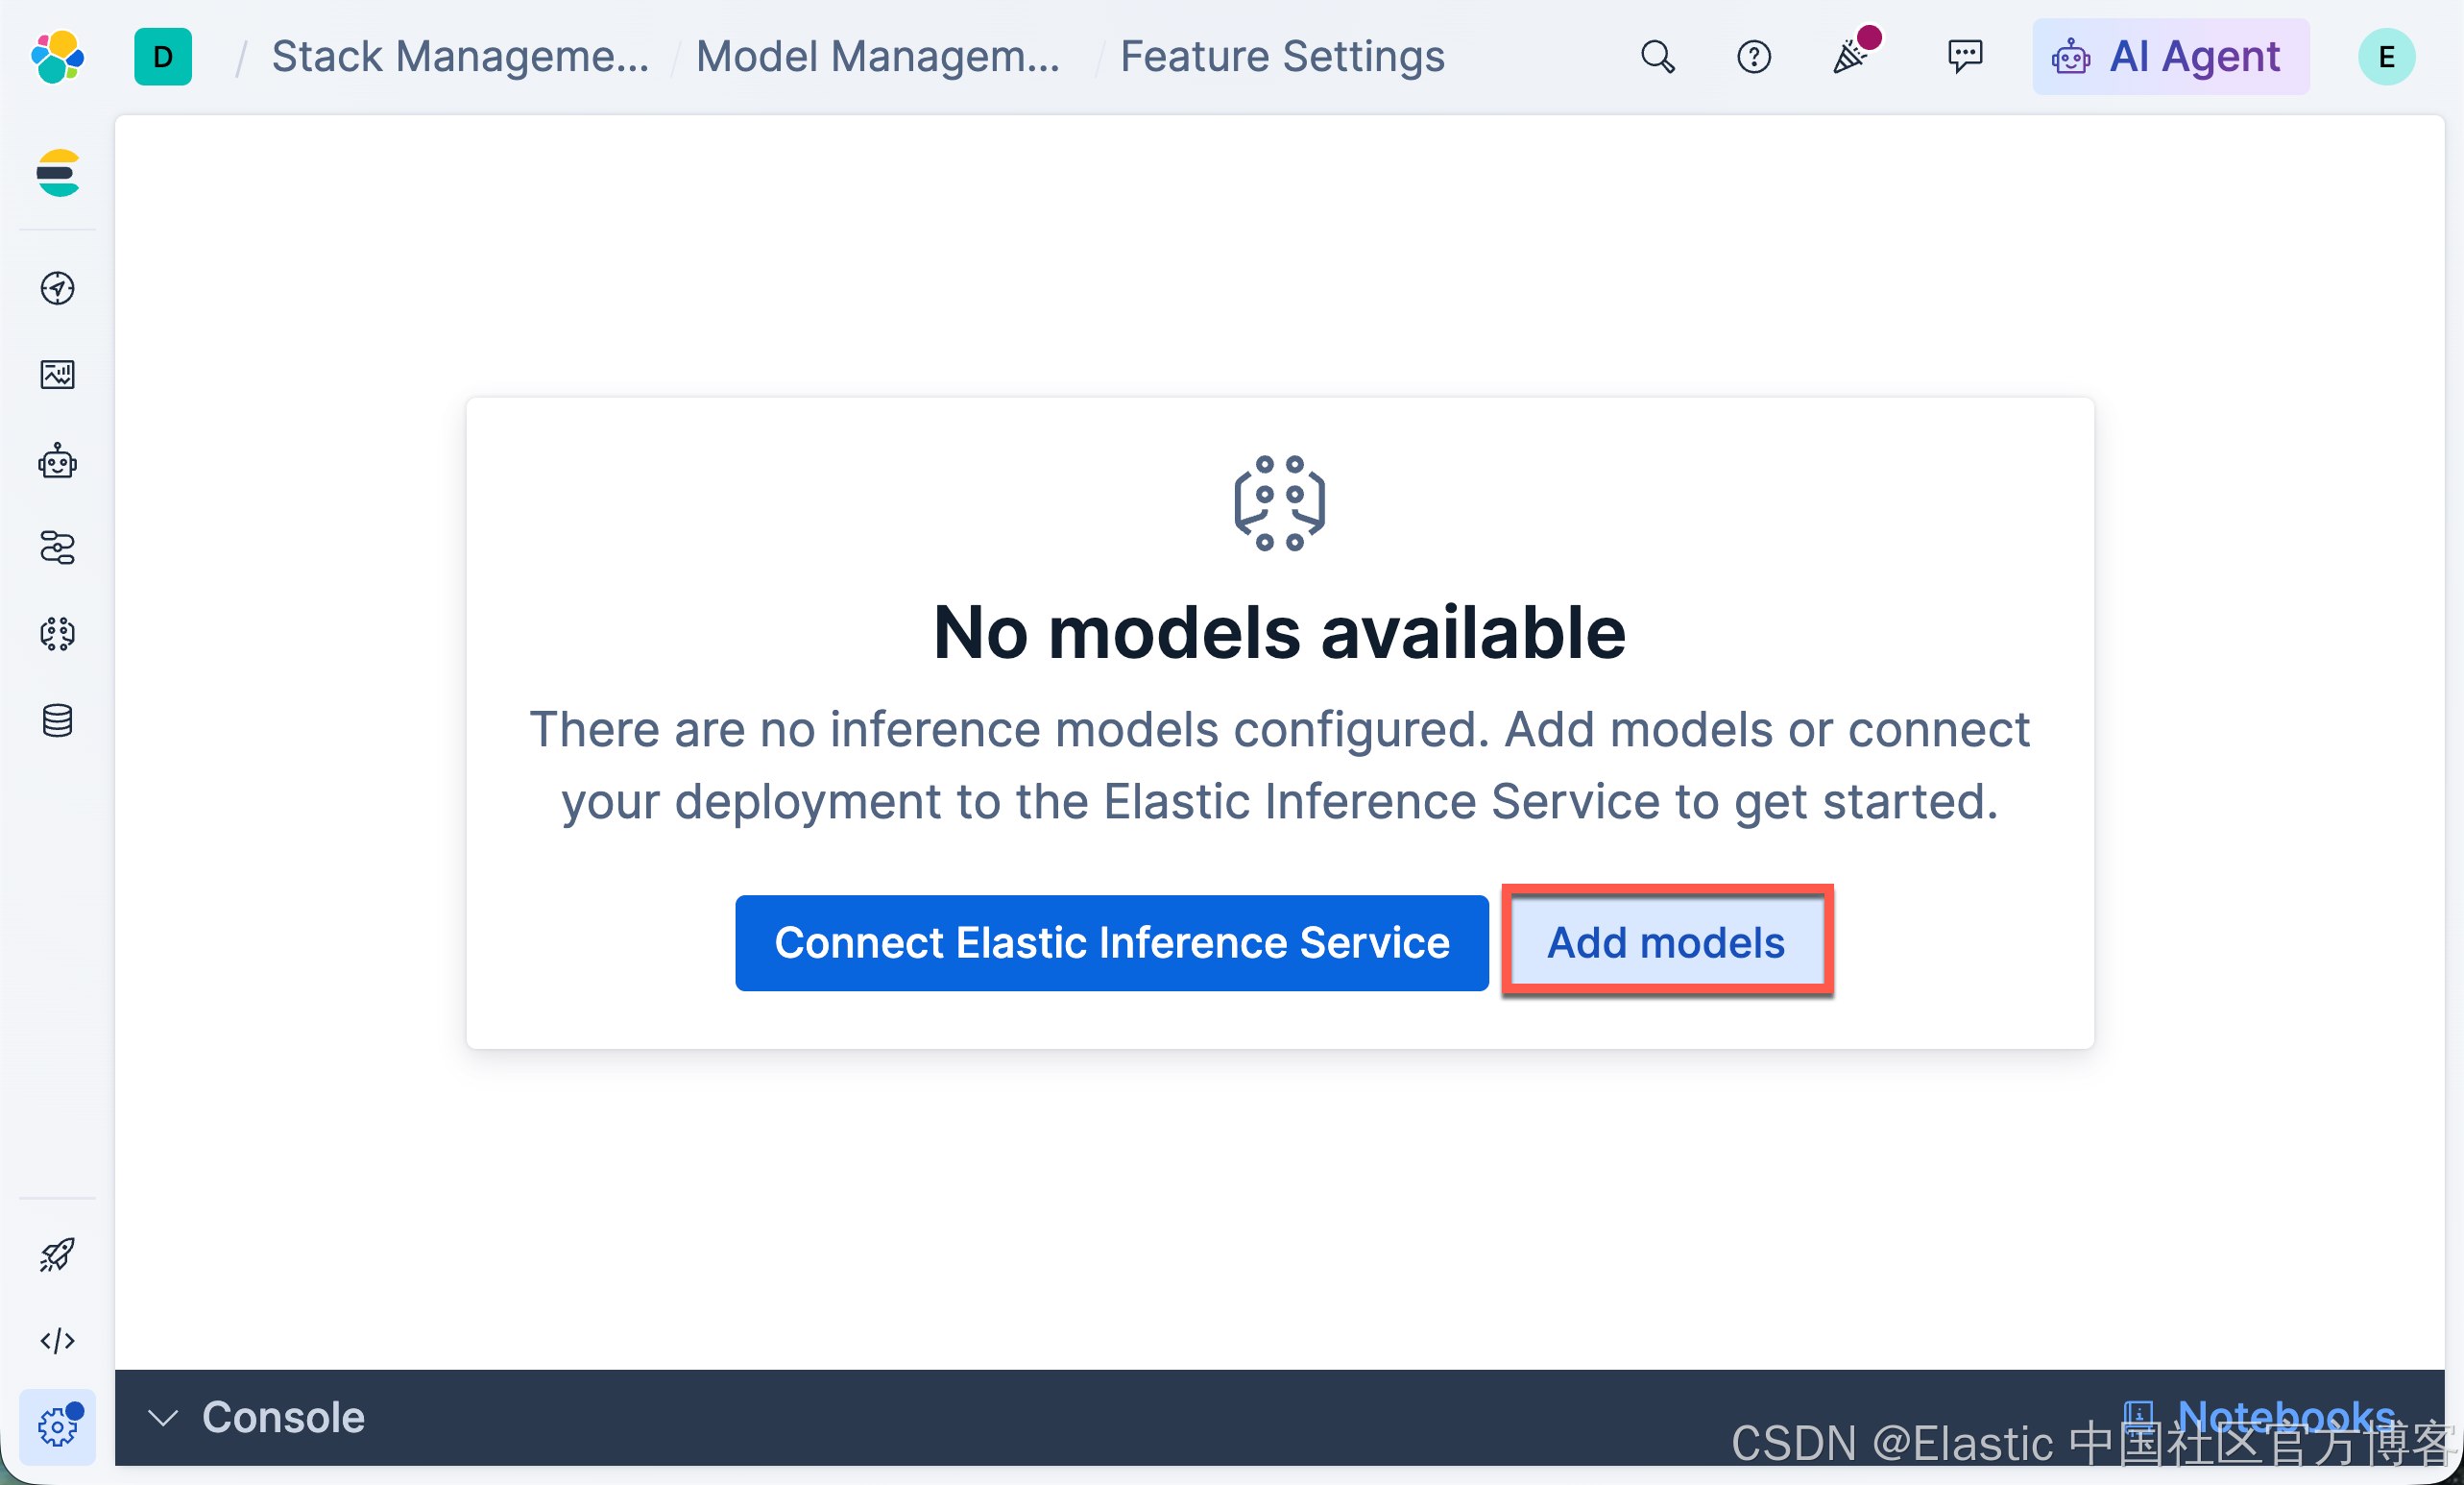
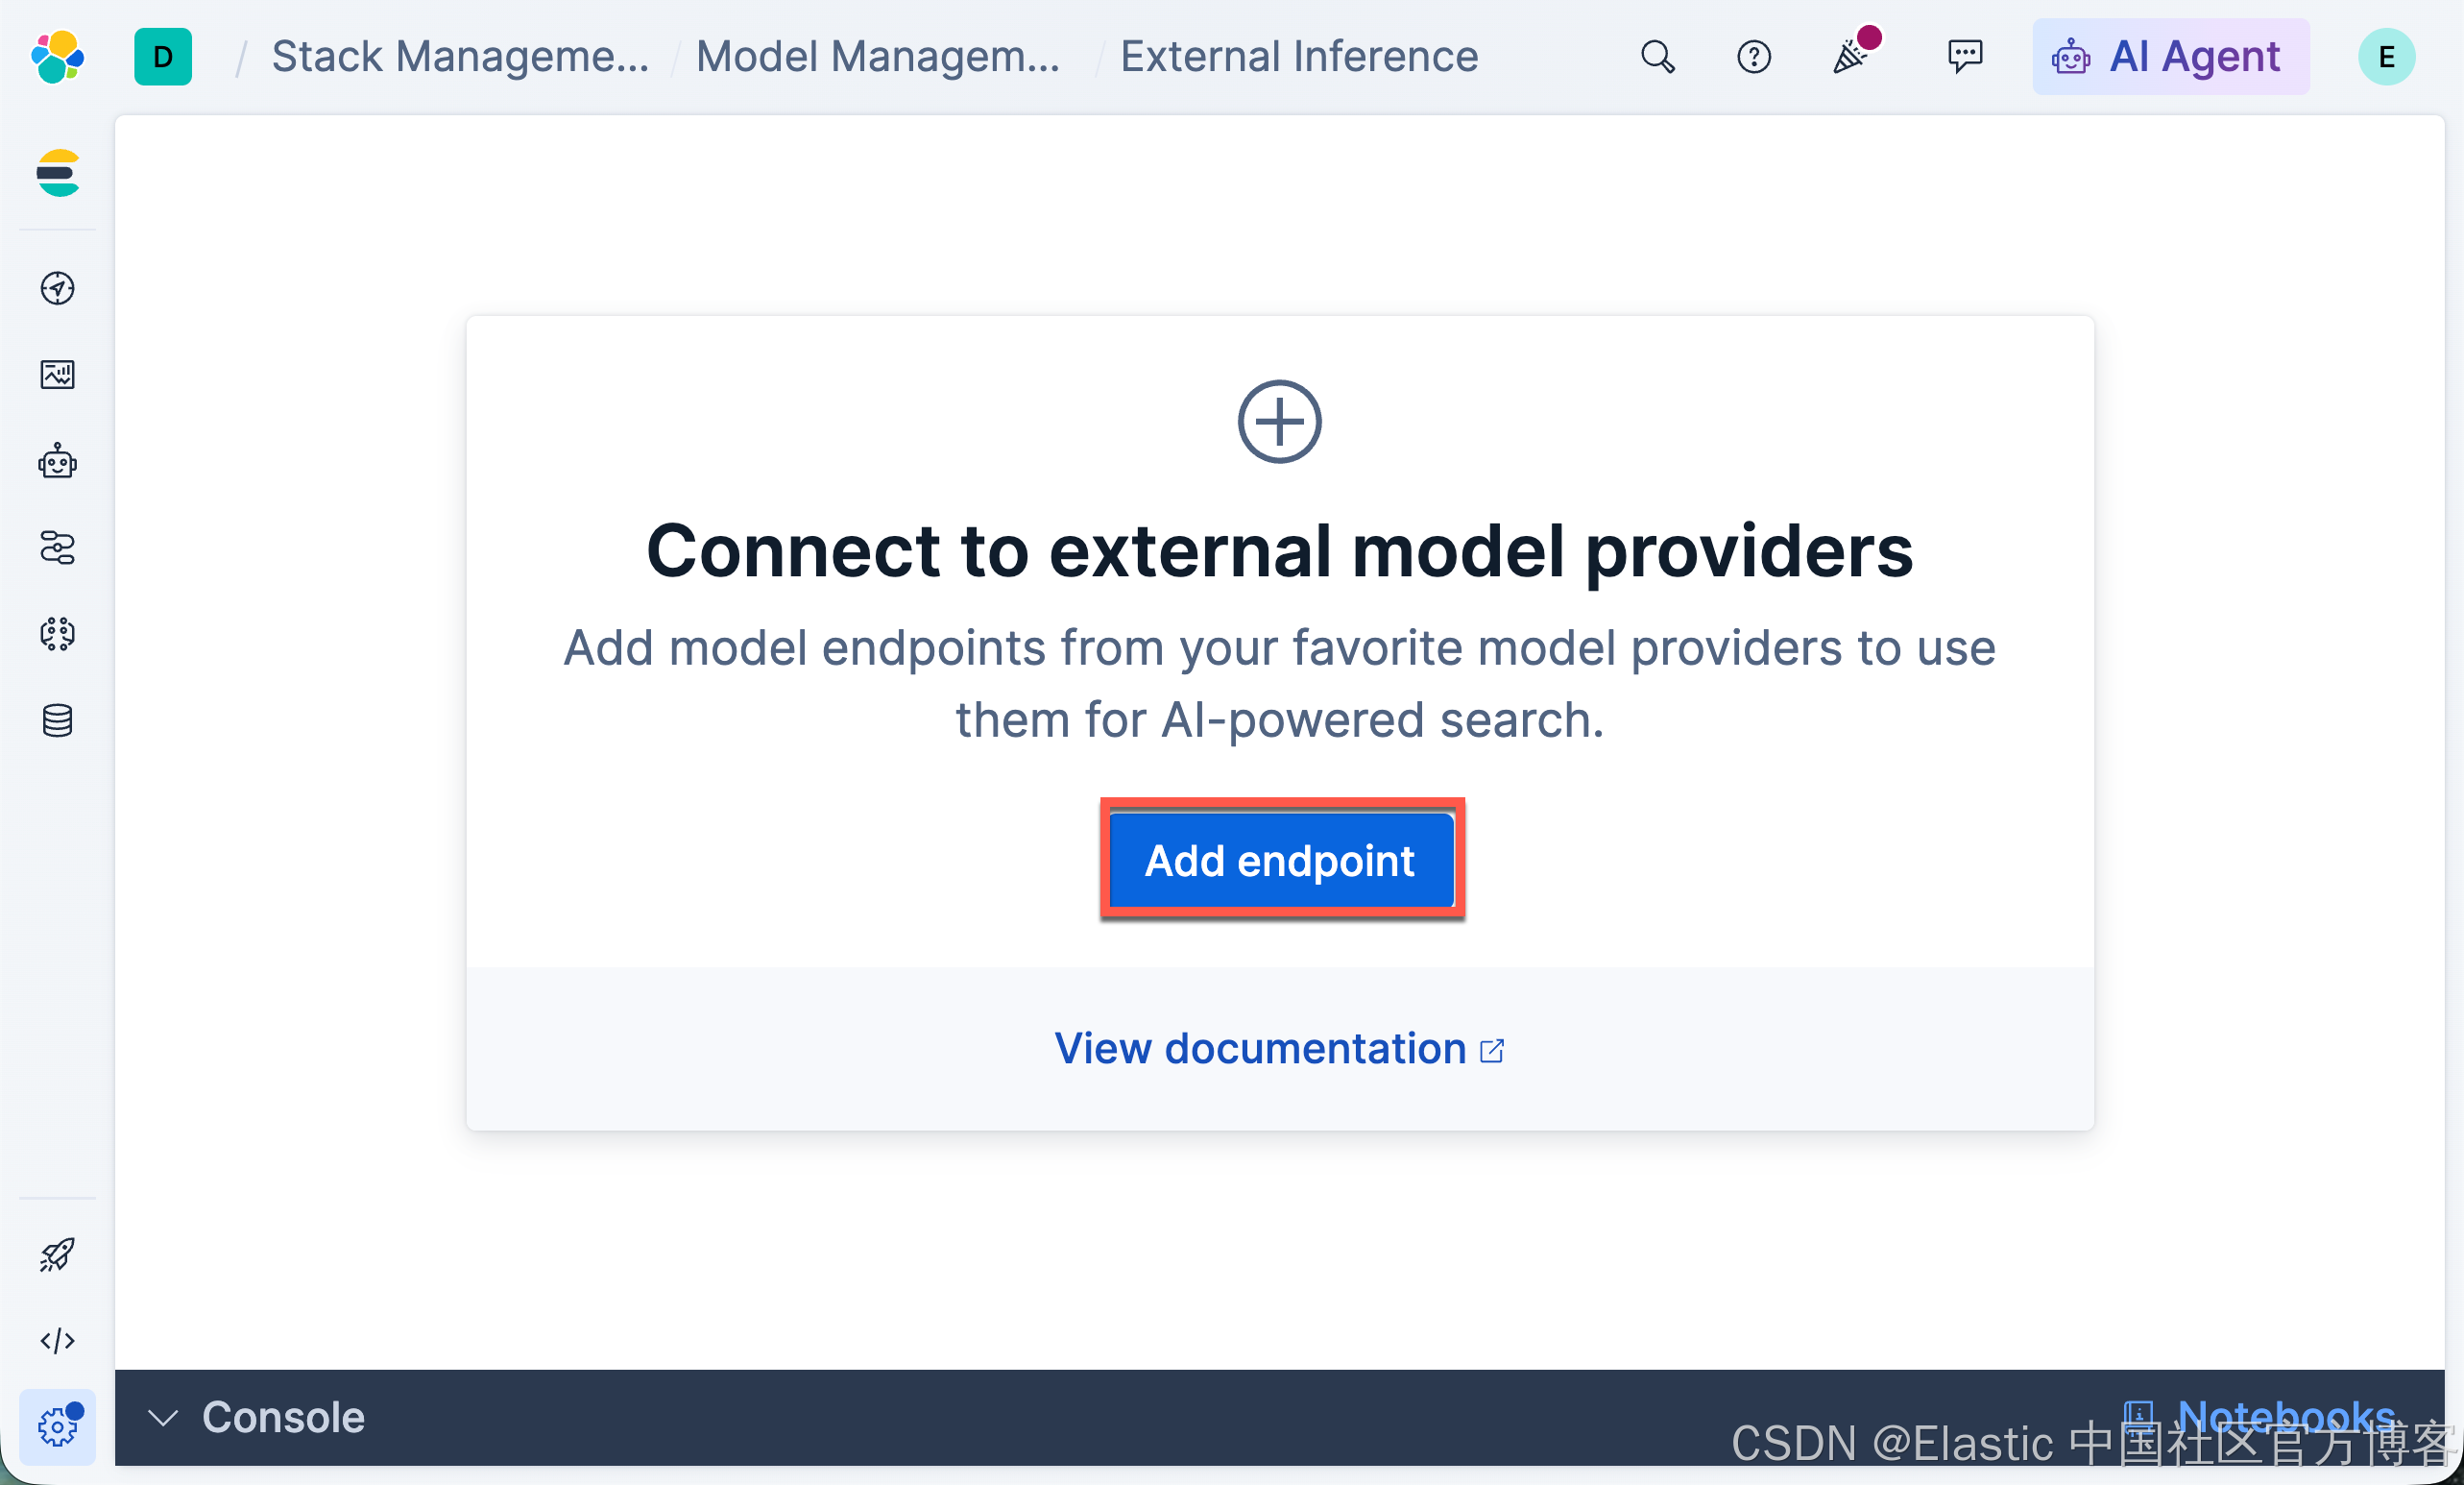
我们以 DeepSeek 为例:
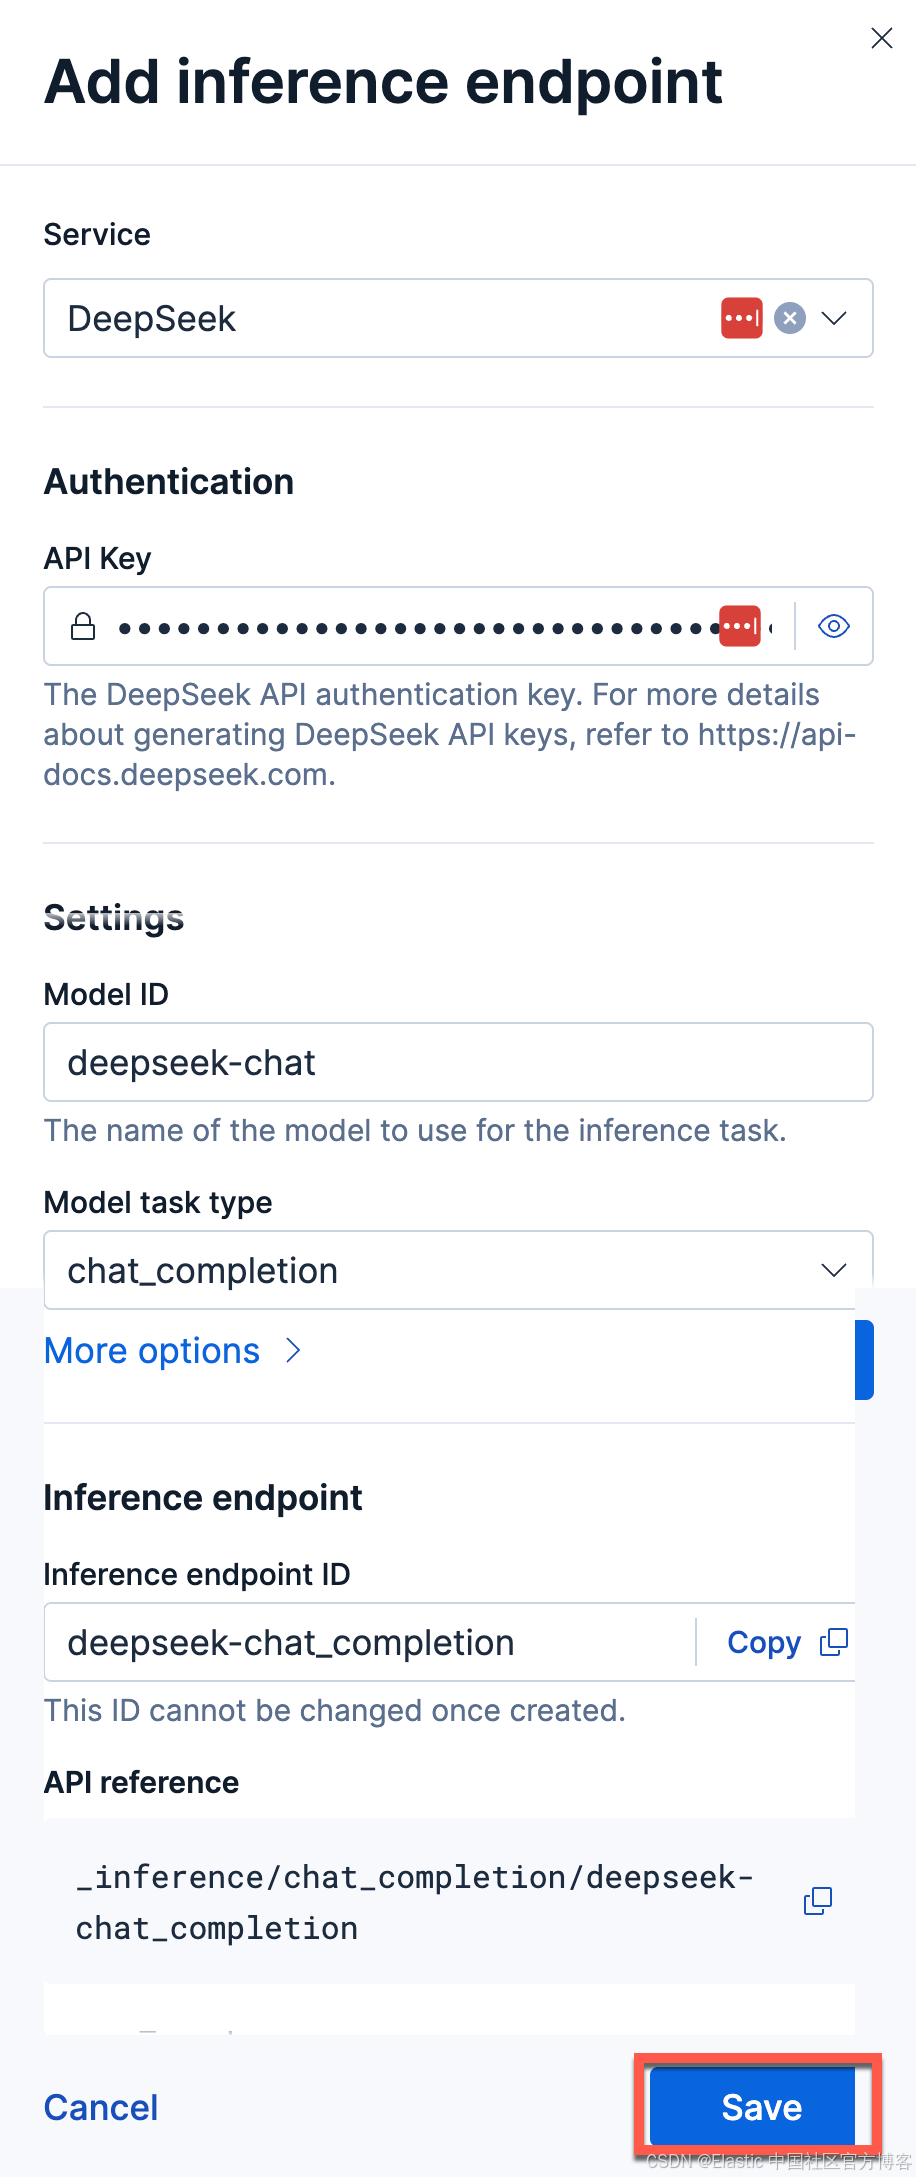
注意:在点击上面的 Svae 按钮之前,如果你有 V.P.N,保存可能会失败。
在上面,我们使用 DeepSeek 官方的 API key 来进行配置。关于 Inference endpoint ID,你也可以取一个自己喜欢的名字。点击上面的 Save 按钮:
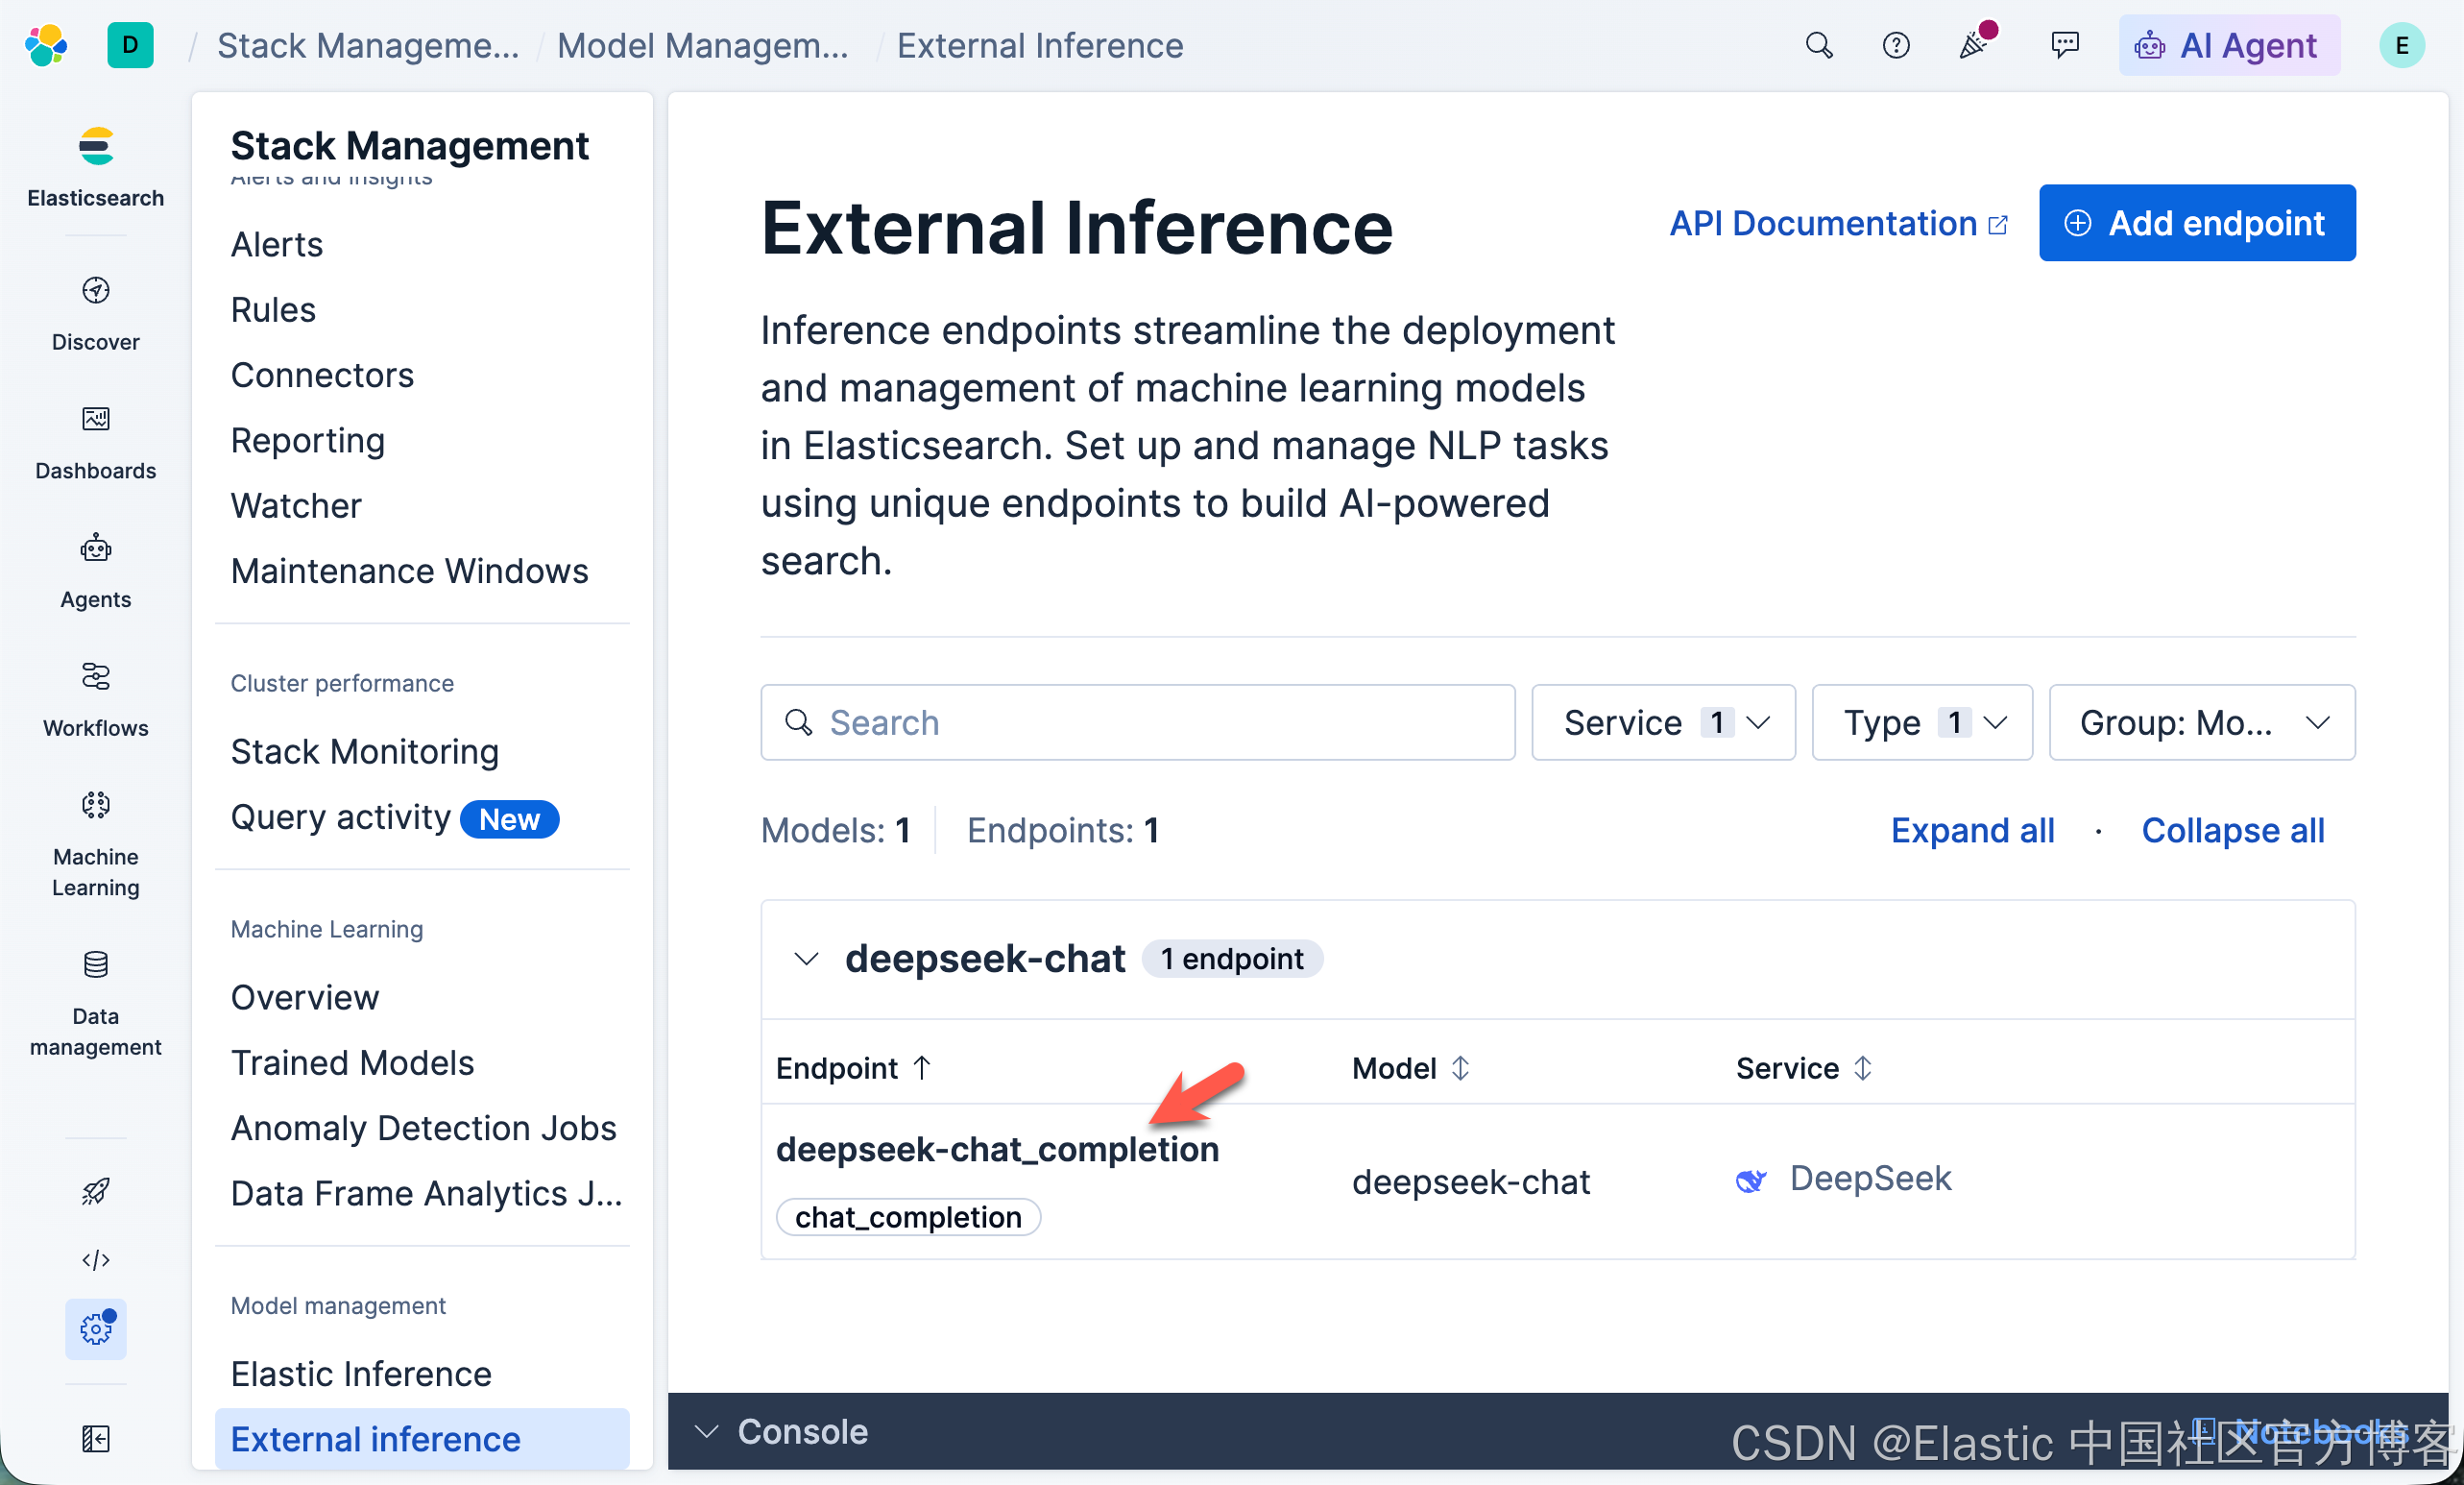
我们看到最新创建的 deep-chat_completion inference endpoint。我们可以在 Kibana 的 Dev Toosl 进行查看:
GET _inference/_all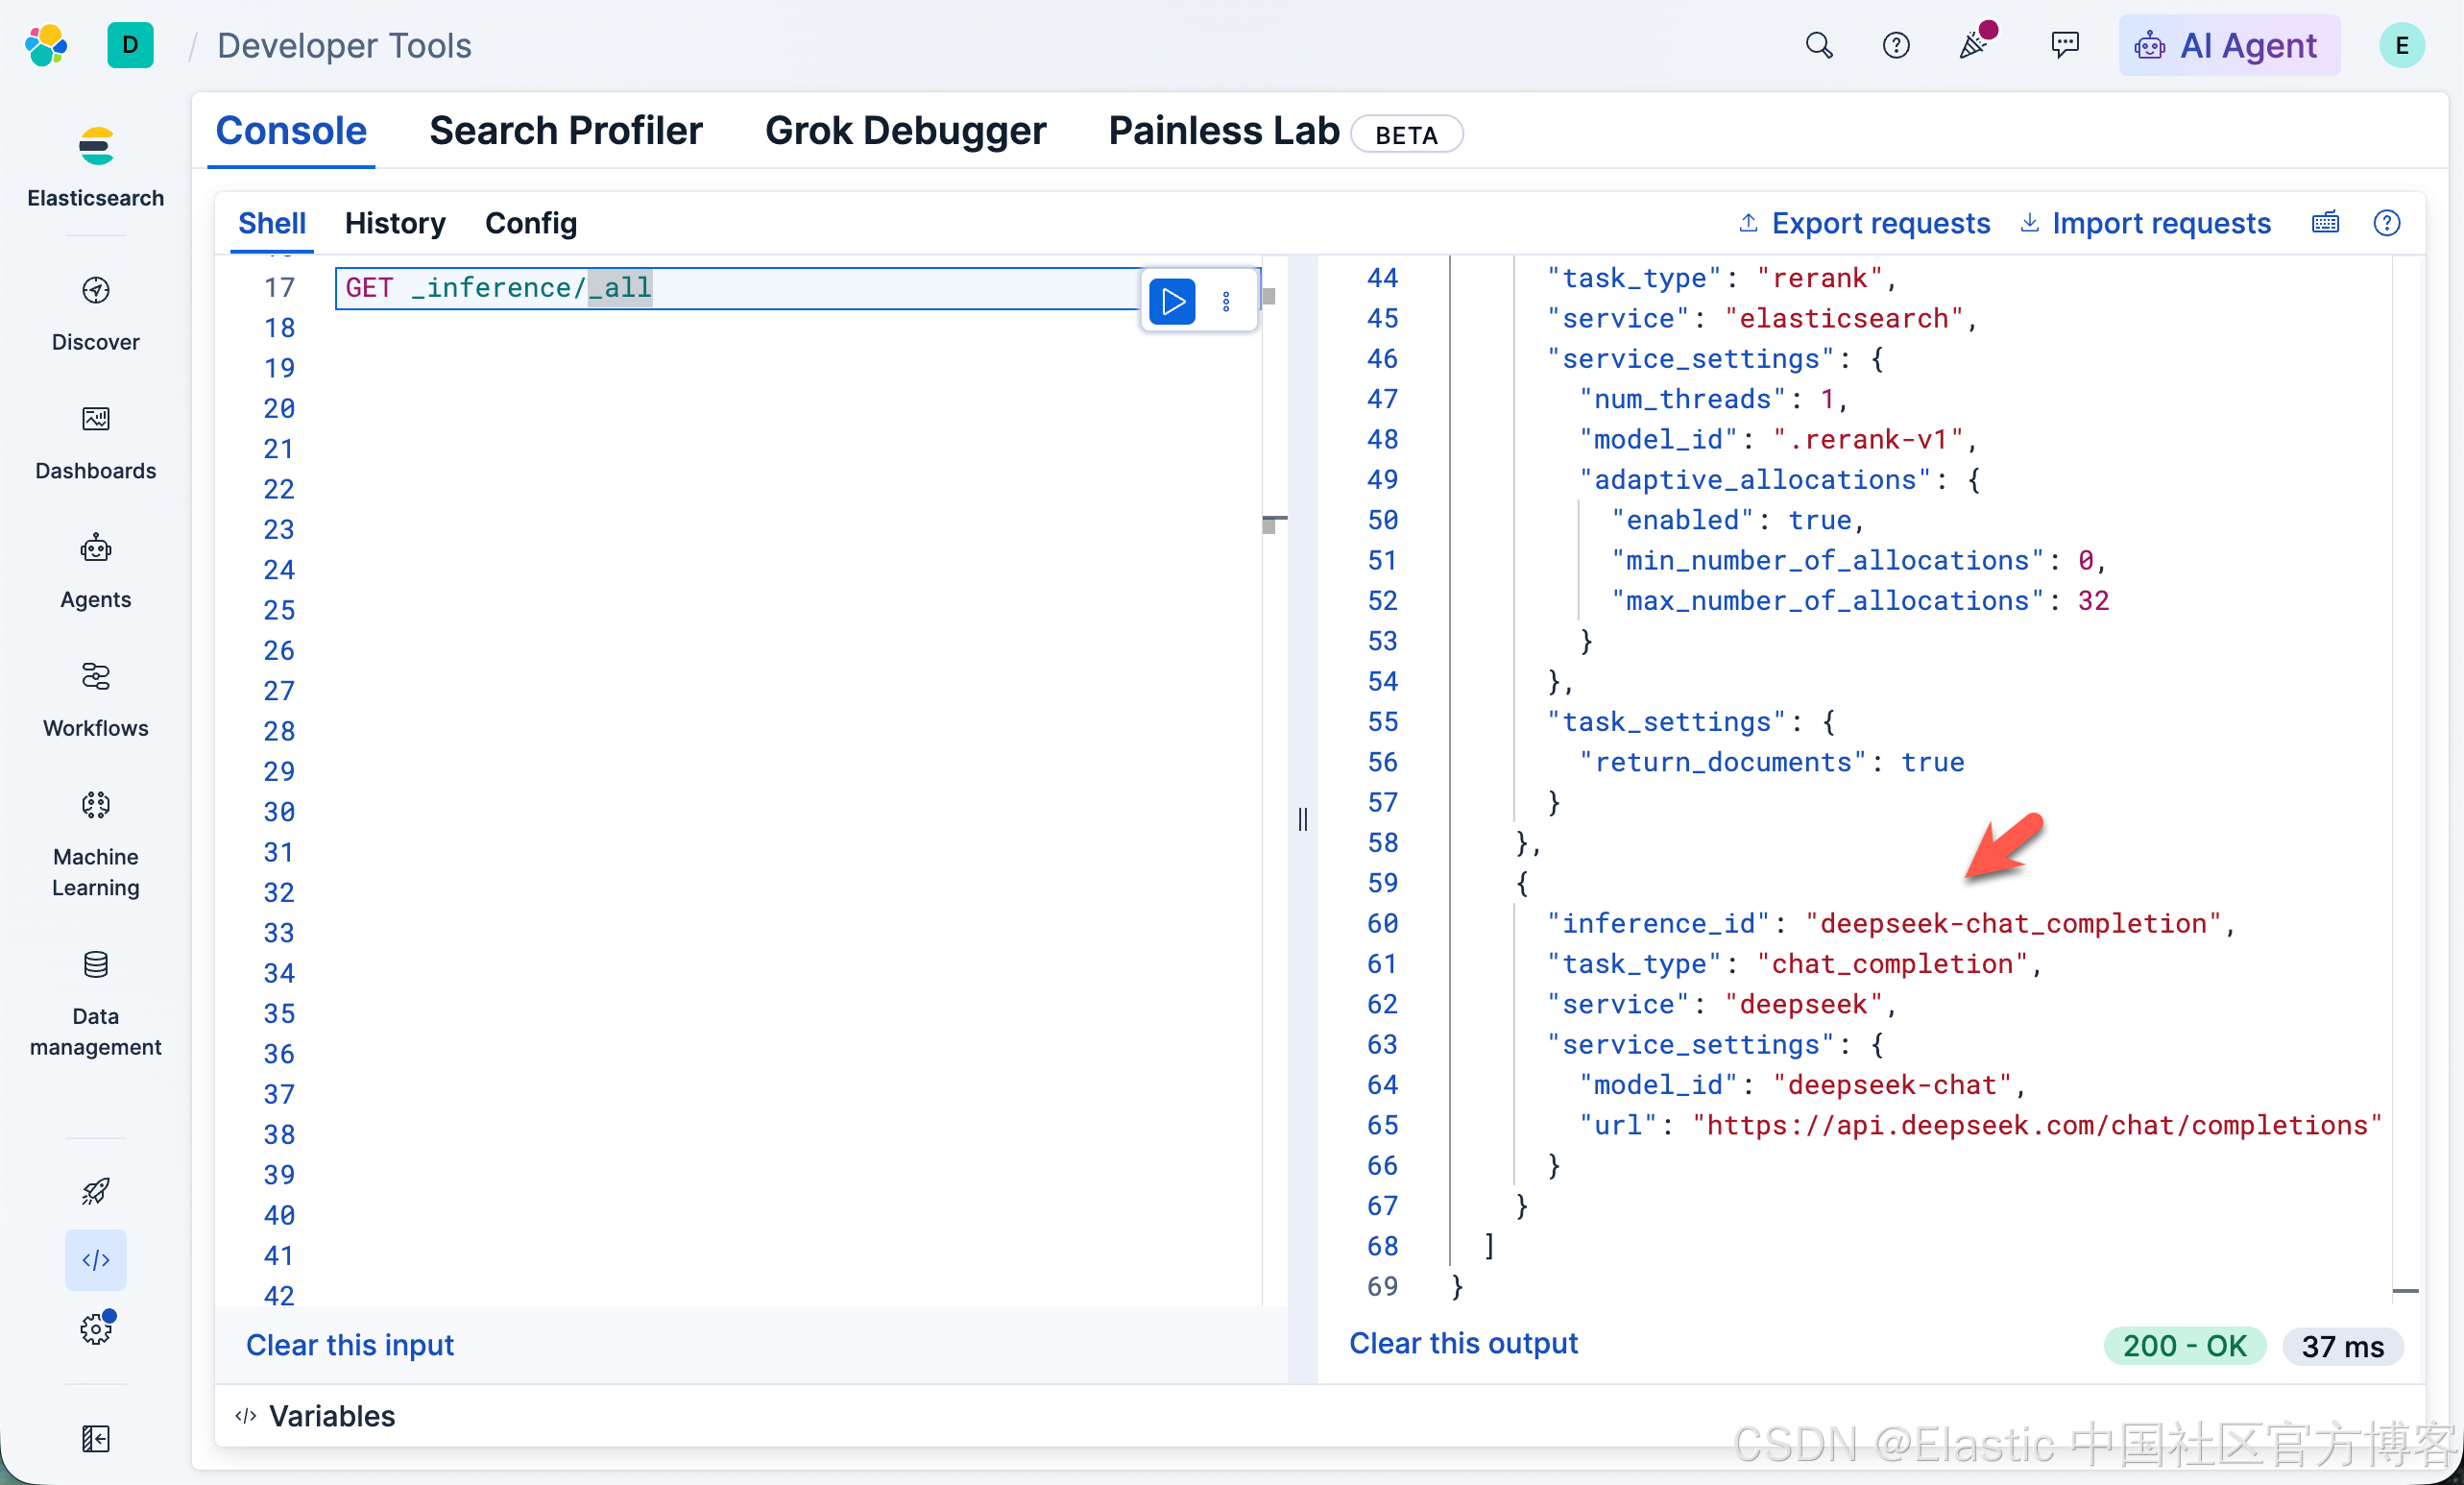
我们再次回到 Agents 页面,我们可以看到 deepseek-chat_completion 自动被选上:
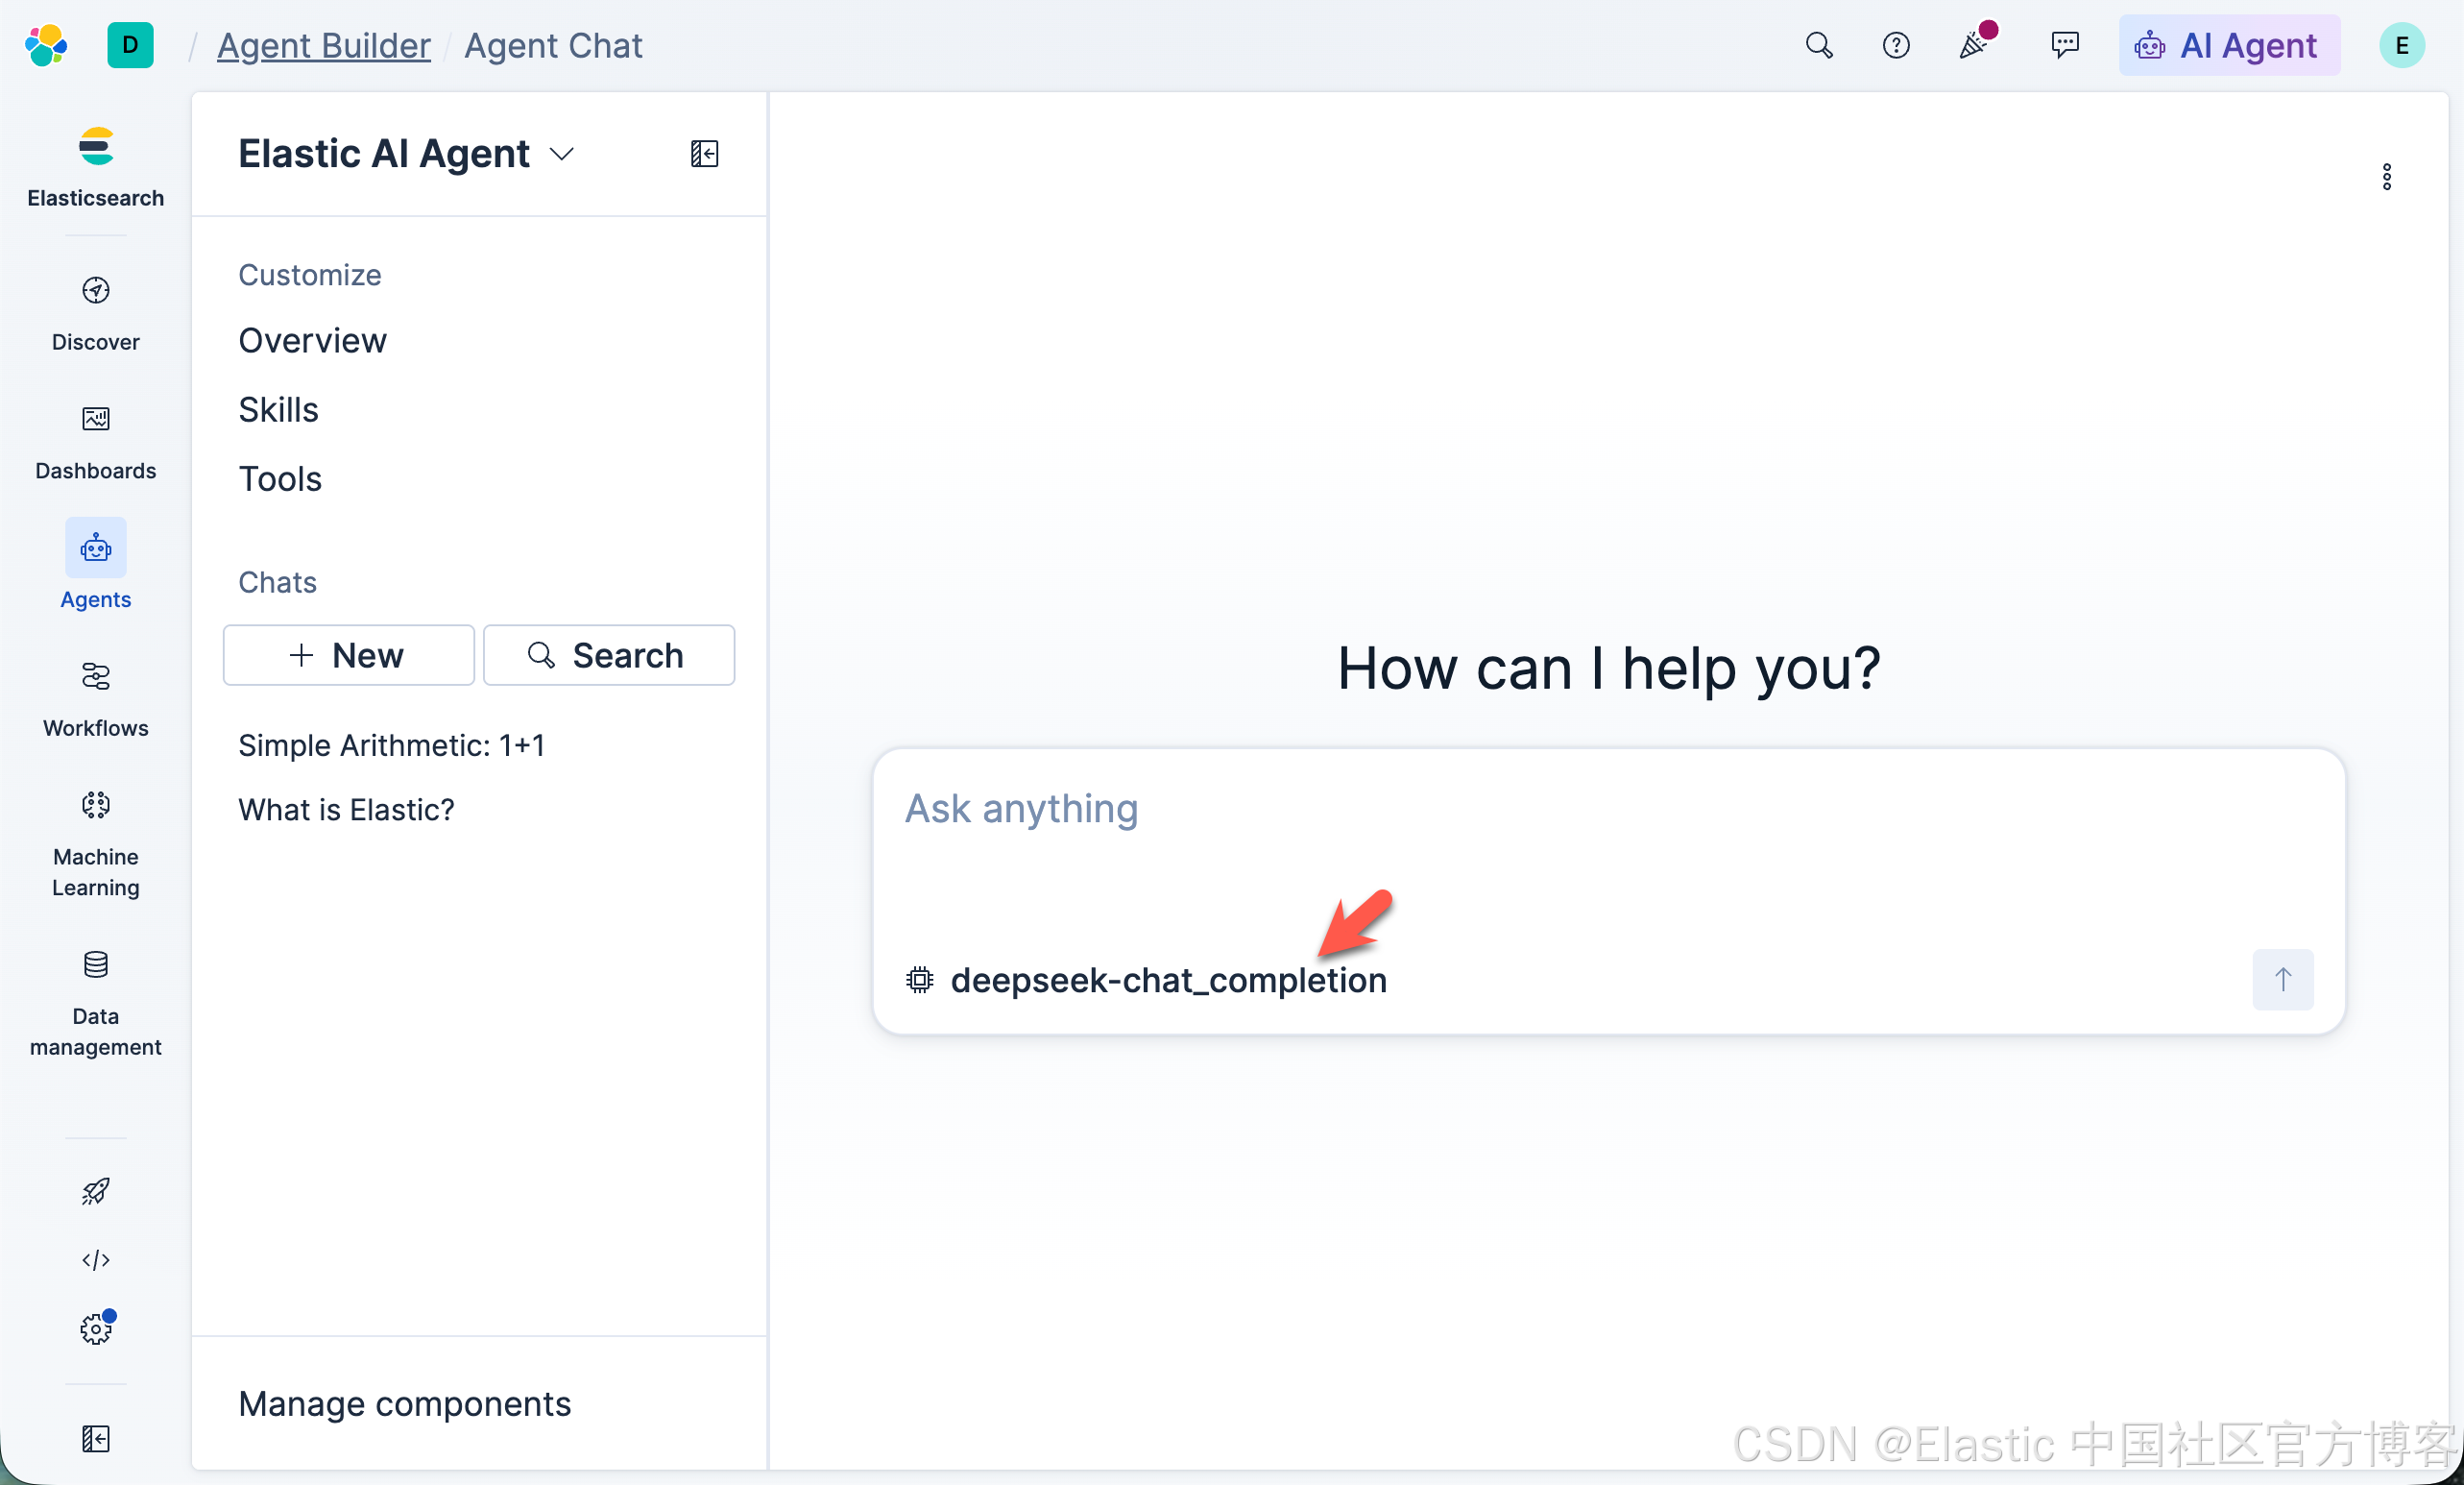
我们打入一个如下的问题:
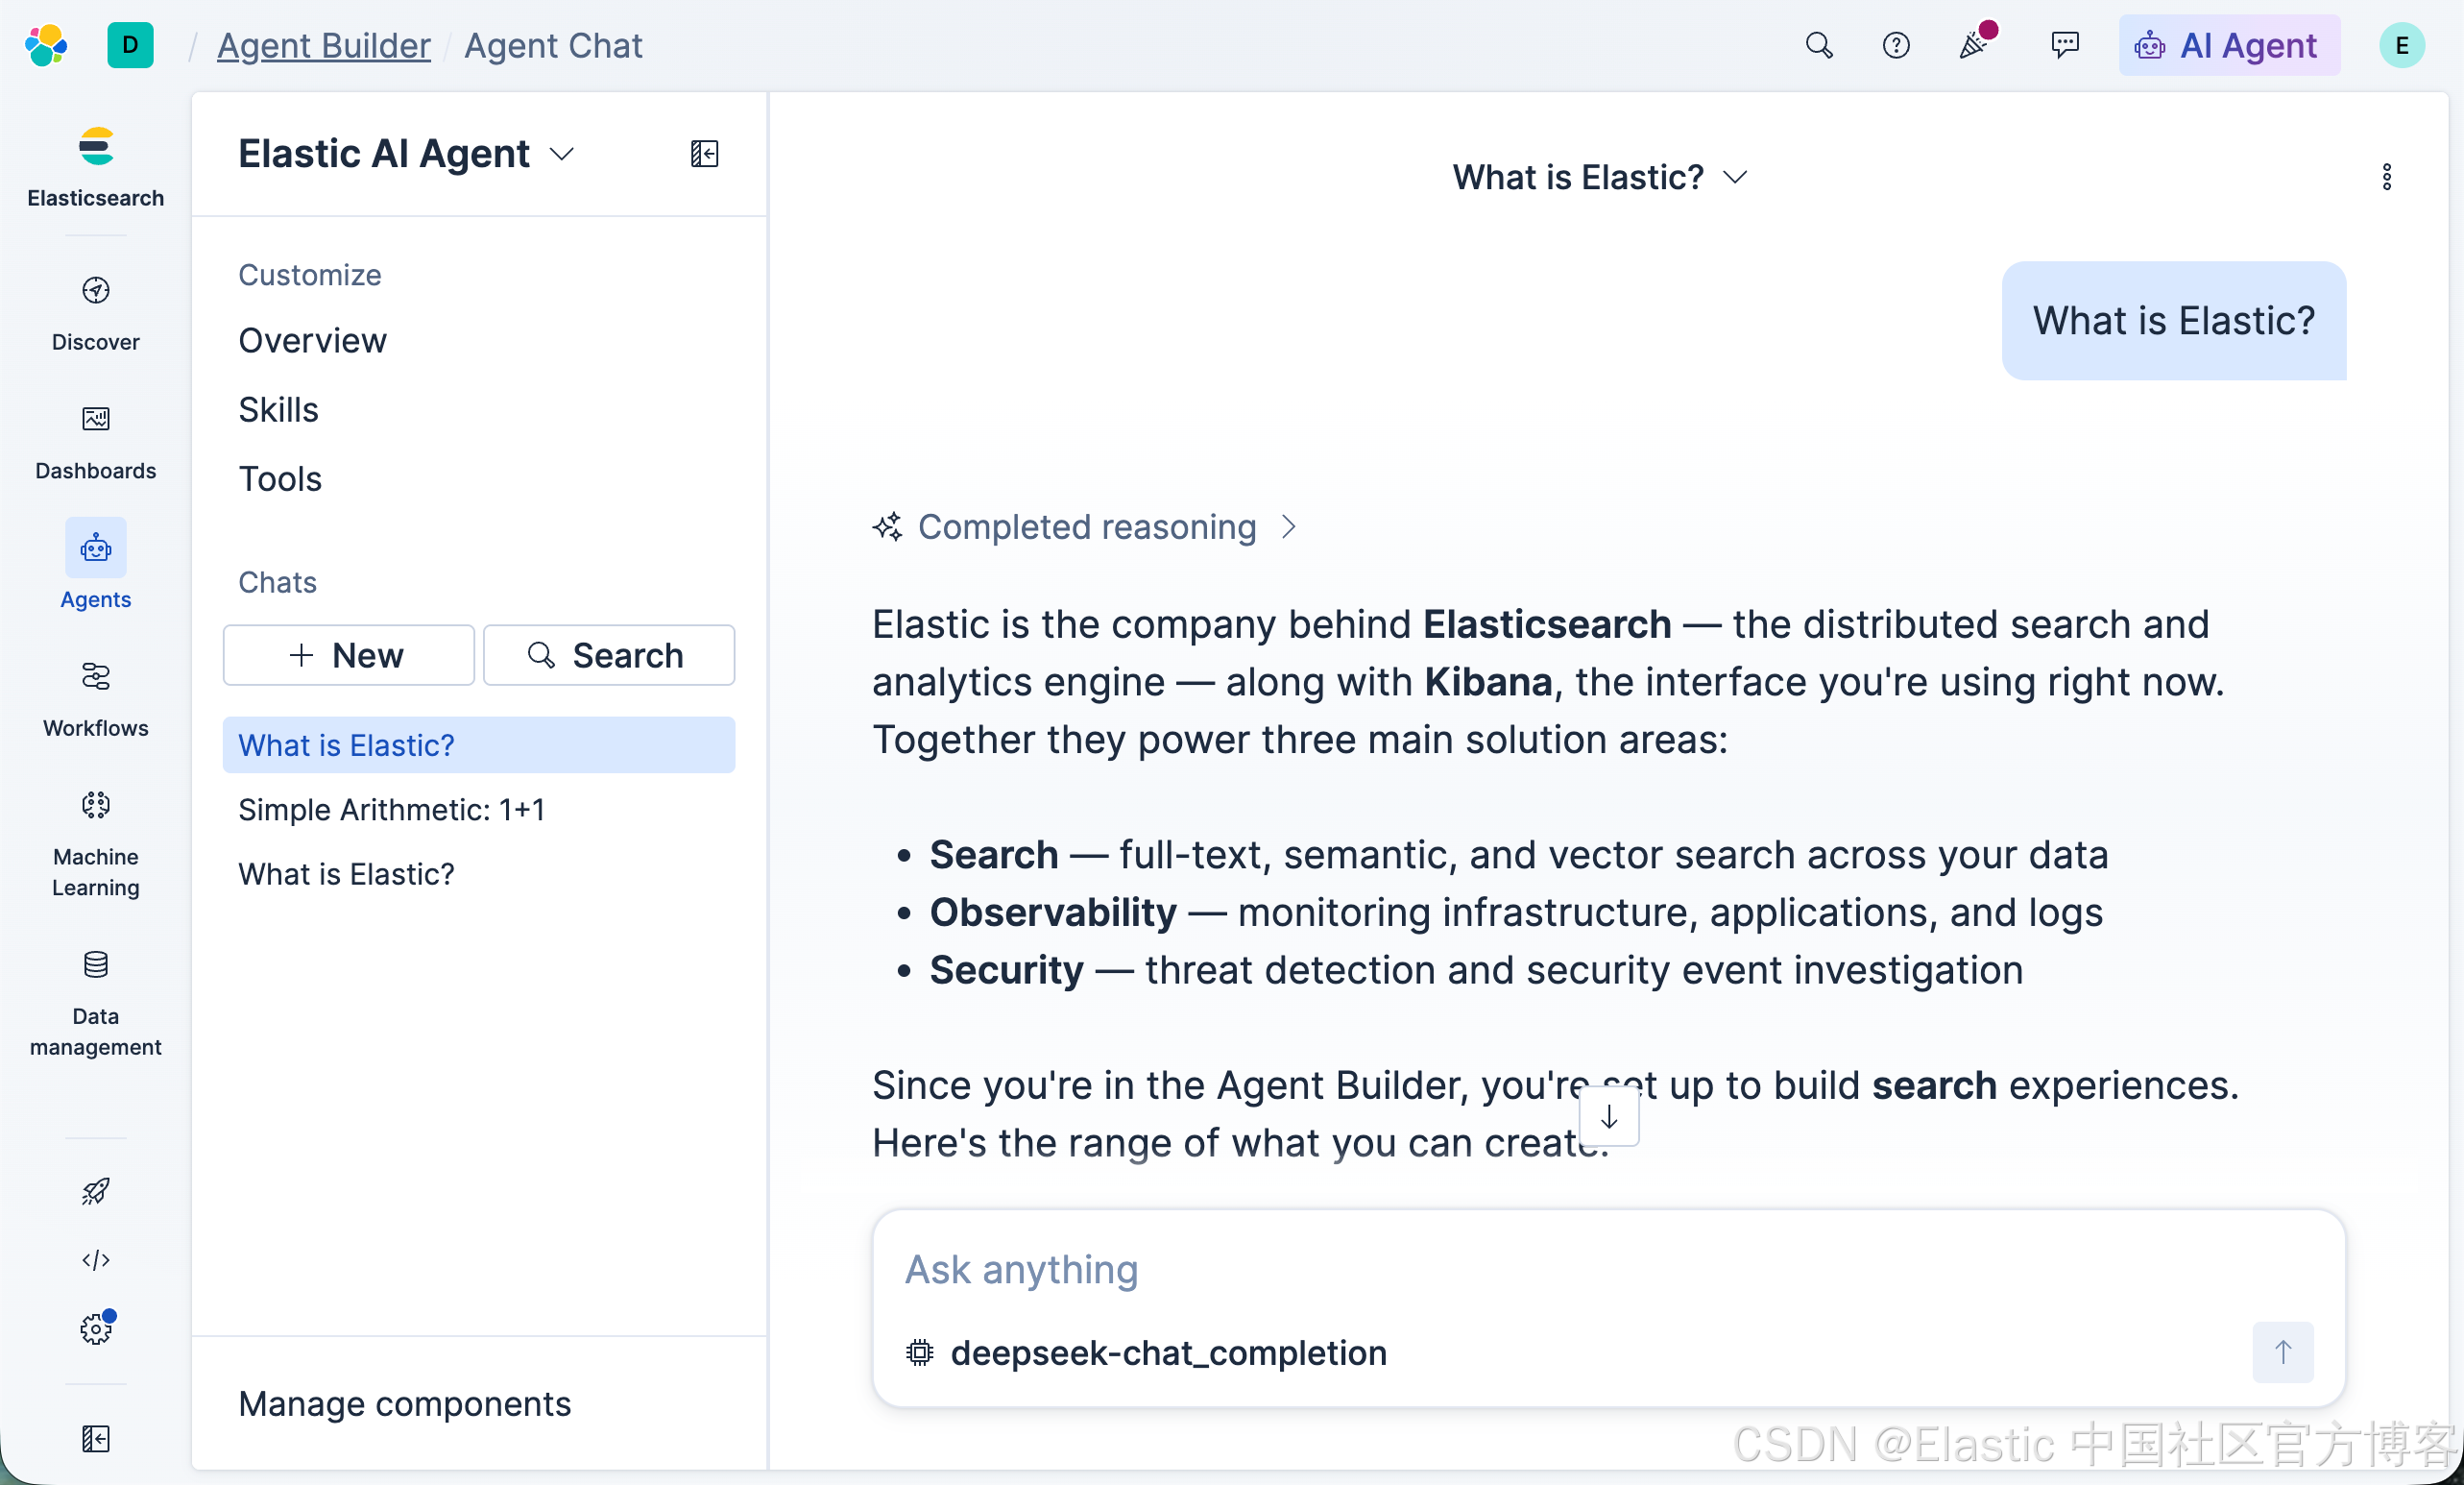
很显然,我们的配置是成功的。
2)配置一个连接器
我们也可以配置一个连机器来工作:
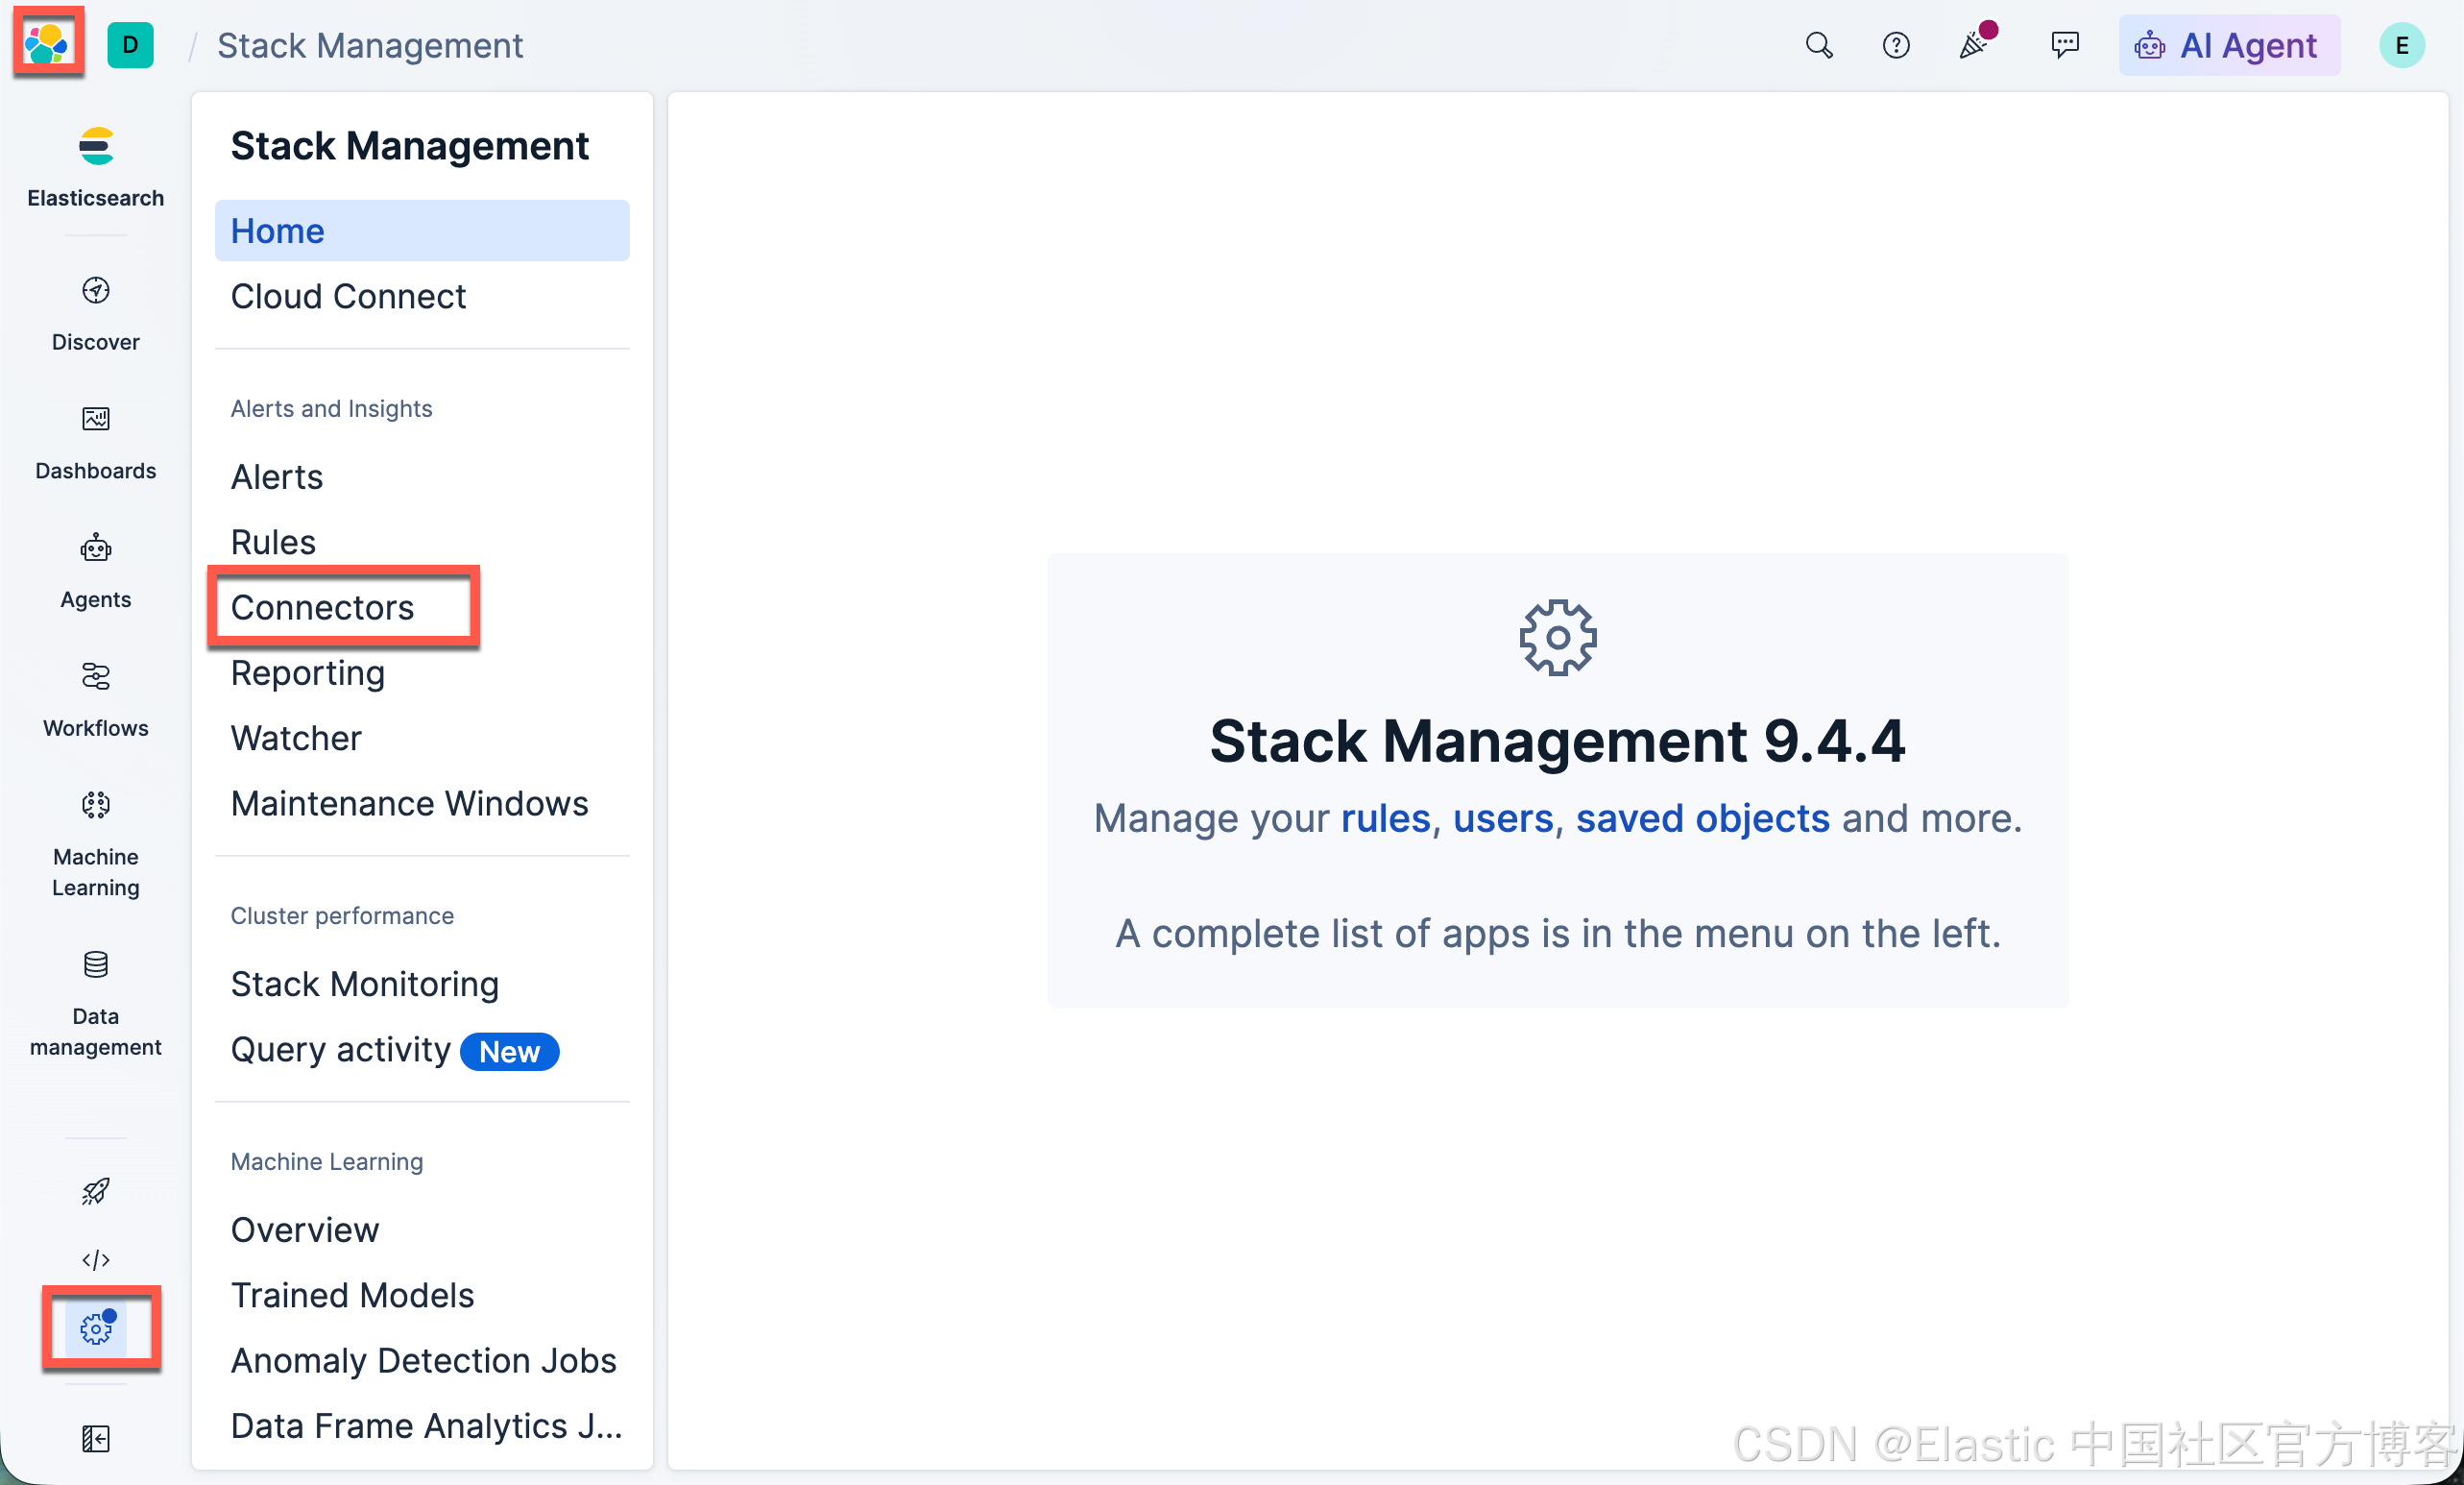
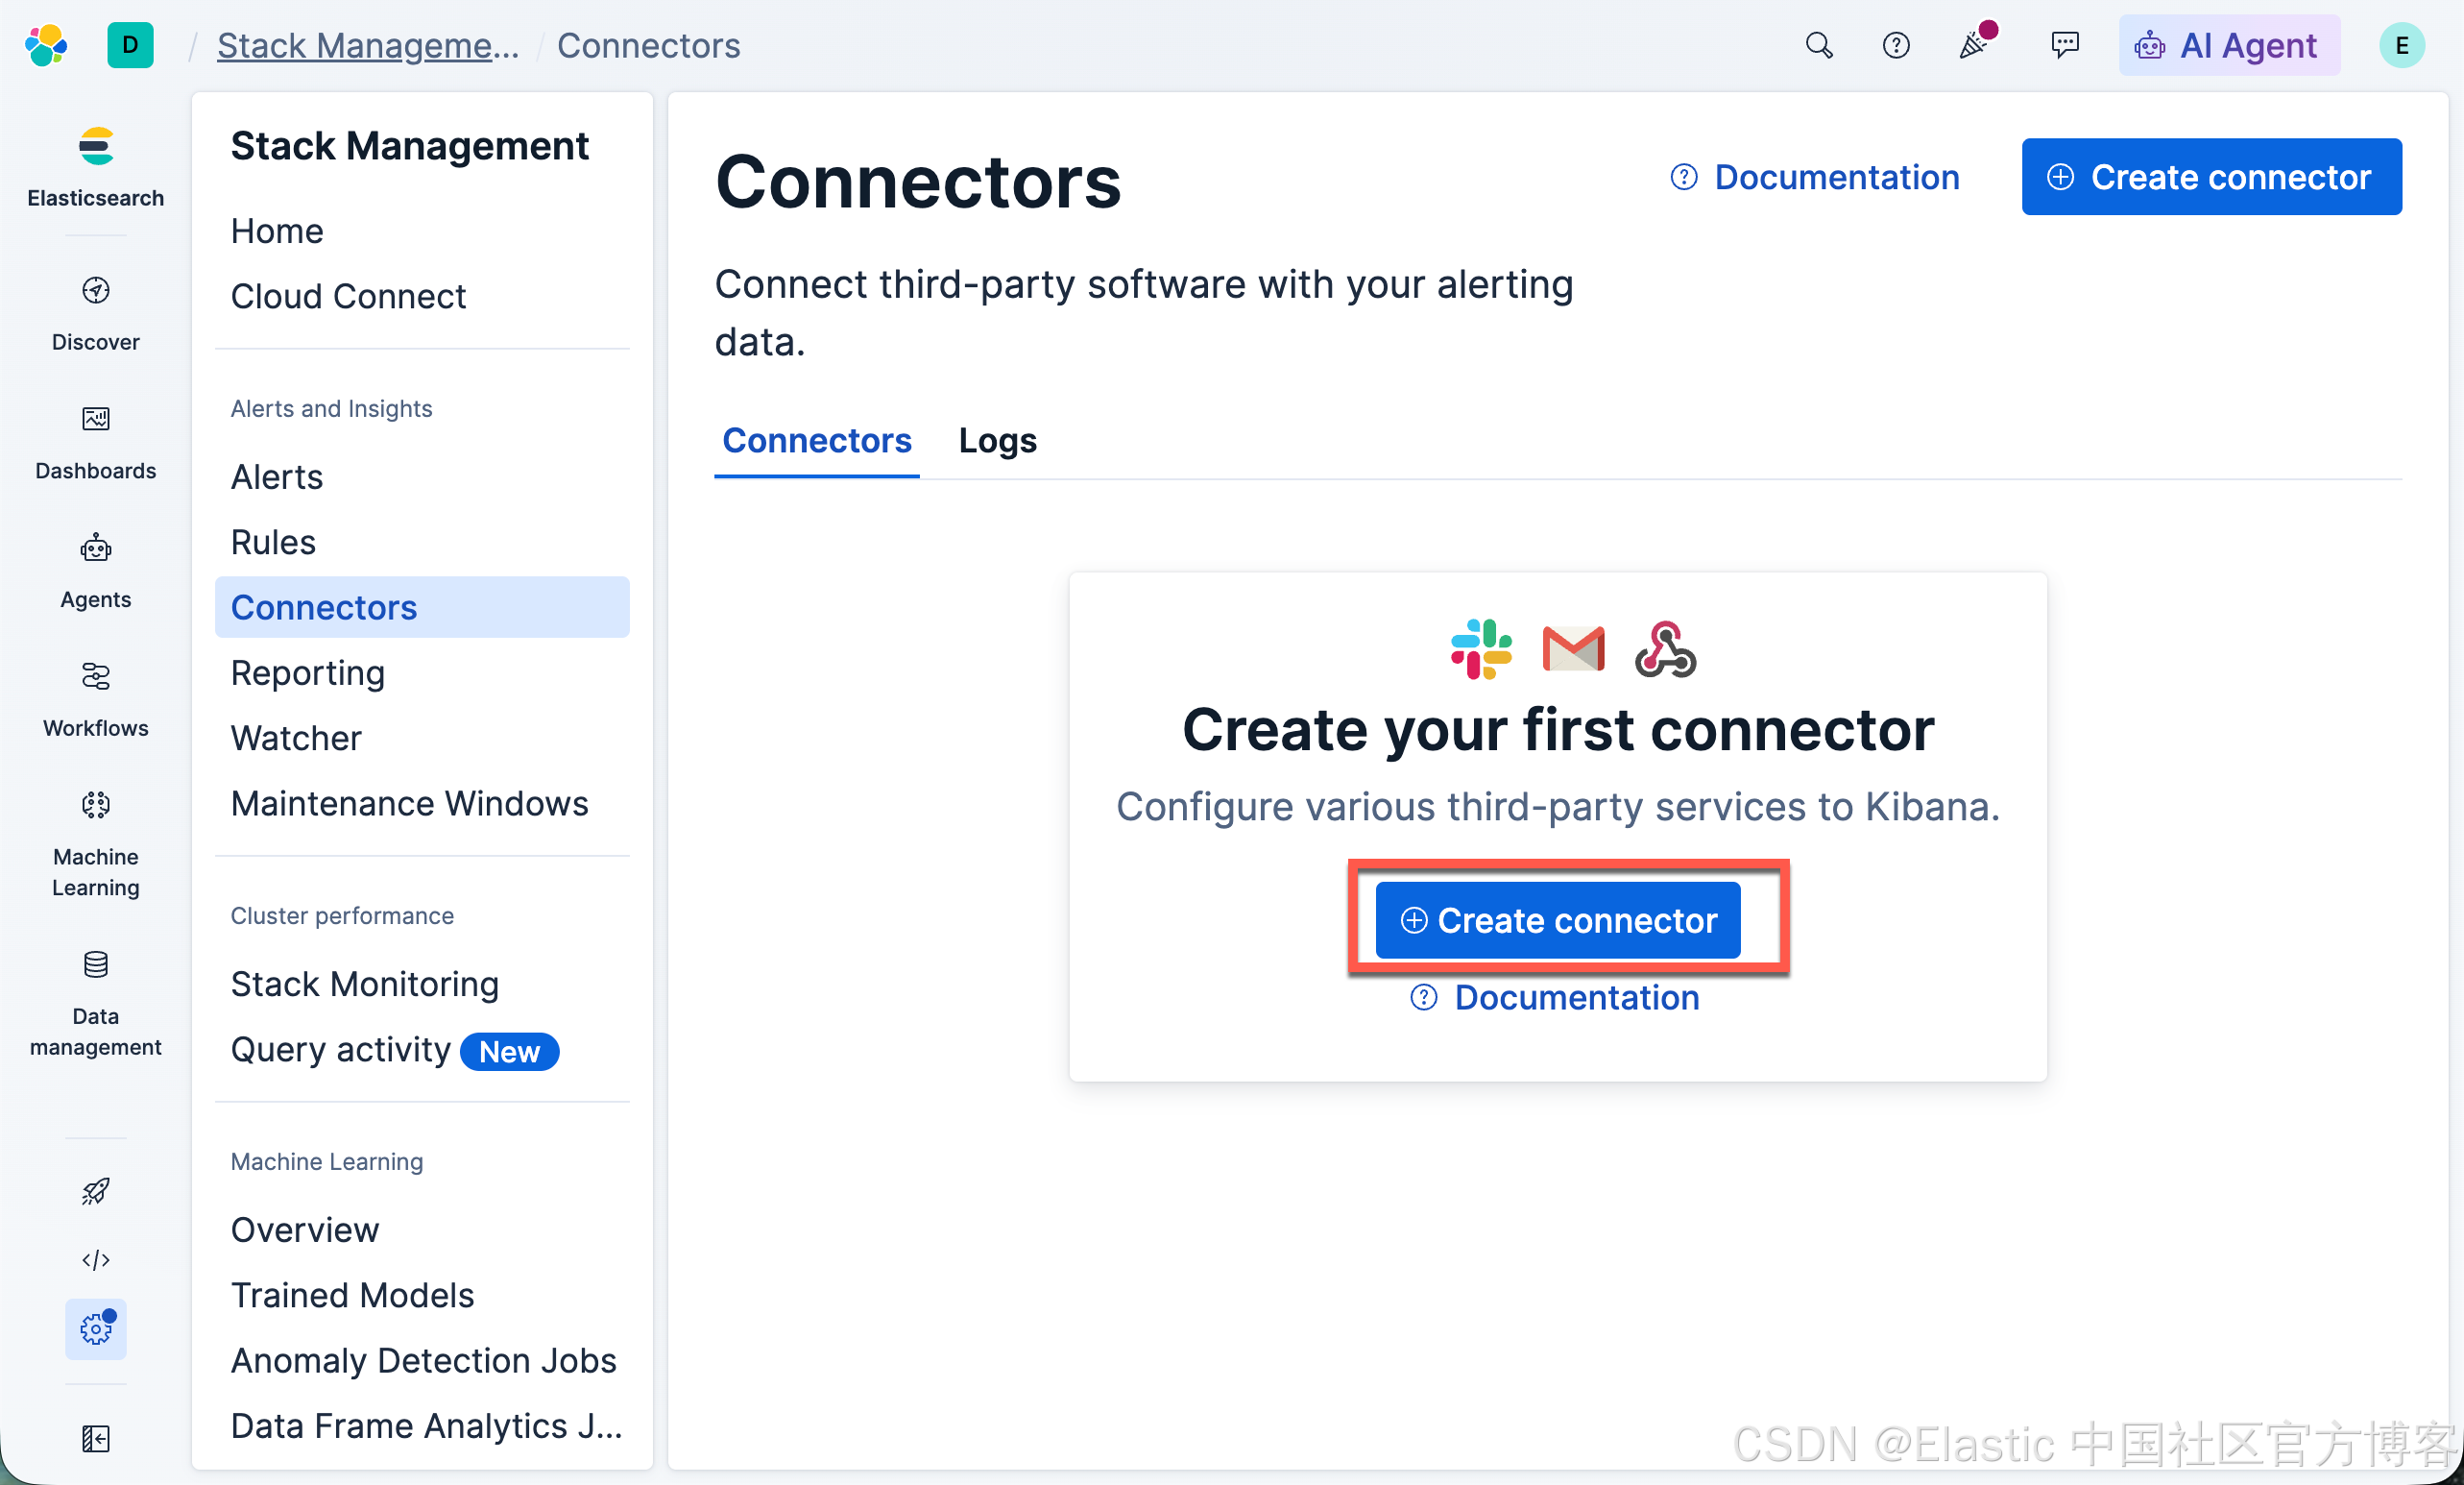
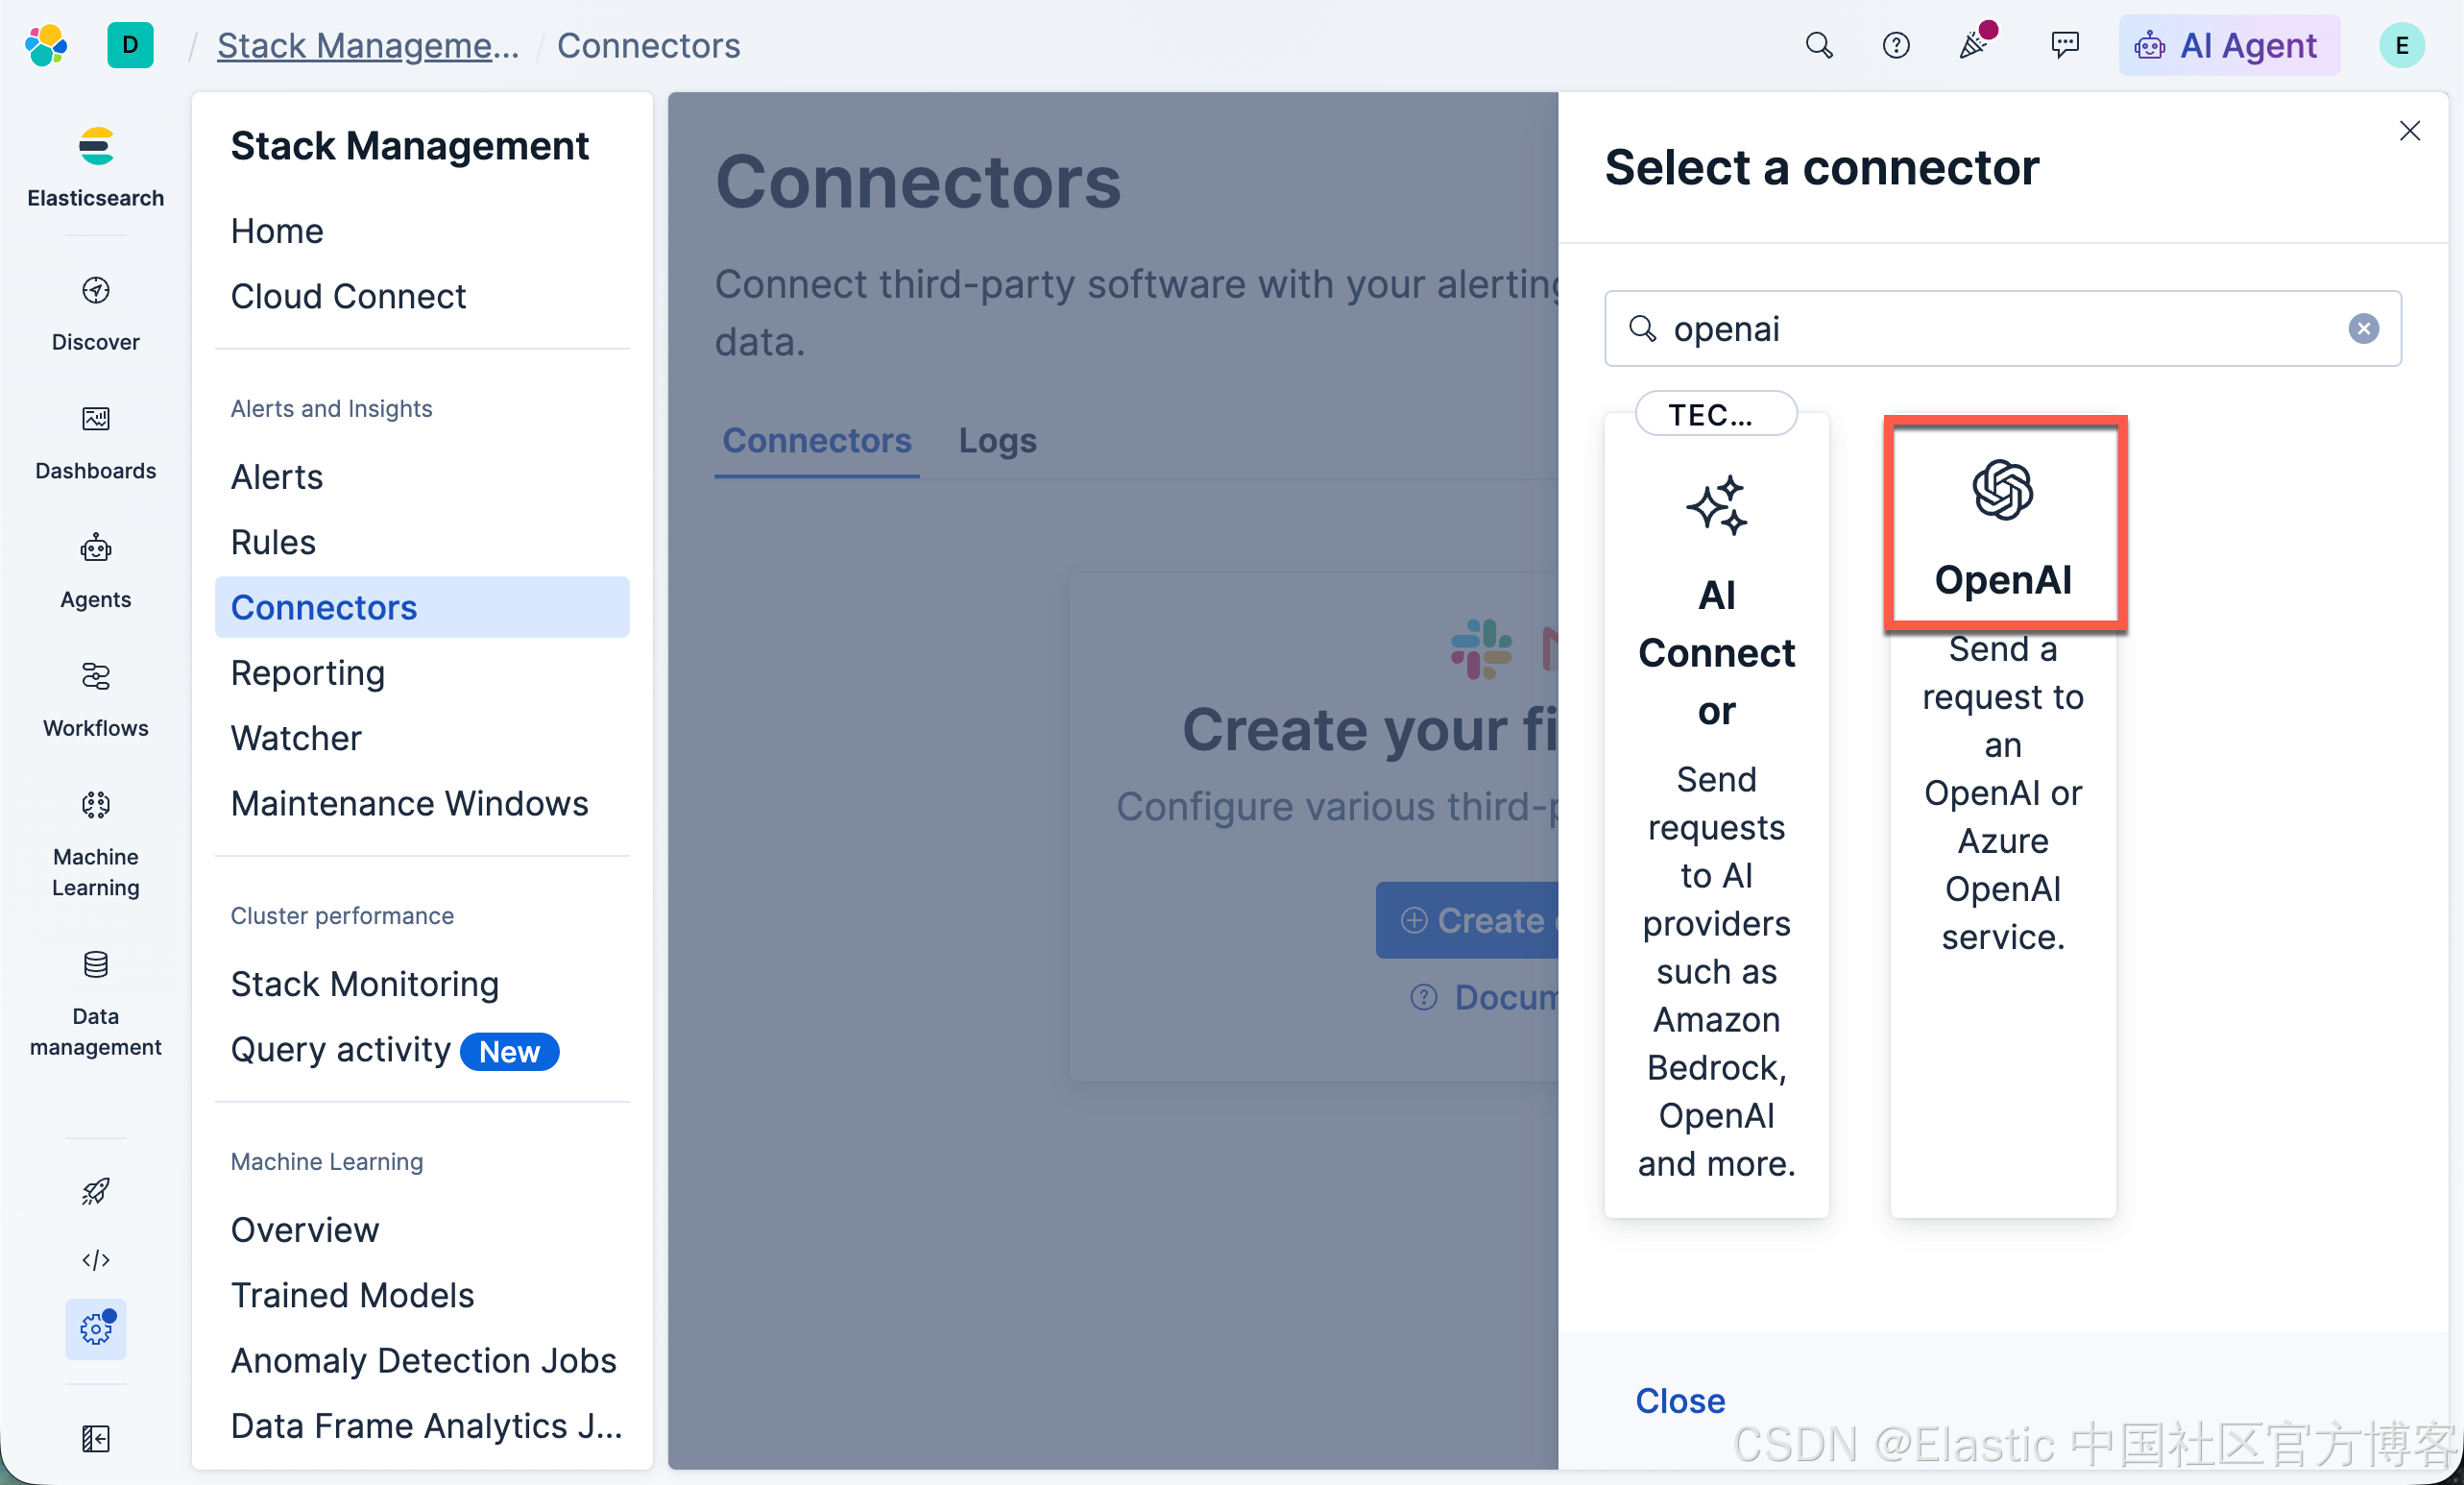
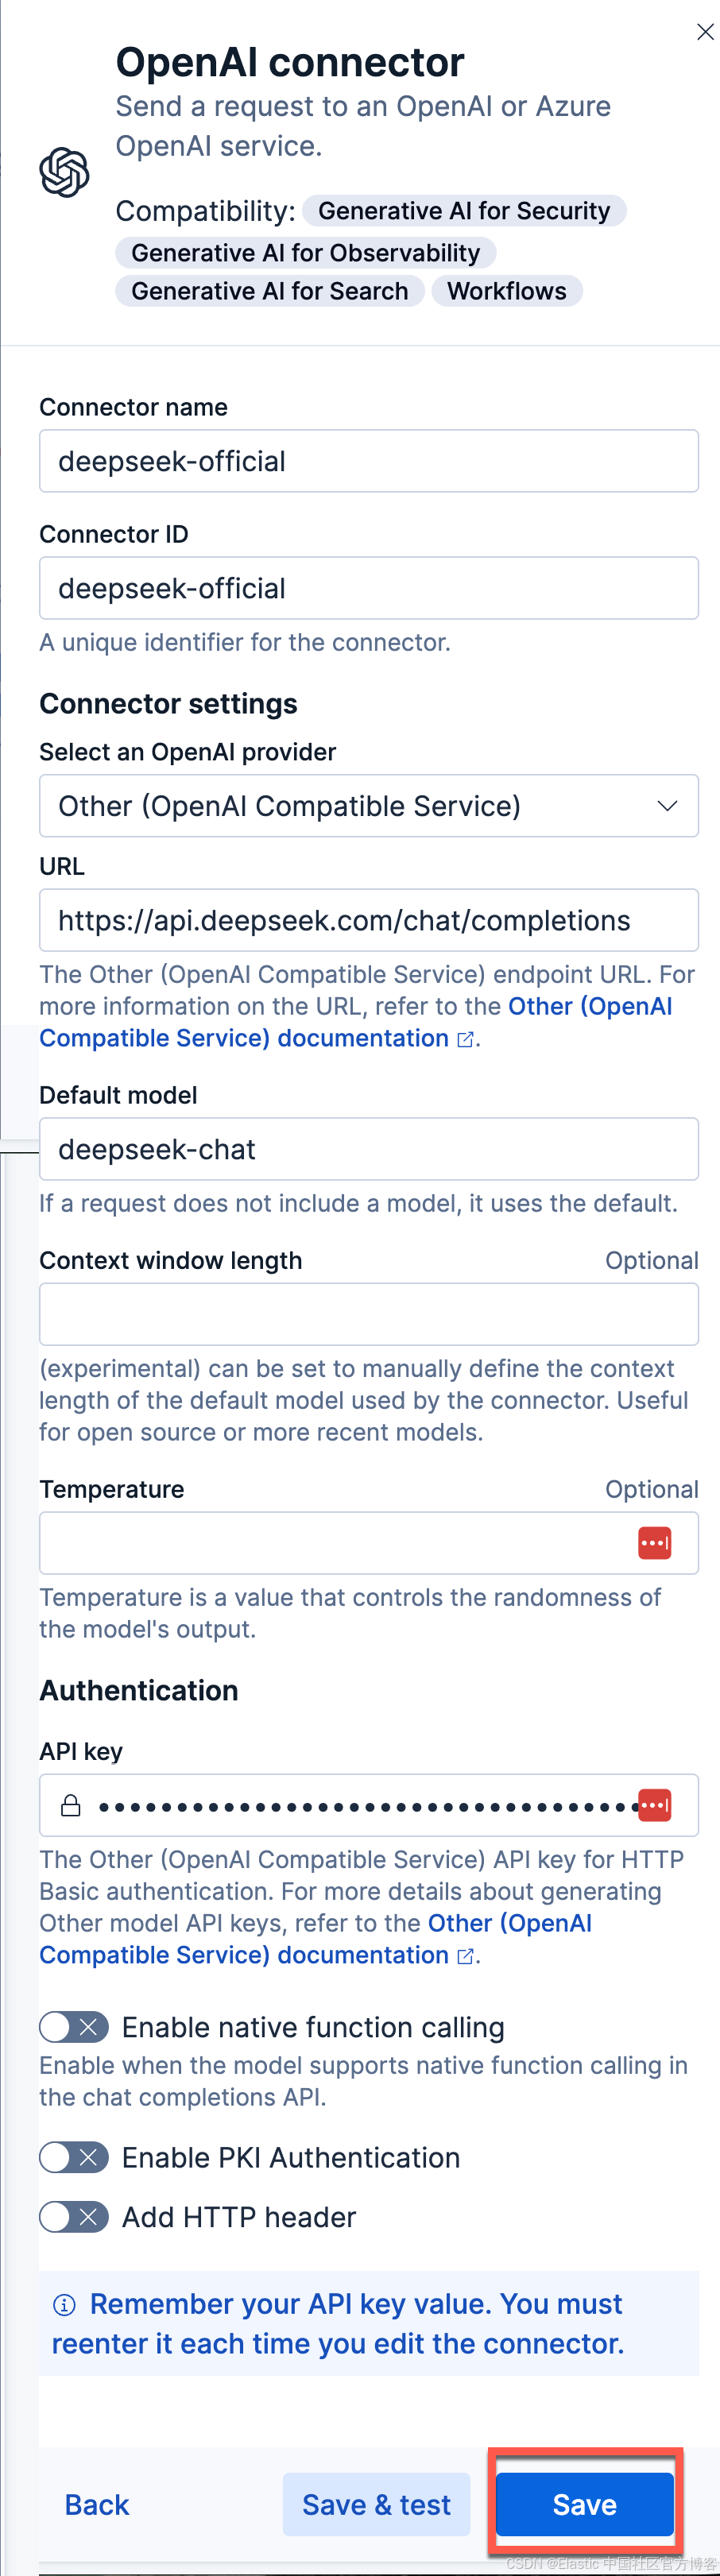
更加详细的步骤,你可以参考文章 “Elasticsearch:在 Elastic 中玩转 DeepSeek R1 来实现 RAG 应用”。点击上面的 Save 按钮。当然,我们也可以点击上面的 Save & test 按钮:
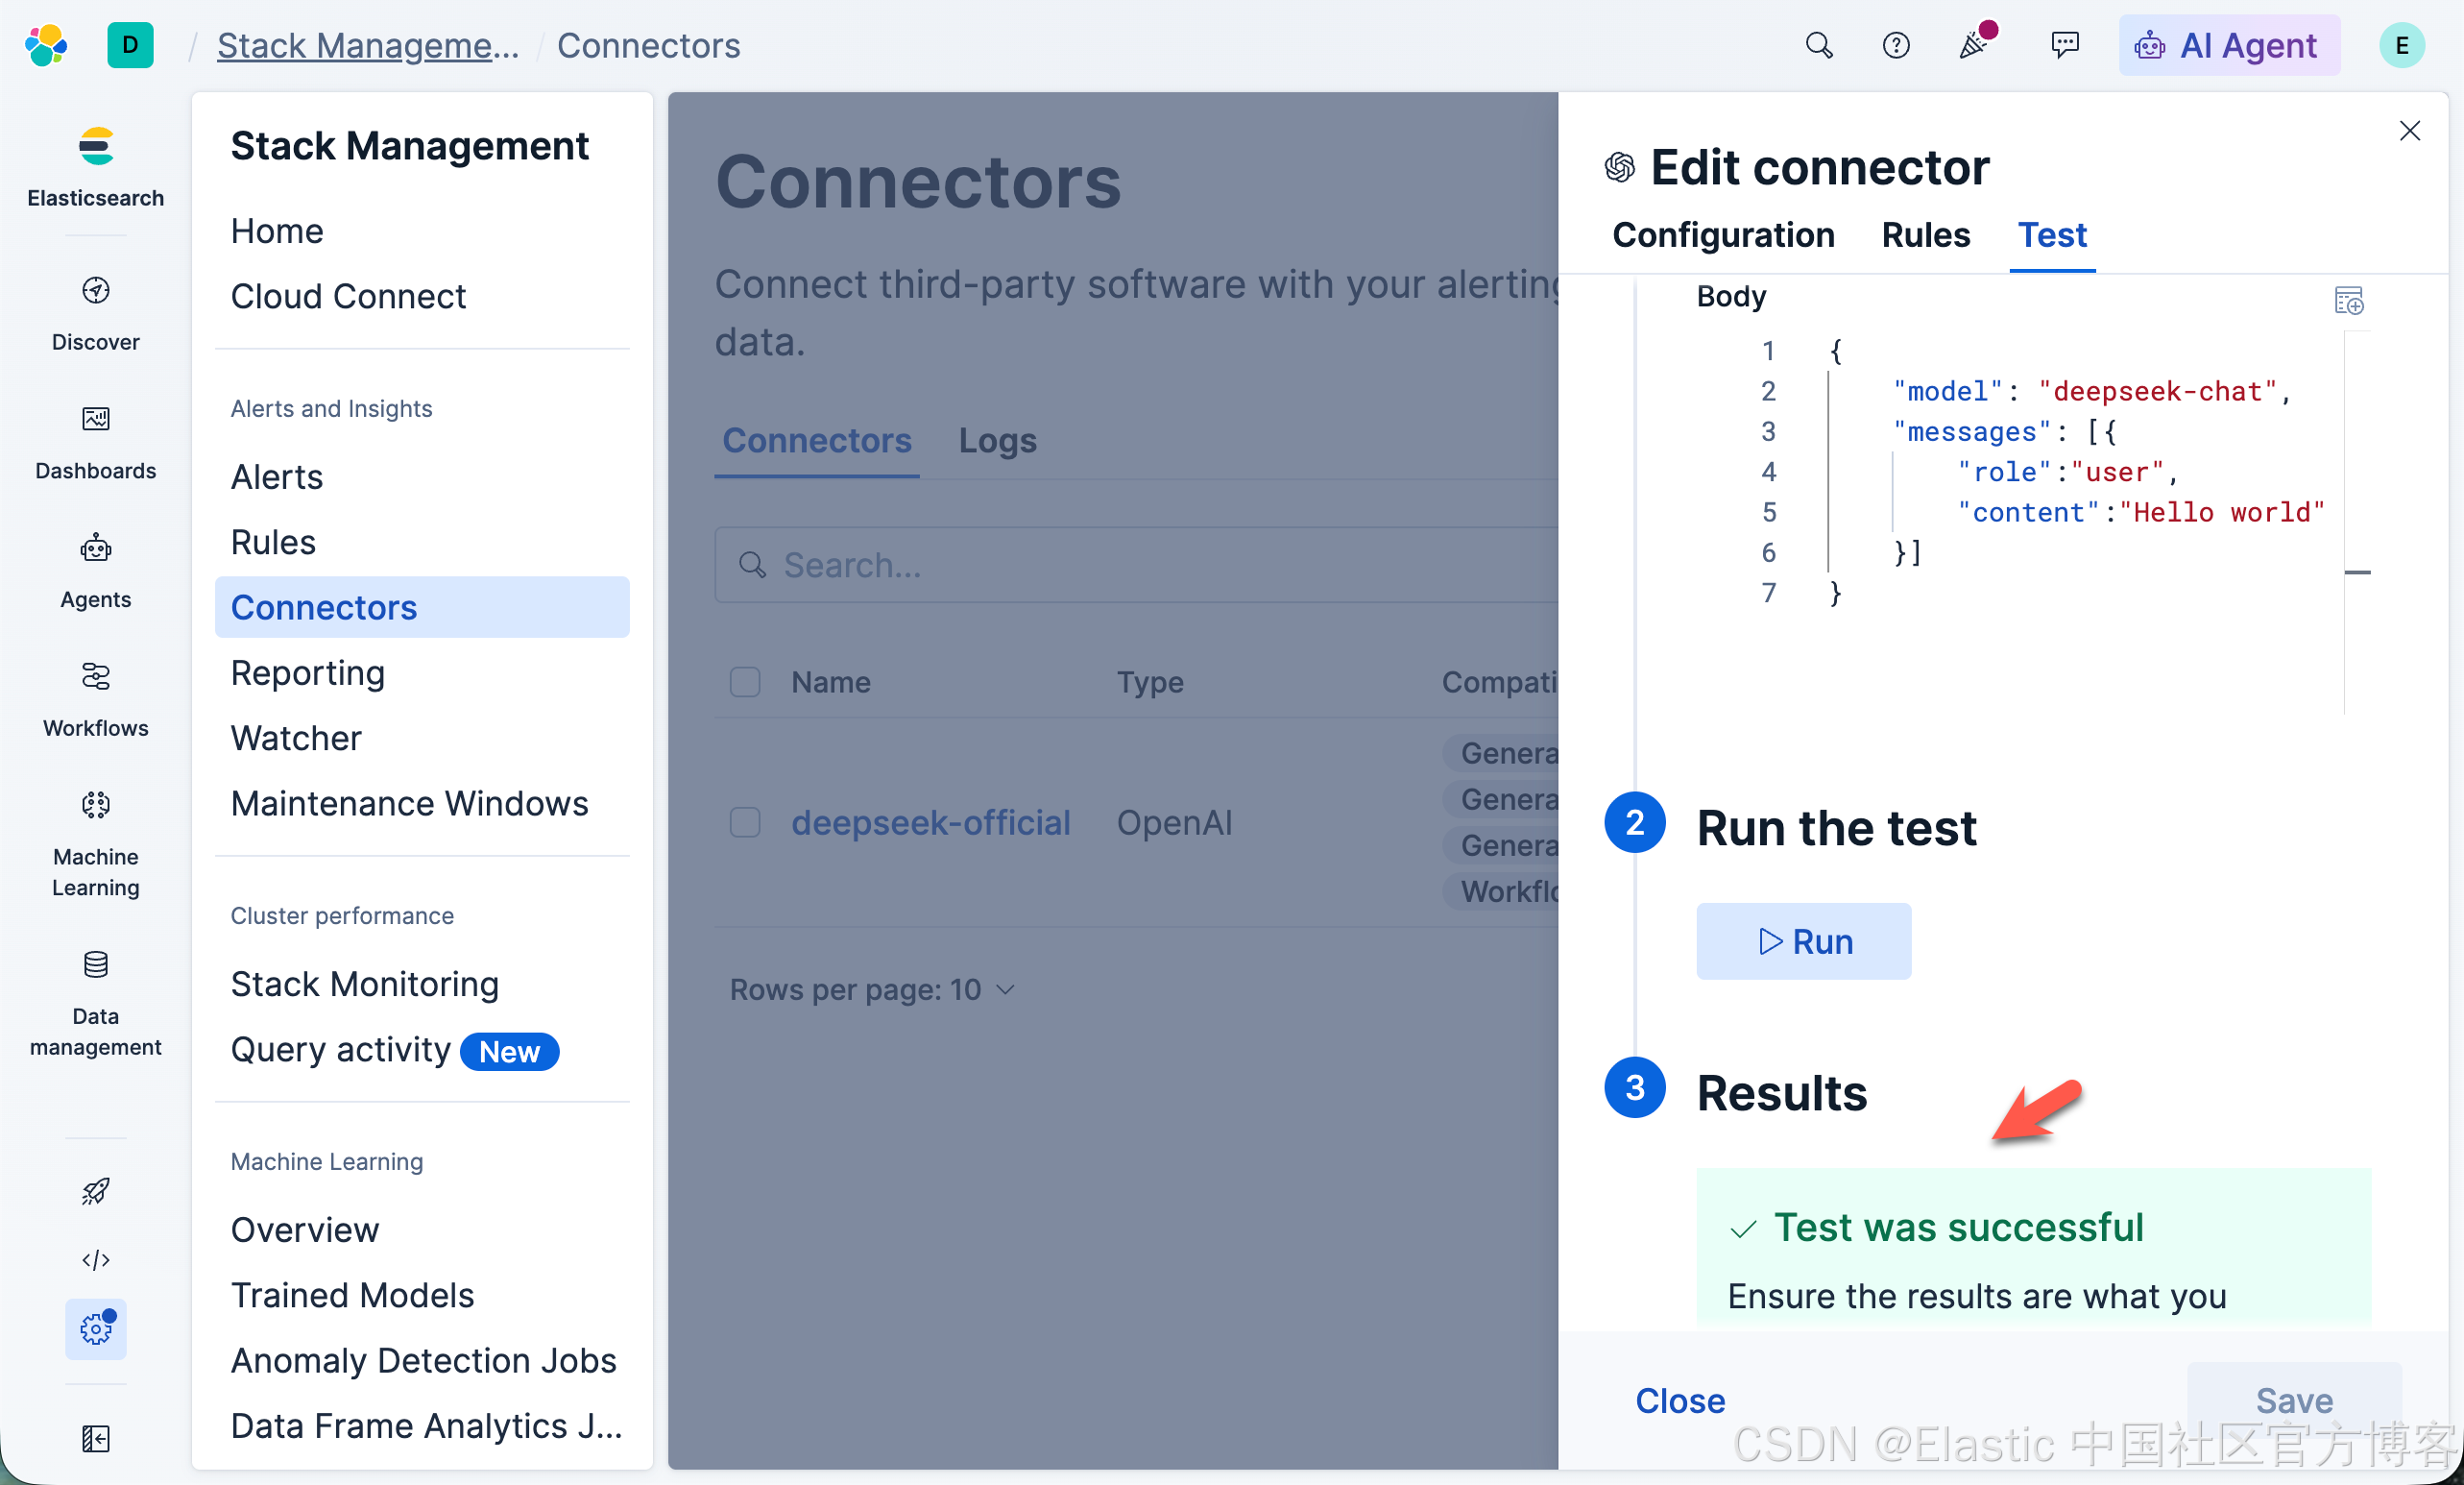
上面显示我们的配置是成功的。我们再次回到 Agents 页面:
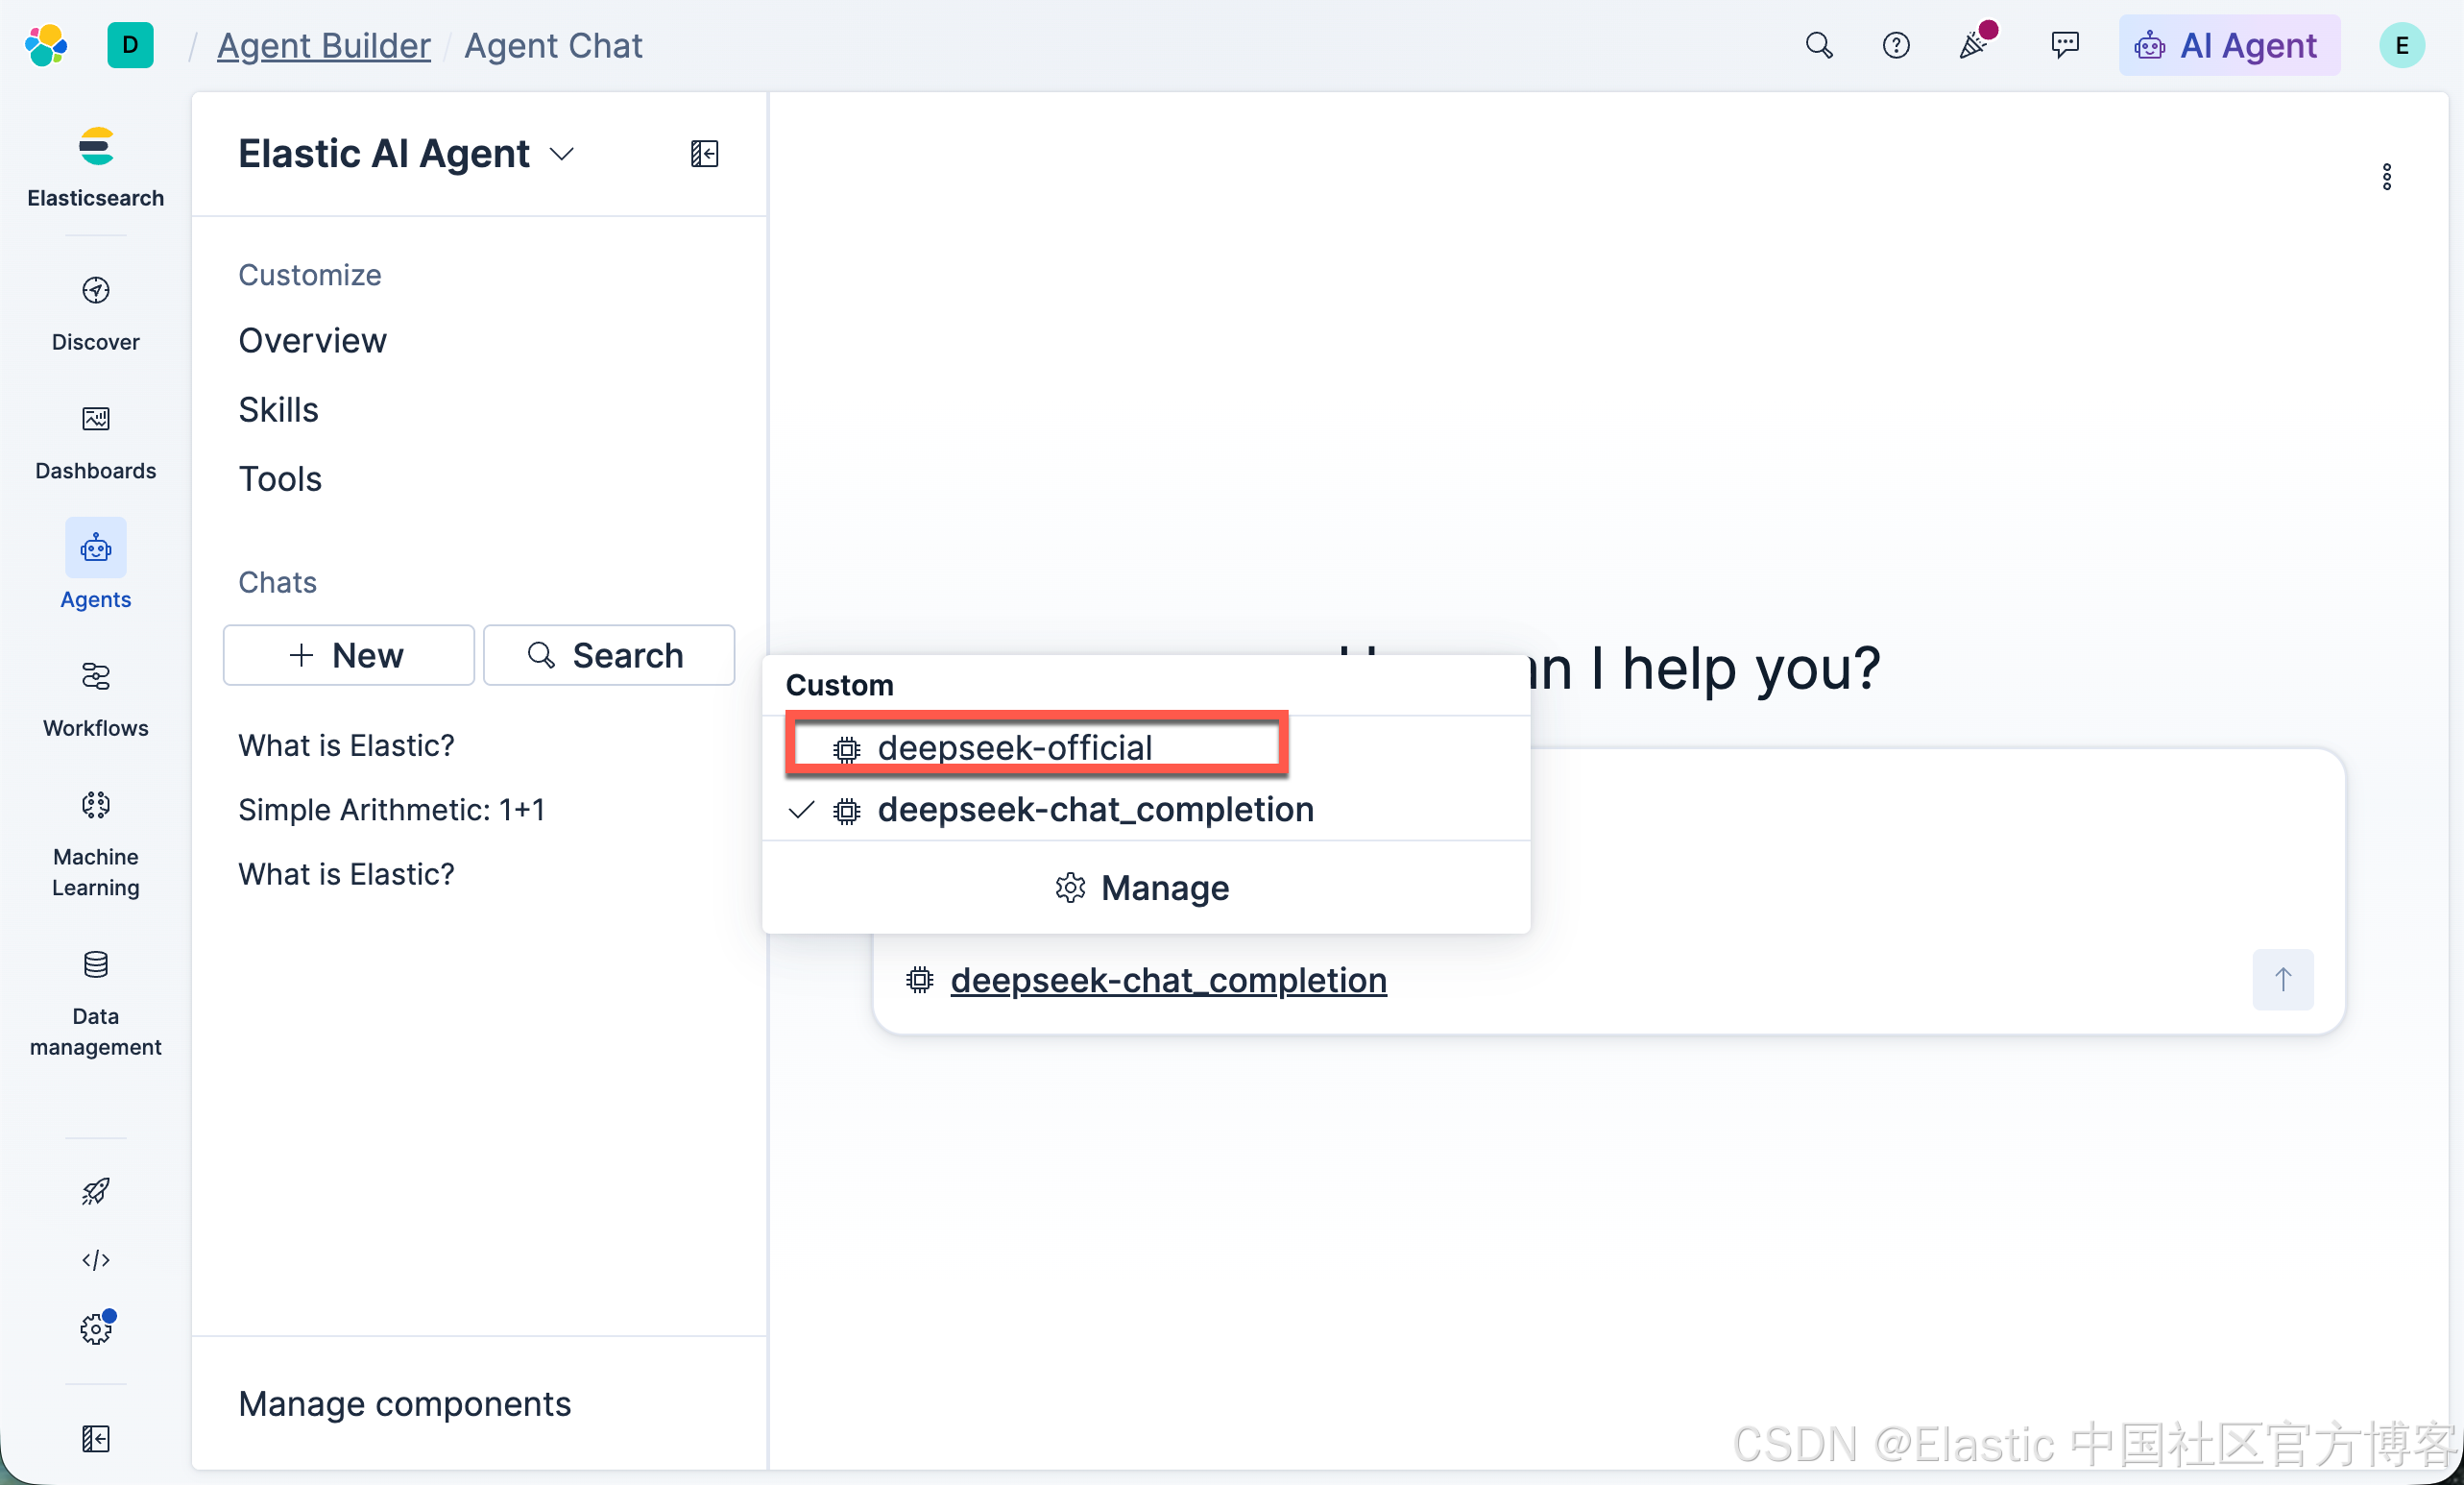
这次,我们可以看到多一个选择。选中 deepseek-official:
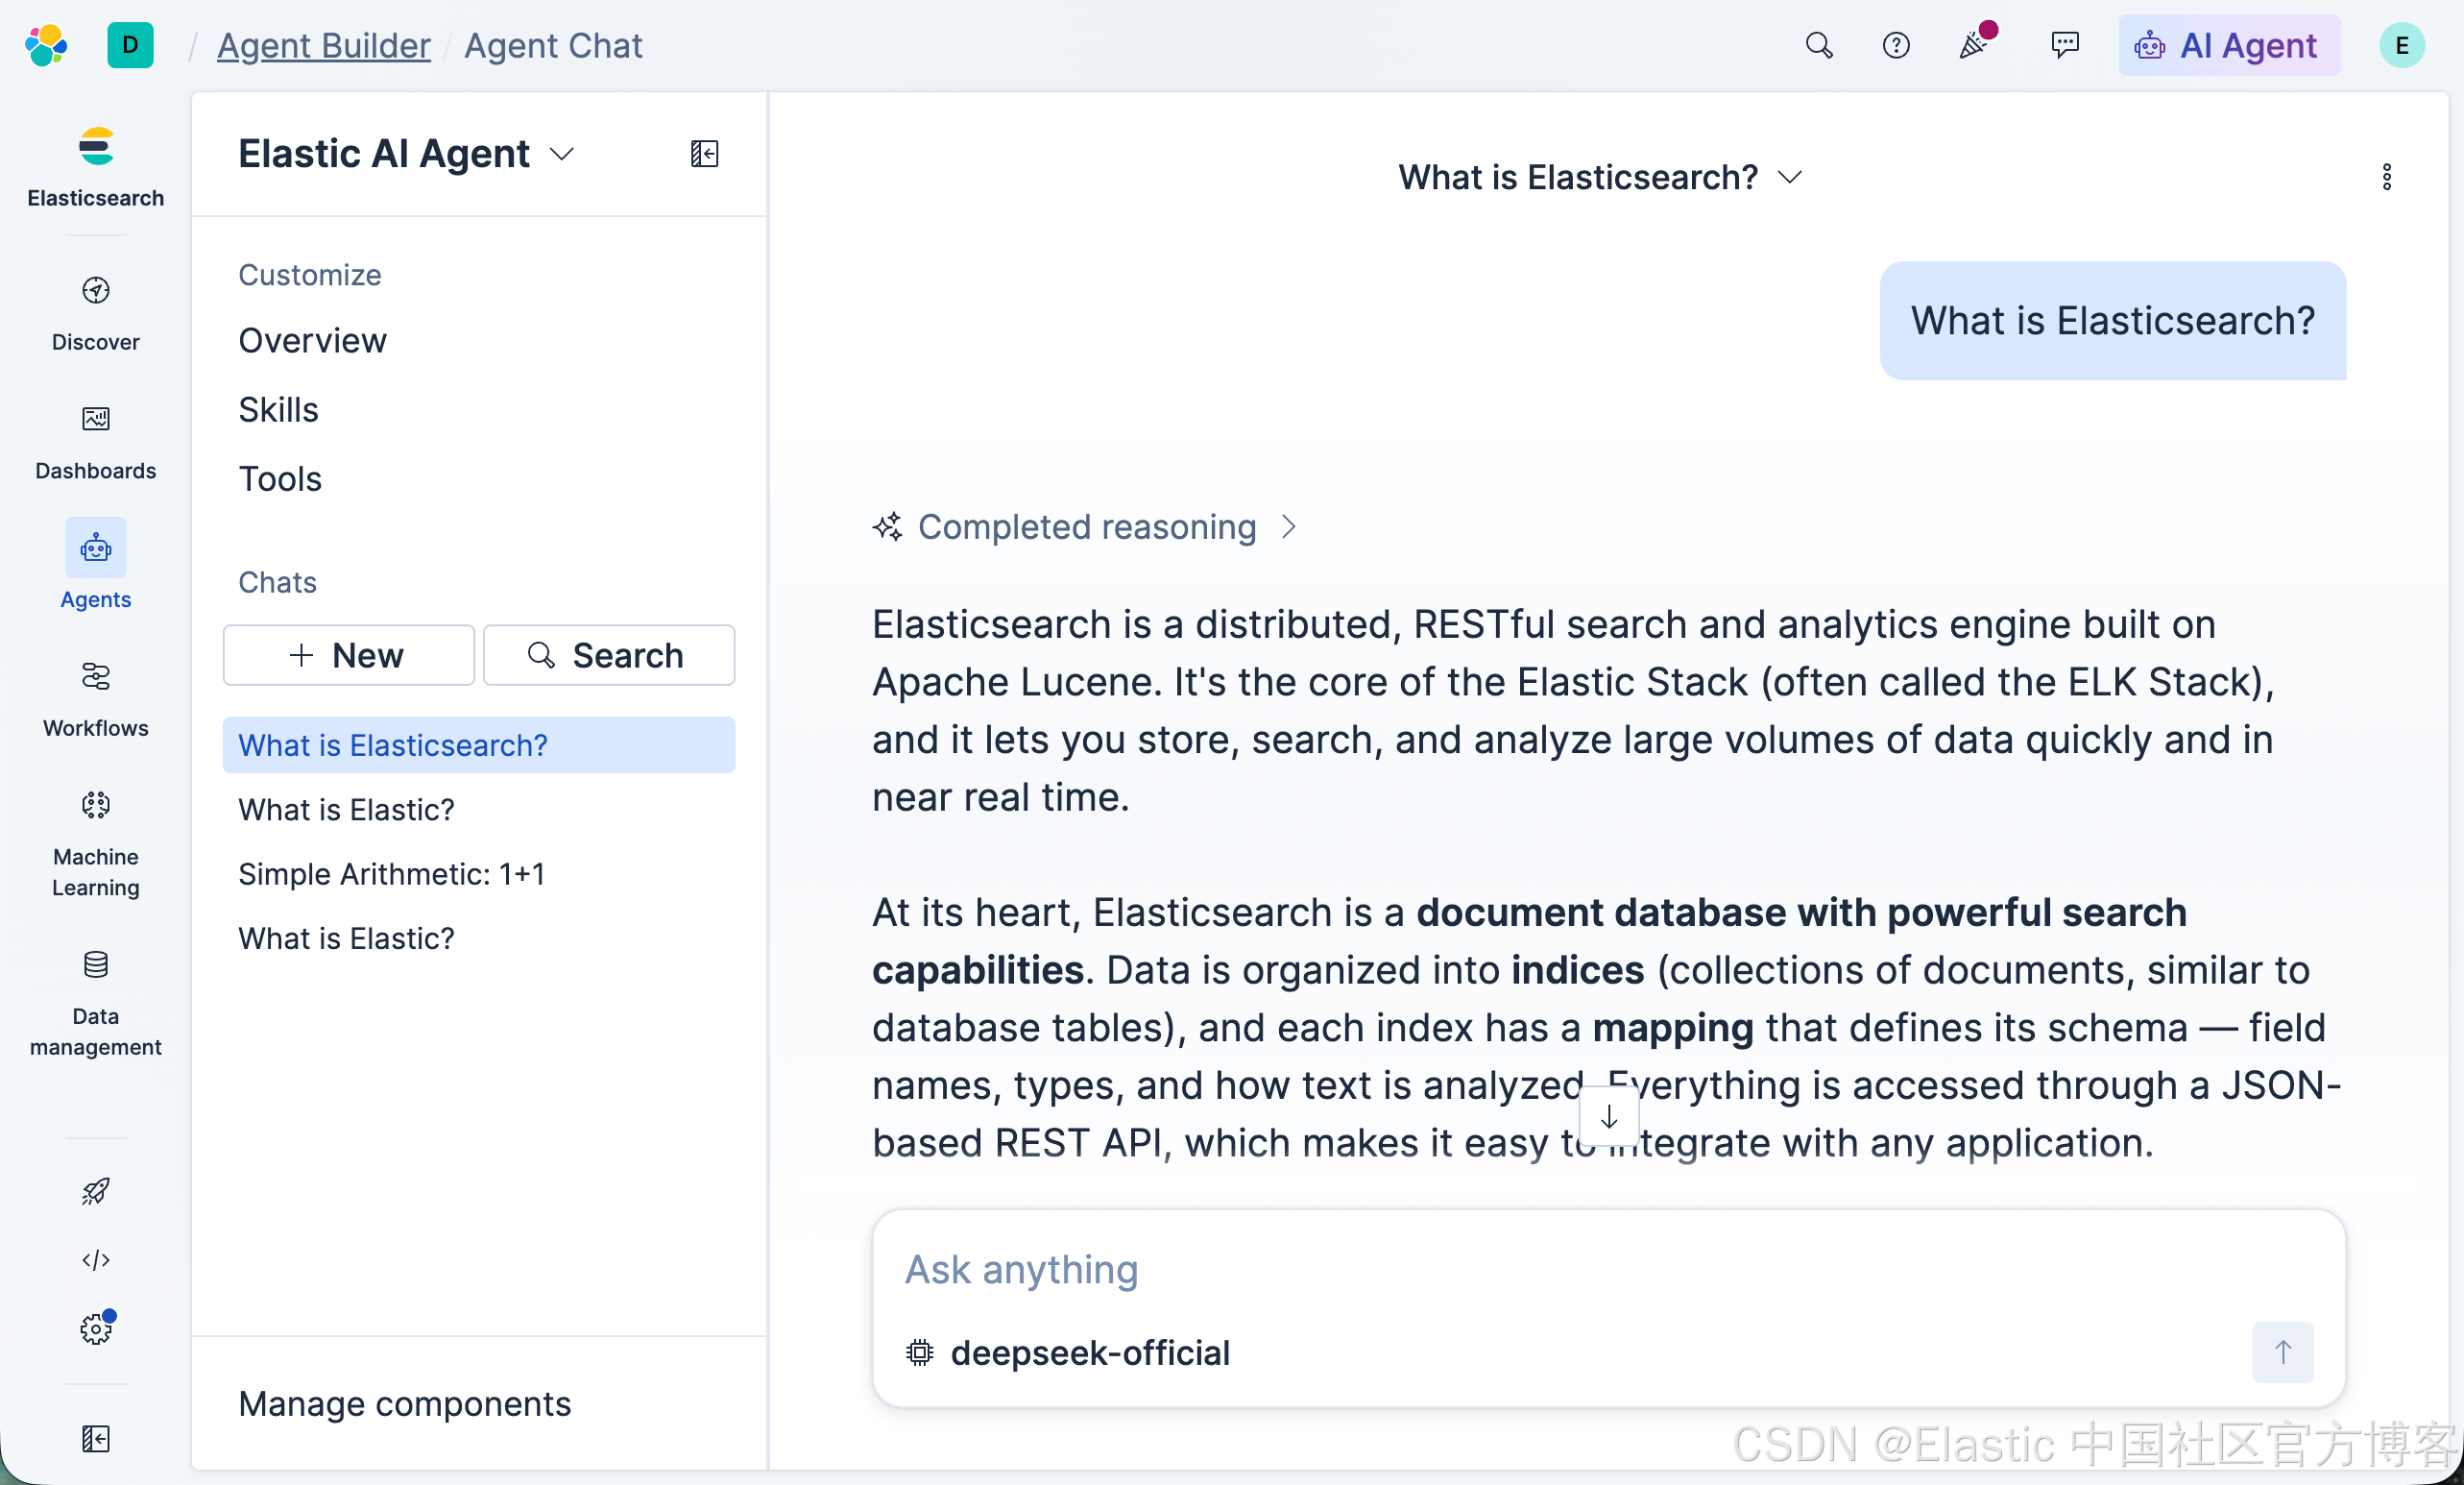
很显然,我们的配置是成功的。
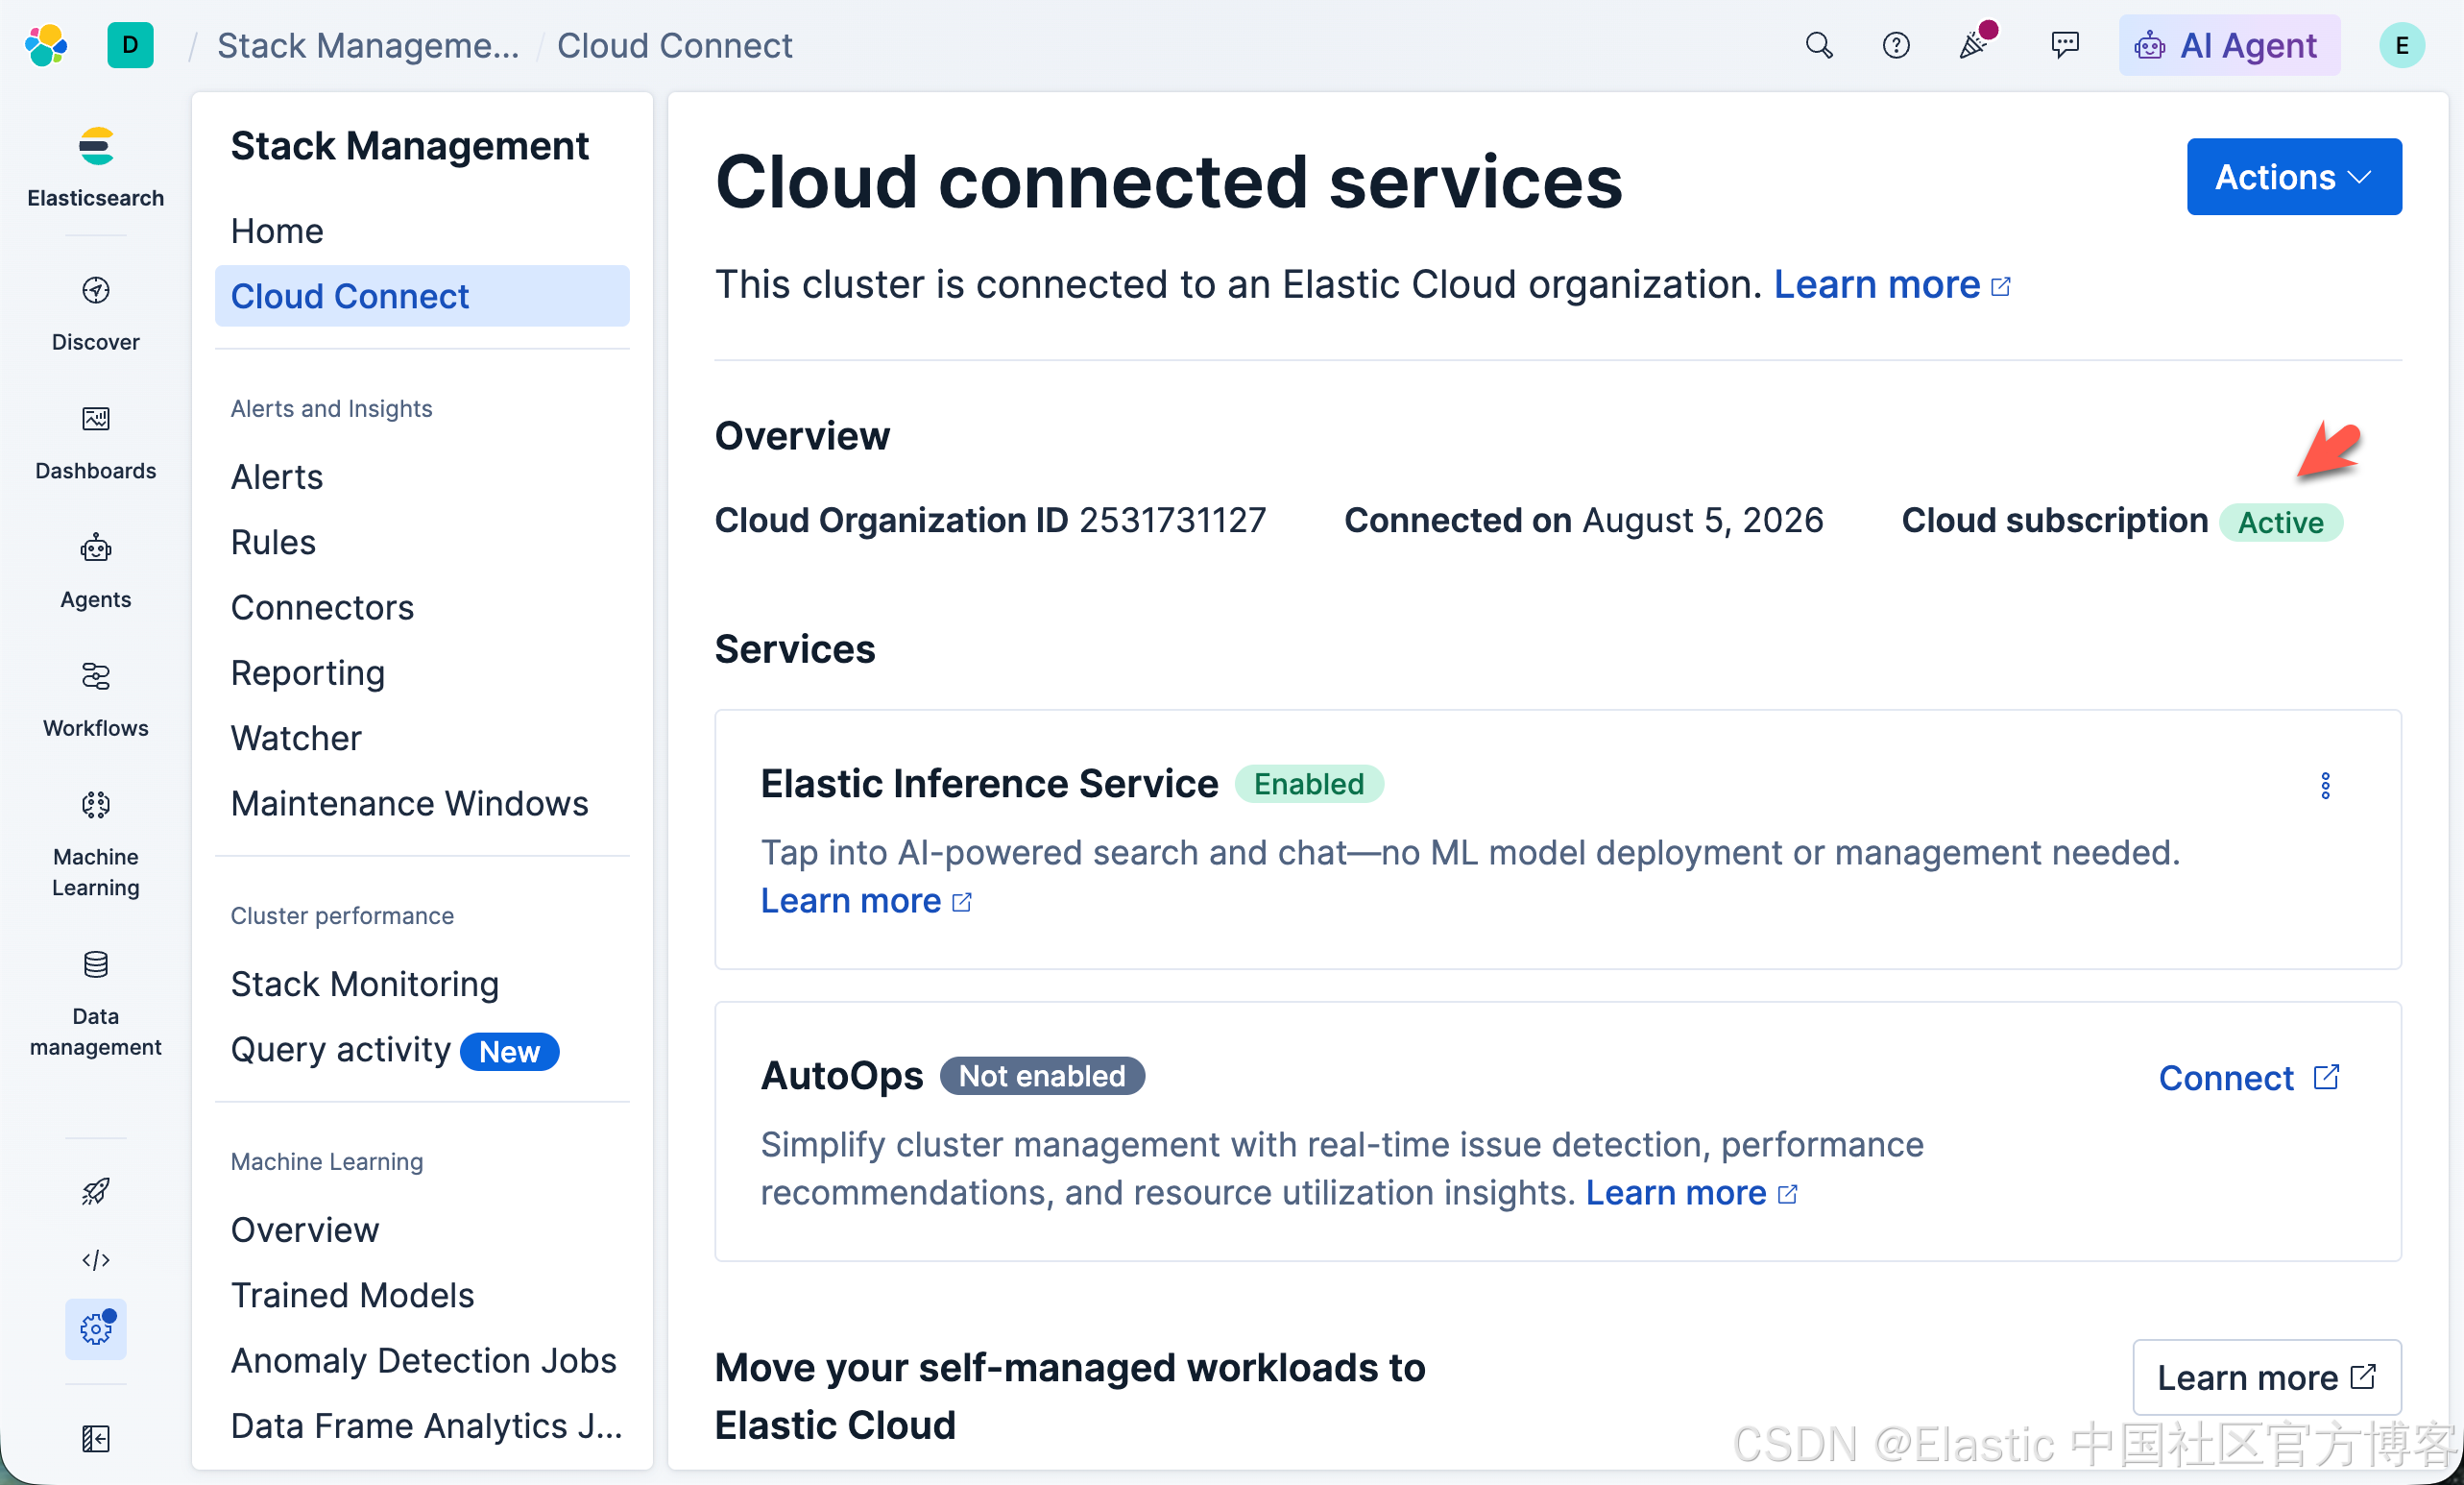
3)Cloud Connect
对于有 Elastic Cloud 账号的开发者来说,你可以通过 Cloud Connec 来进行连接:
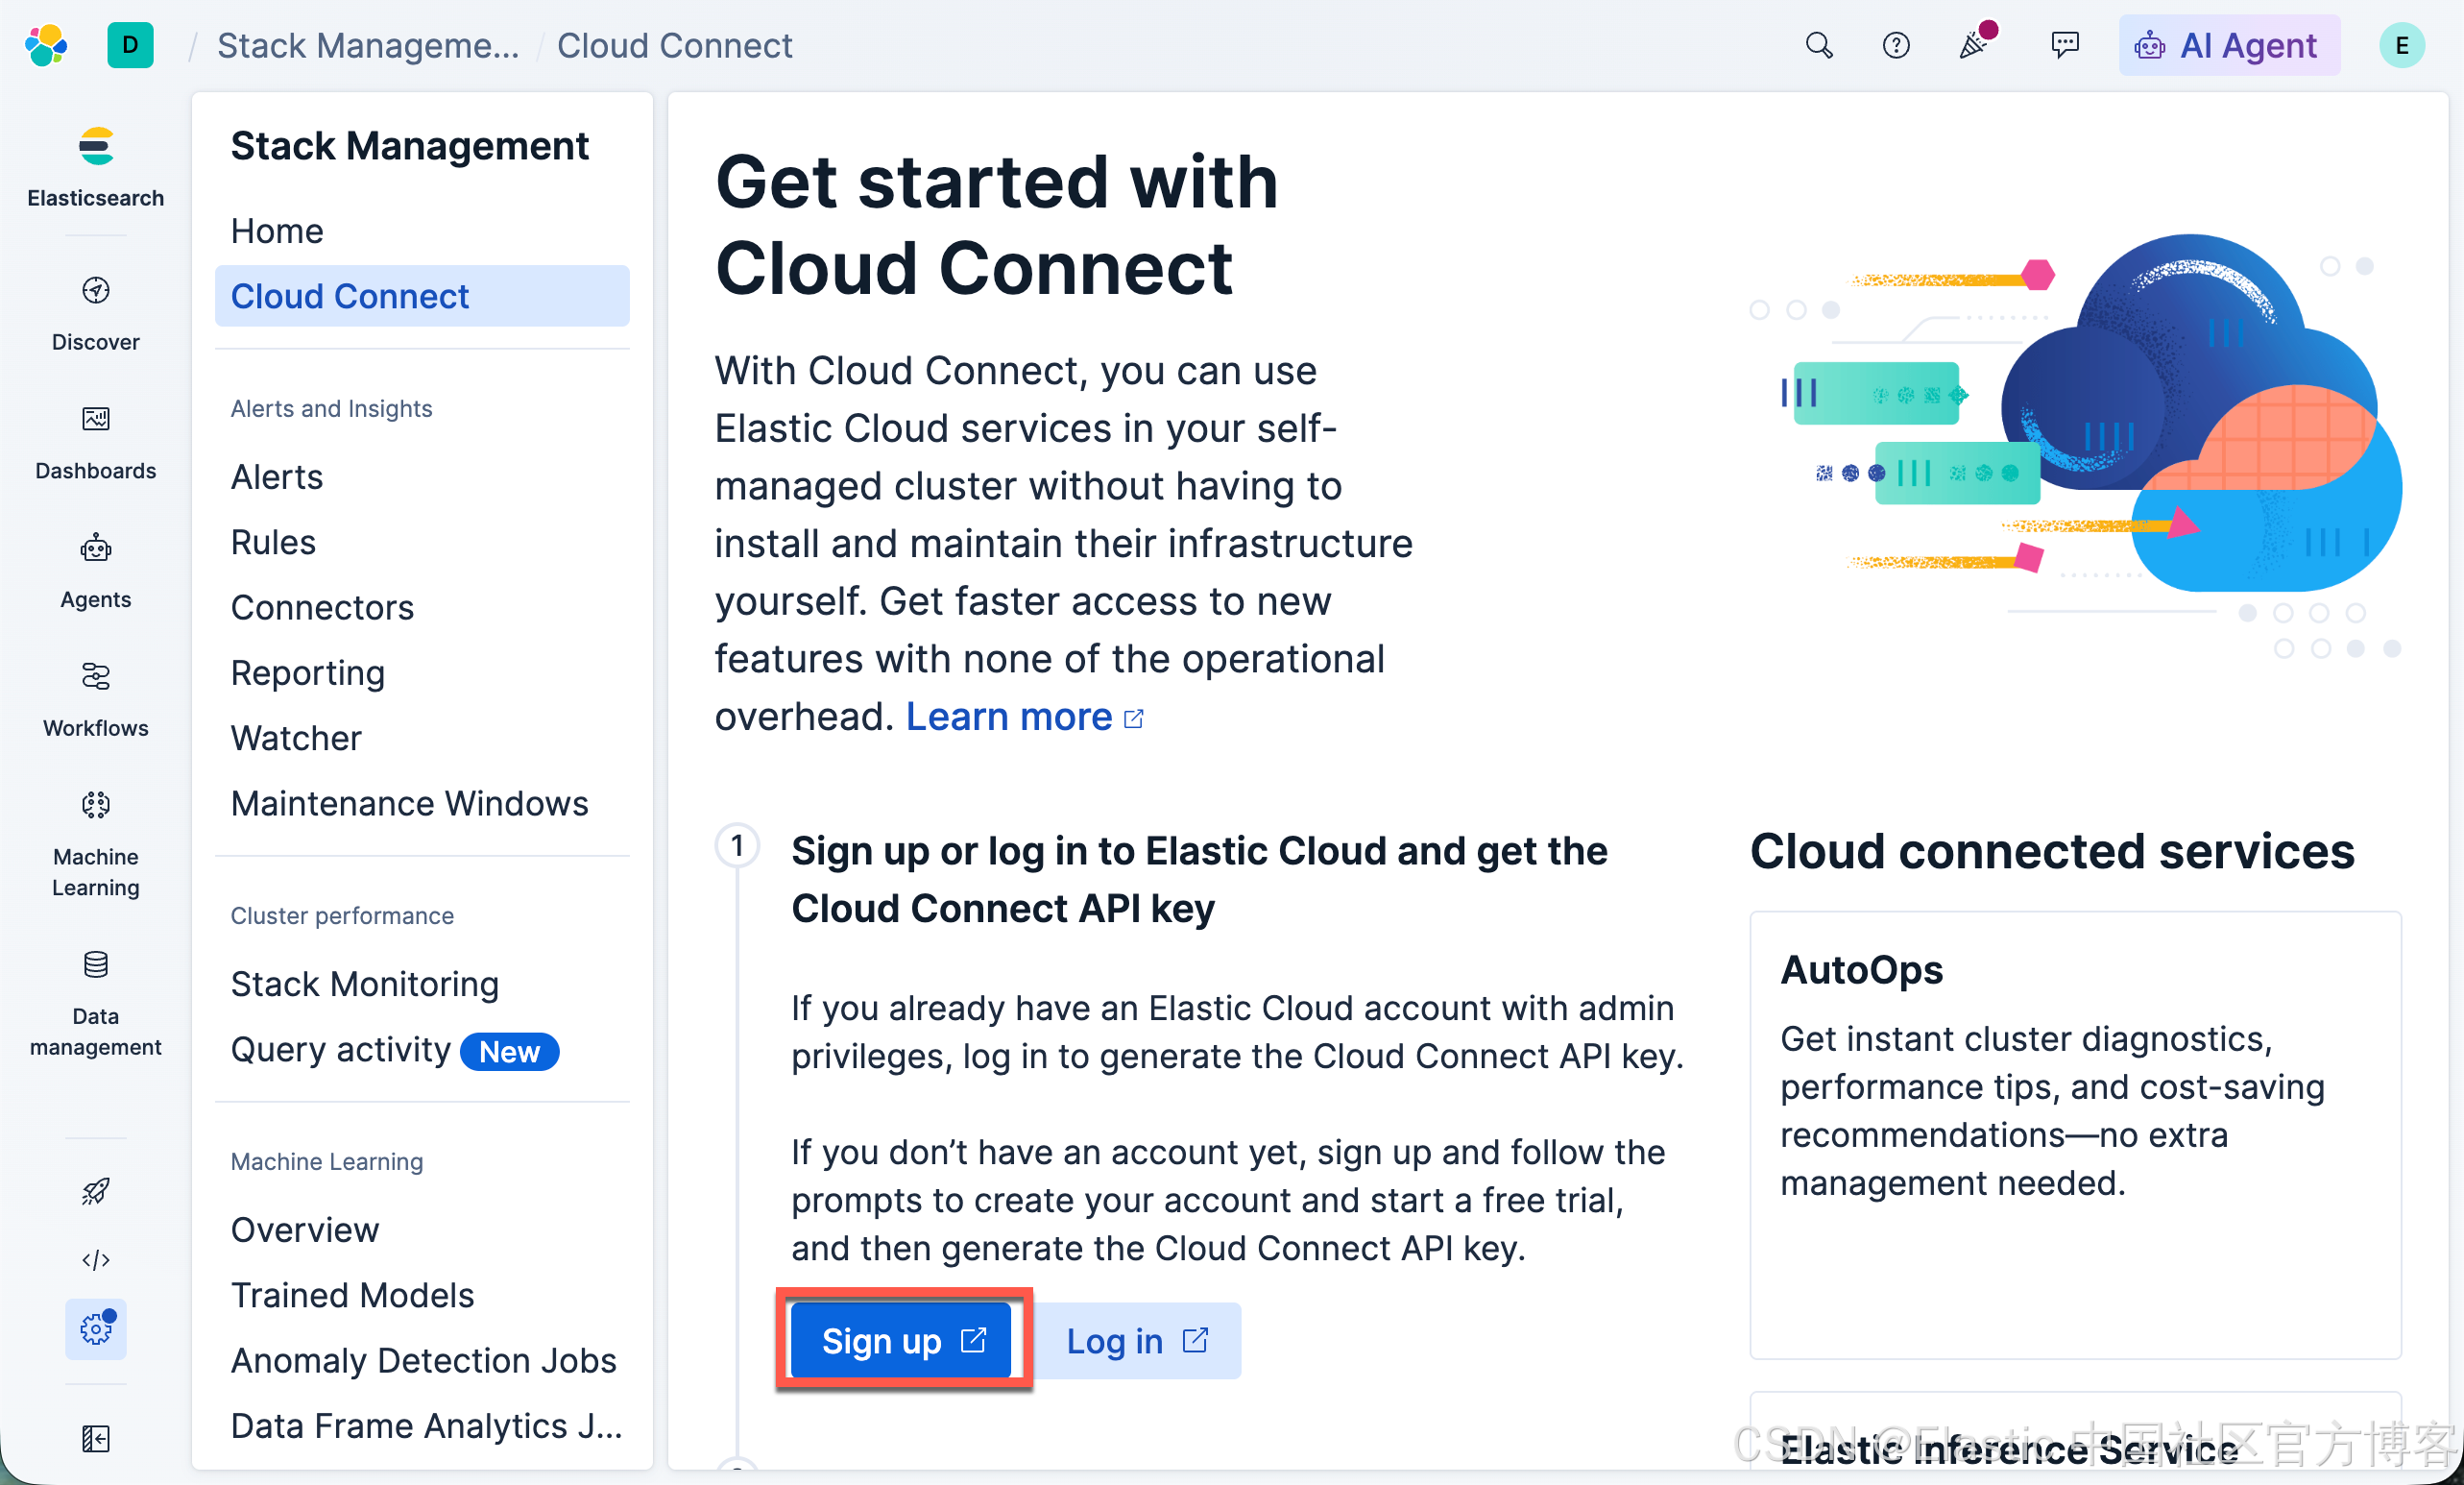

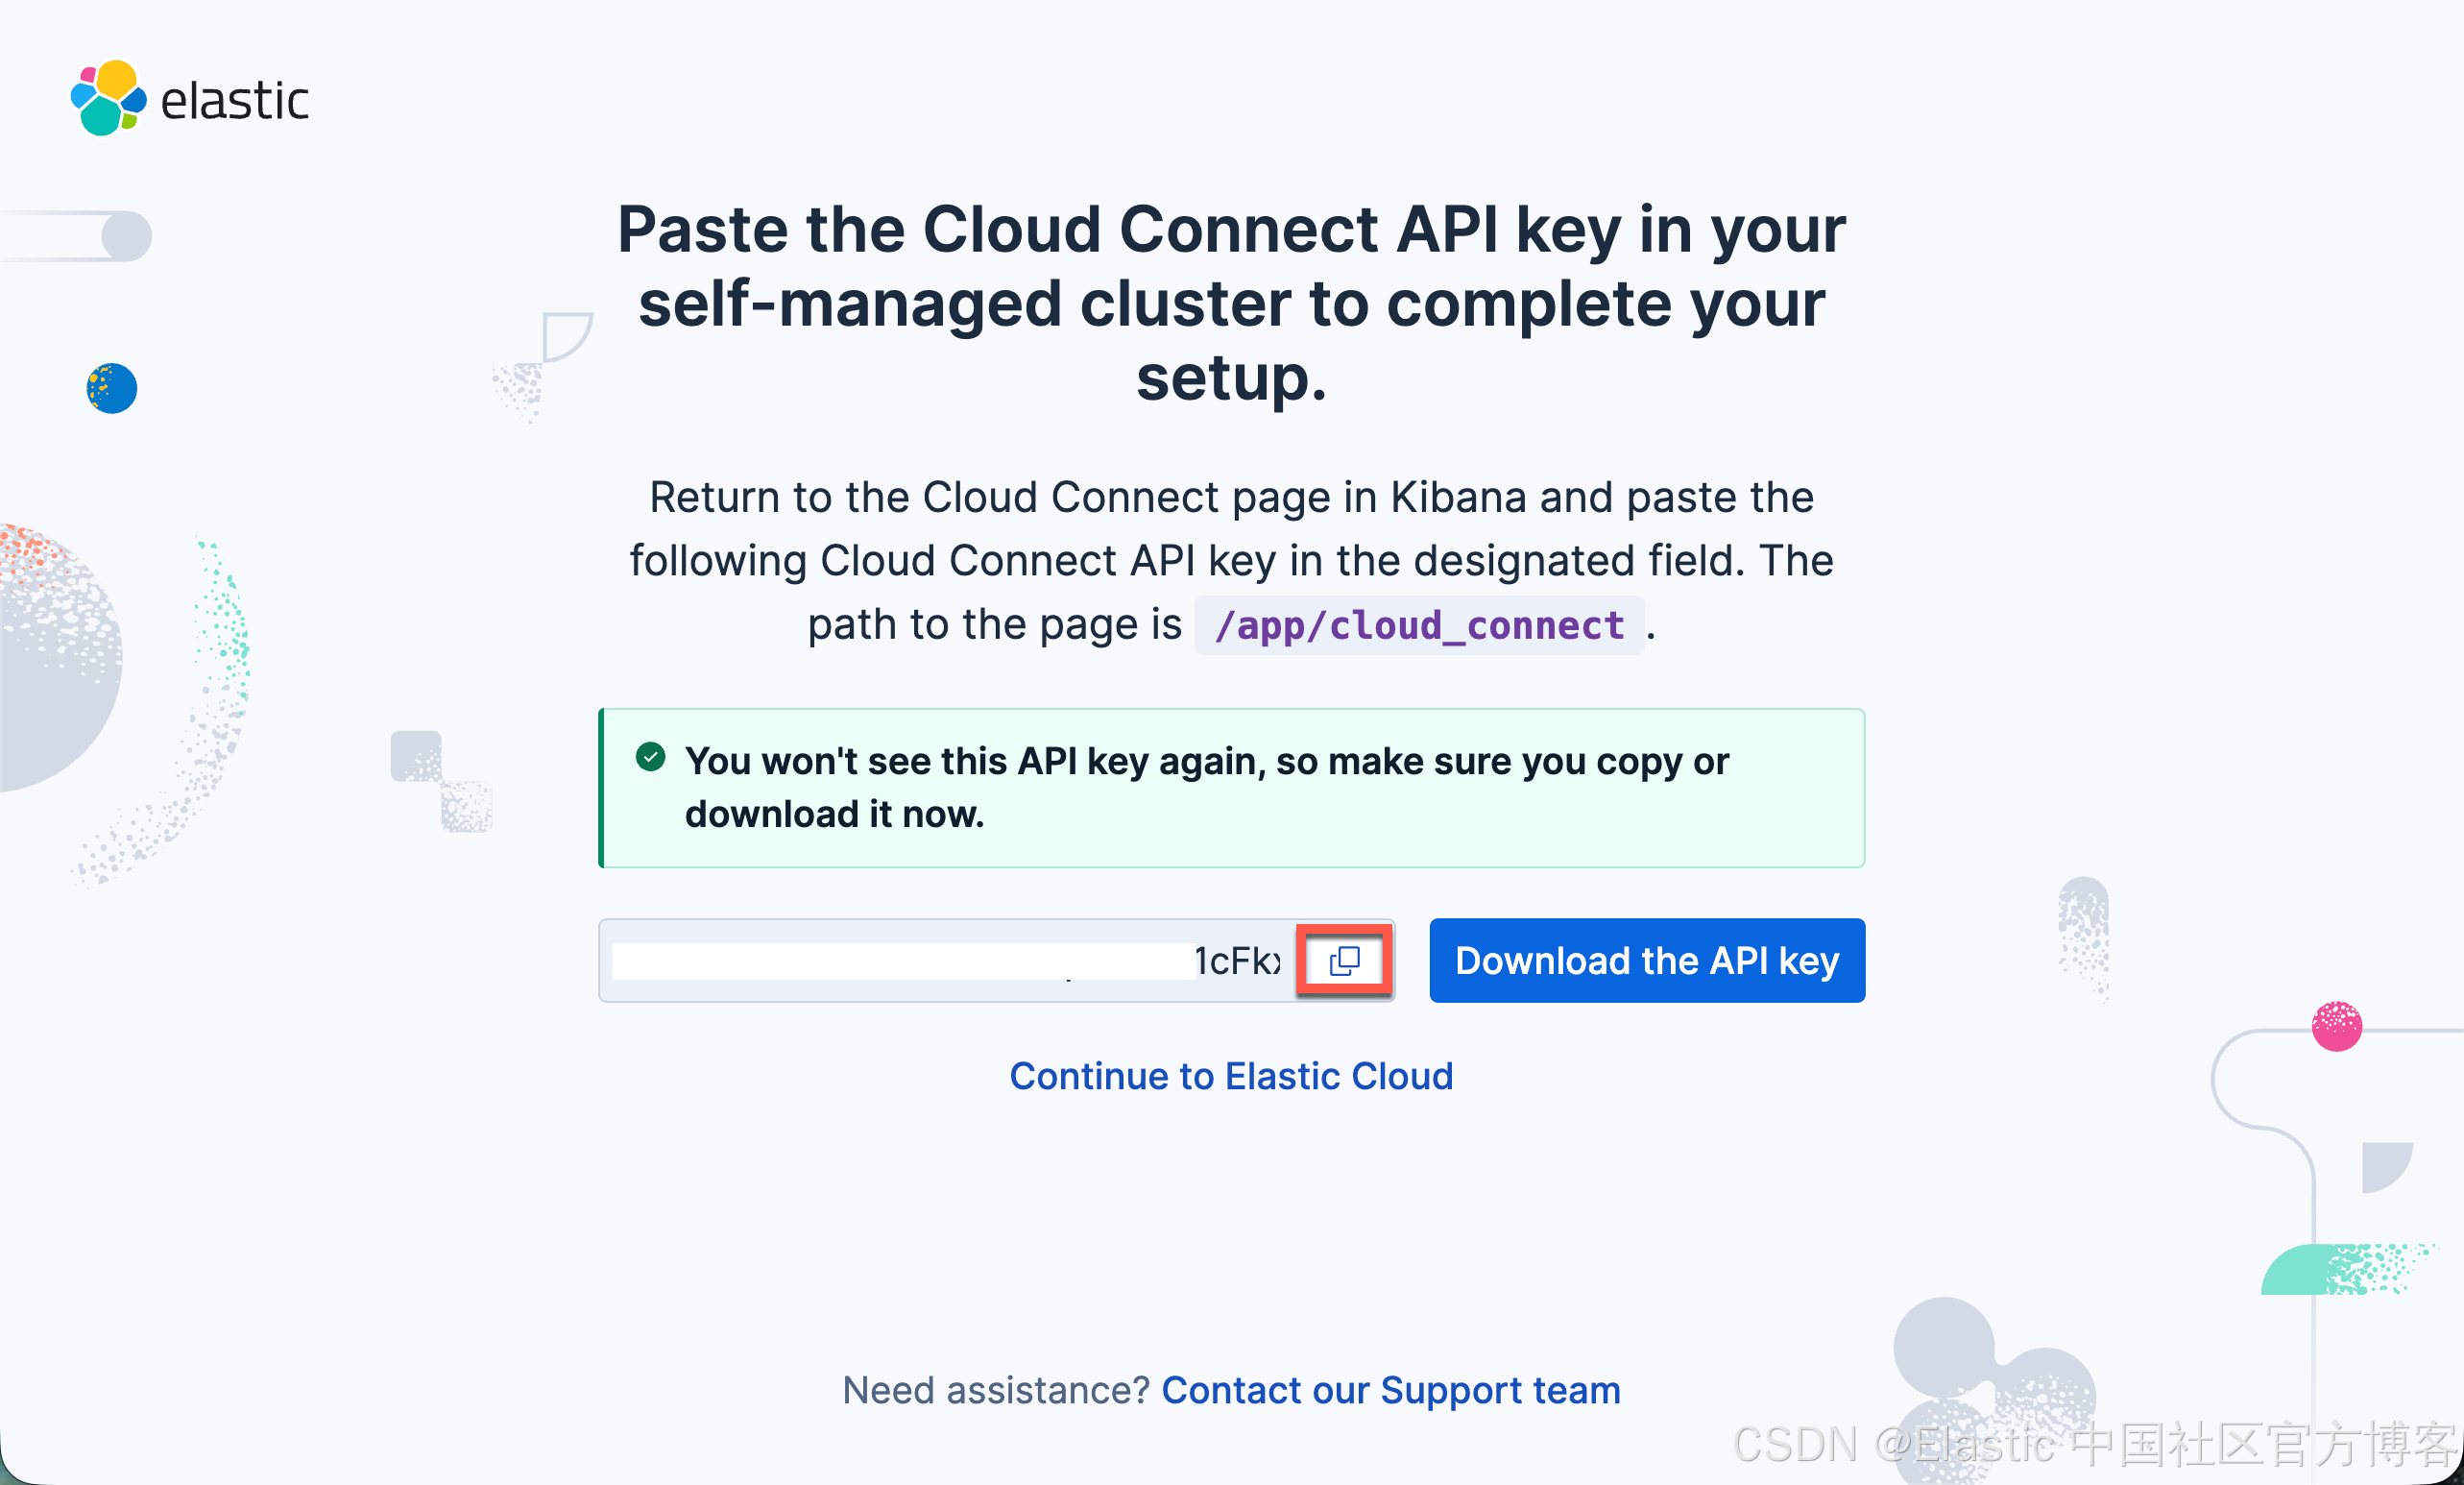
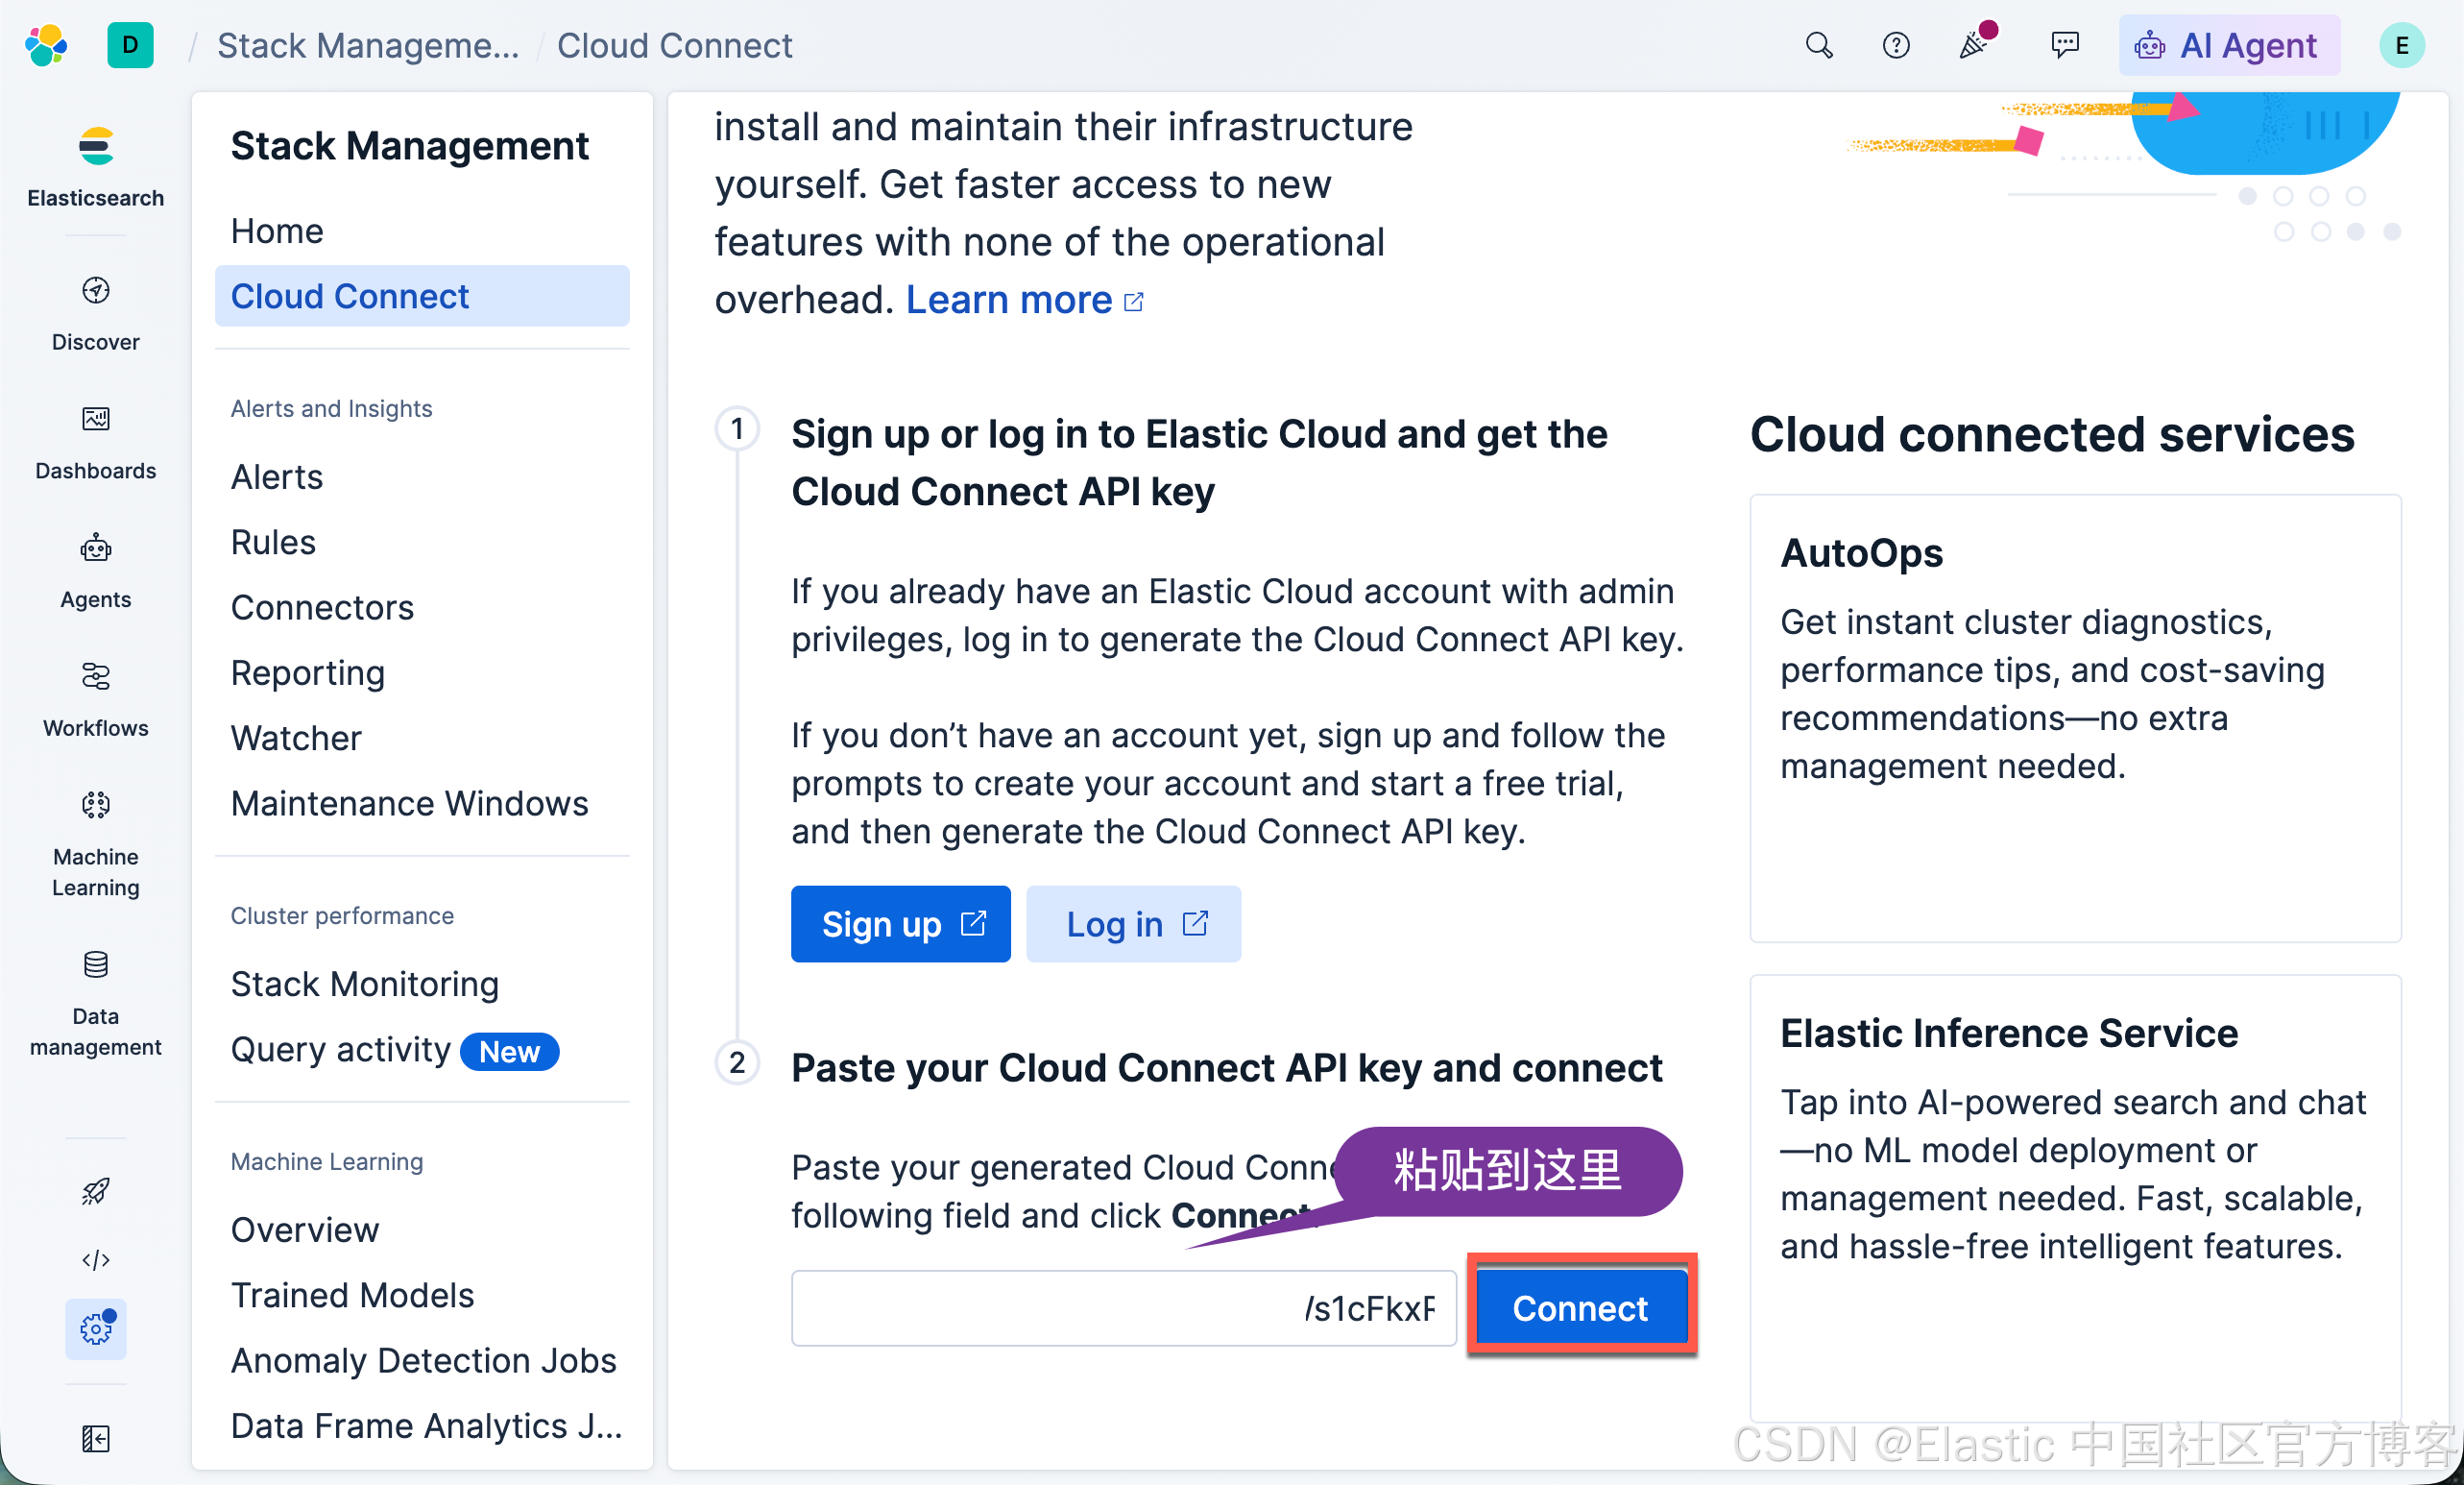
我们再回到 Agents 页面:
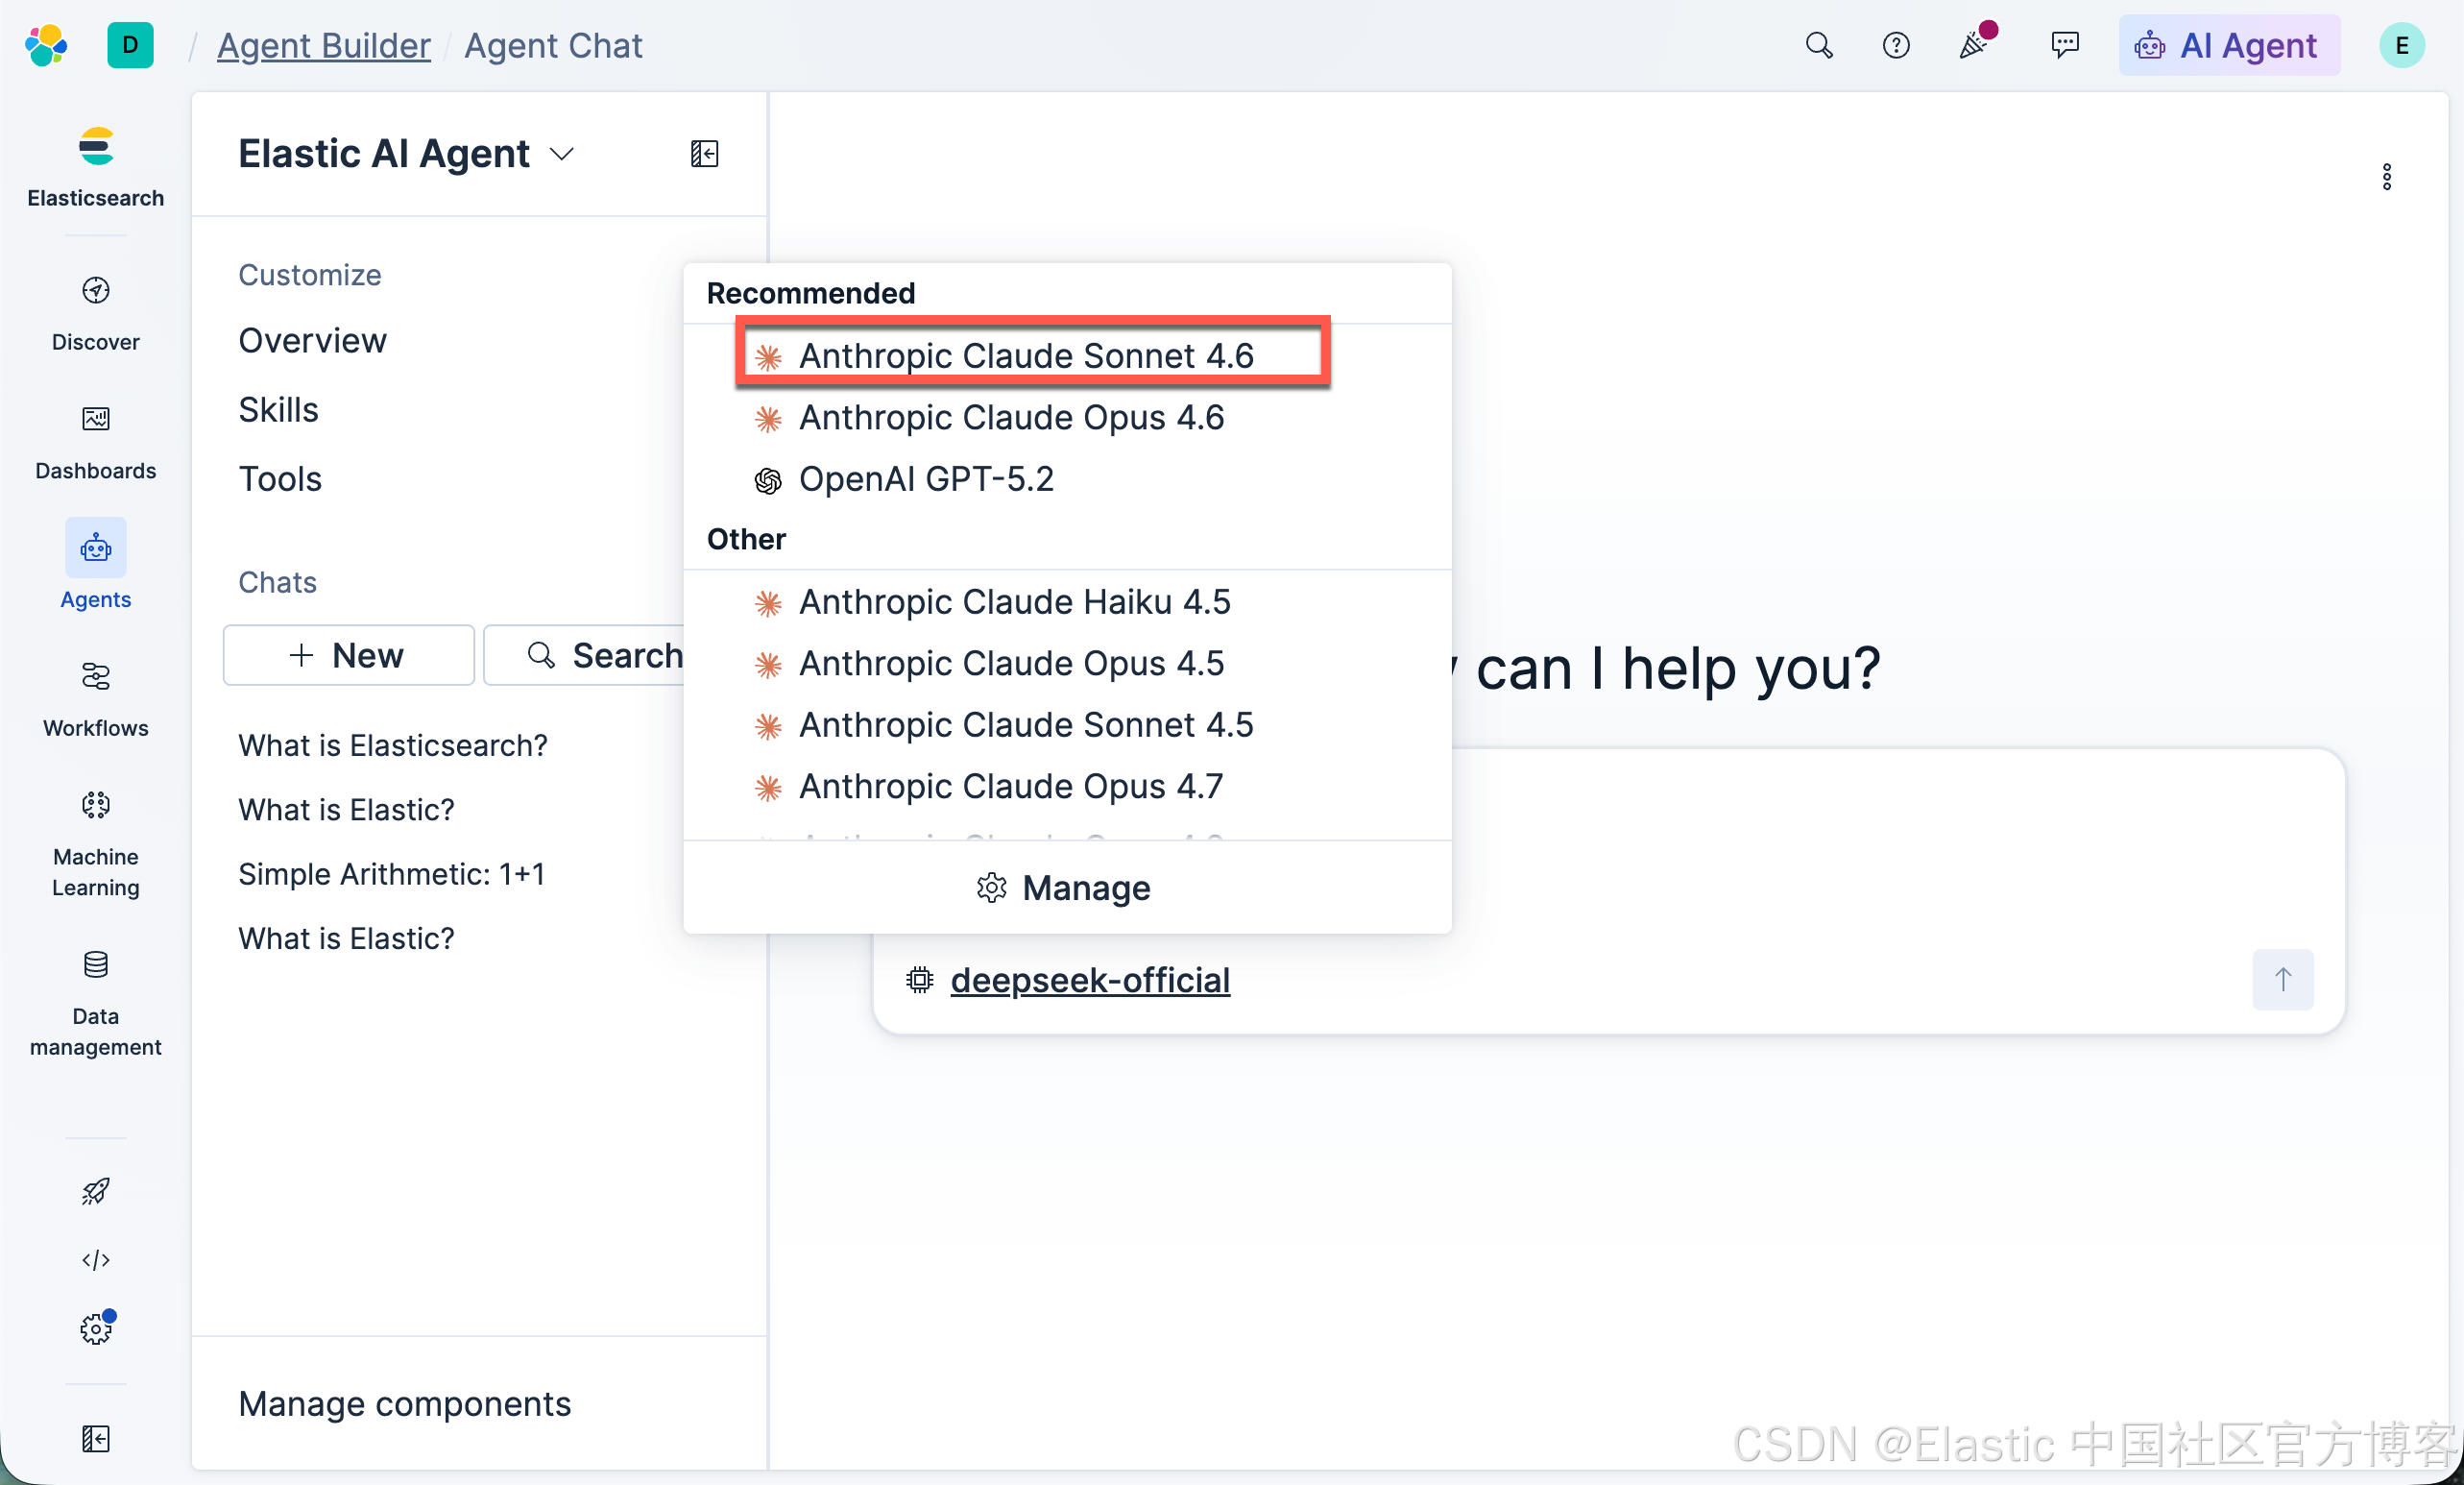
这次我们可以看到更多的模型可以供选择:
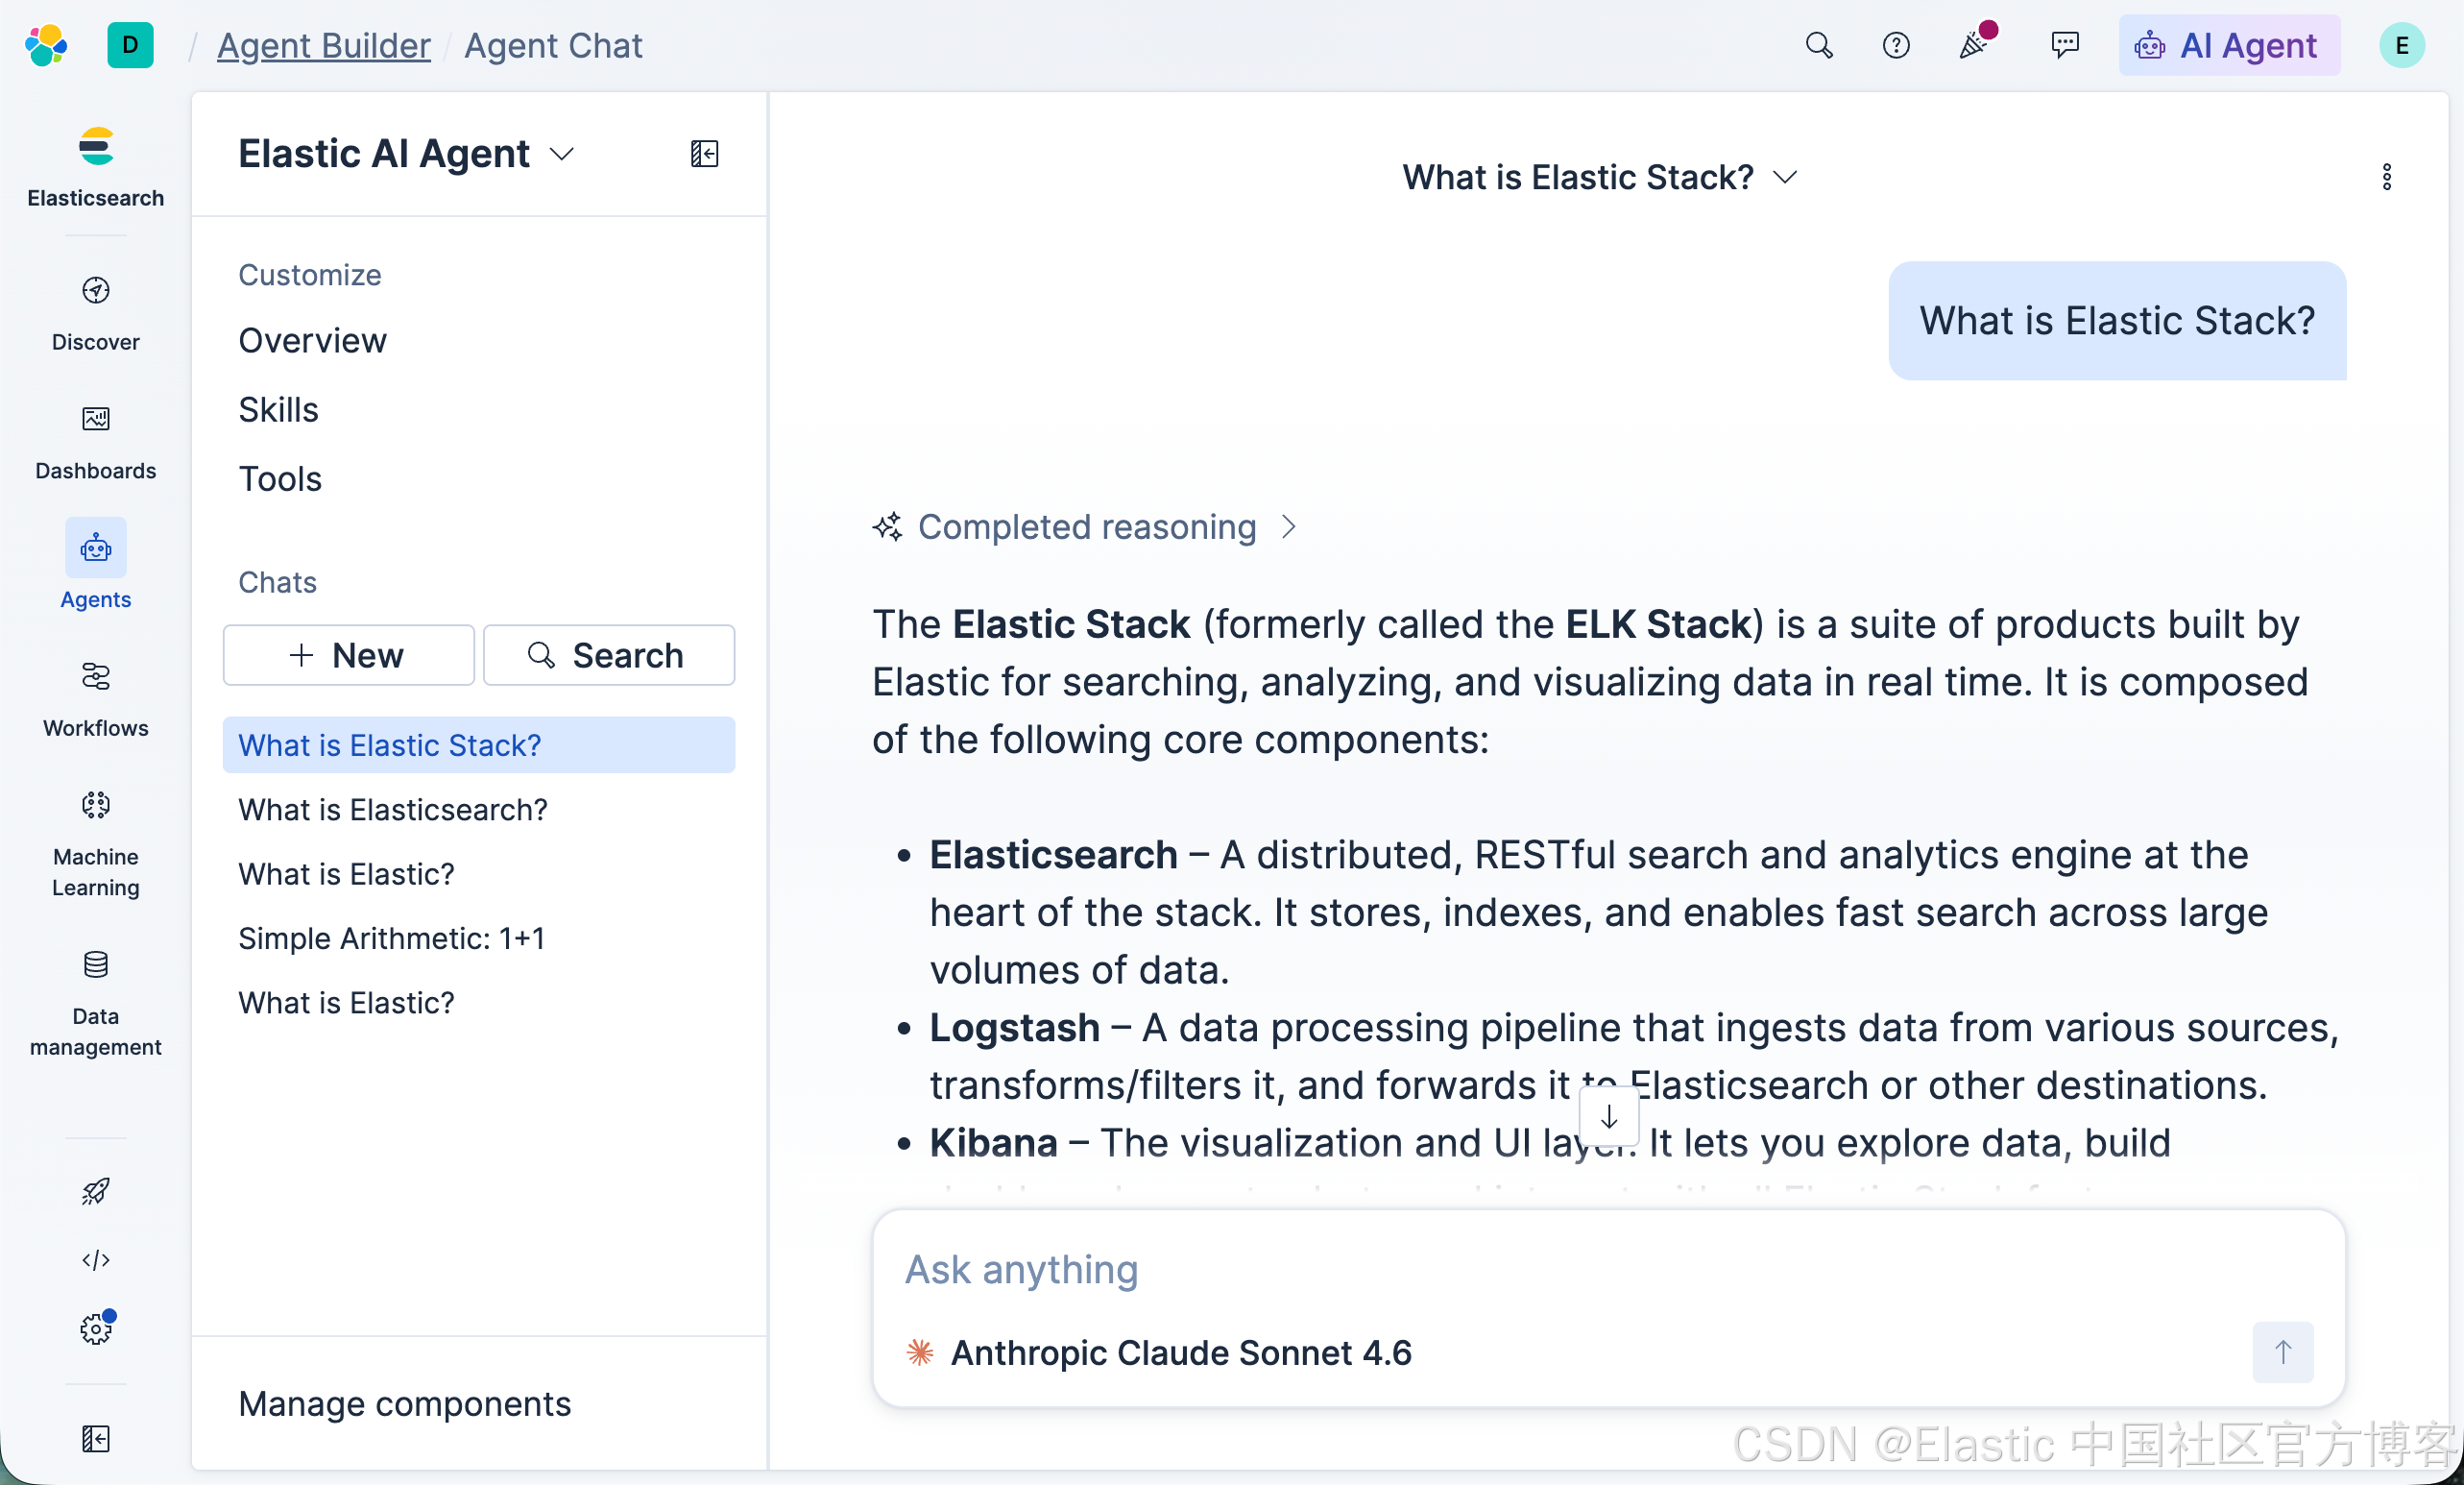
很显然,我们的配置是成功的。
更多有关 Cloud Connect 的知识,请参考文章 “跳过 MLOps:通过 Cloud Connect 使用 EIS 为自管理 Elasticsearch 提供托管云推理”。
下在 E5 嵌入模型
这个部分是可选的。如果你的应用需要用到向量嵌入模型,那么你可以下载 E5 嵌入模型,并使用它做向量搜索。具体的步骤如下:
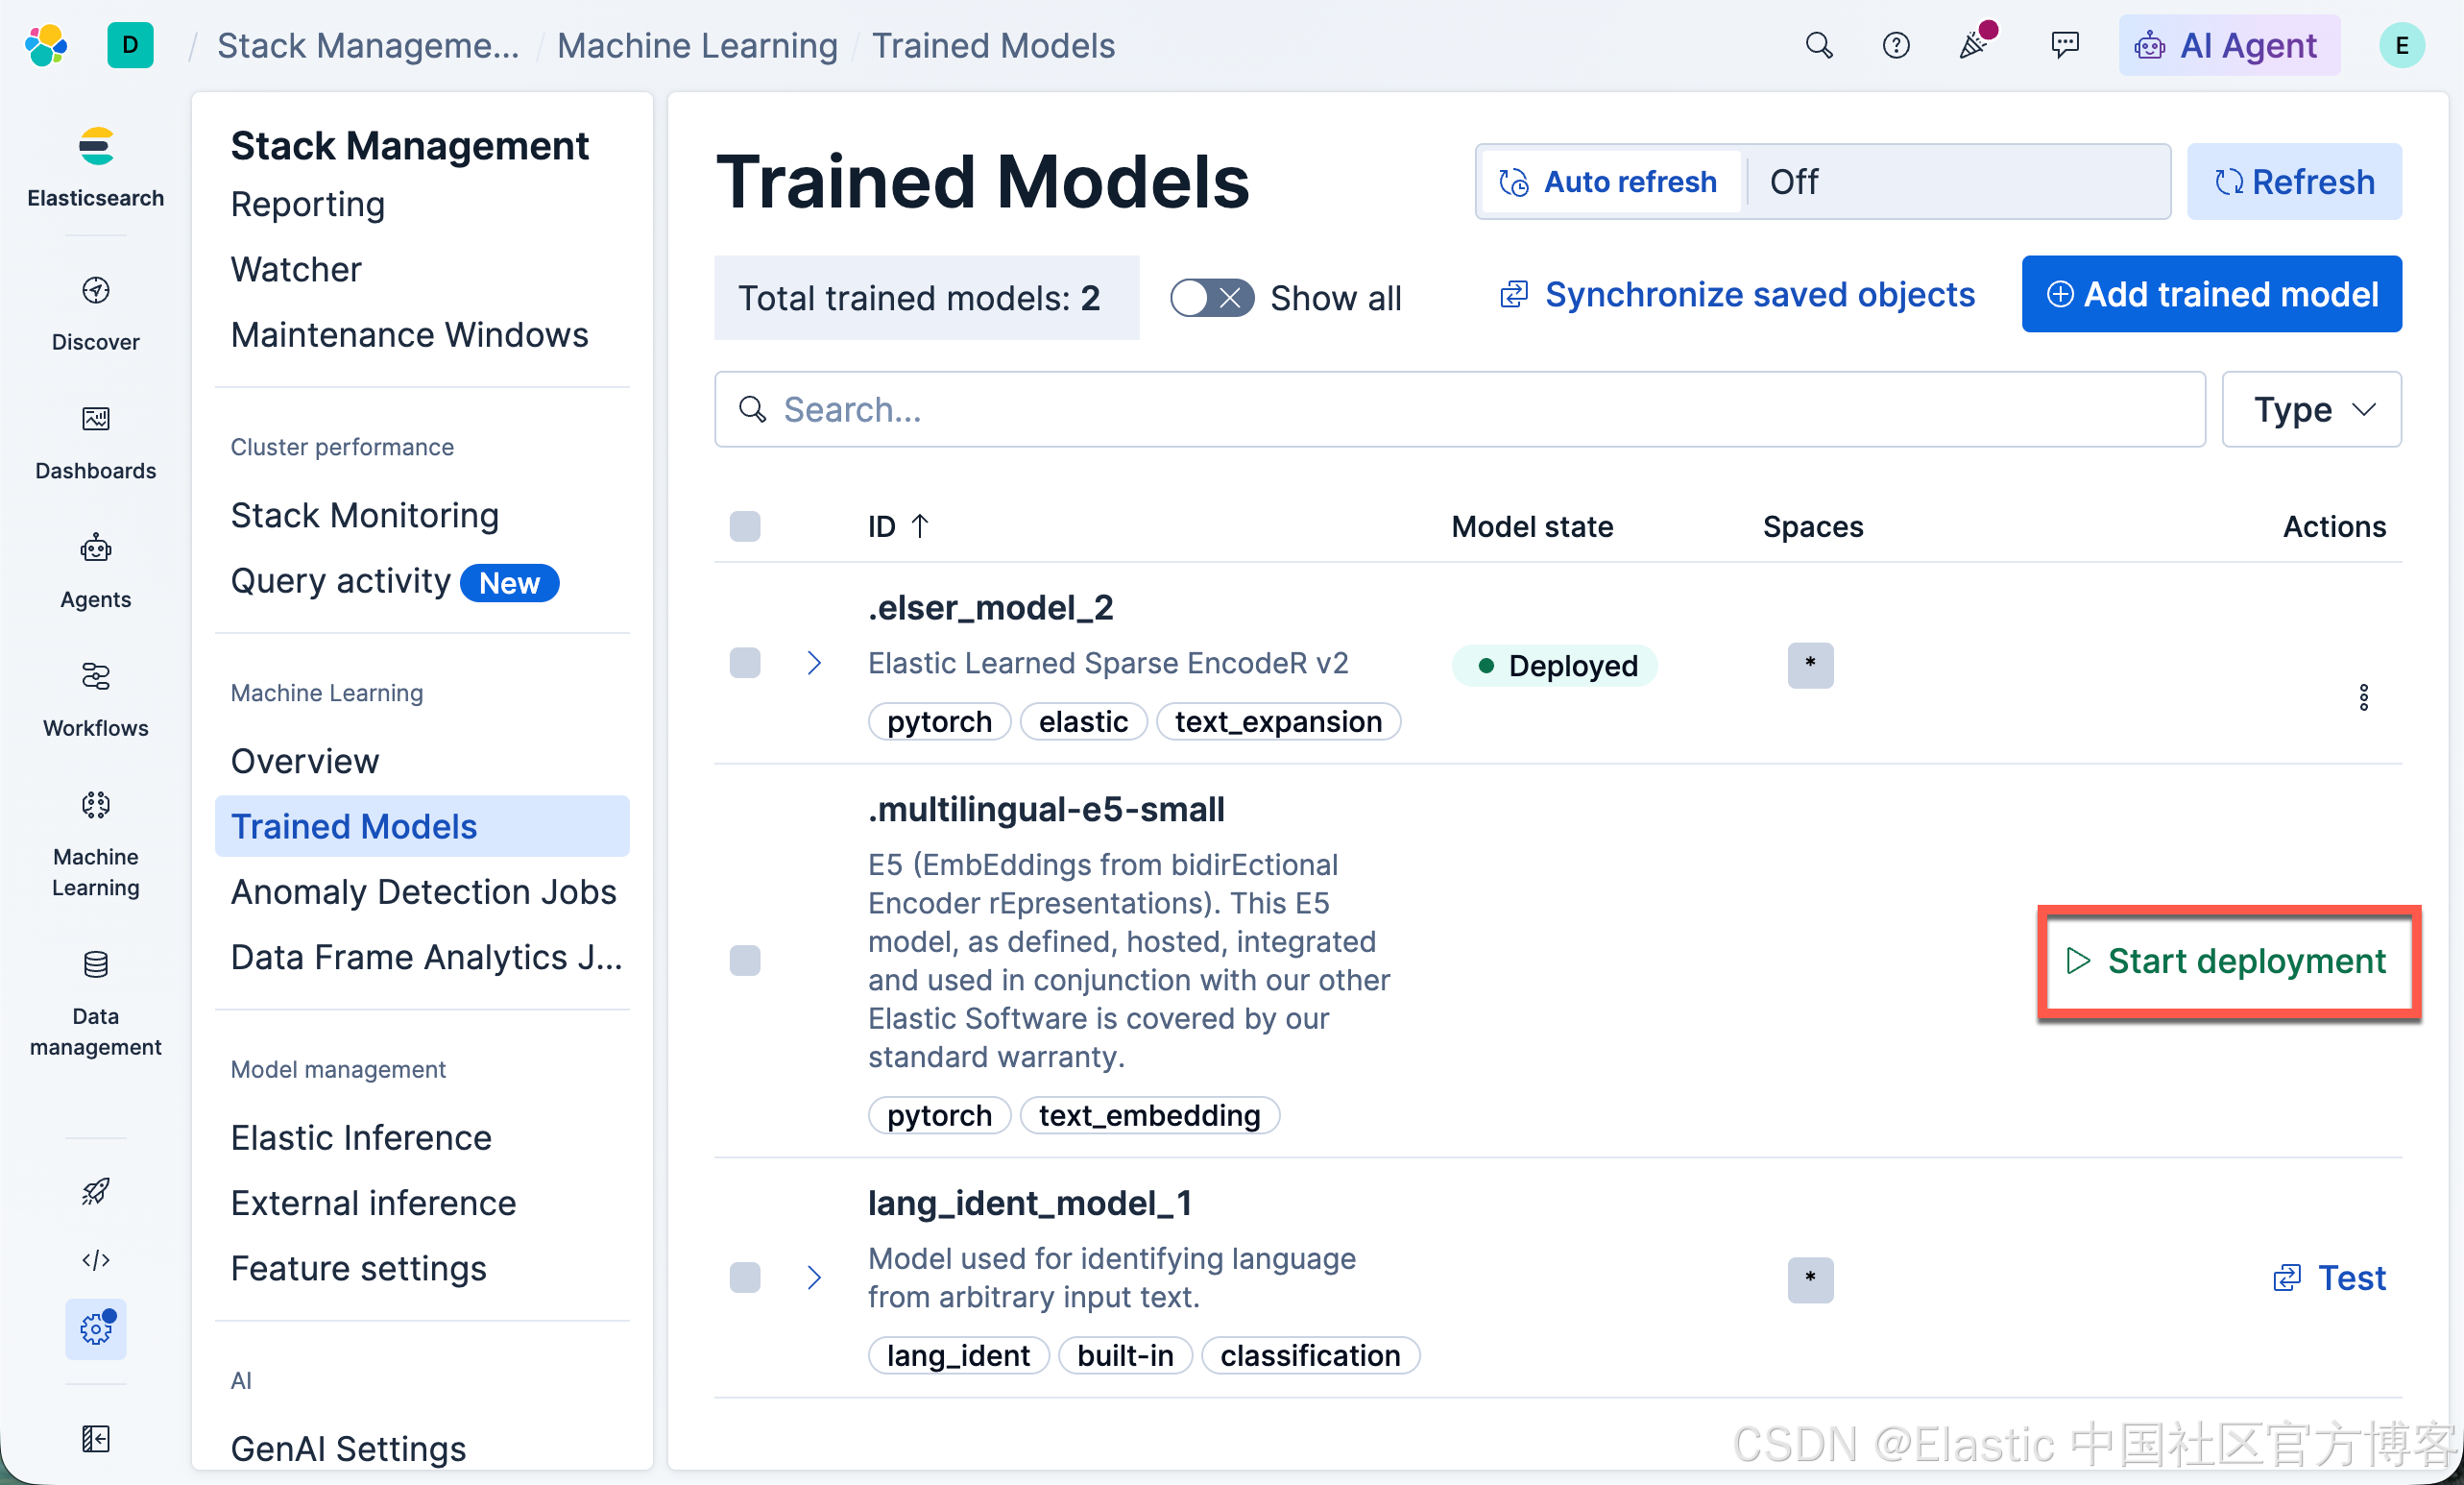
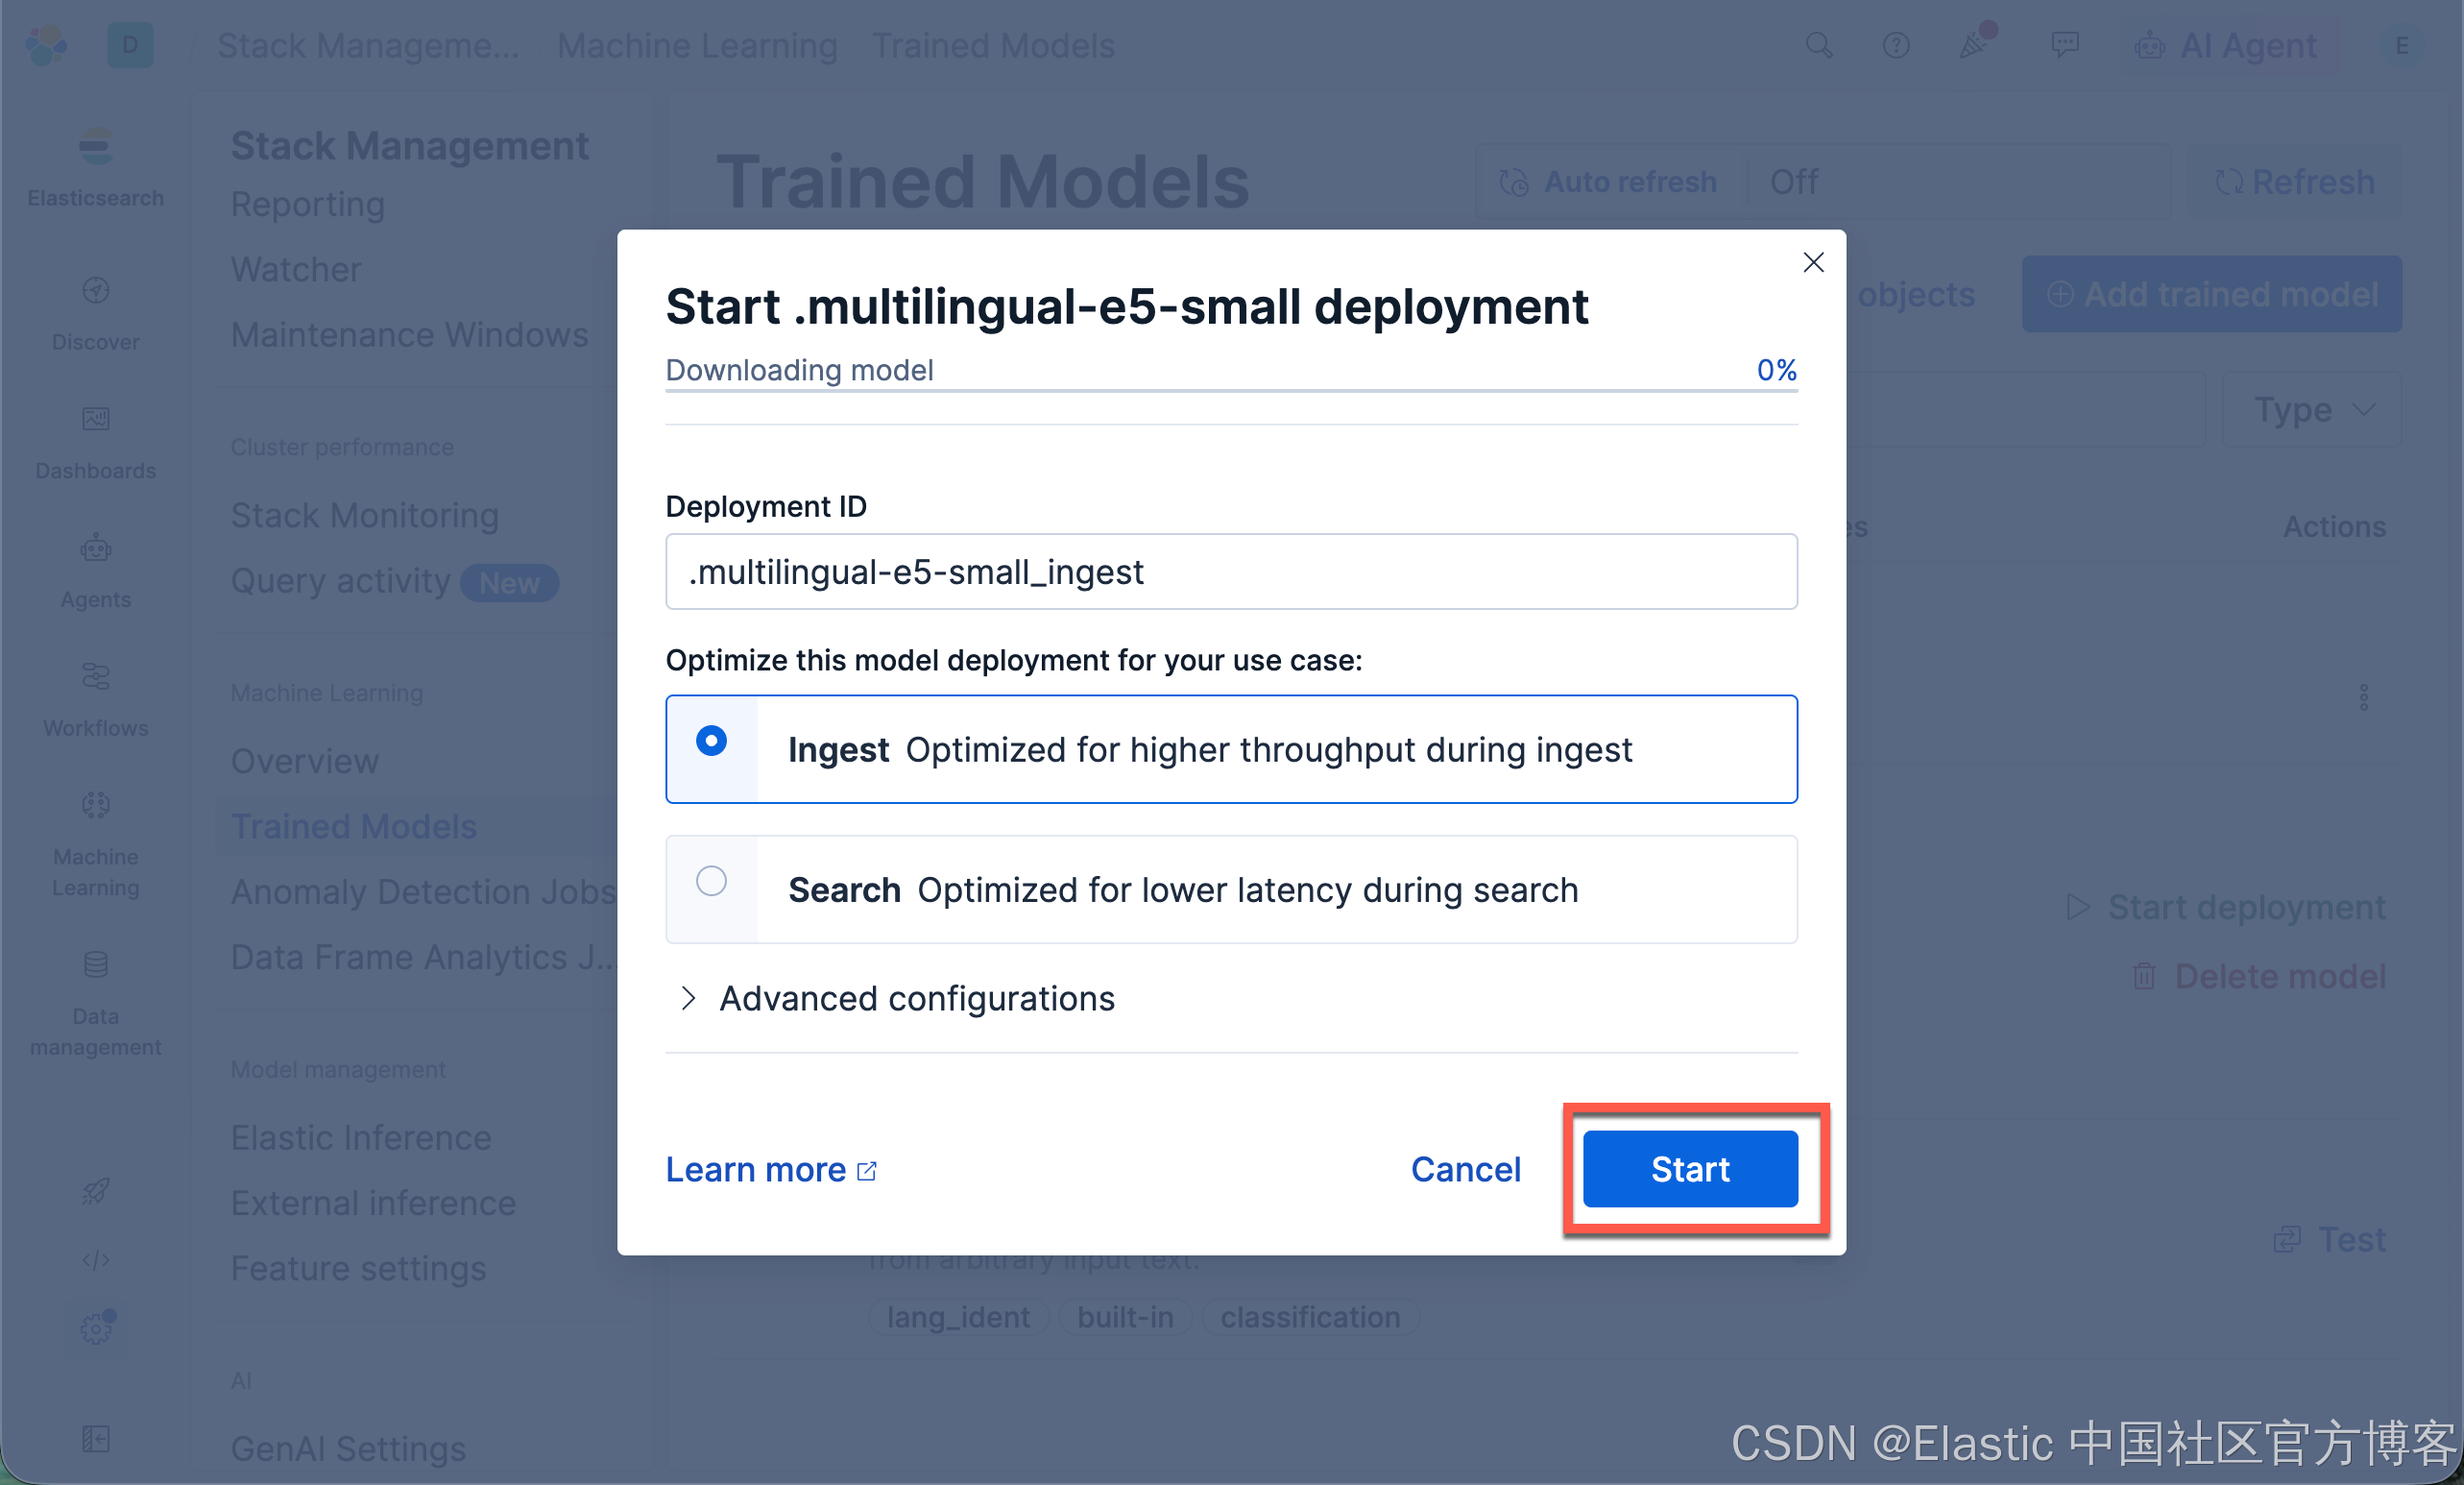
下周的速度依赖于你的网络速度:
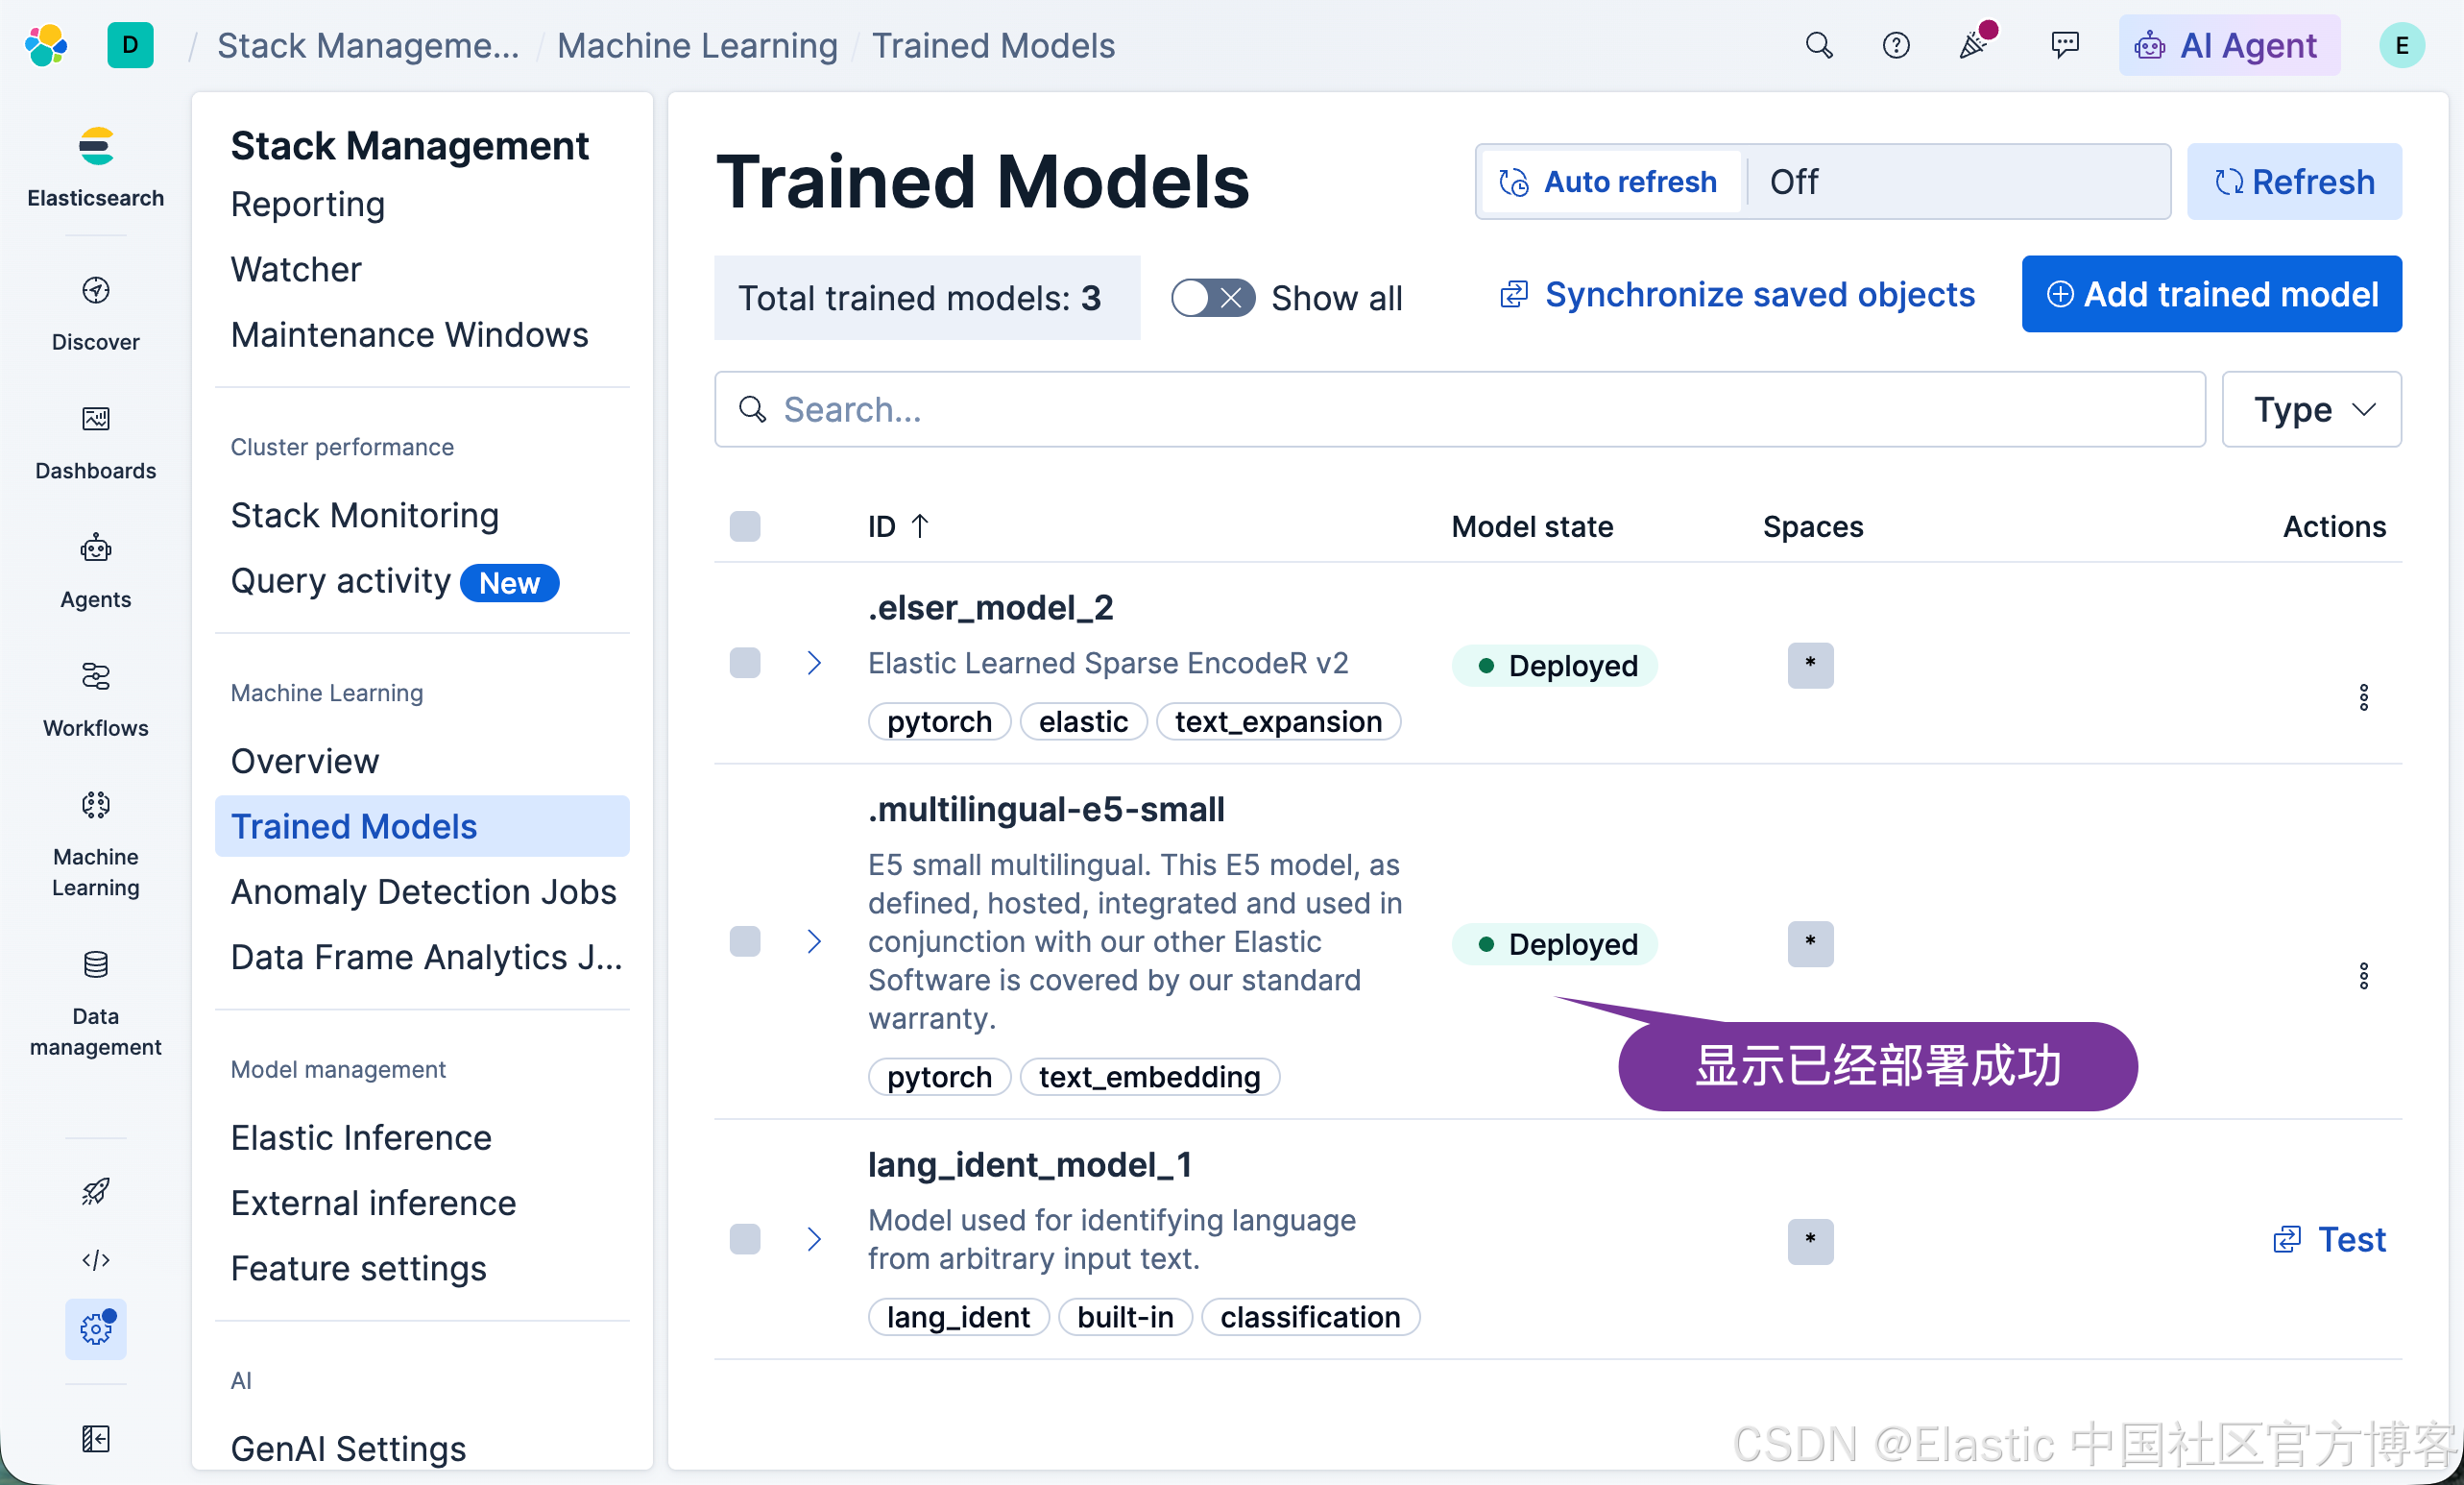
我们可以使用如下的命令来查看:
GET _inference/_all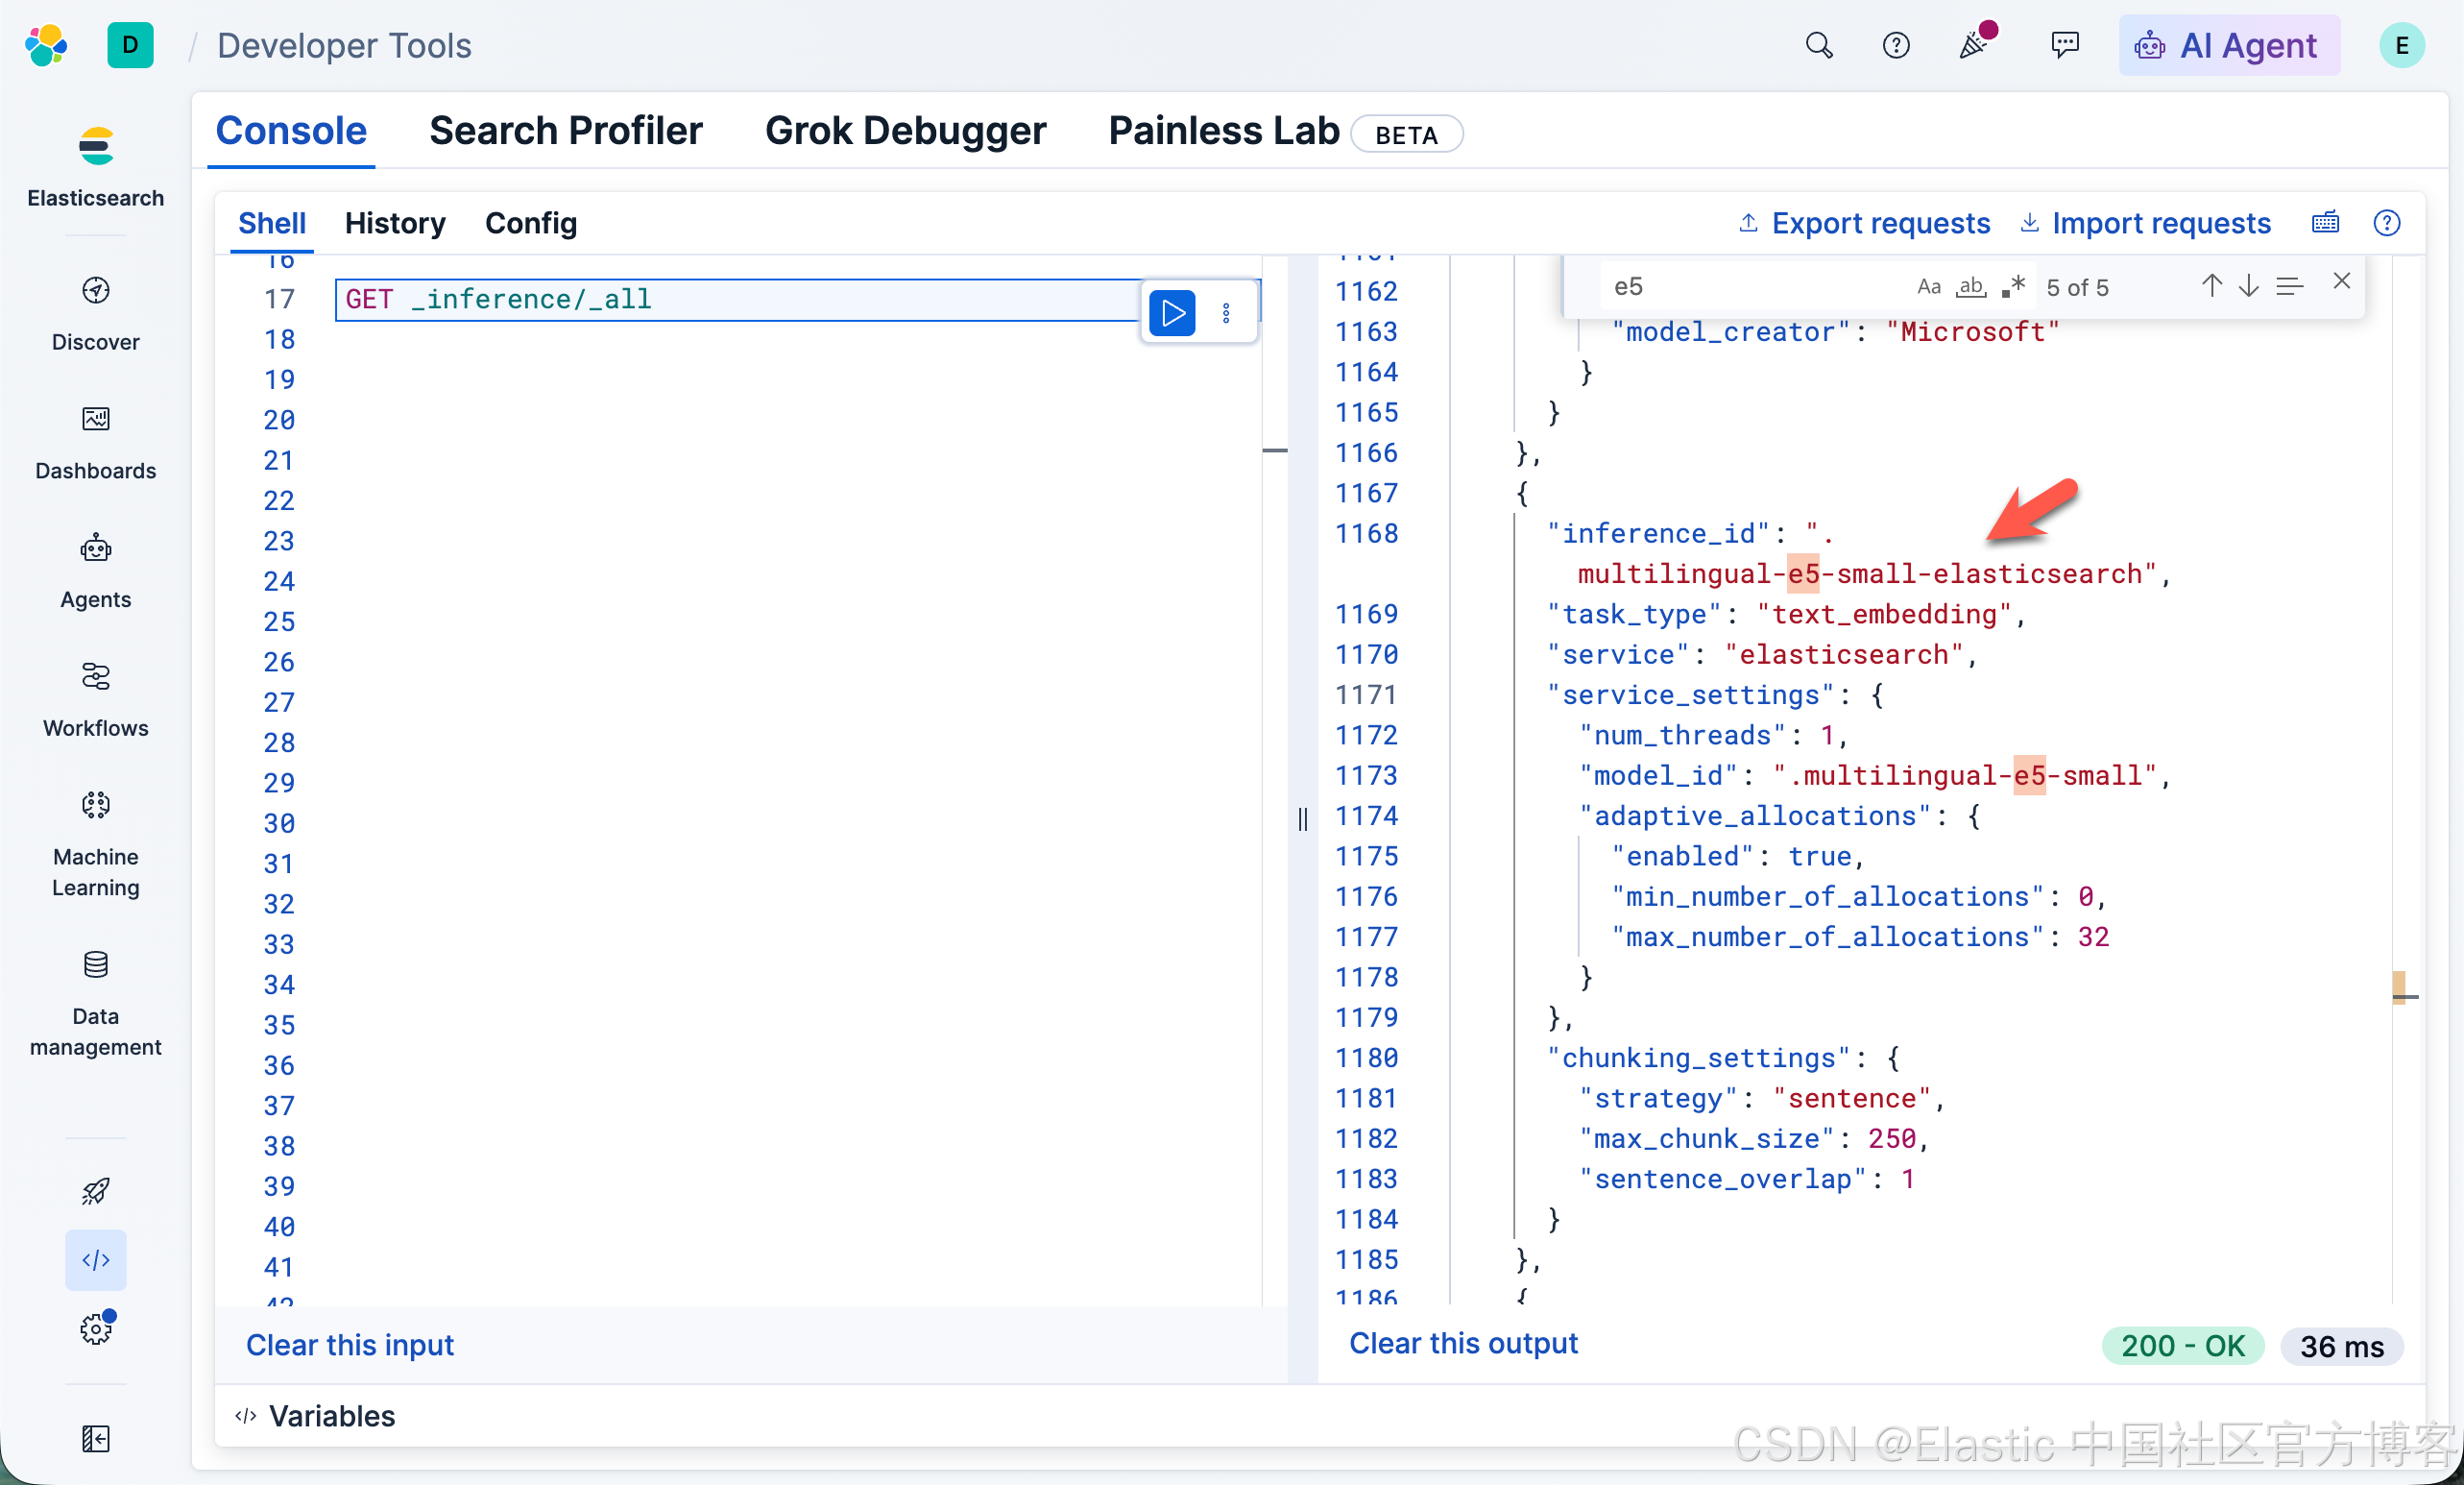
我们也可以使用如下的名来查看一下它是否工作:
POST _inference/.multilingual-e5-small-elasticsearch
{
  "input": "The sky above the port was the color of television tuned to a dead channel."
}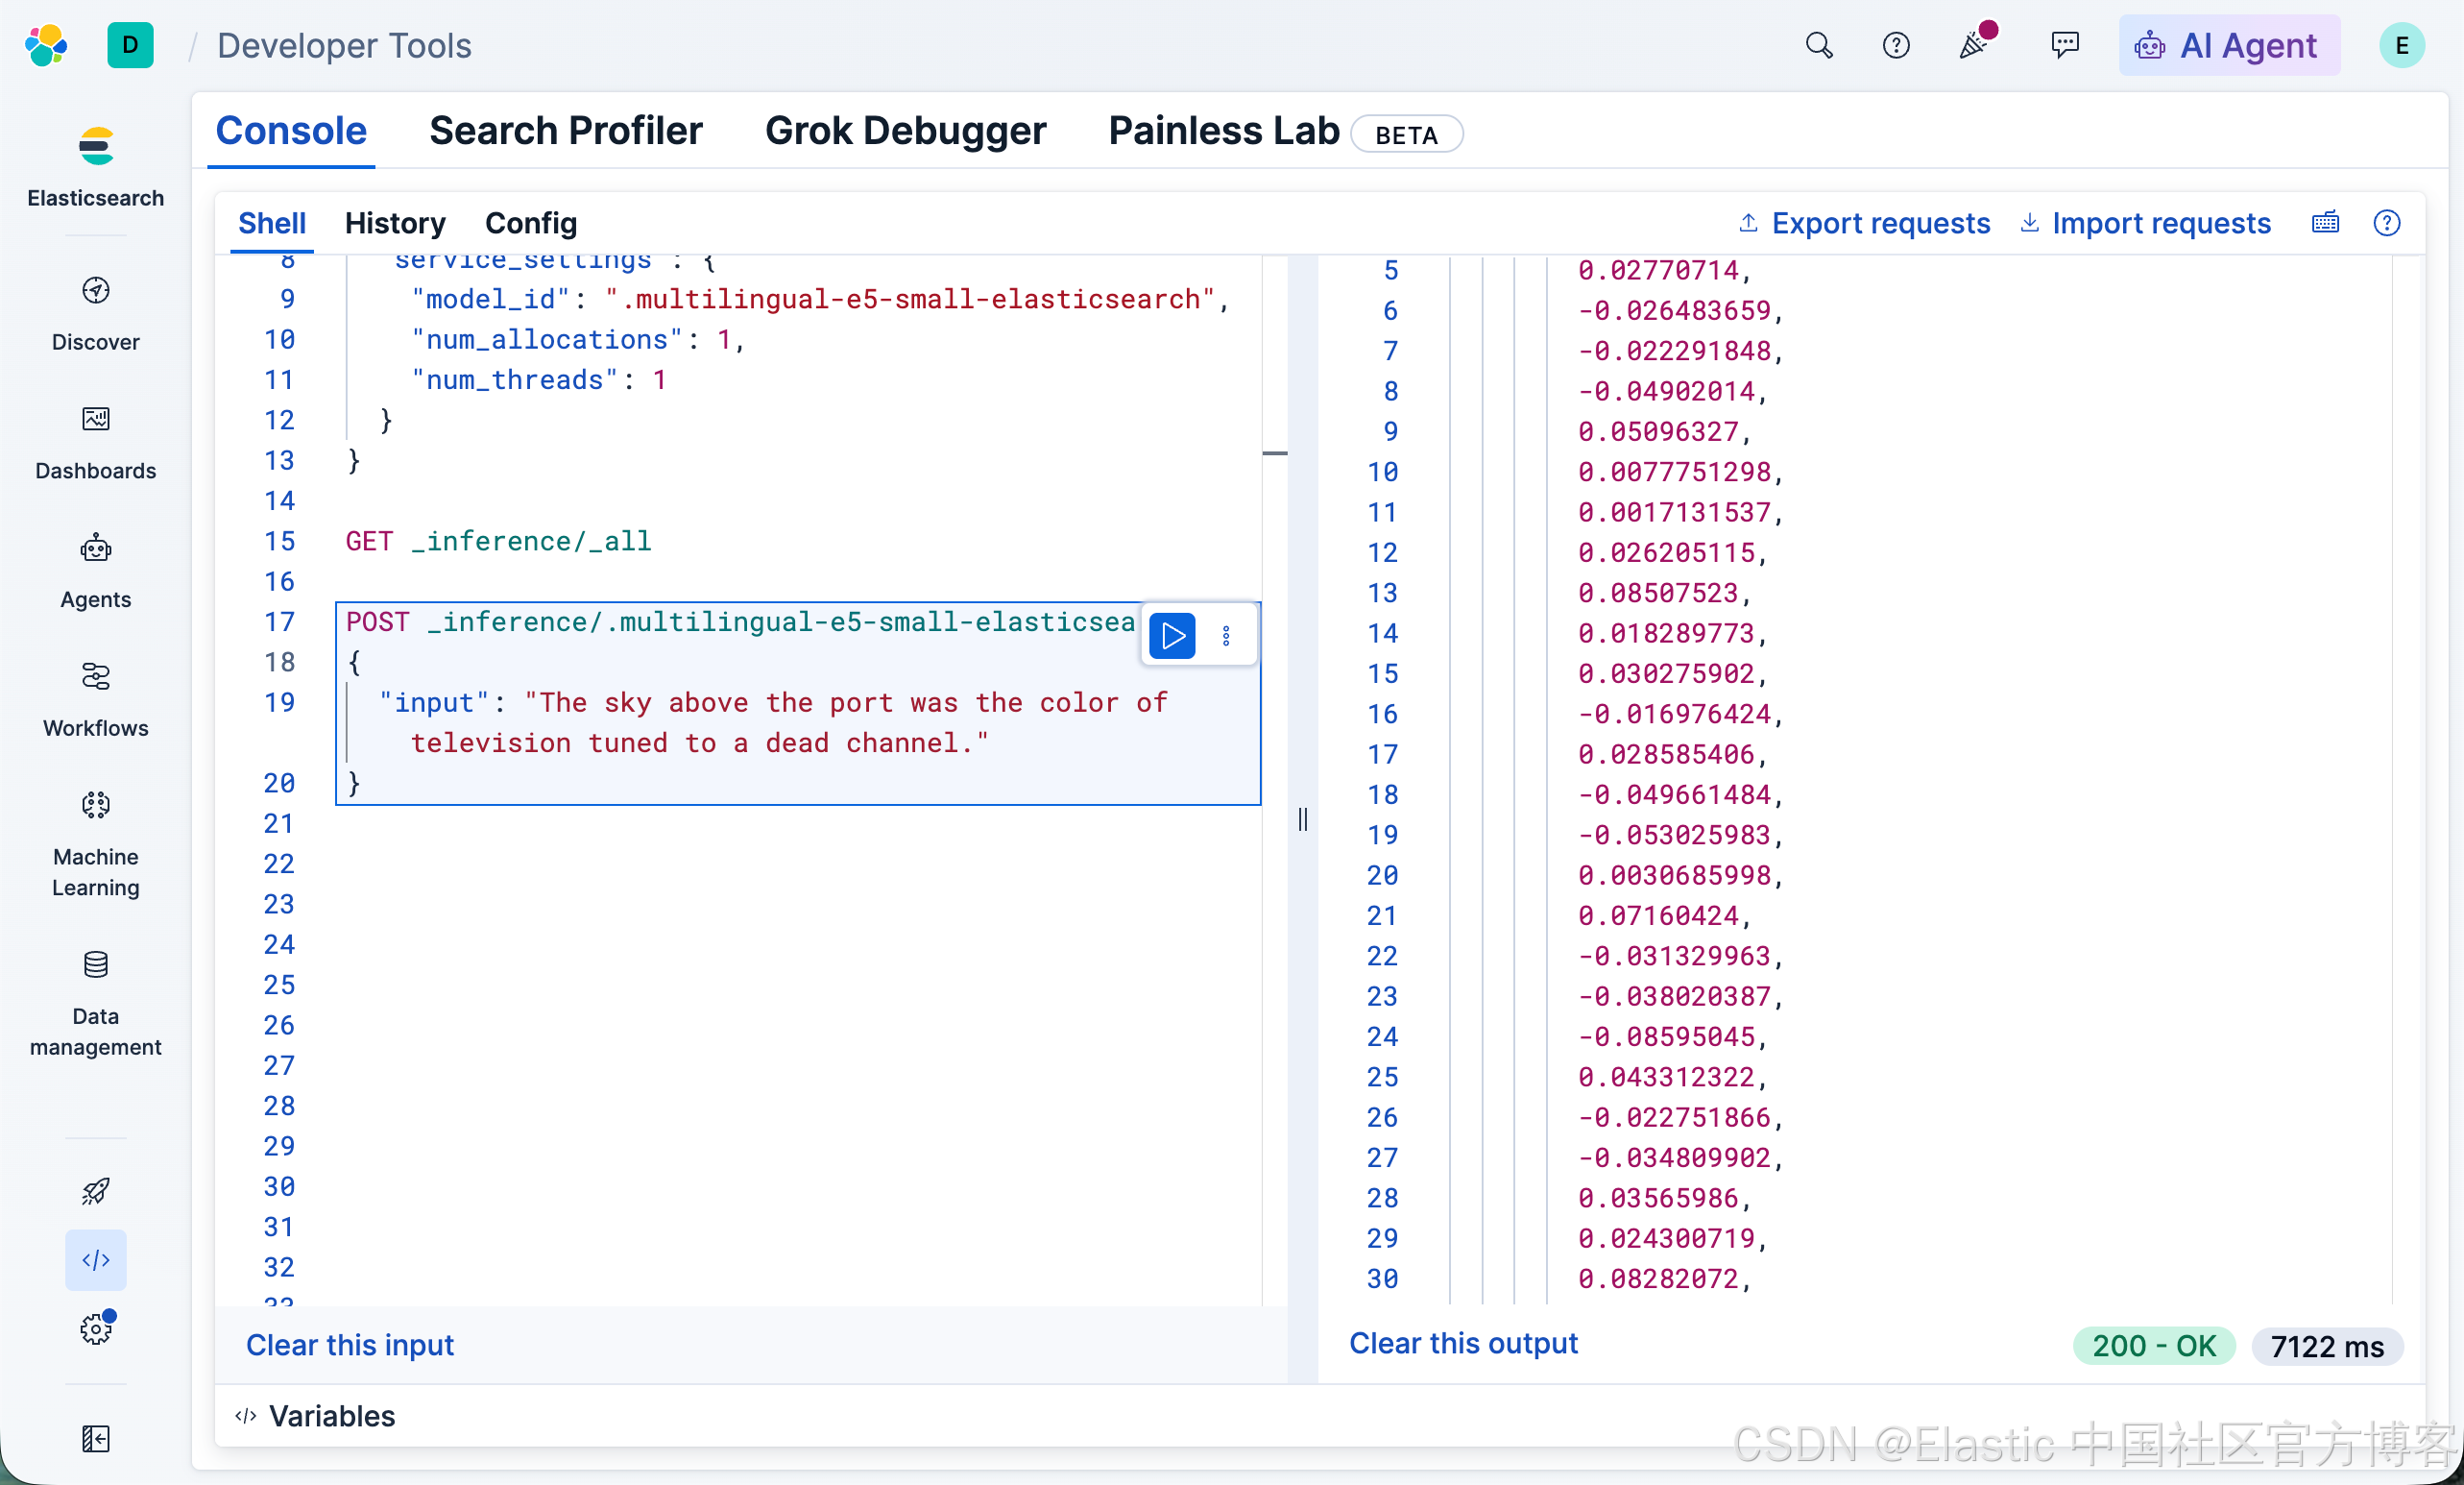
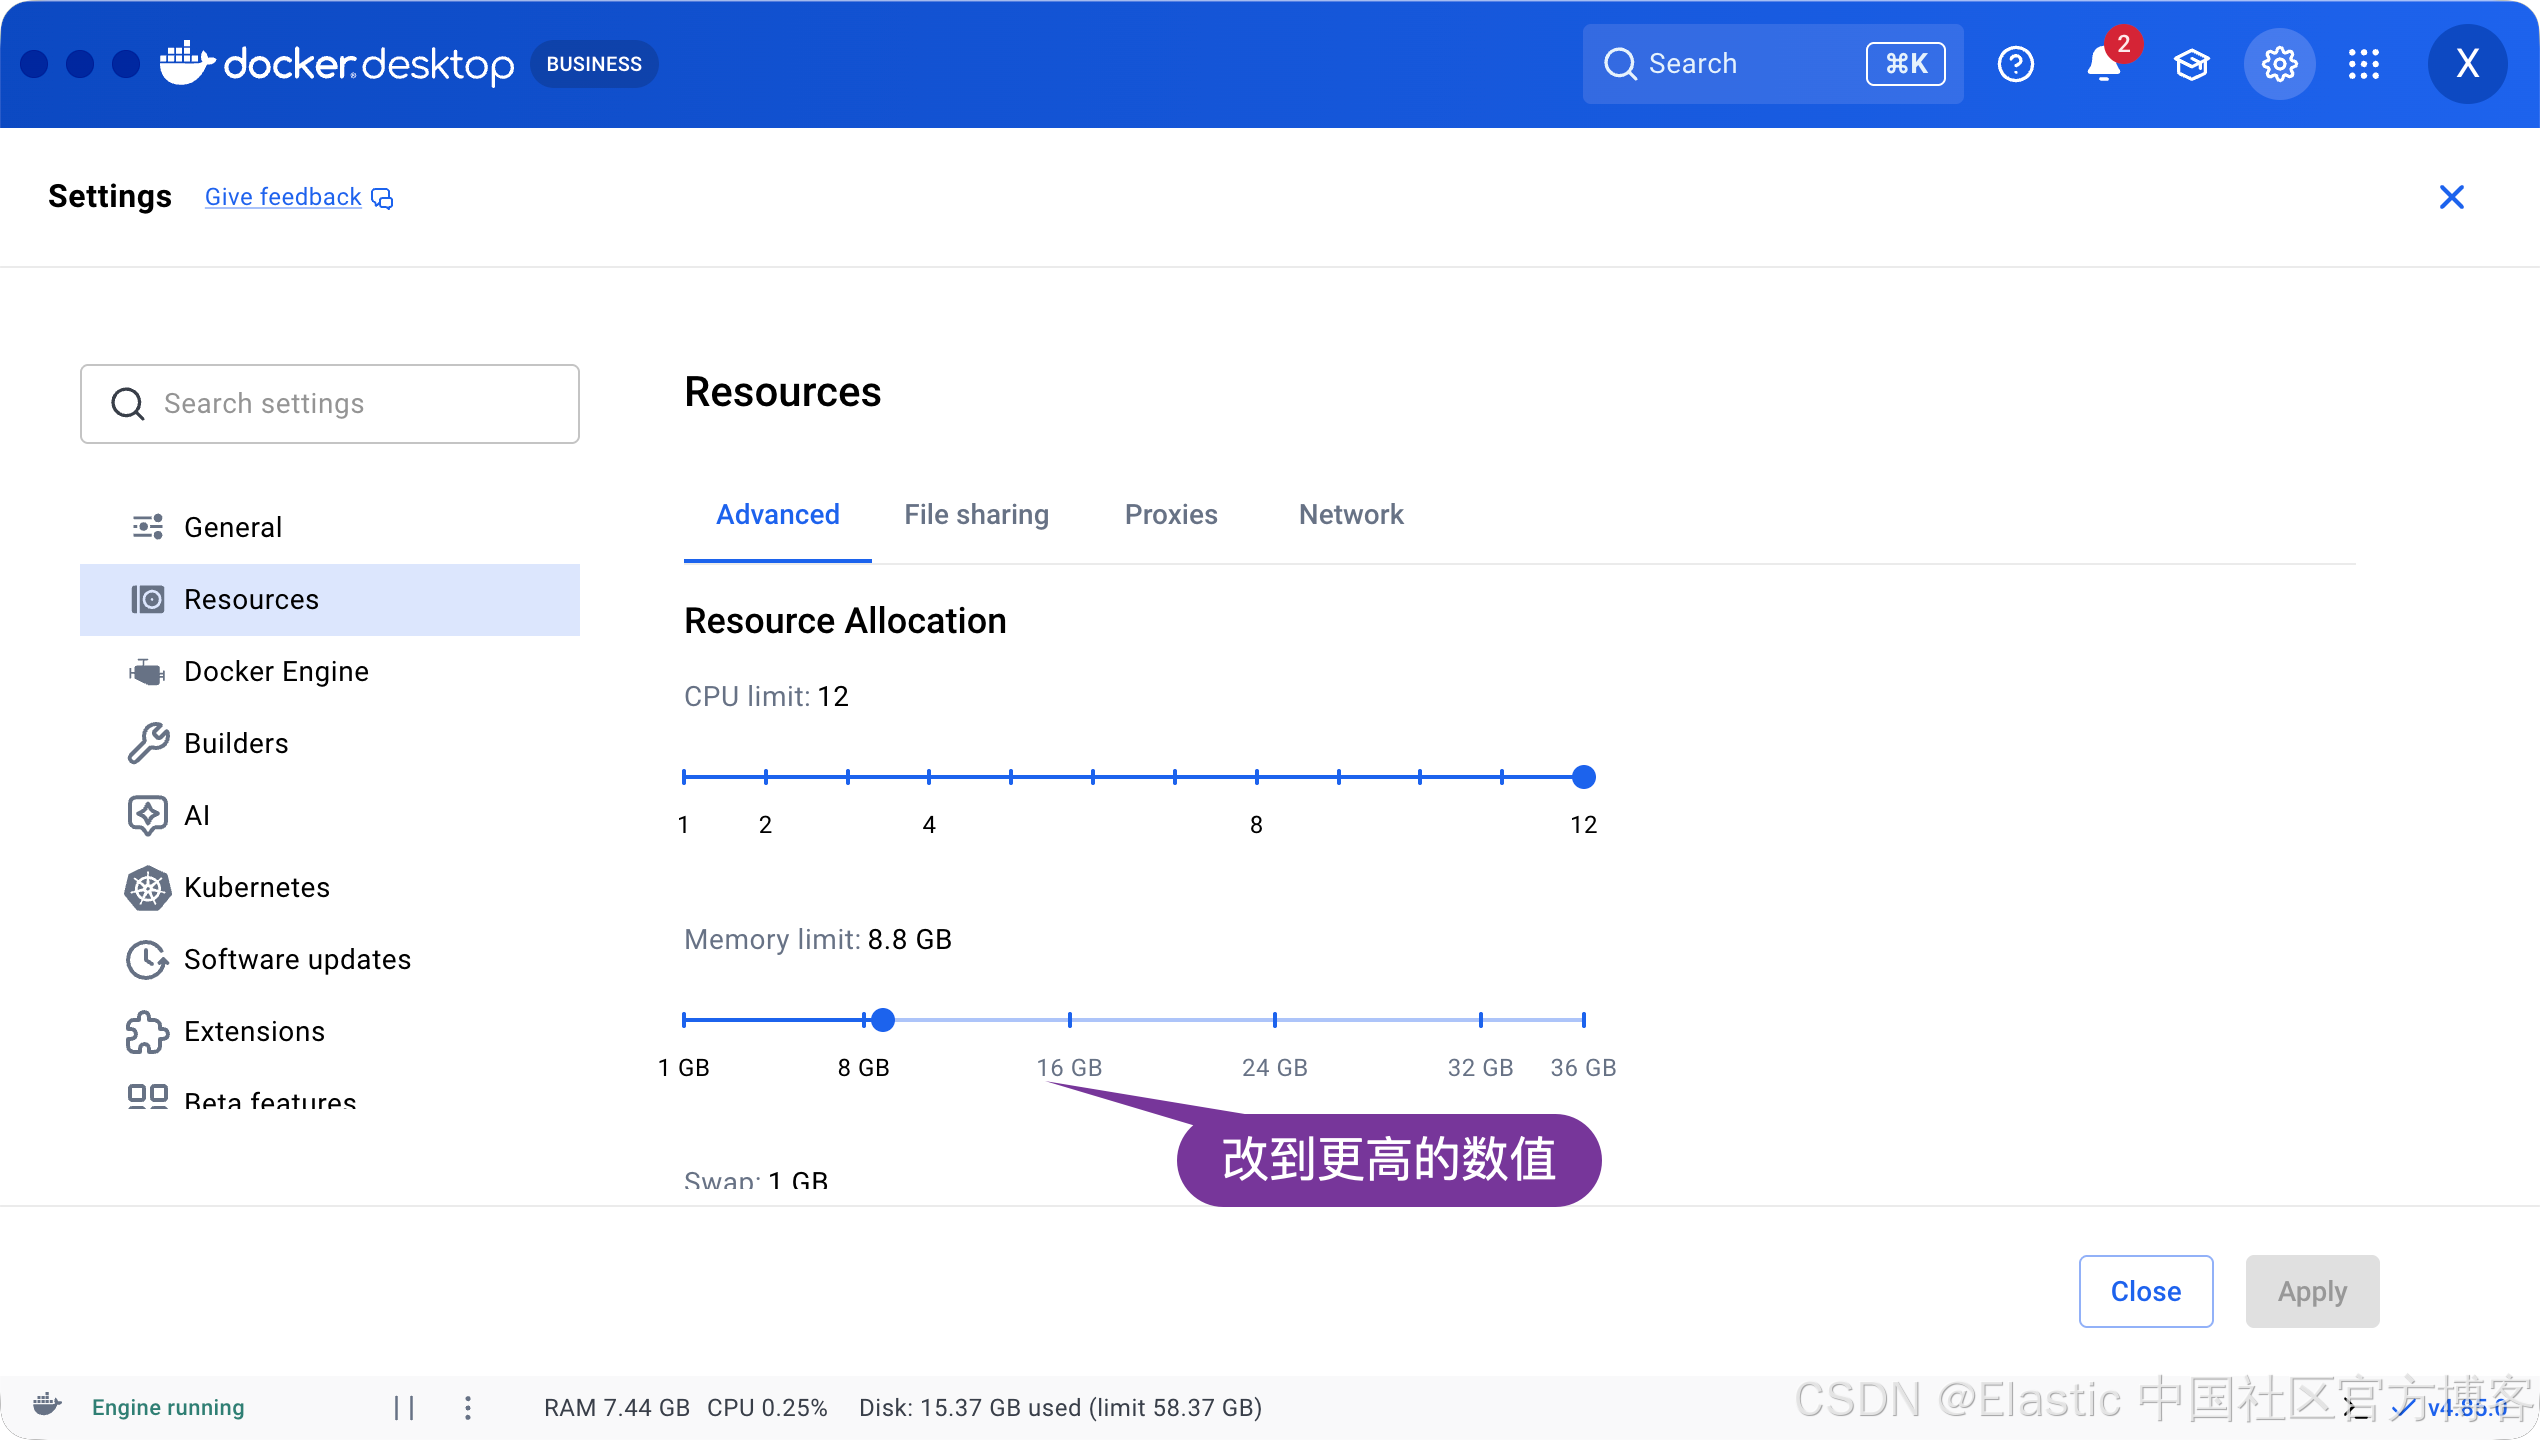
上面显示它是工作的。如果你遇到 ML 不能启动的问题,那么可能就是你的 Docker Desktop 限制了你的内存大小。你可以尝试调整如下的参数:
写入数据到 Elasticsearch 中
我们参考文章 “如何写入 IMDB 电影数据并针对它运用 AI Agent Builder 对它进行分享”。我们使用它里面的 Python 代码写入数据:.
.env
ES_URL="http://localhost:9200"
ES_API_KEY="RUk1Mnk1OEJnUjJZeWxGLXBza3o6TlRKUVpRaHIyLUd0NGpOMk1IbkdUZw=="注意:我们可以从刚开始安装 Elastic Stack 输出的部分找到上面的 ES_API_KEY 的值。当然,我们也可以自己去创建一个新的 API key。
ingest_imdb.py
#!/usr/bin/env python3
"""Ingest imdb_movies.csv into Elasticsearch, using connection settings from .env."""

import csv
import os
import sys
import urllib3

from dotenv import load_dotenv
from elasticsearch import Elasticsearch
from elasticsearch.helpers import bulk, BulkIndexError
from elastic_transport import TlsError

INDEX_NAME = "imdb"
CSV_PATH = os.path.join(os.path.dirname(os.path.abspath(__file__)), "imdb_movies.csv")
BULK_CHUNK_SIZE = 50
REQUEST_TIMEOUT = 300

INDEX_MAPPING = {
    "mappings": {
        "properties": {
            "budget_x": {"type": "double"},
            "country": {"type": "keyword"},
            "crew": {"type": "text"},
            "date_x": {"type": "keyword"},
            "genre": {"type": "keyword"},
            "names": {"type": "text"},
            "orig_lang": {"type": "keyword"},
            "orig_title": {"type": "text"},
            "overview": {"type": "text", "copy_to": ["overview_semantic"]},
            "overview_semantic": {
                "type": "semantic_text",
                "inference_id": ".multilingual-e5-small-elasticsearch",
                "model_settings": {
                    "service": "elasticsearch",
                    "task_type": "text_embedding",
                    "dimensions": 384,
                    "similarity": "cosine",
                    "element_type": "float",
                },
            },
            "revenue": {"type": "double"},
            "score": {"type": "double"},
            "status": {"type": "keyword"},
        },
    }
}


def build_client(es_url: str, es_api_key: str) -> Elasticsearch:
    """Connect to Elasticsearch, working for both trusted and self-signed TLS certs."""
    try:
        client = Elasticsearch(
            es_url, api_key=es_api_key, verify_certs=True, request_timeout=REQUEST_TIMEOUT
        )
        client.info()
        return client
    except TlsError:
        print("Certificate could not be verified (self-signed?), retrying with verify_certs=False", file=sys.stderr)
        urllib3.disable_warnings(urllib3.exceptions.InsecureRequestWarning)
        client = Elasticsearch(
            es_url, api_key=es_api_key, verify_certs=False, request_timeout=REQUEST_TIMEOUT
        )
        client.info()
        return client


def ensure_index(client: Elasticsearch) -> None:
    if client.indices.exists(index=INDEX_NAME):
        print(f"Index '{INDEX_NAME}' already exists, skipping creation")
        return
    client.indices.create(index=INDEX_NAME, body=INDEX_MAPPING)
    client.cluster.health(index=INDEX_NAME, wait_for_status="yellow", timeout="30s")
    print(f"Created index '{INDEX_NAME}'")


def to_float(value):
    value = (value or "").strip()
    if not value:
        return None
    try:
        return float(value)
    except ValueError:
        return None


def read_docs(csv_path: str):
    with open(csv_path, newline="", encoding="utf-8") as f:
        reader = csv.DictReader(f)
        for row in reader:
            doc = {
                "names": (row.get("names") or "").strip(),
                "date_x": (row.get("date_x") or "").strip(),
                "score": to_float(row.get("score")),
                "genre": [g.strip() for g in (row.get("genre") or "").split(",") if g.strip()],
                "overview": (row.get("overview") or "").strip(),
                "crew": (row.get("crew") or "").strip(),
                "orig_title": (row.get("orig_title") or "").strip(),
                "status": (row.get("status") or "").strip(),
                "orig_lang": (row.get("orig_lang") or "").strip(),
                "budget_x": to_float(row.get("budget_x")),
                "revenue": to_float(row.get("revenue")),
                "country": (row.get("country") or "").strip(),
            }
            yield {"_index": INDEX_NAME, "_source": doc}


def main() -> None:
    load_dotenv()
    es_url = os.environ["ES_URL"]
    es_api_key = os.environ["ES_API_KEY"]

    client = build_client(es_url, es_api_key)
    ensure_index(client)

    try:
        success, errors = bulk(
            client,
            read_docs(CSV_PATH),
            chunk_size=BULK_CHUNK_SIZE,
            raise_on_error=False,
        )
    except BulkIndexError as e:
        print(f"Bulk indexing failed: {e}", file=sys.stderr)
        sys.exit(1)

    print(f"Indexed {success} documents into '{INDEX_NAME}'")
    if errors:
        print(f"{len(errors)} documents failed to index", file=sys.stderr)
        for err in errors[:5]:
            print(err, file=sys.stderr)


if __name__ == "__main__":
    main()
运行上面的代码:
python ingest_imdb.py我们再回到 Kibana 中进行查看:
GET imdb/_search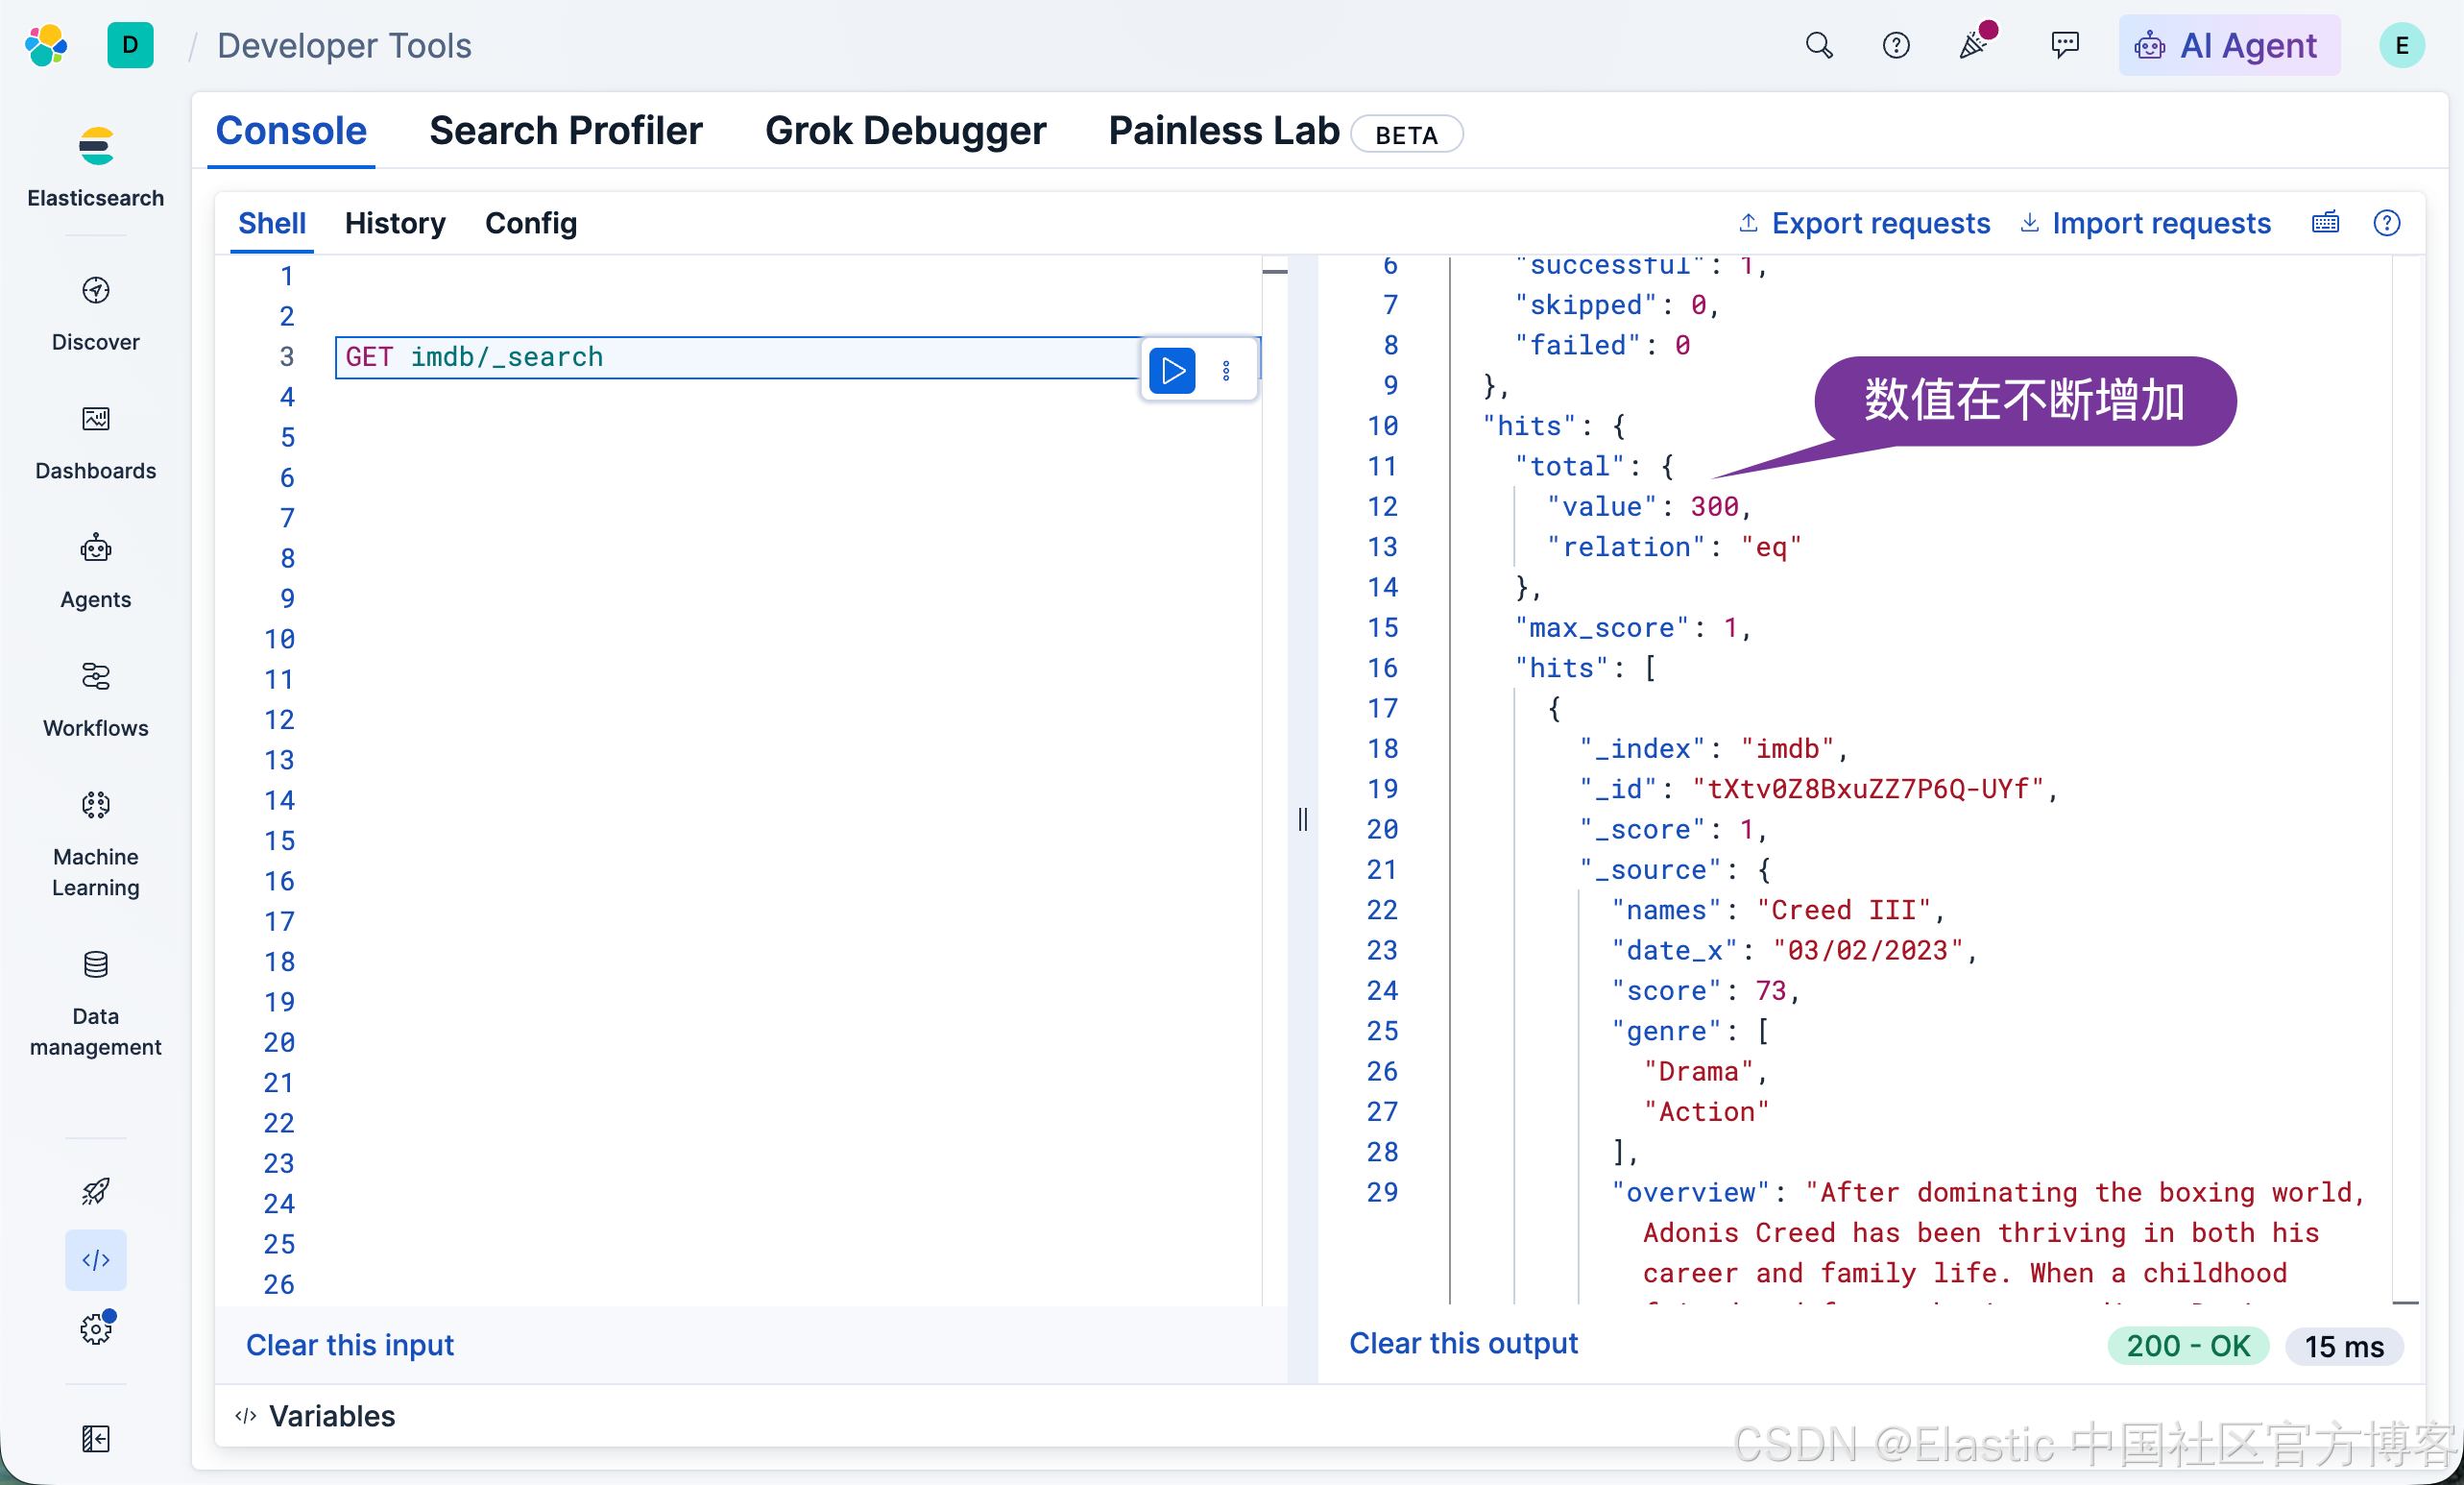
我们需要等一下时间直到所有的数据都被写入:
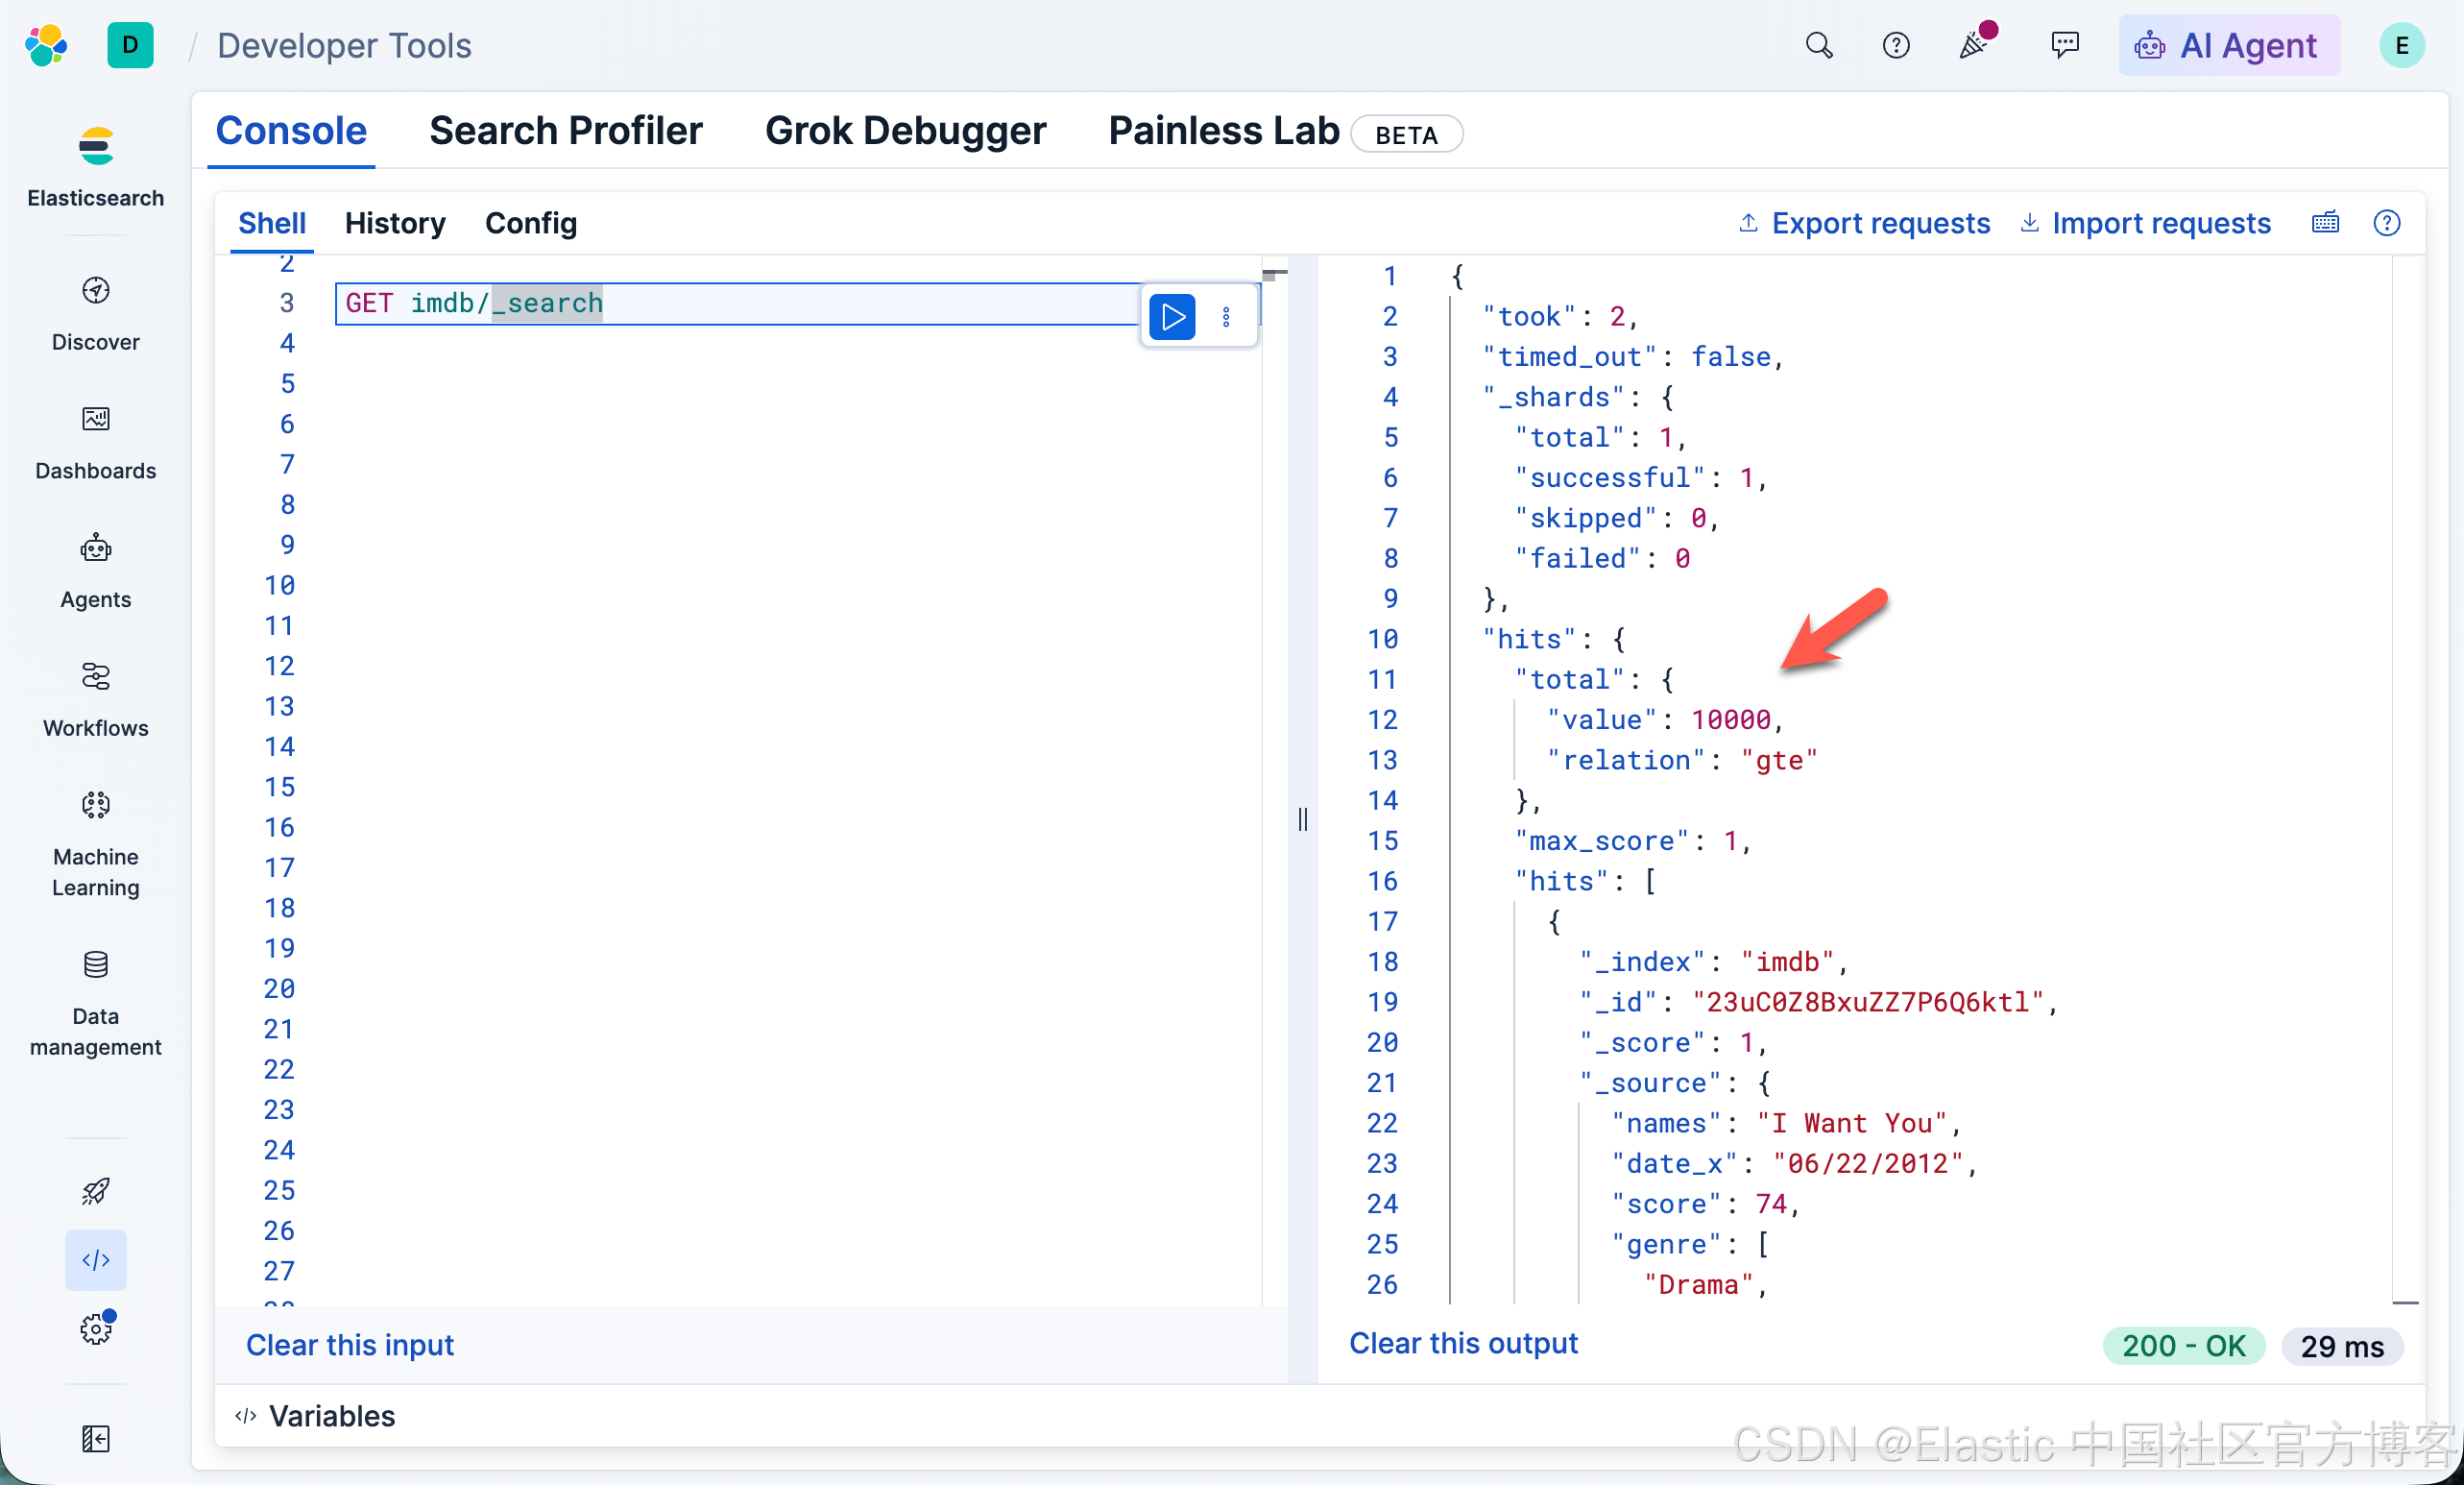
当我们看到 10000 个数据被写入到 Elasticsearch 中时,我们的数据已经被成功地写入了。
初试 AI Agent Builder
我们接下来简单地使用 AI Agent Builder:
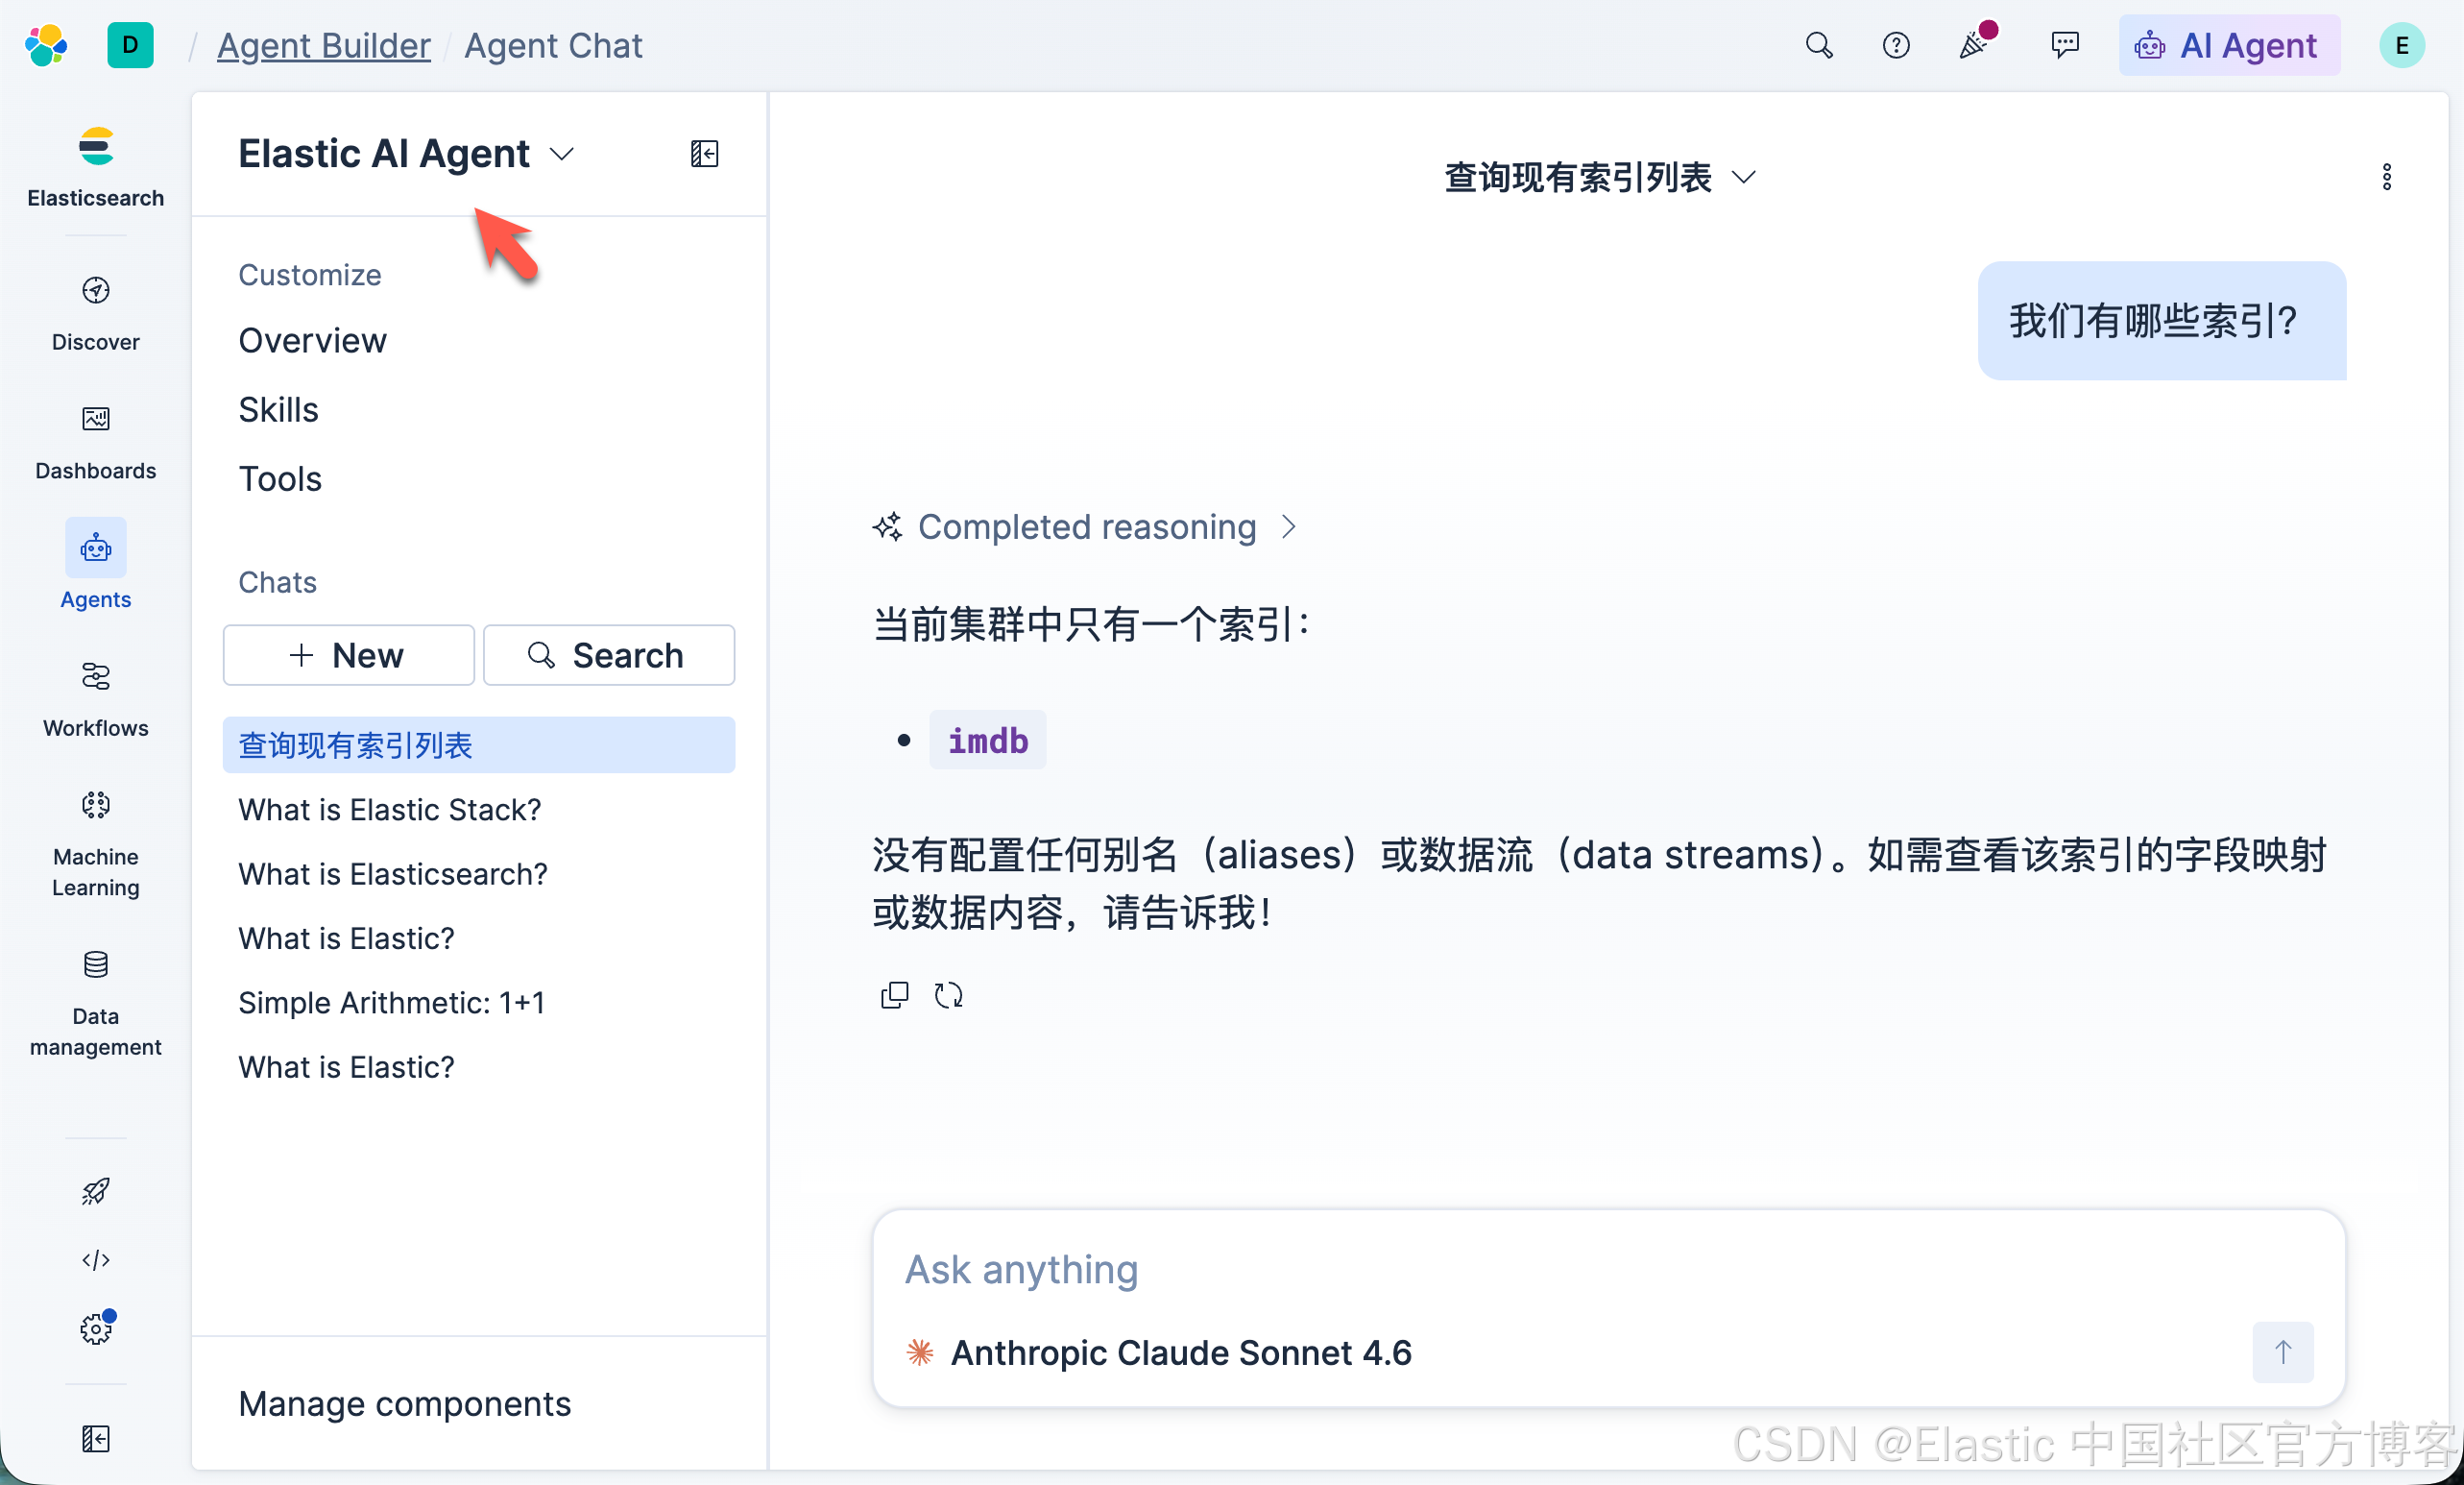
打开 Agents,我们可以看到一个默认的 Elastic Agent:Elastic AI Agent。使用它,我们就可以做很多的事。
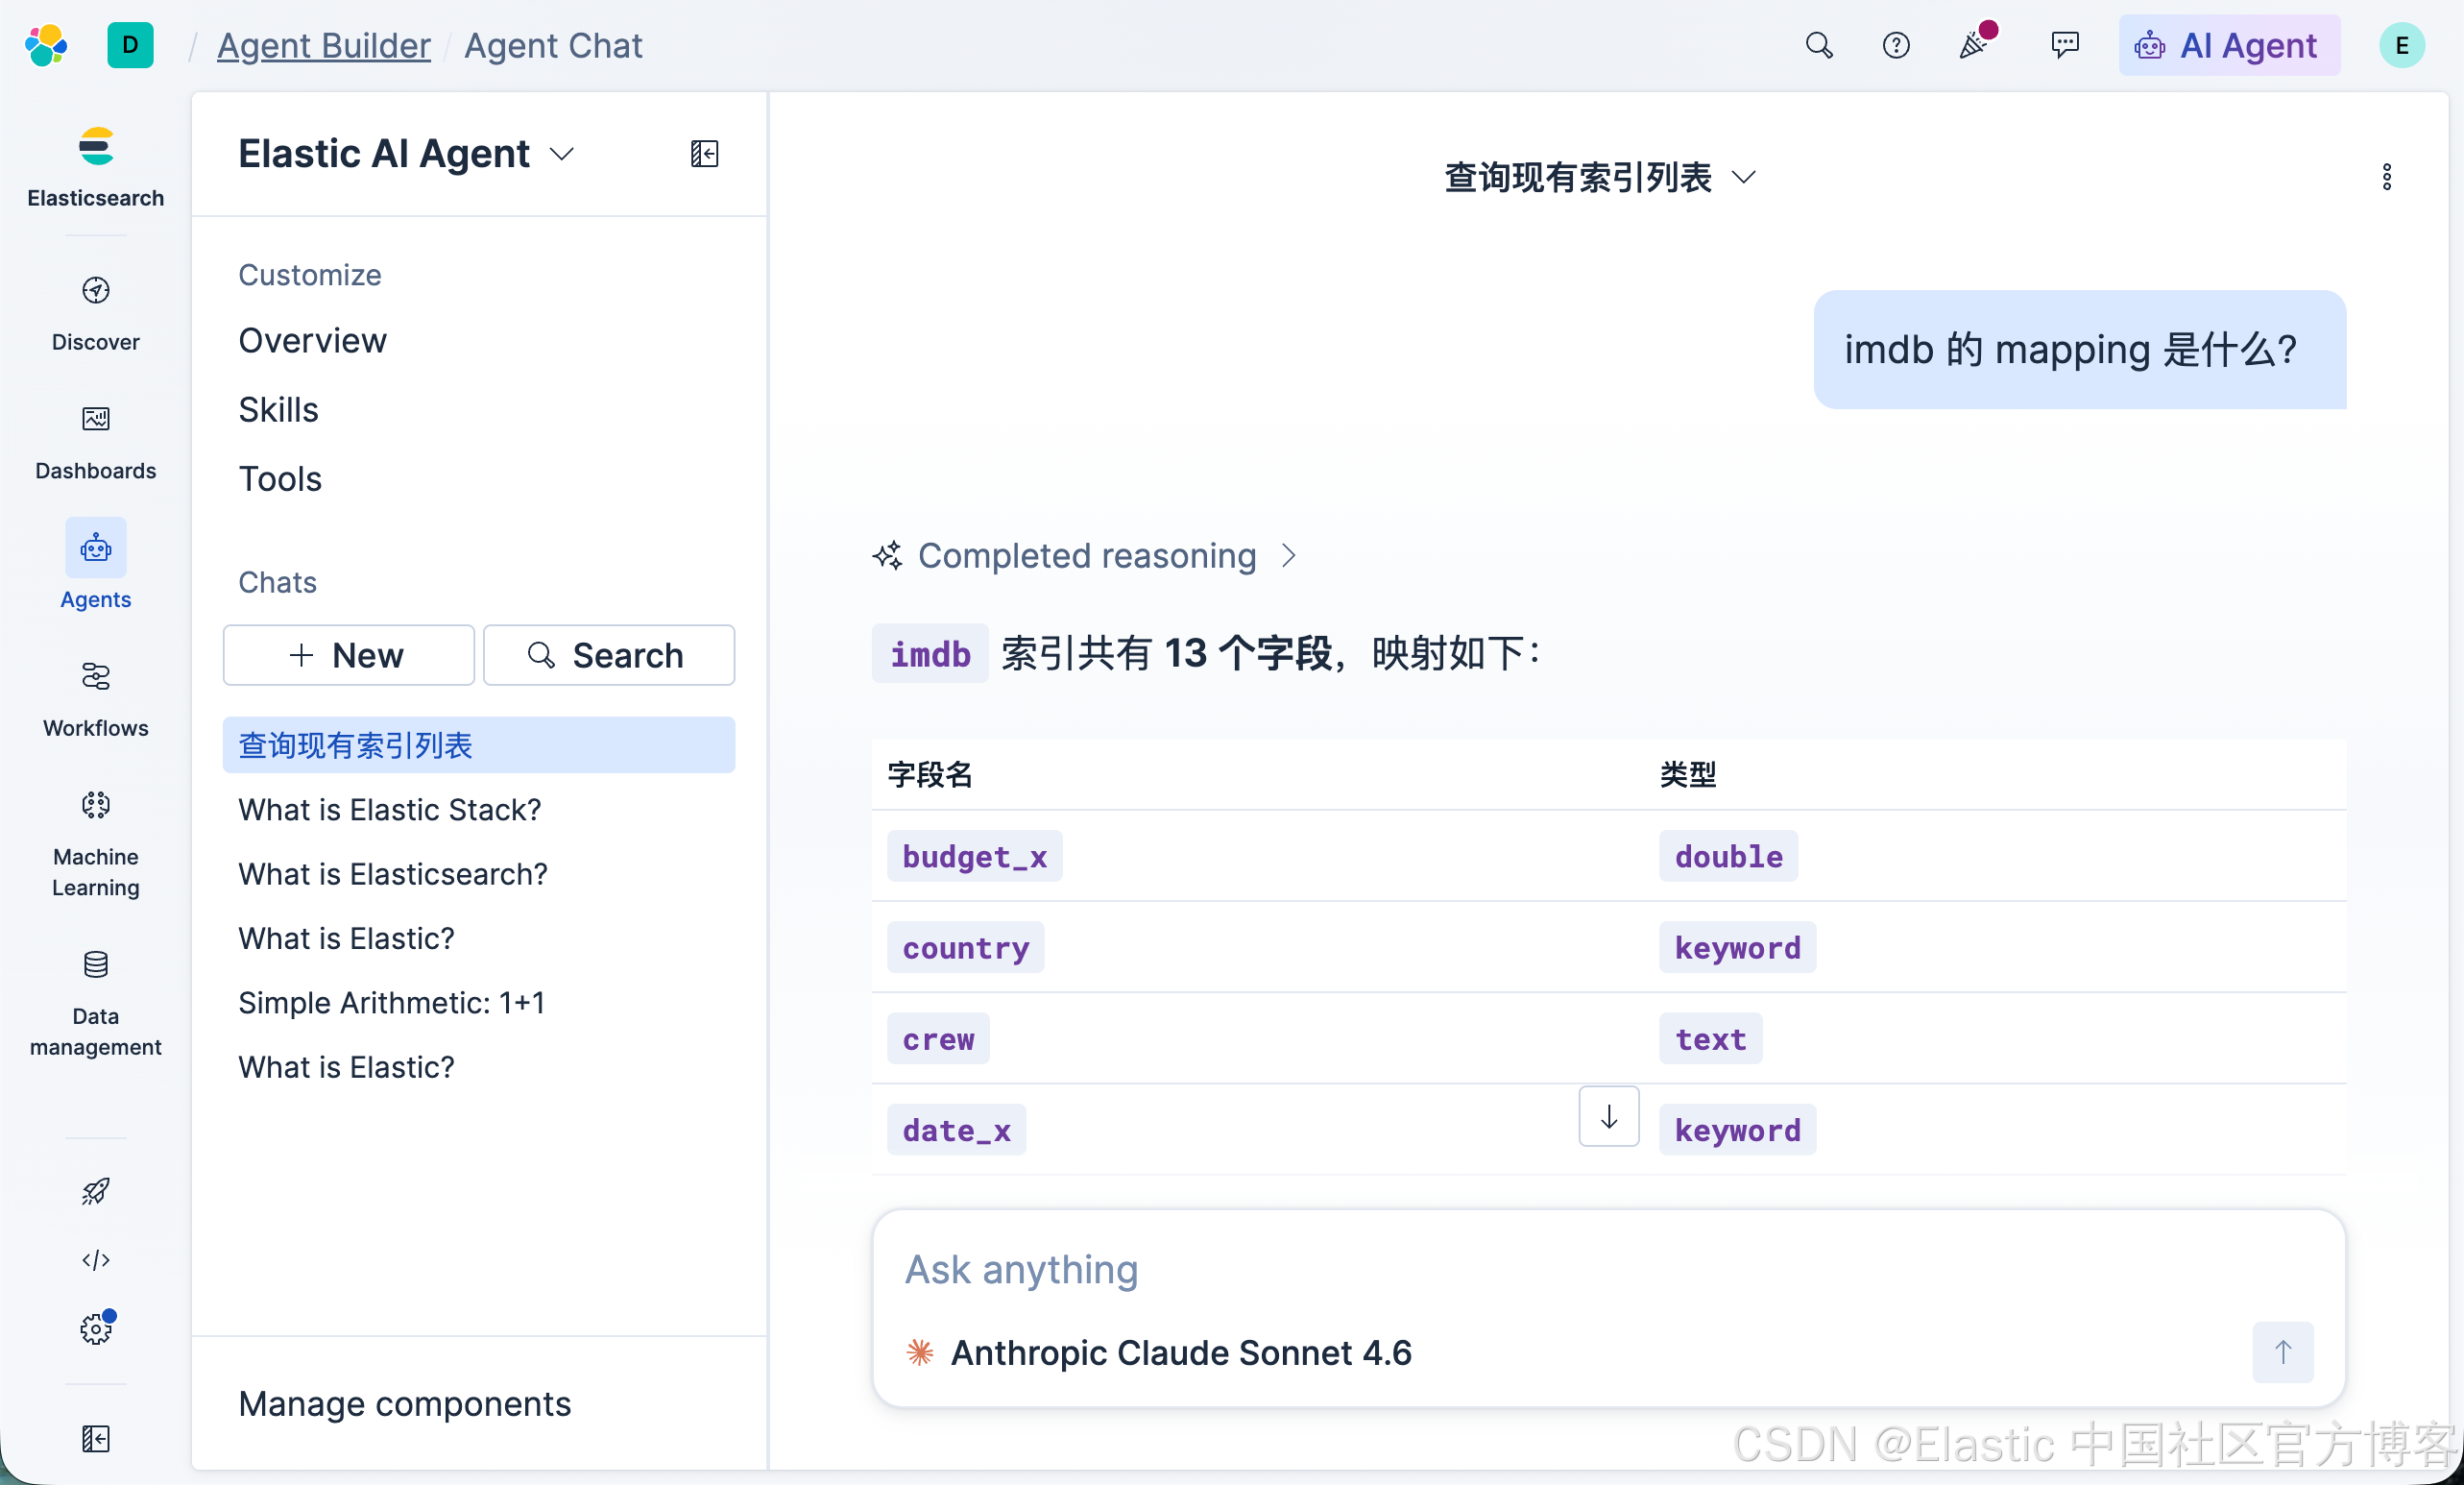
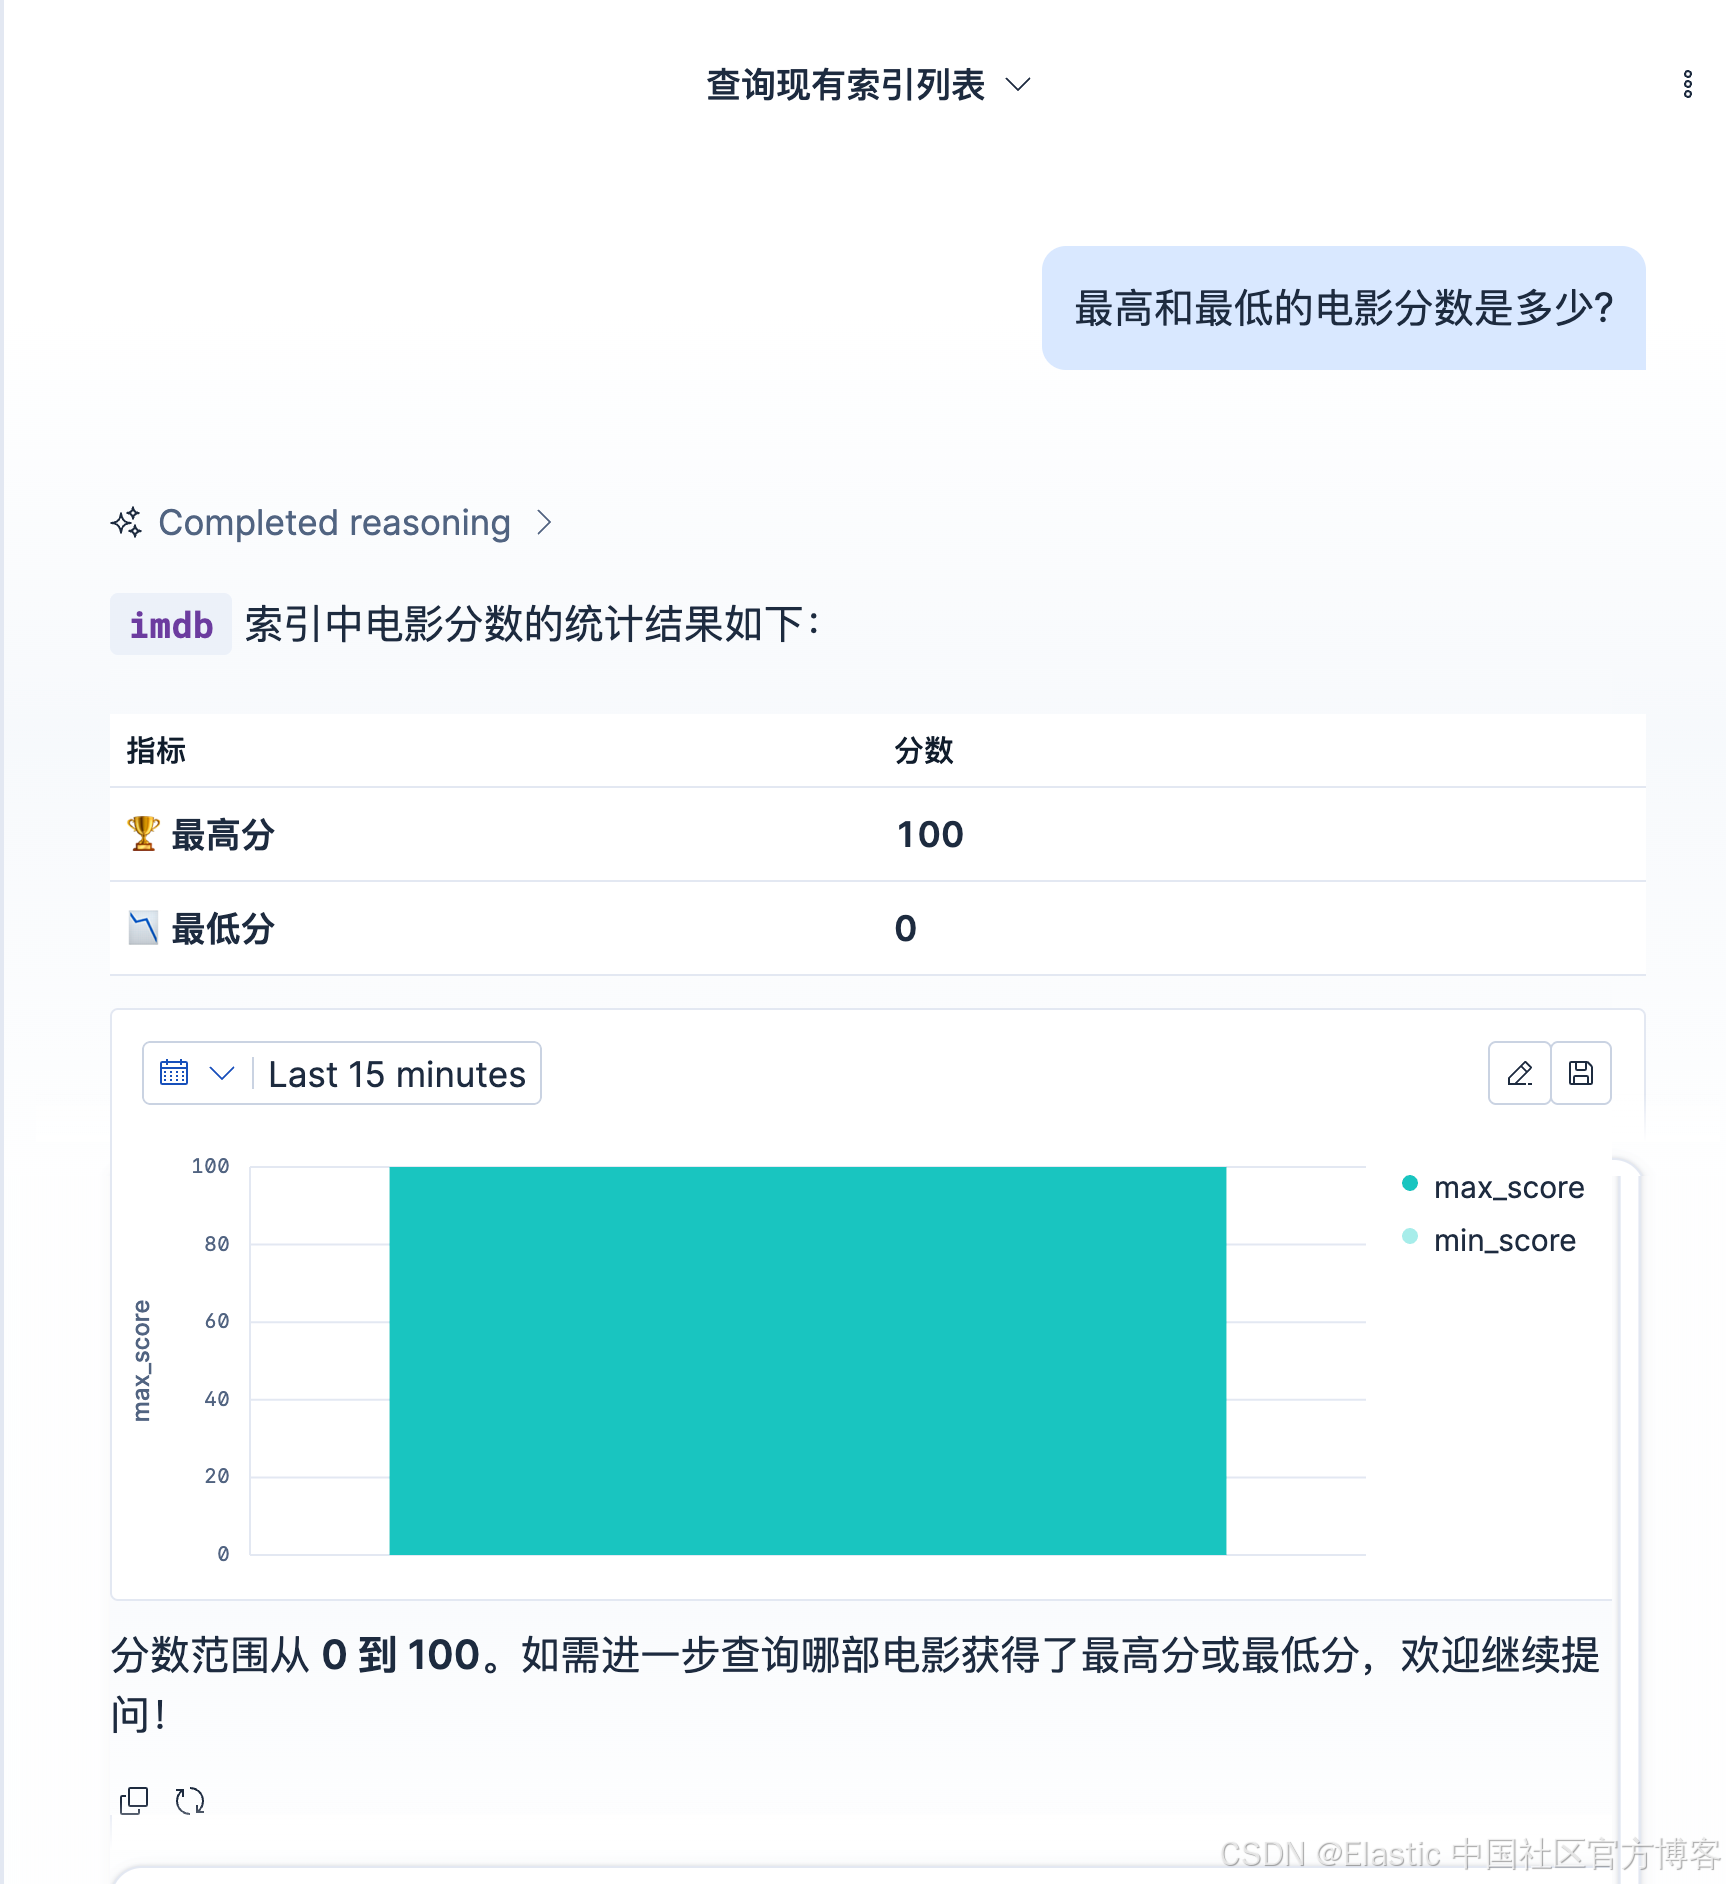
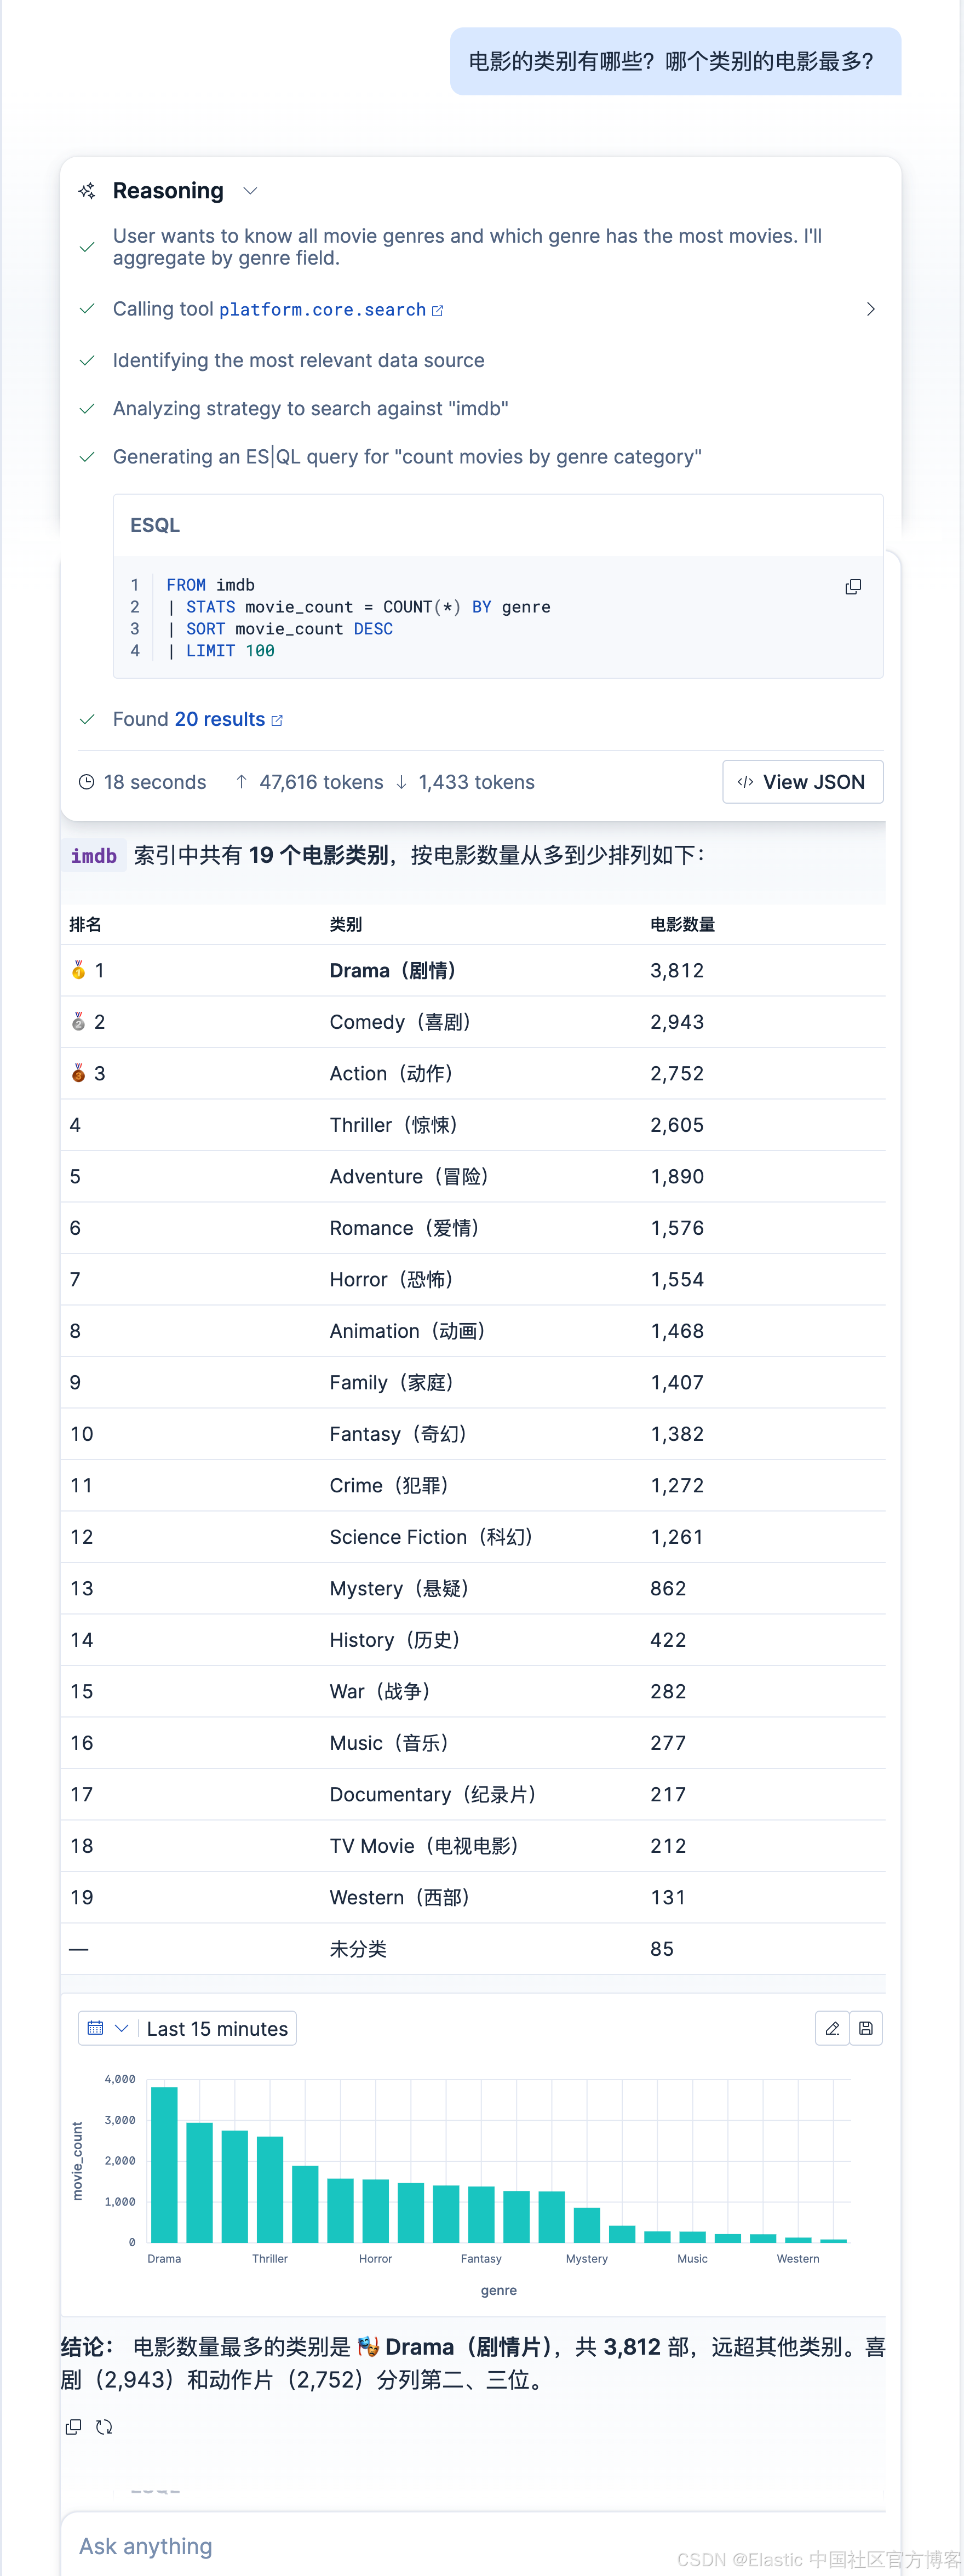
很显然,我们的大模型首先是要思考使用哪个索引,然后再进行推理使用哪个 ES|QL 语句来进行计算。这个显然是需要花费时间和 tokens 来完成的。为了能加速我们的这个过程,我们可以创建自己的 Agents 并在它里面使用自己创建的 tools 来完成这个。这样专有的 tools 完成所需要的动作要快,而且每次的调用都会一致。我们拷贝下上面推理所使用的 ES|QL:
FROM imdb
| STATS movie_count = COUNT(*) BY genre
| SORT movie_count DESC
| LIMIT 100
创建自己的 Agent
创建工具
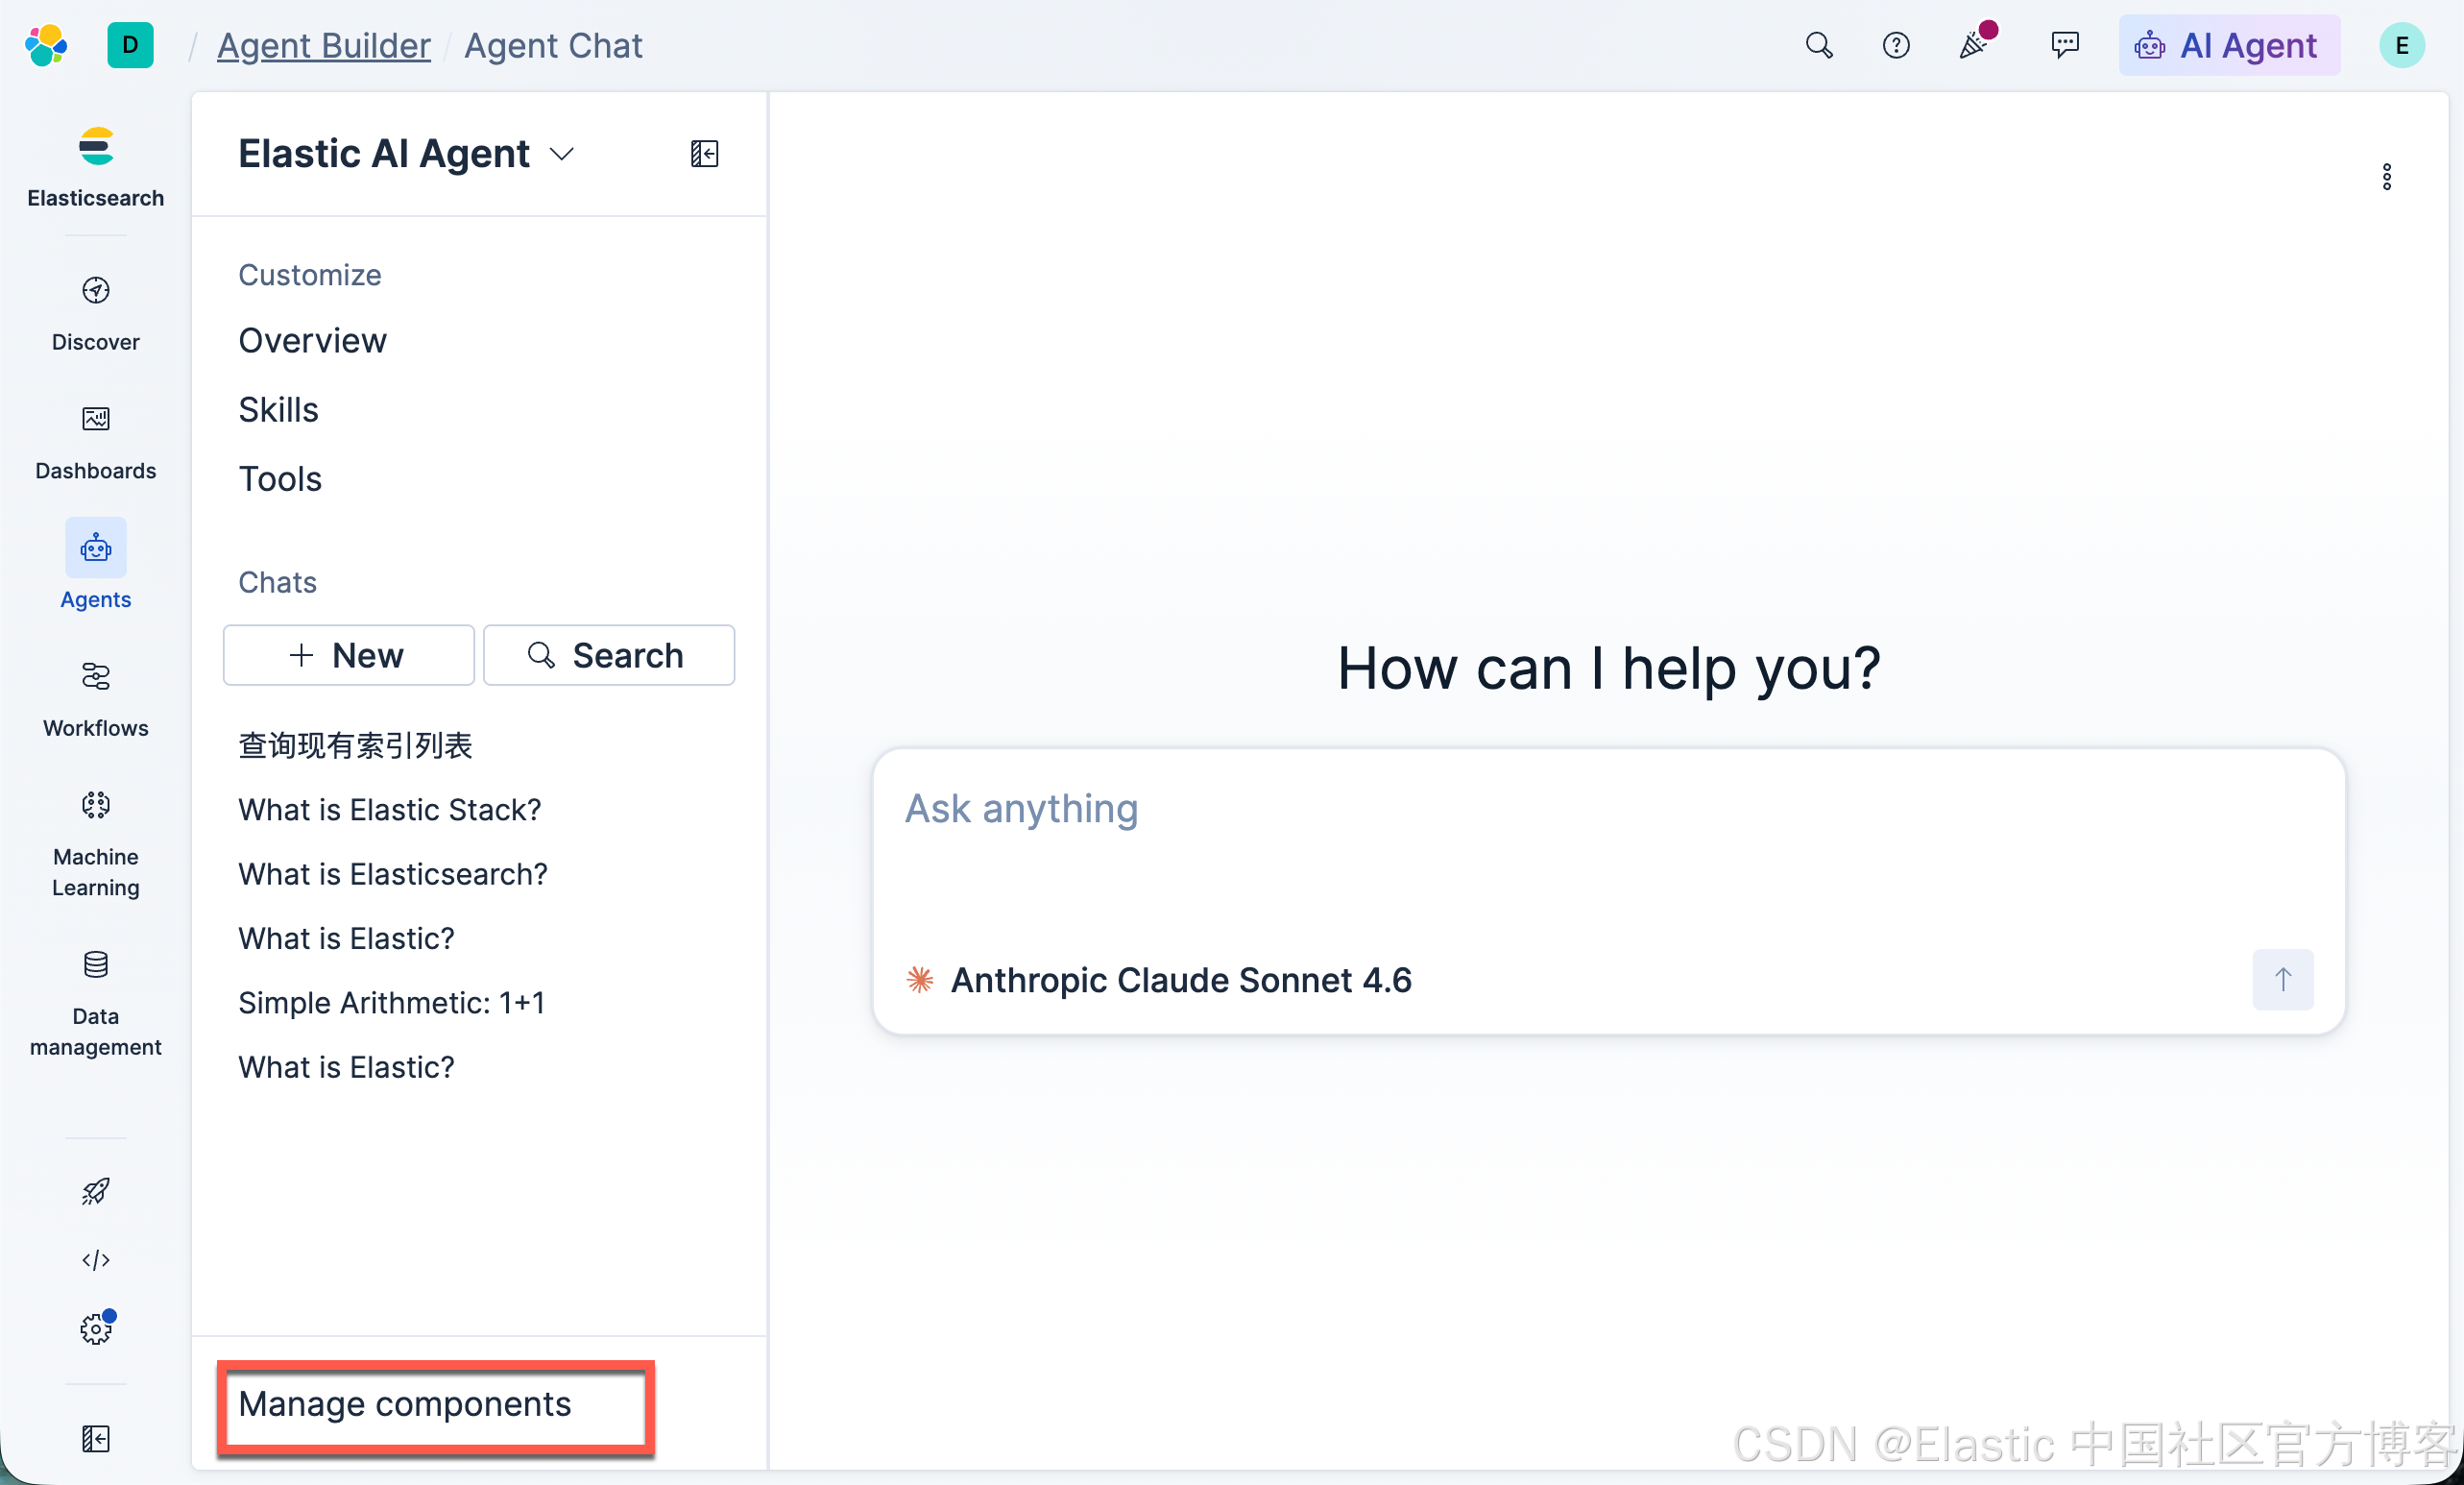
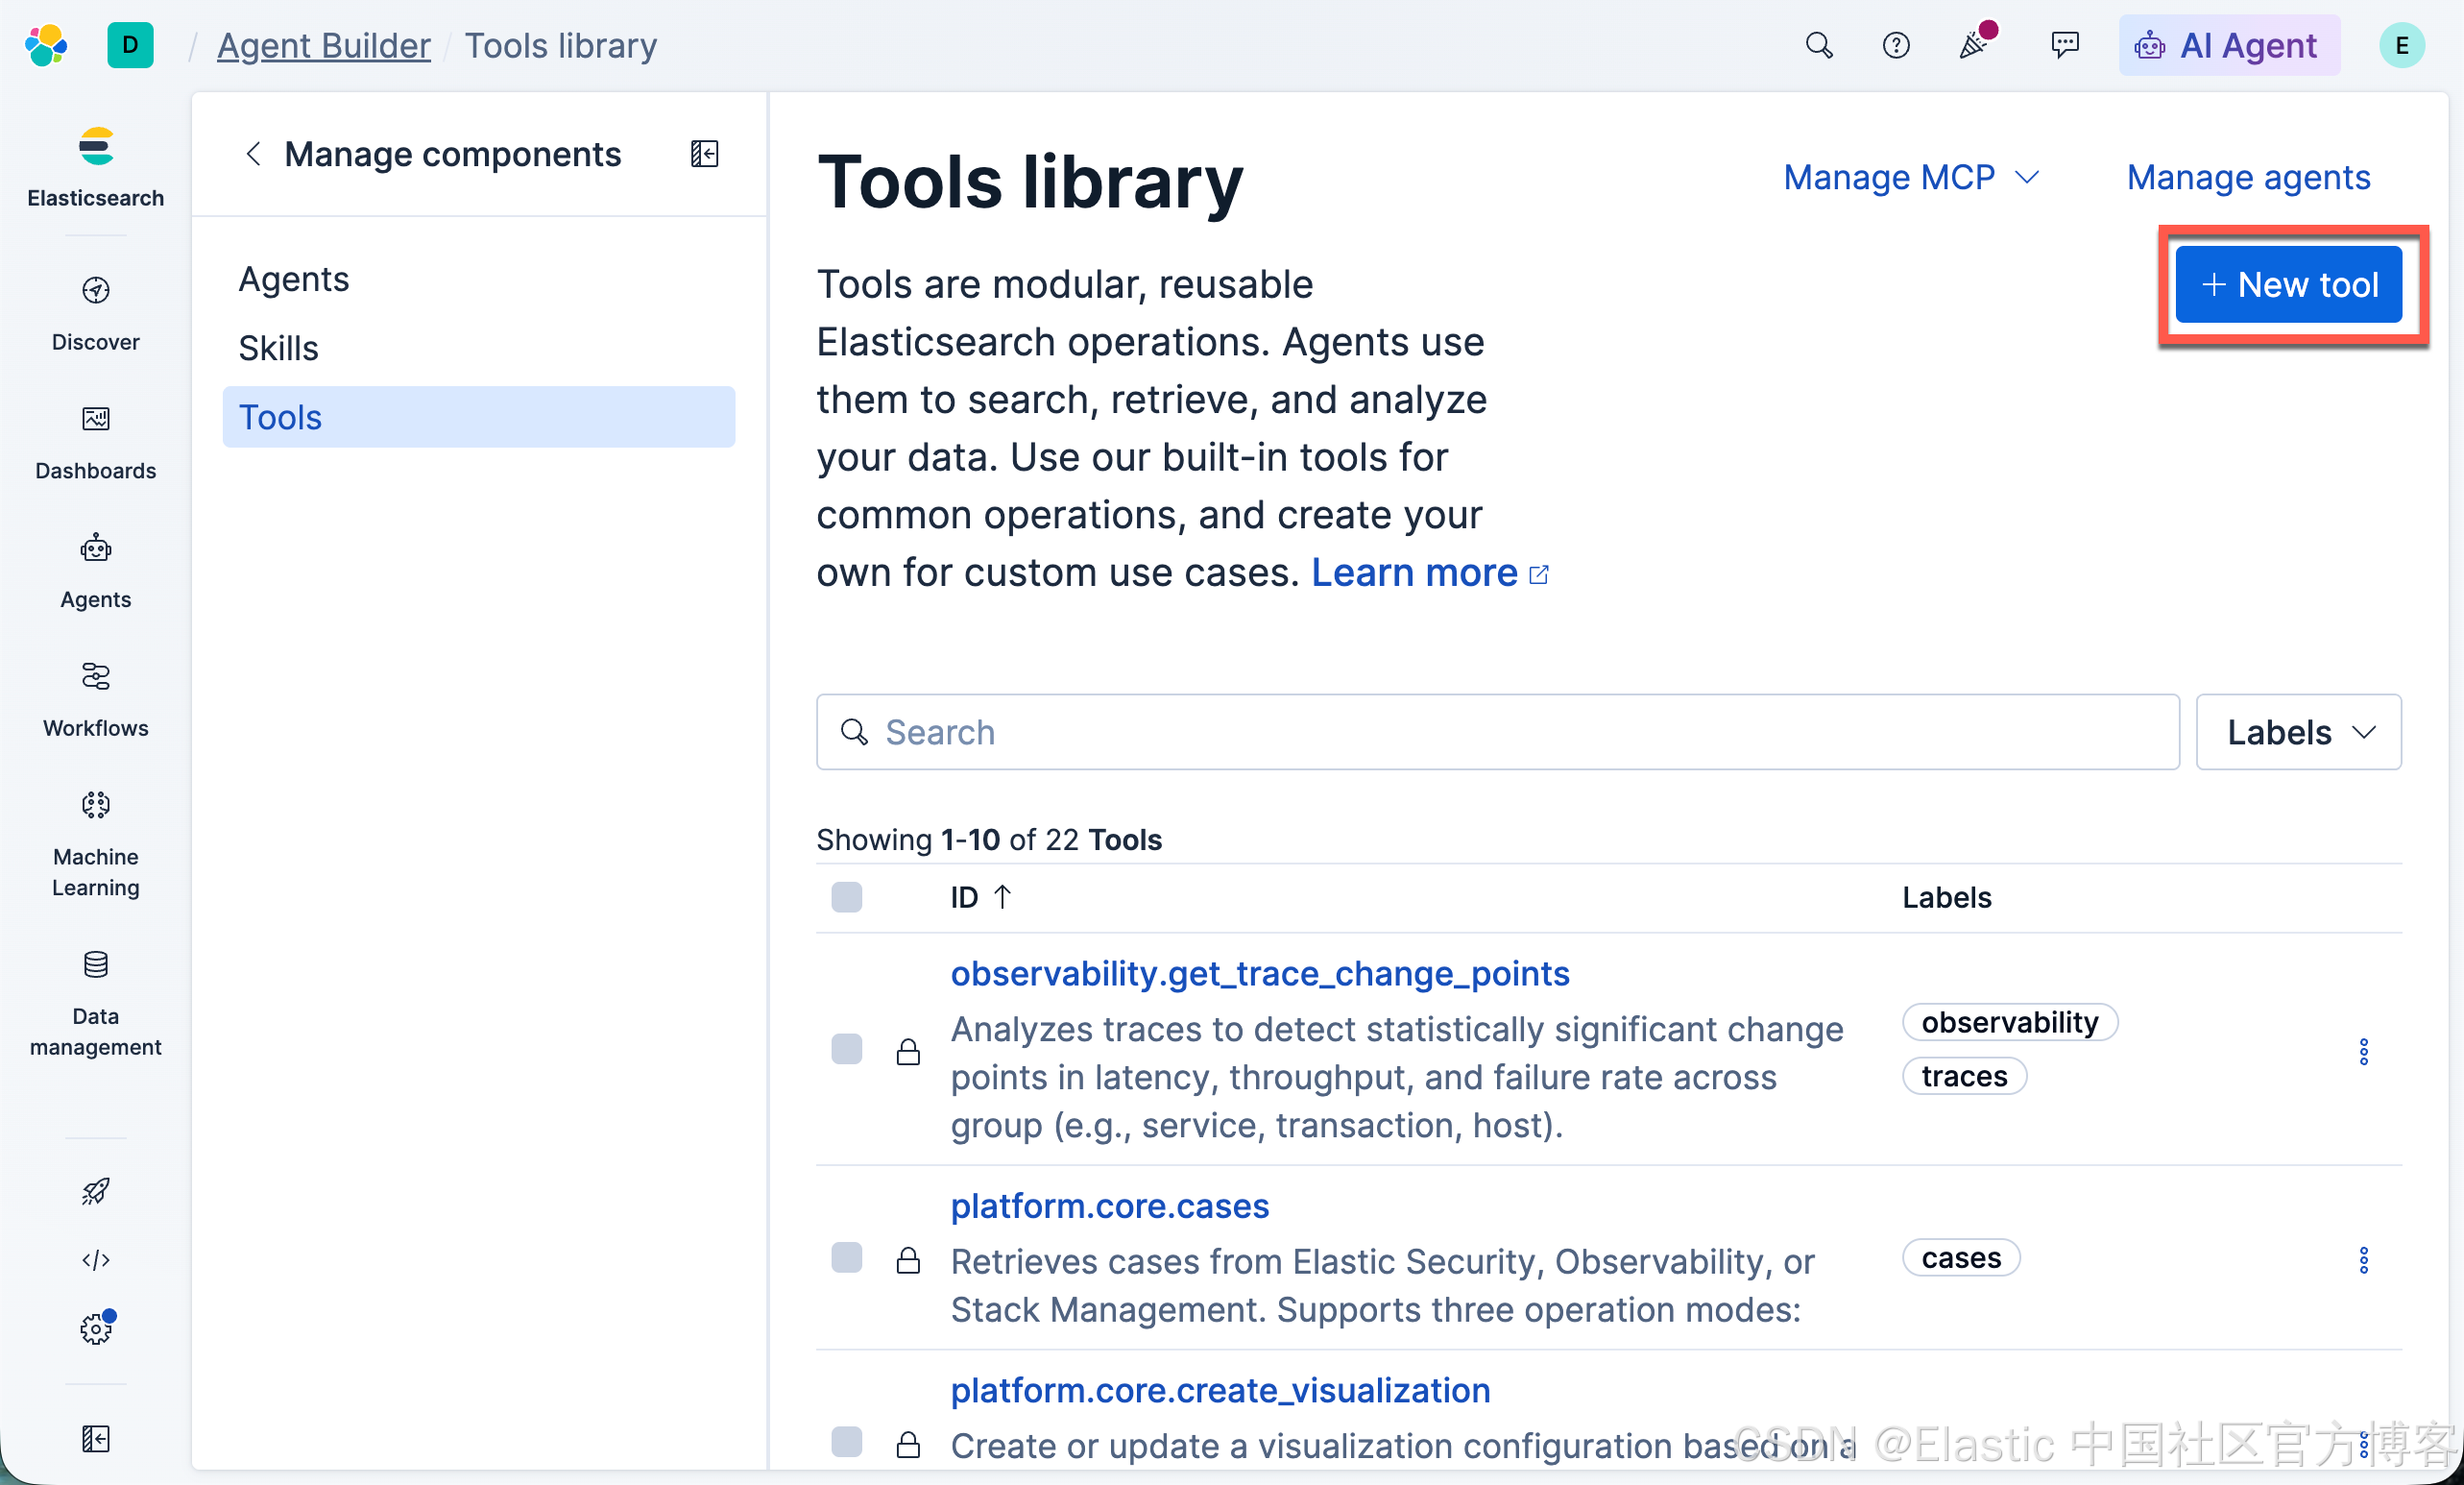
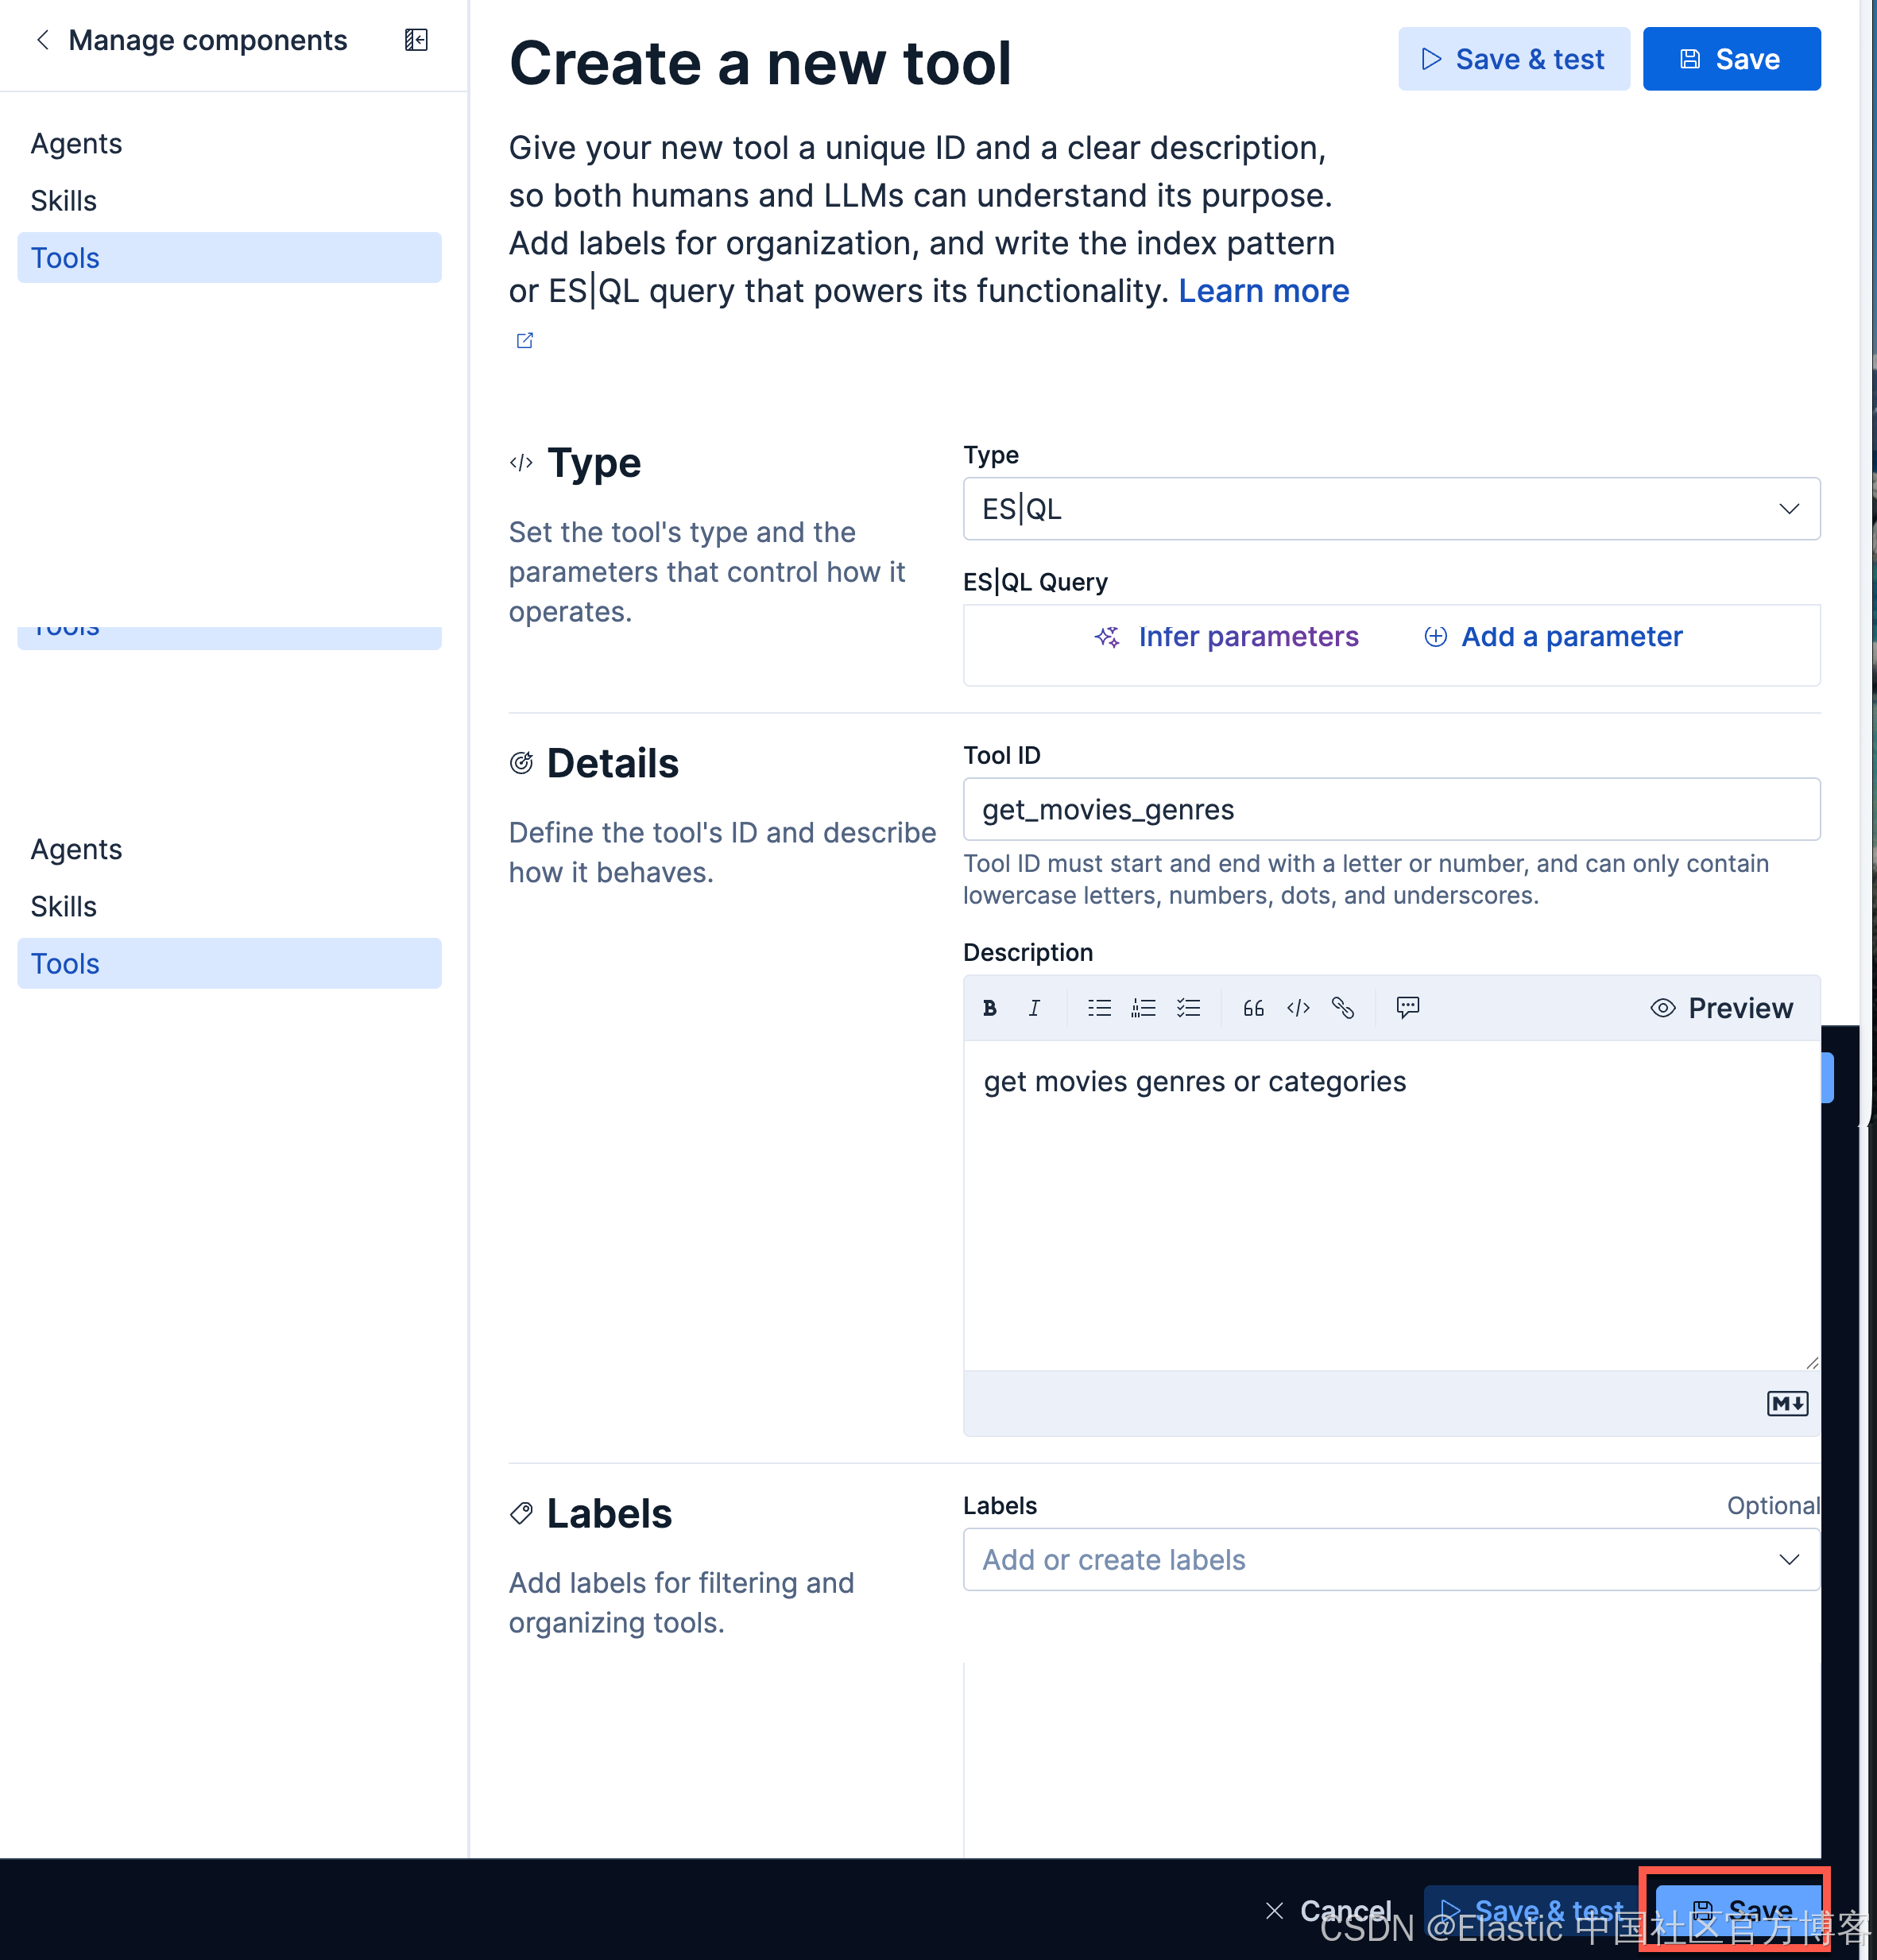
我们填入所需要的信息,并点击 Save 按钮:
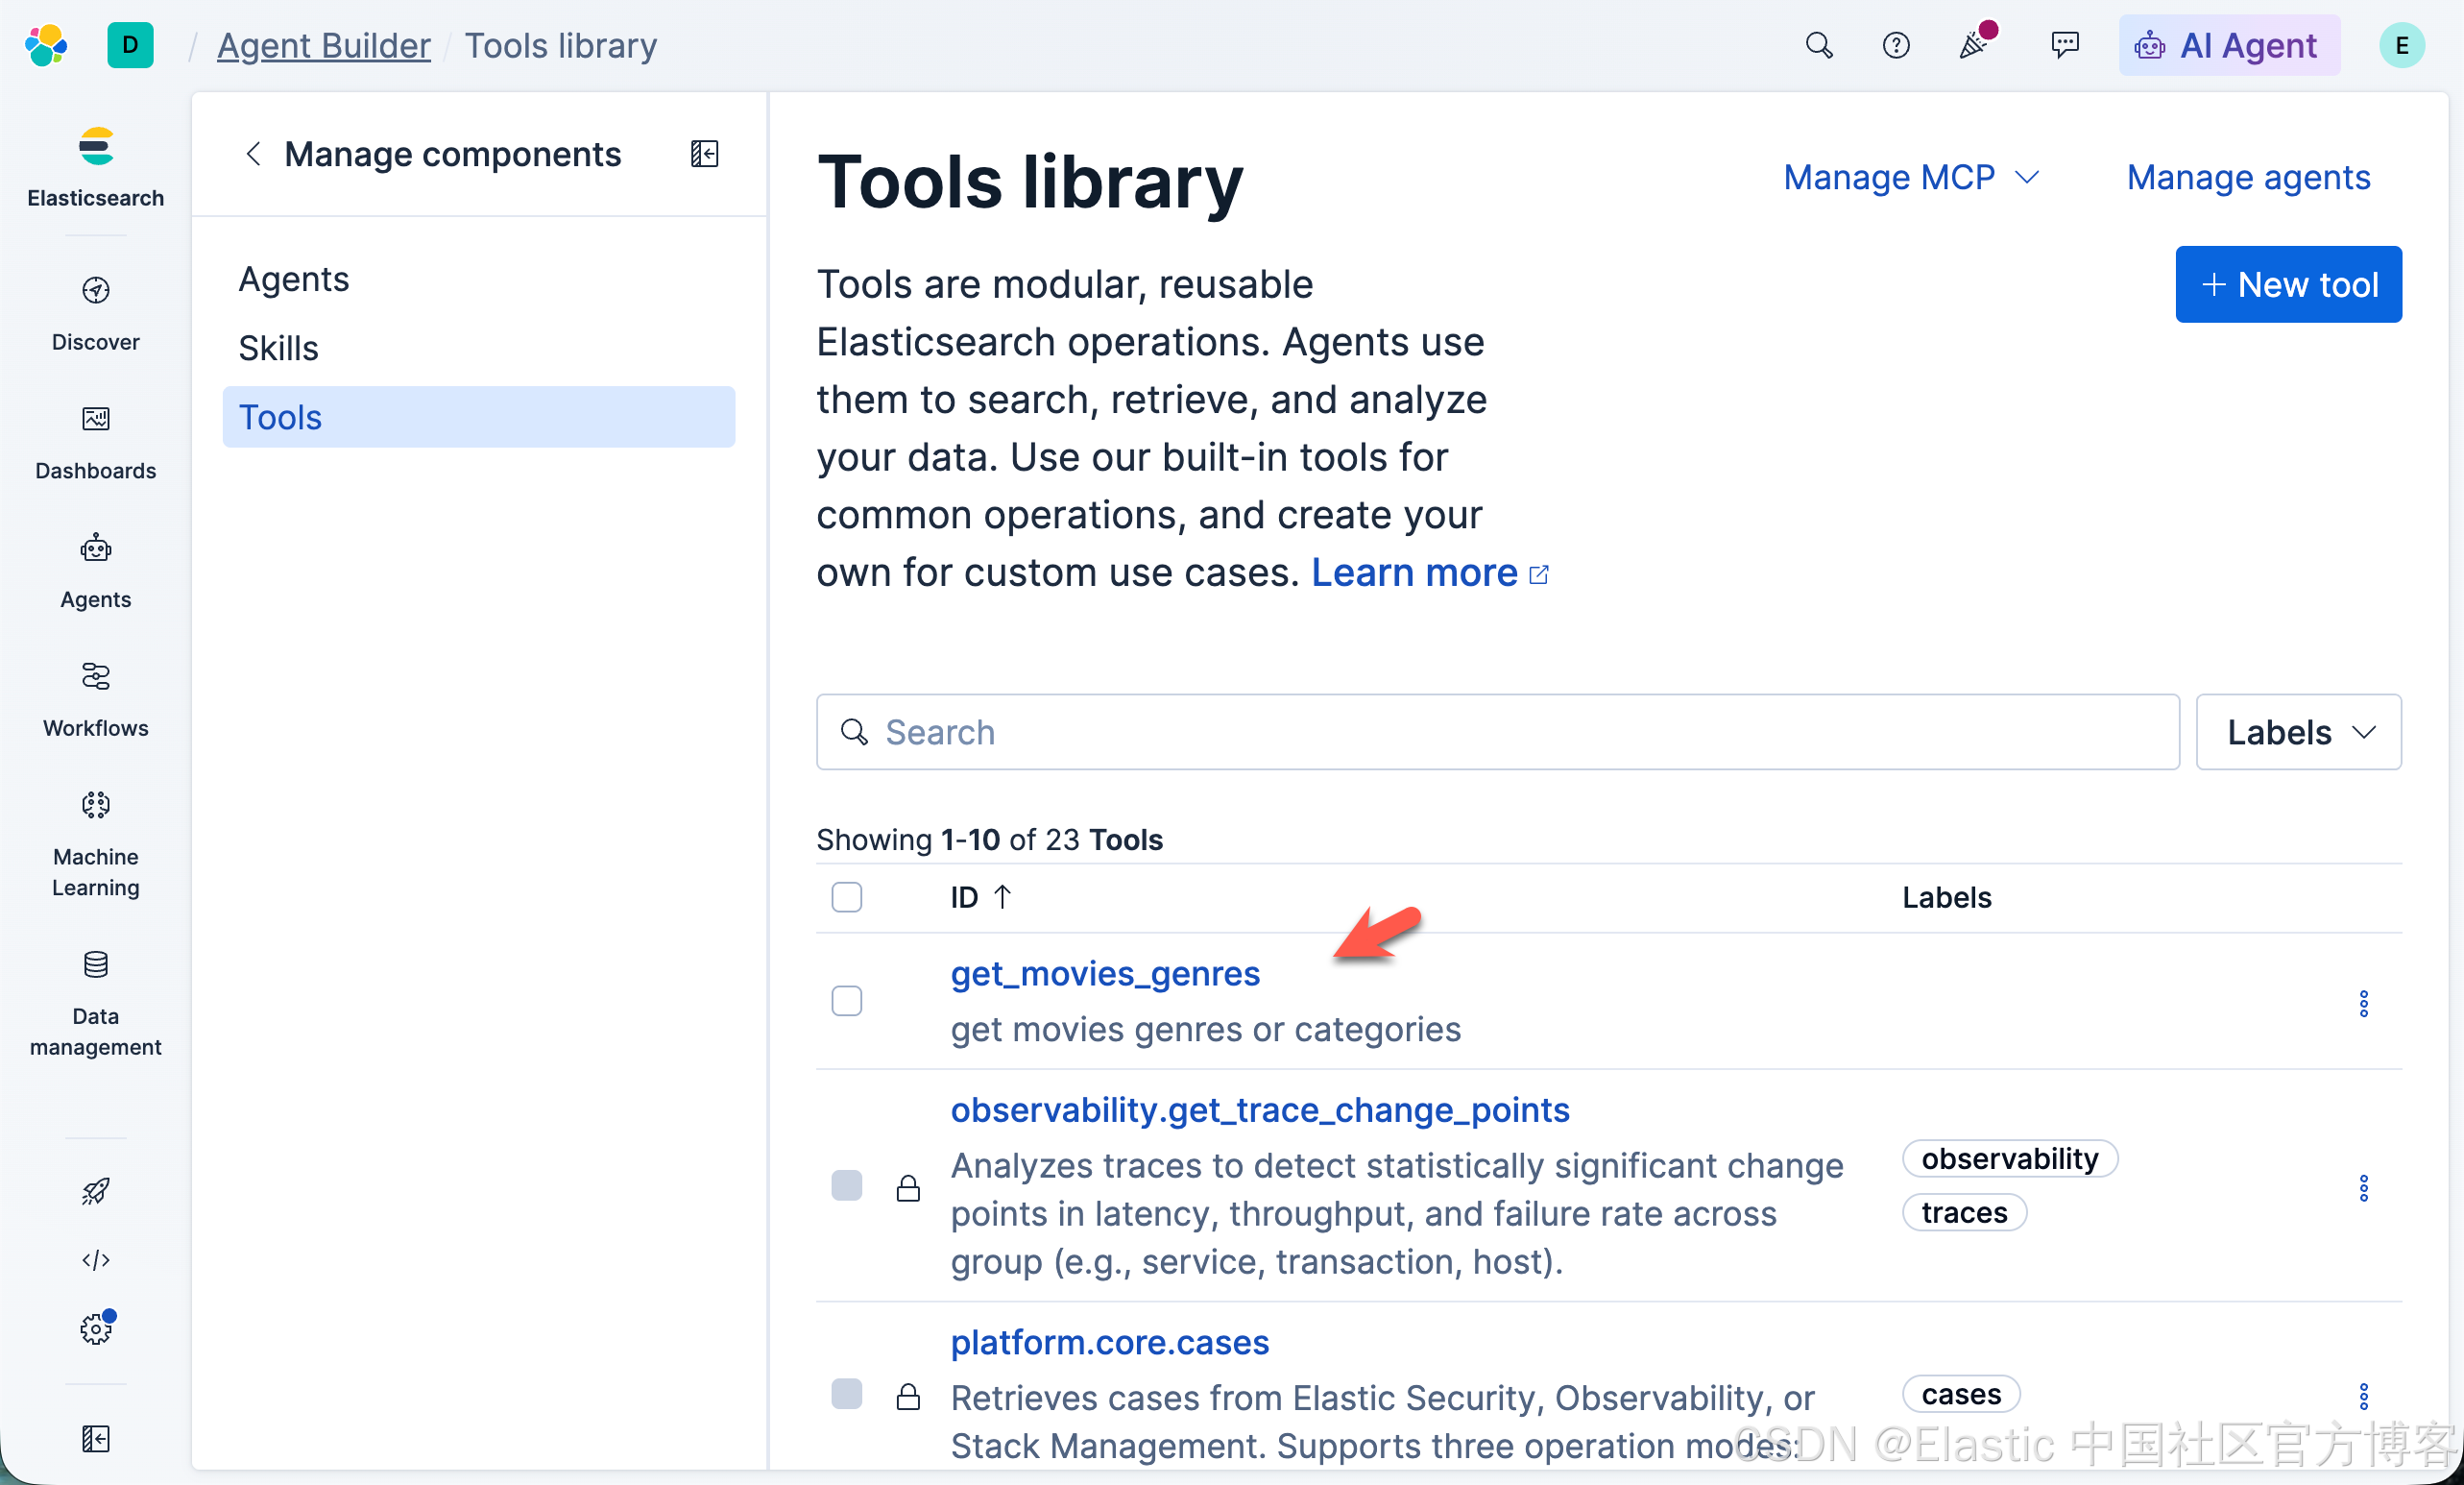
这样就创建了我们一个叫做 get_movies_genres 的 tool。
创建 Agent
创建 Agent 也非常容易:
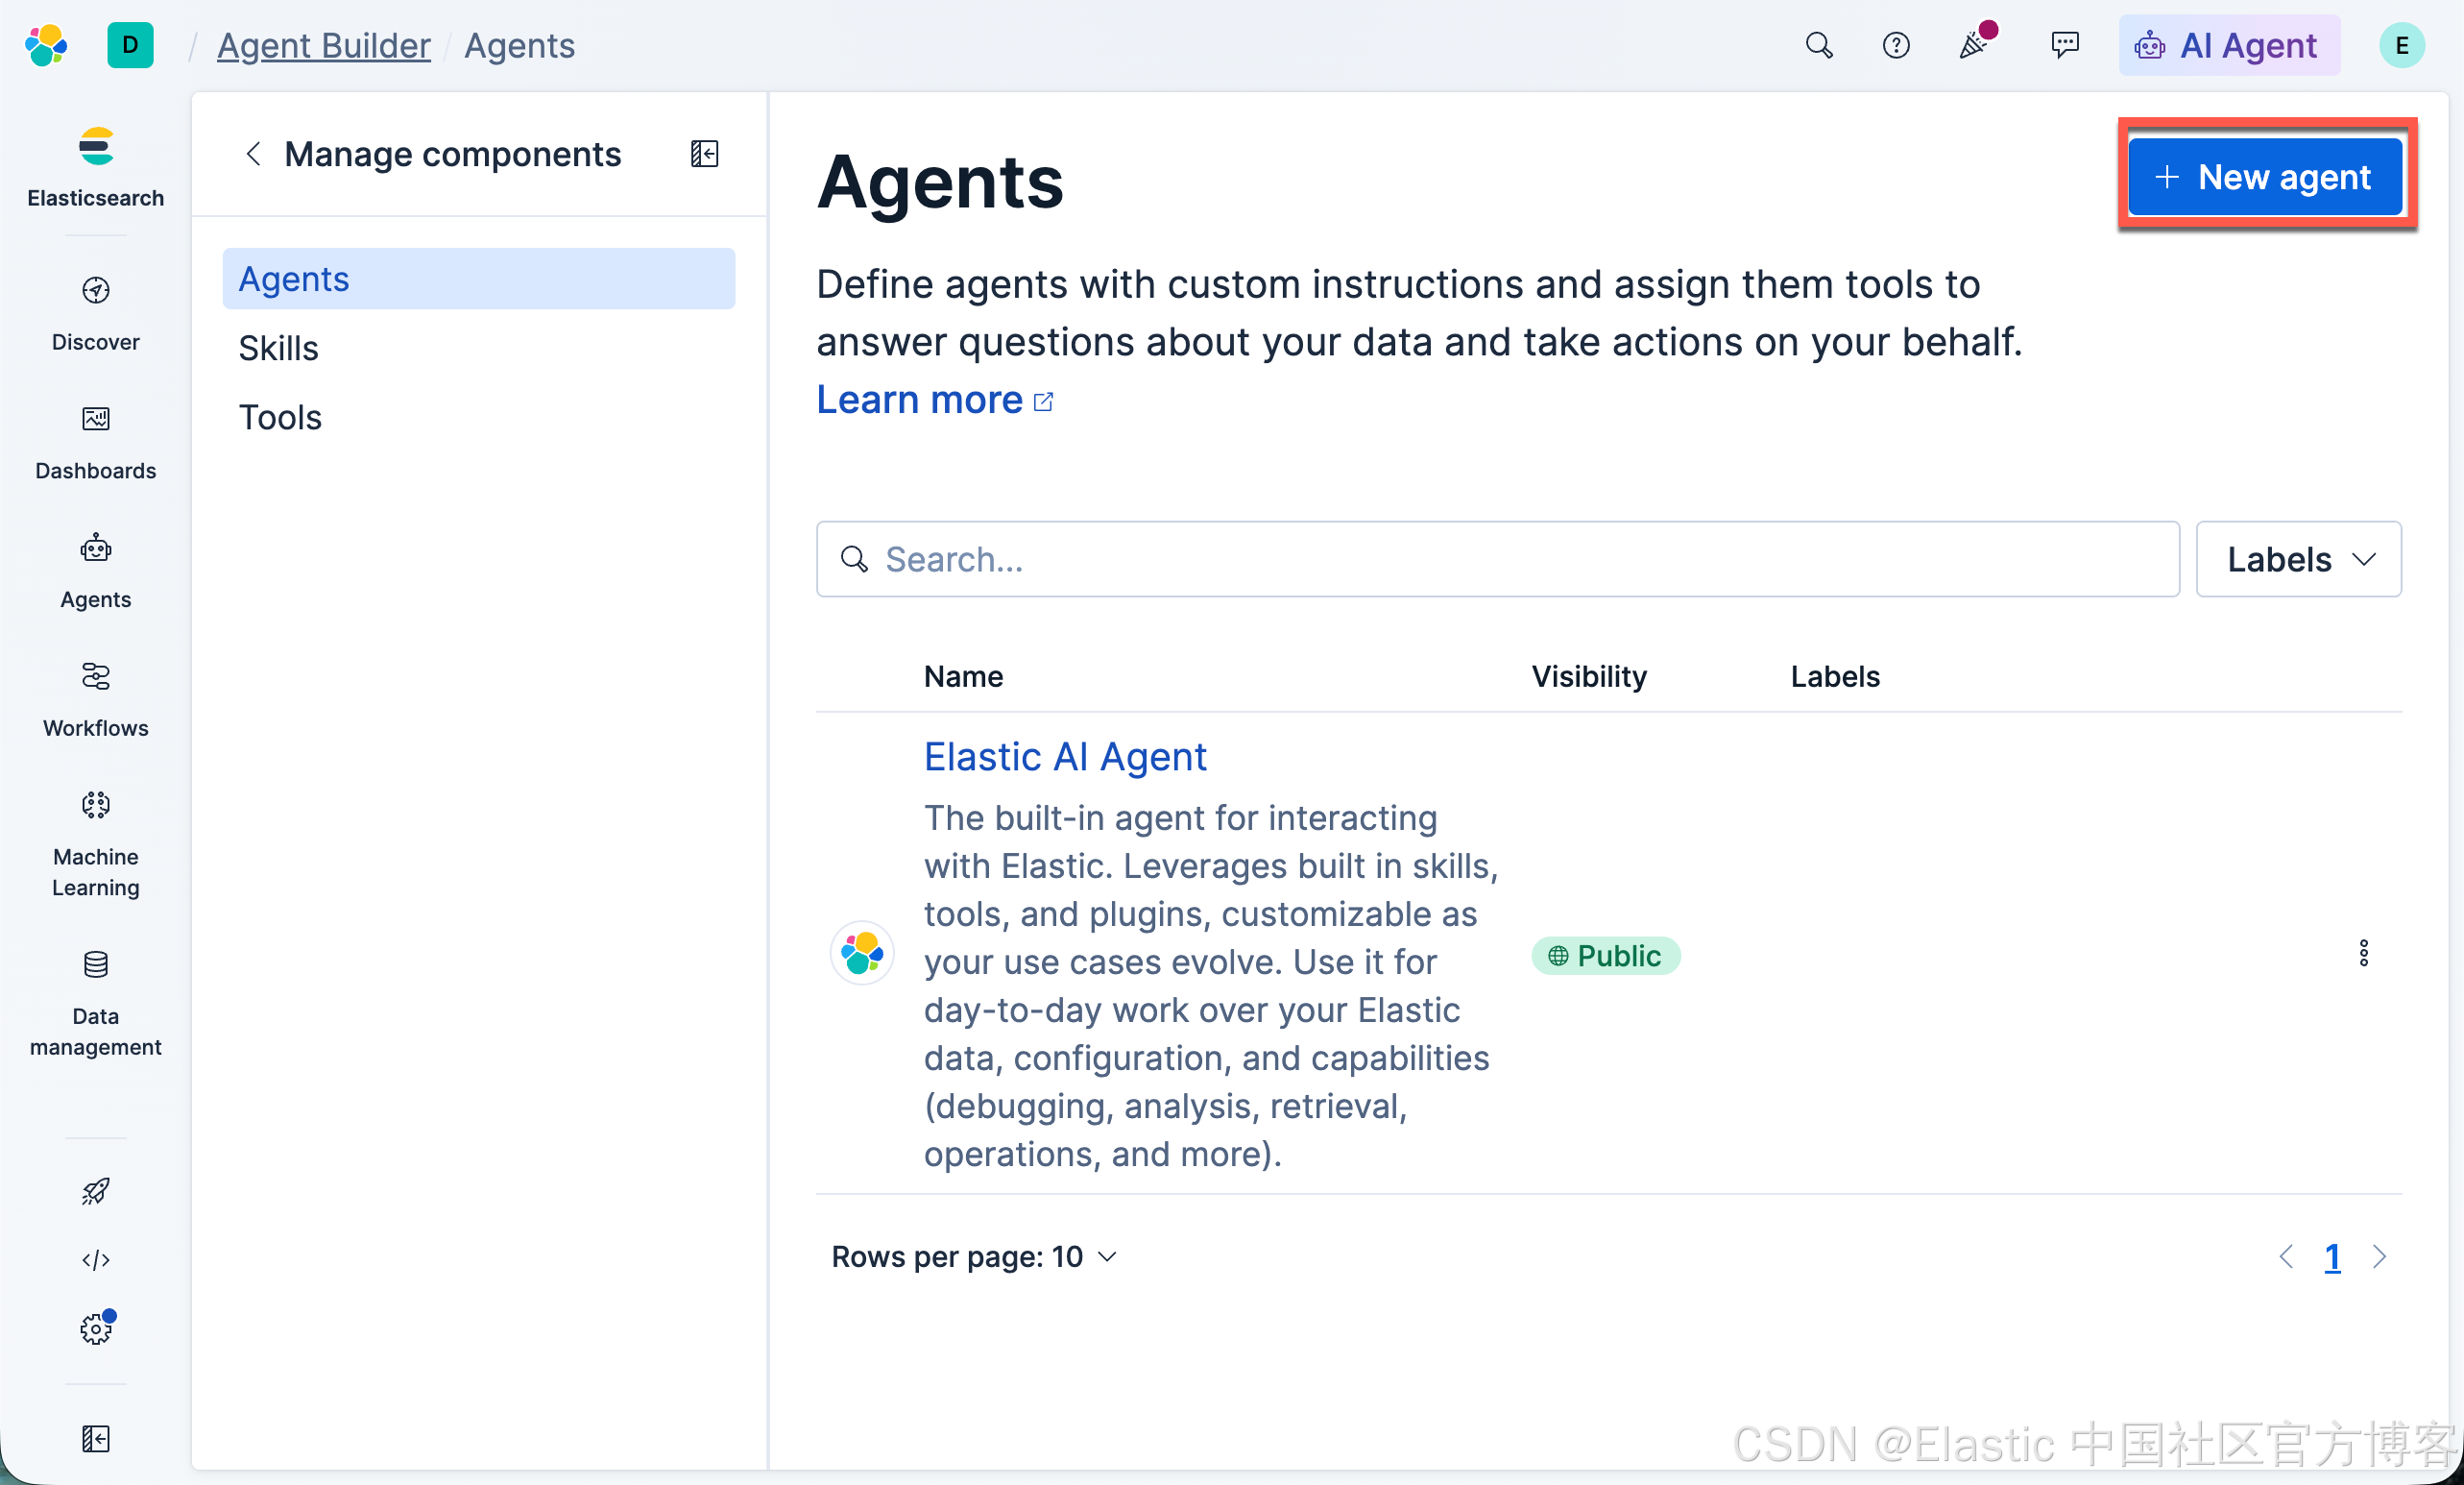
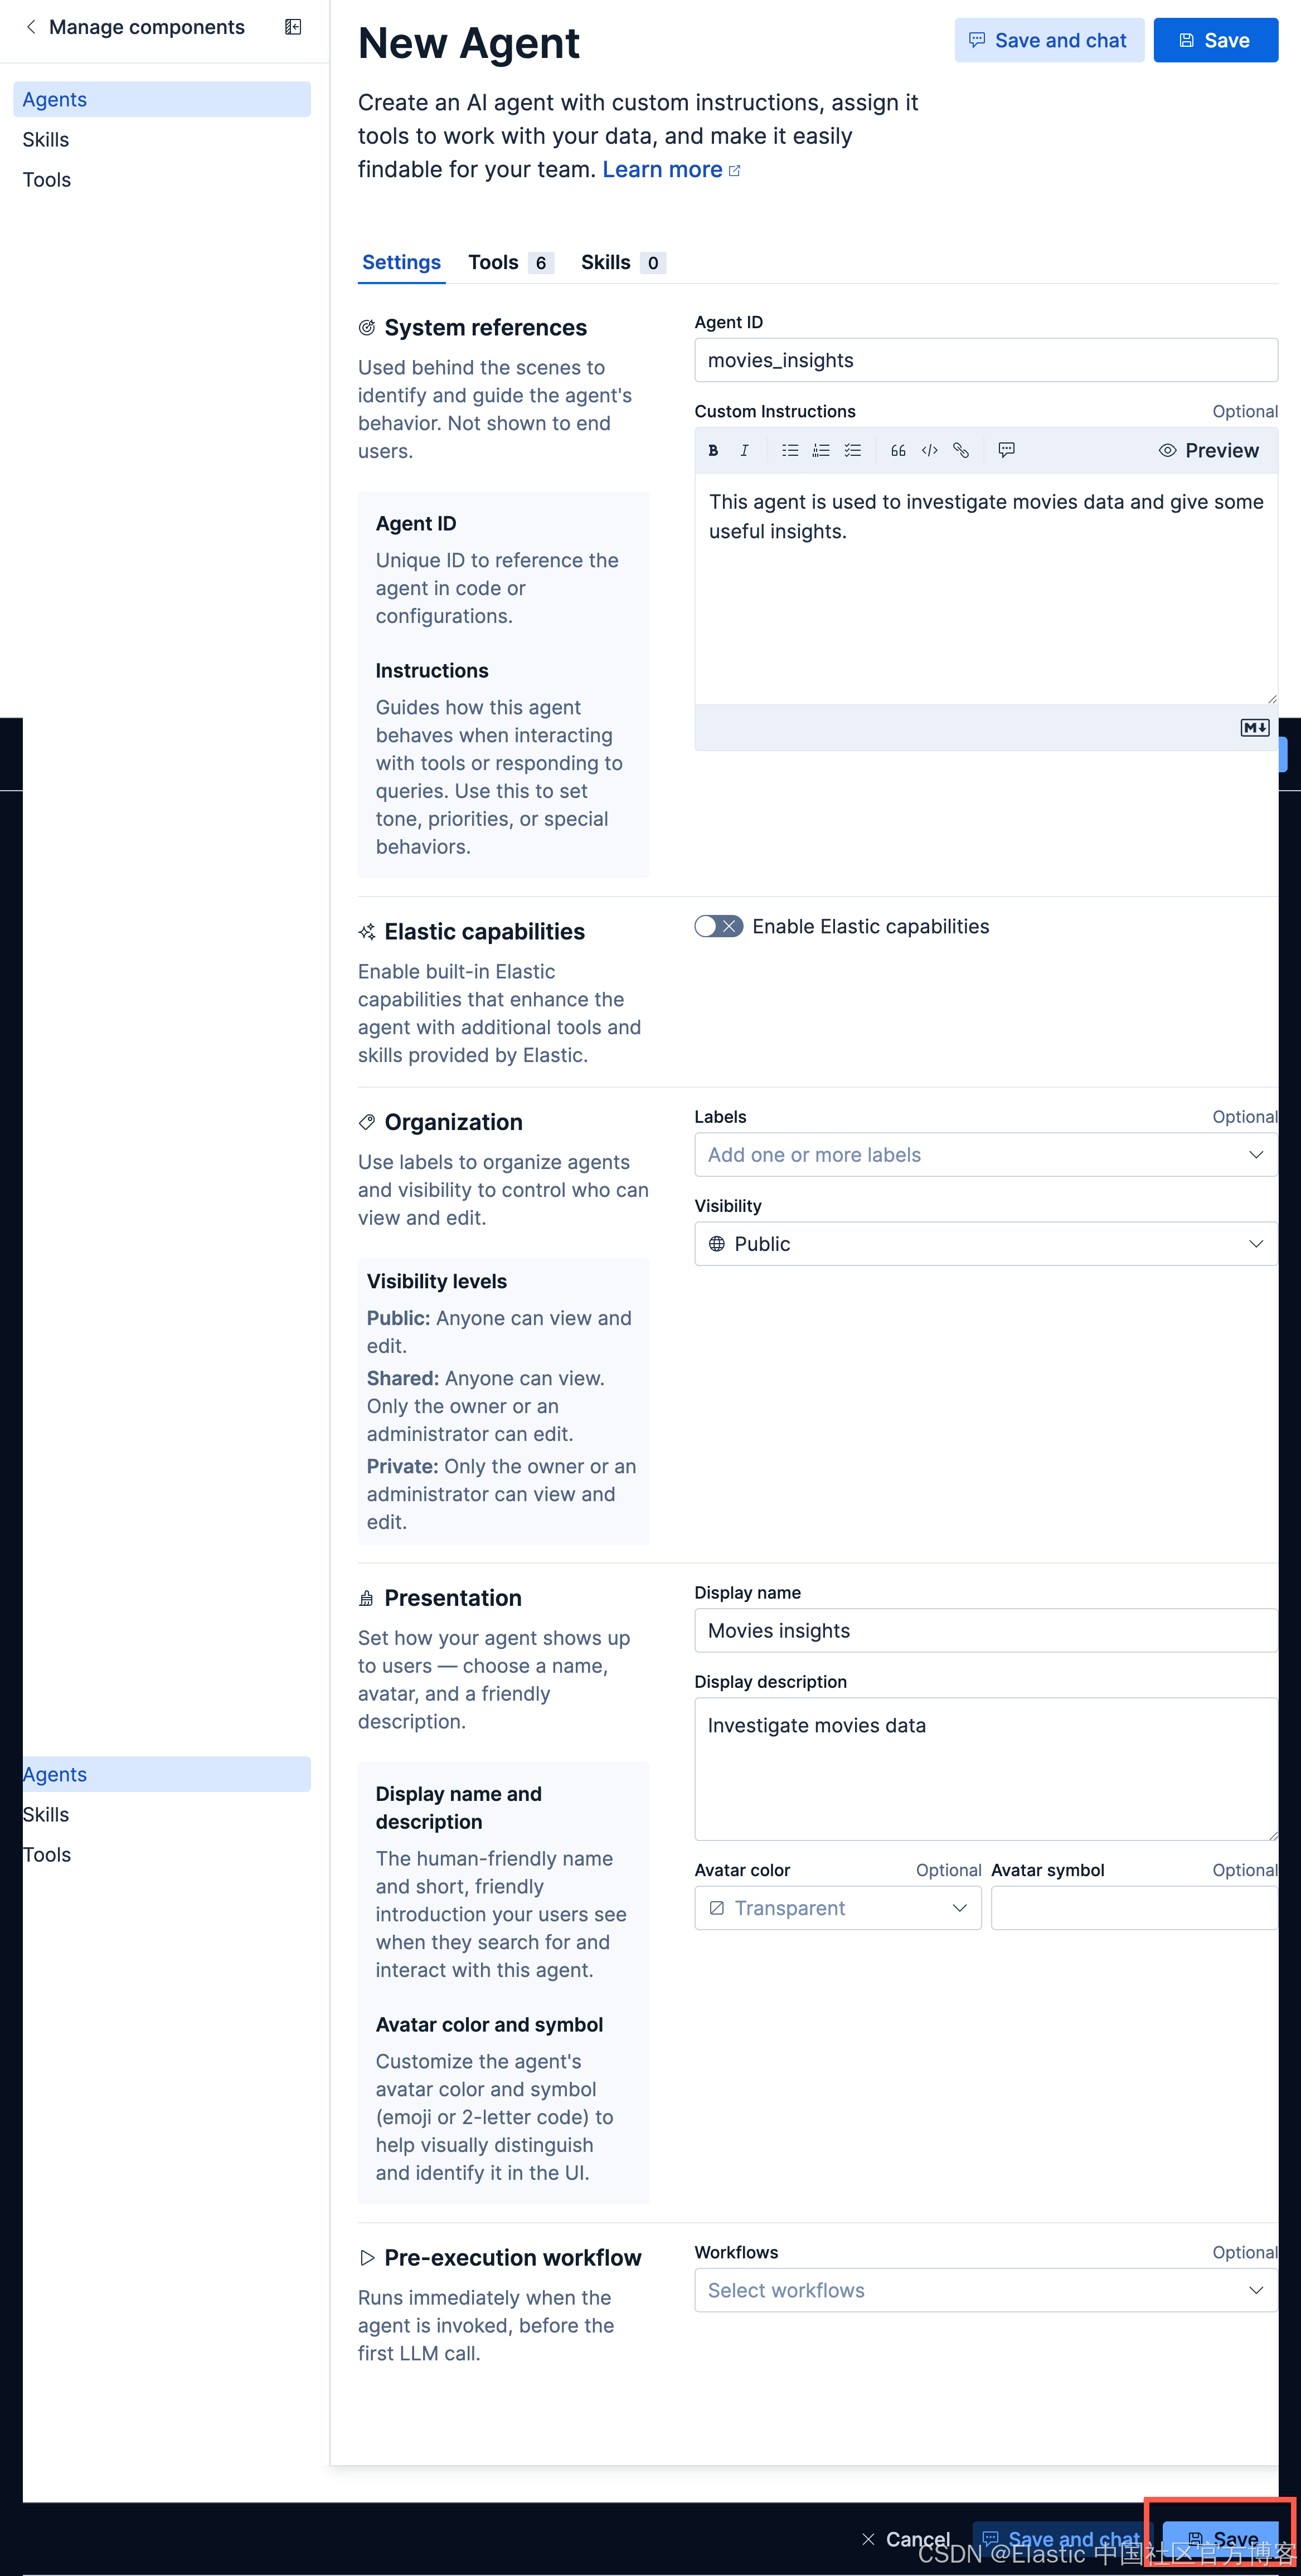
我们接下来在 Tools 窗口选中我们之前创建的工具:
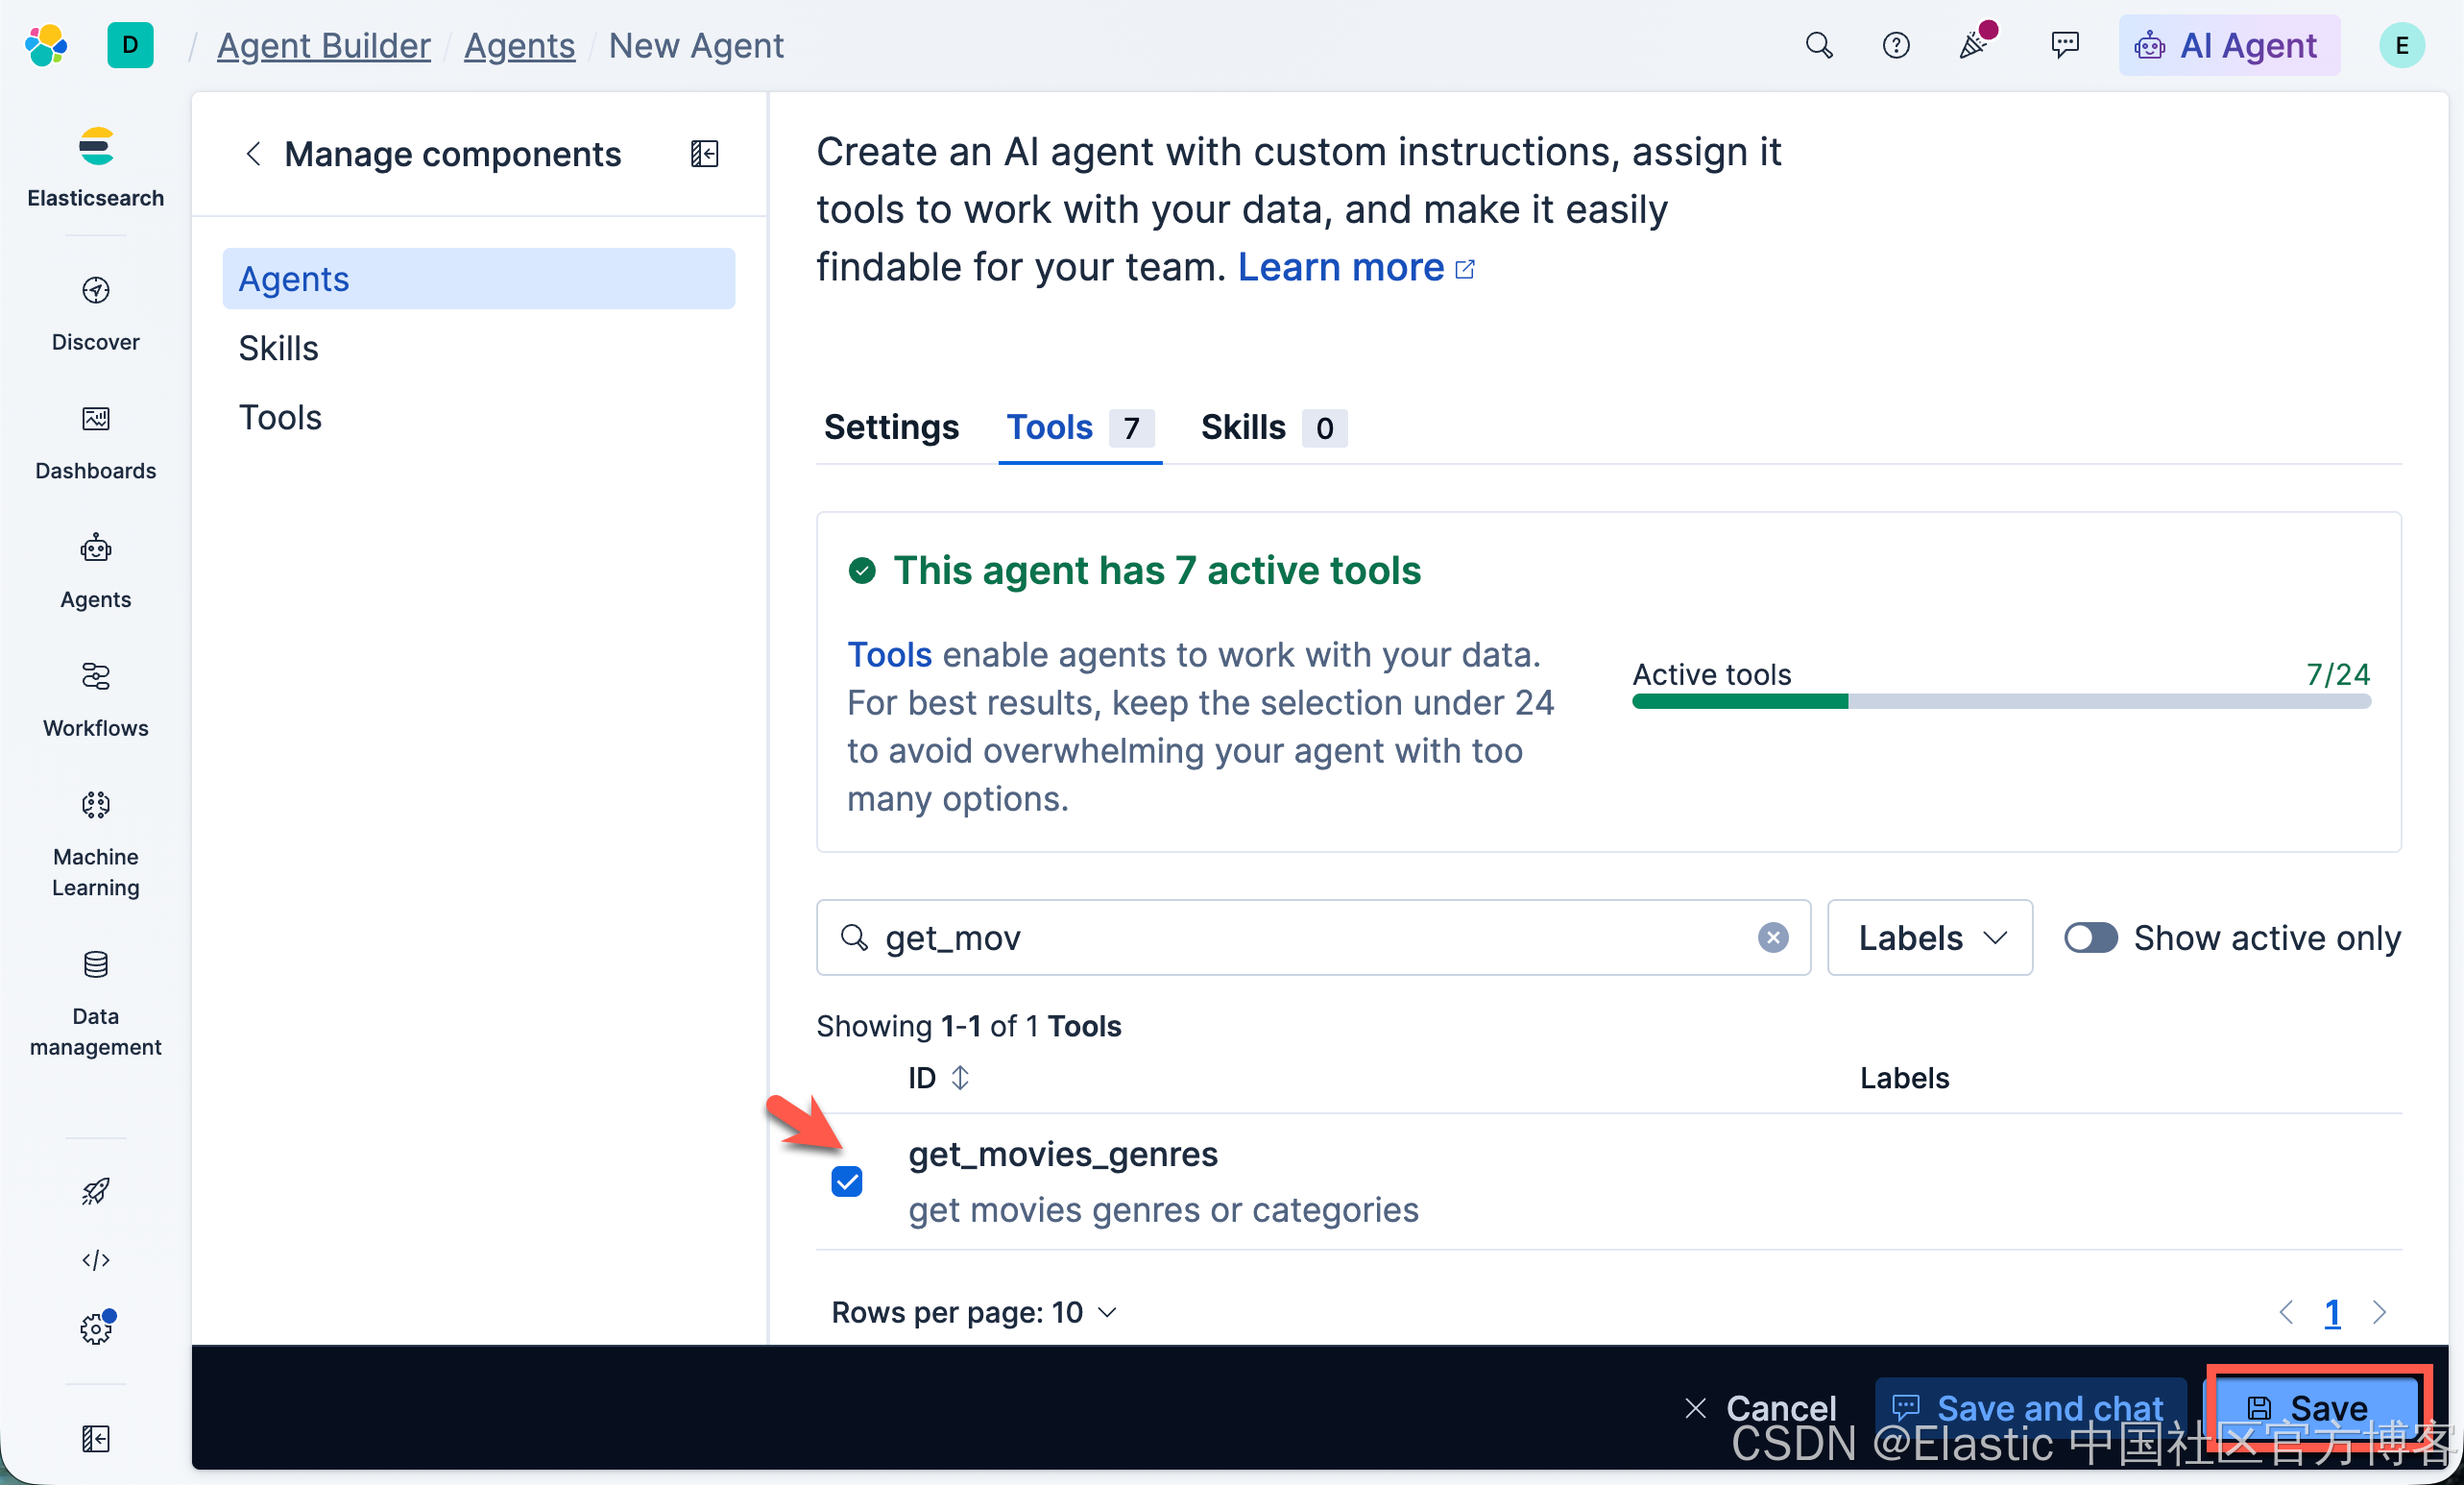
如上所示,在默认的情况下,它已经为我们选中了 6 个通常我们需要的工具:
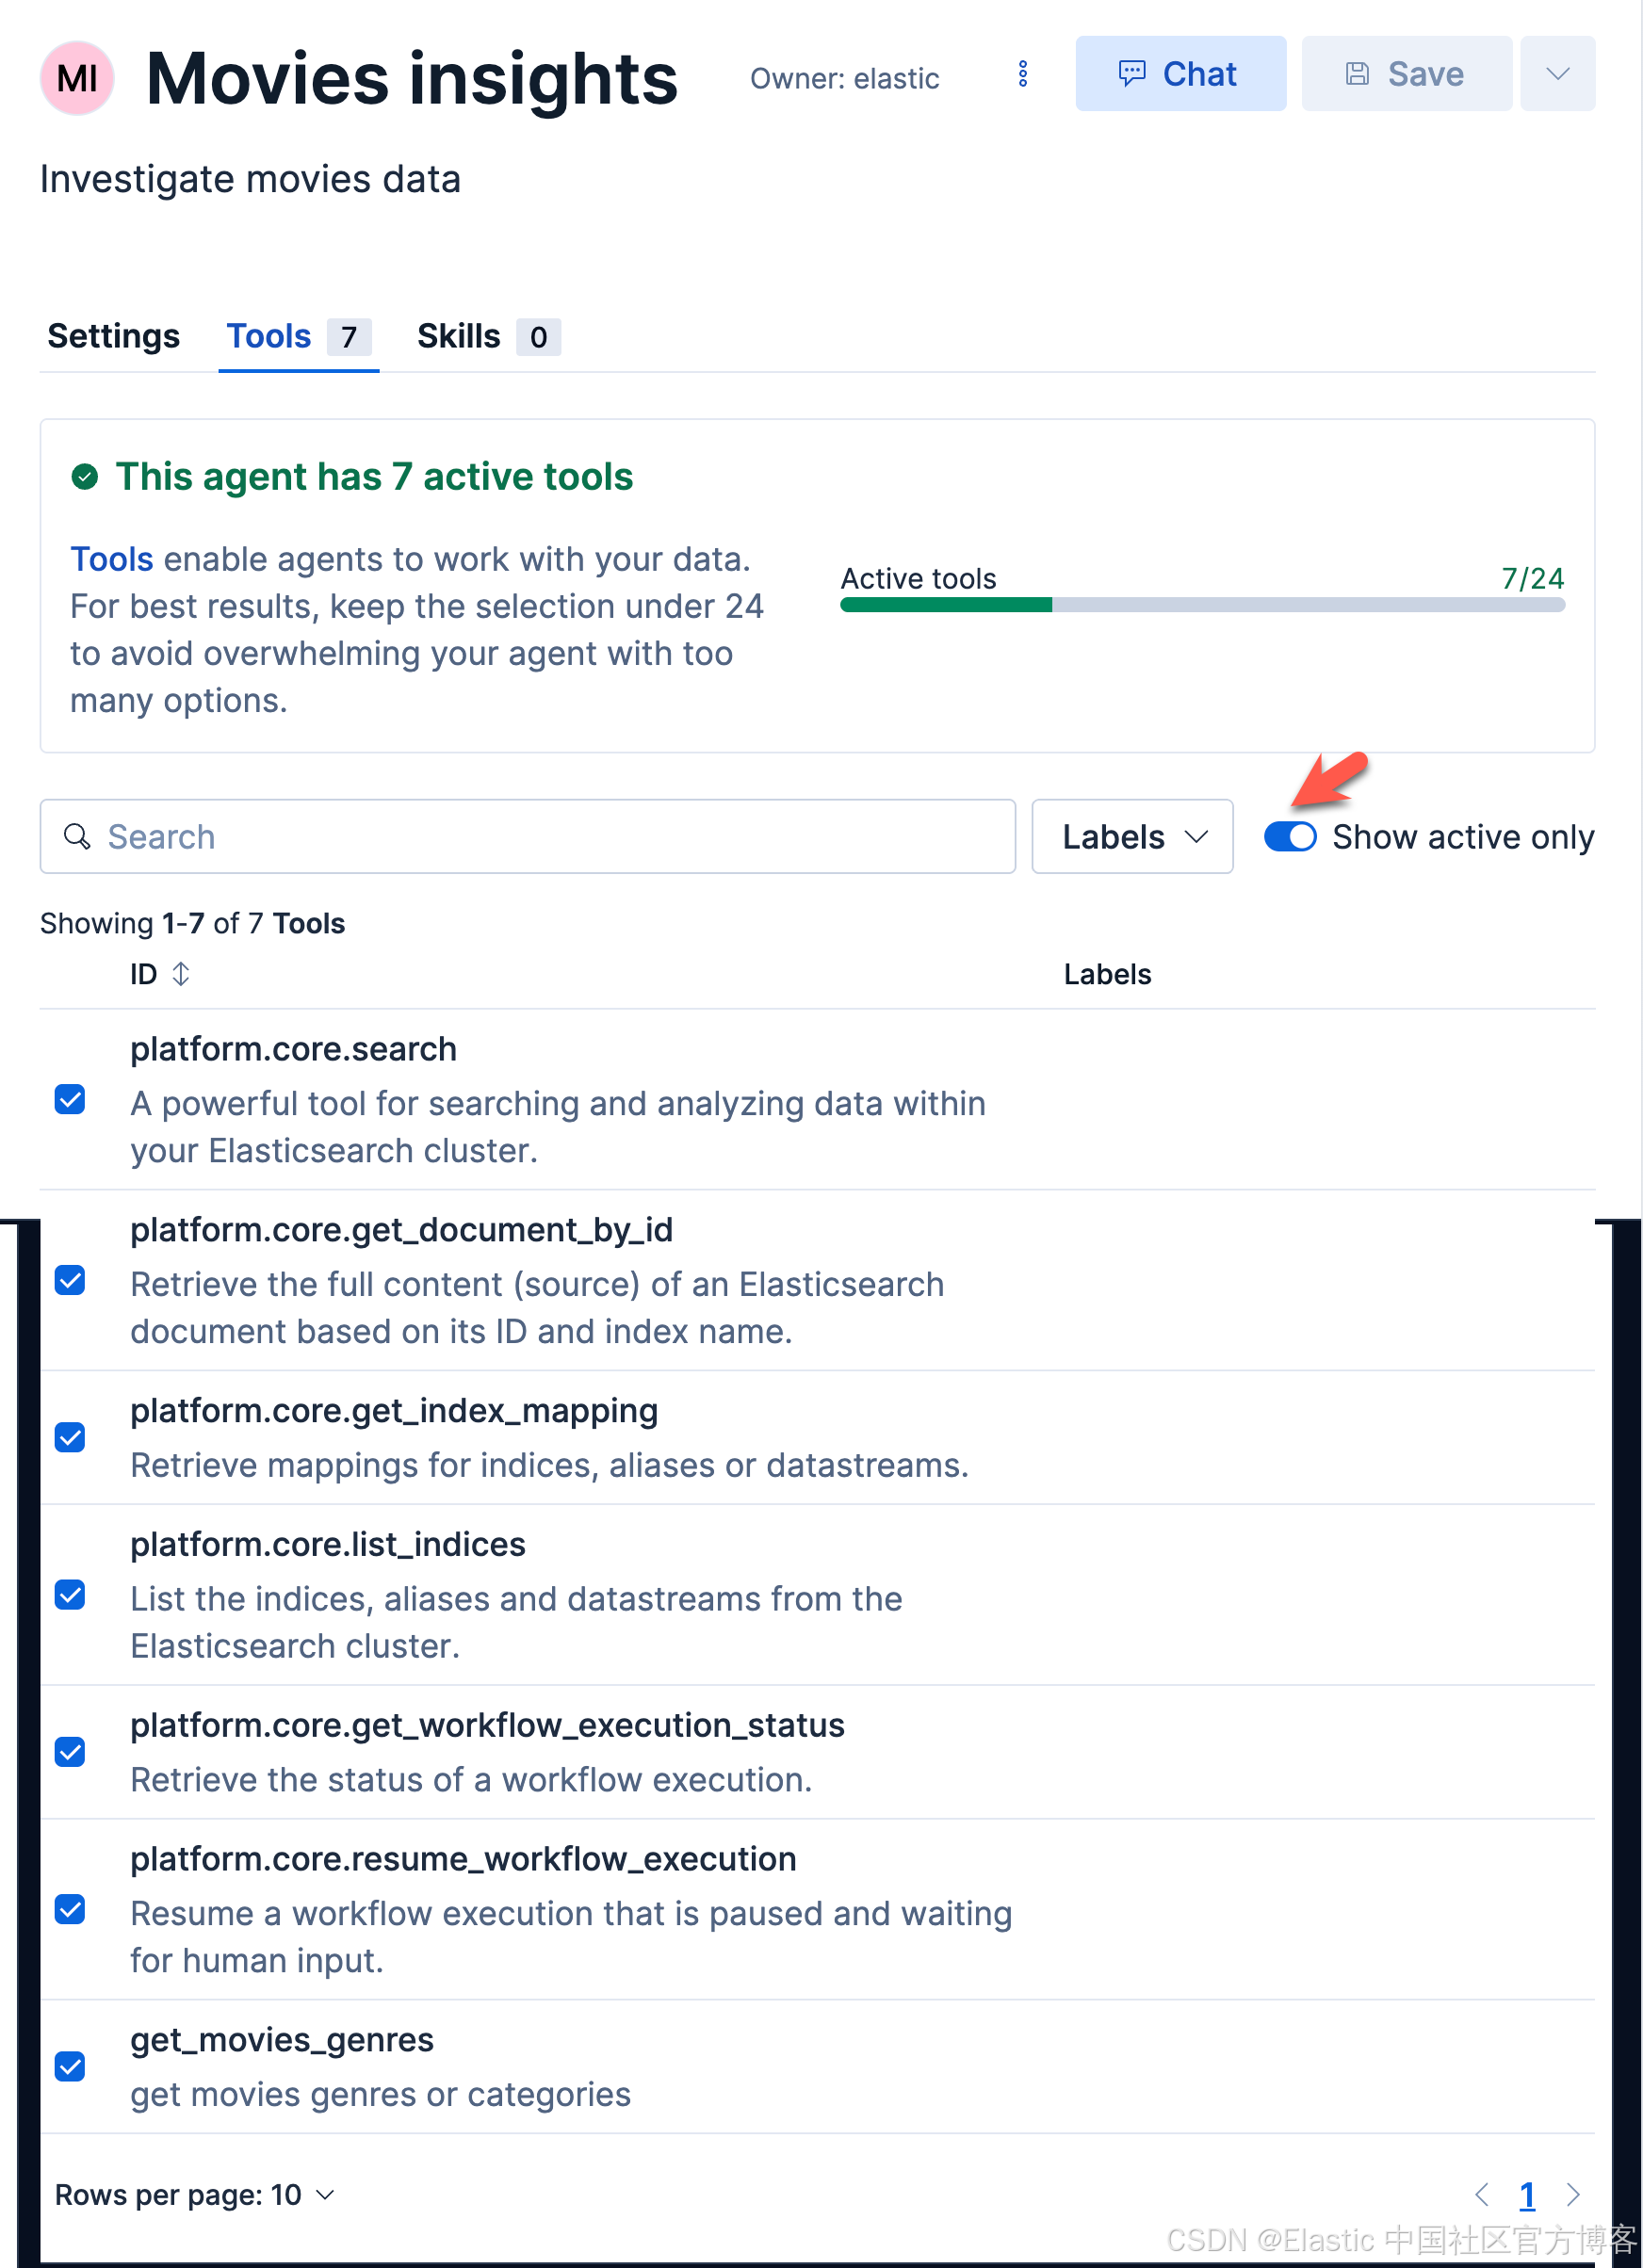
点击 Save 按钮:
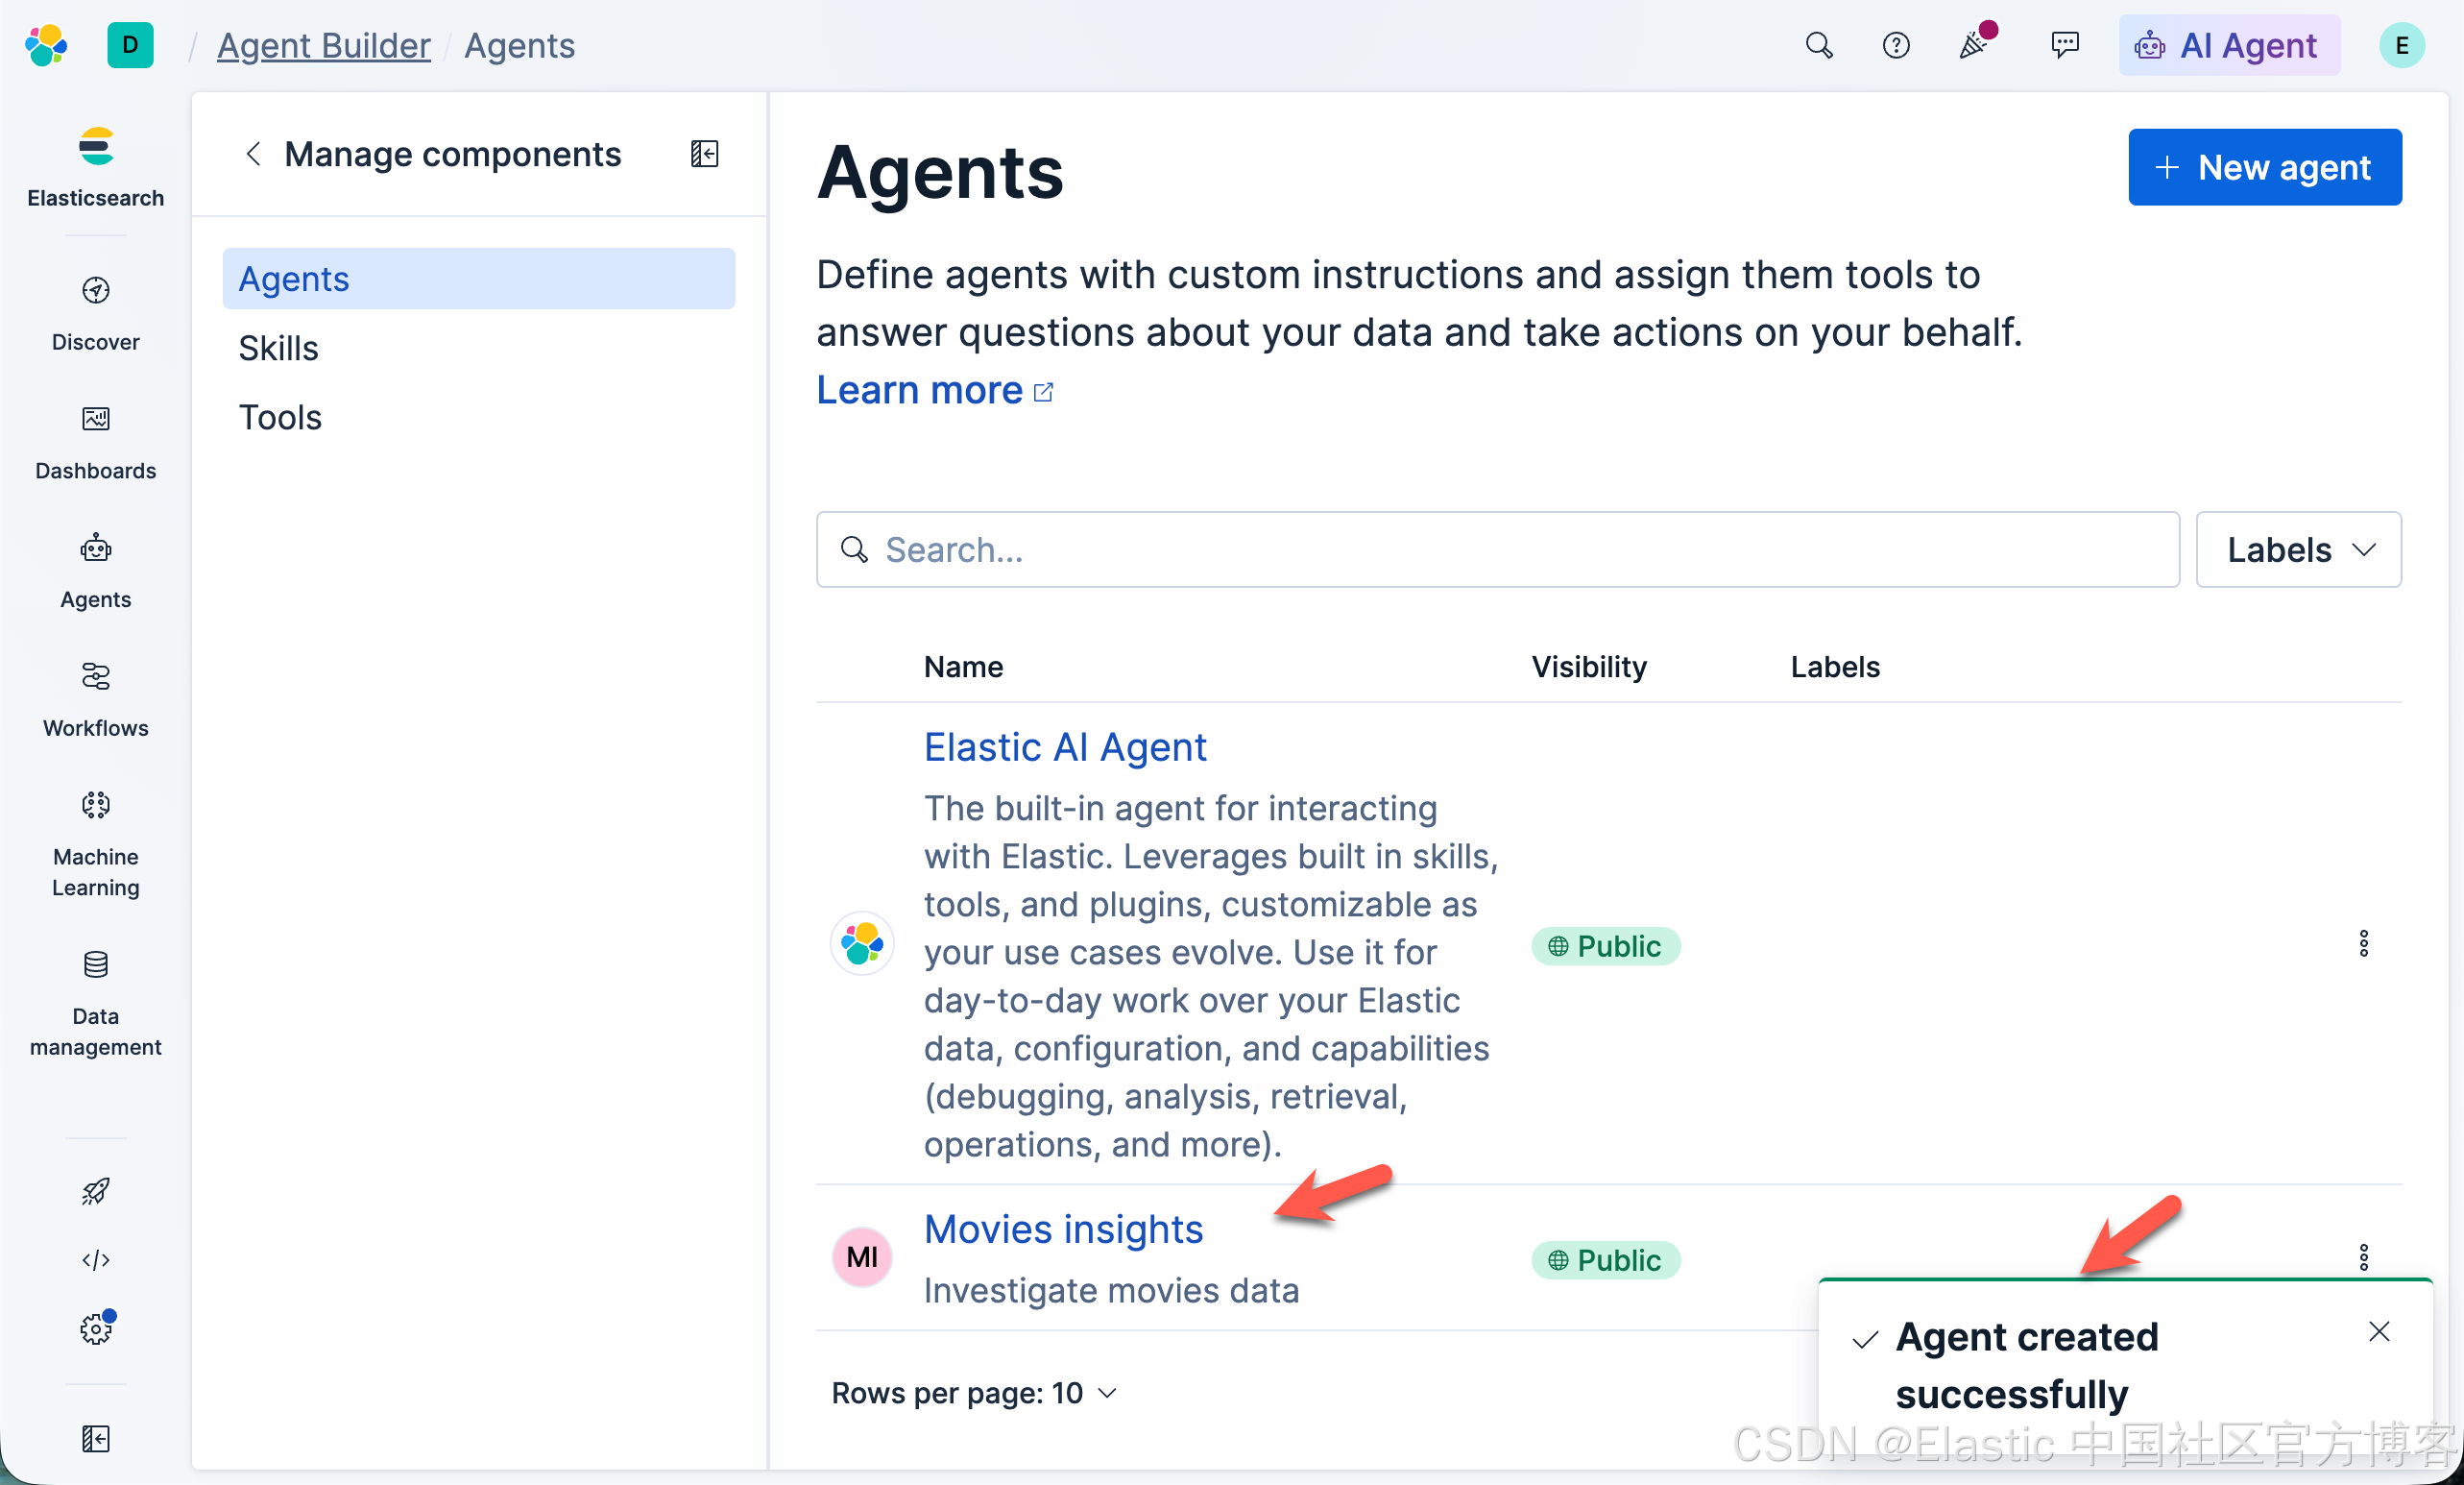
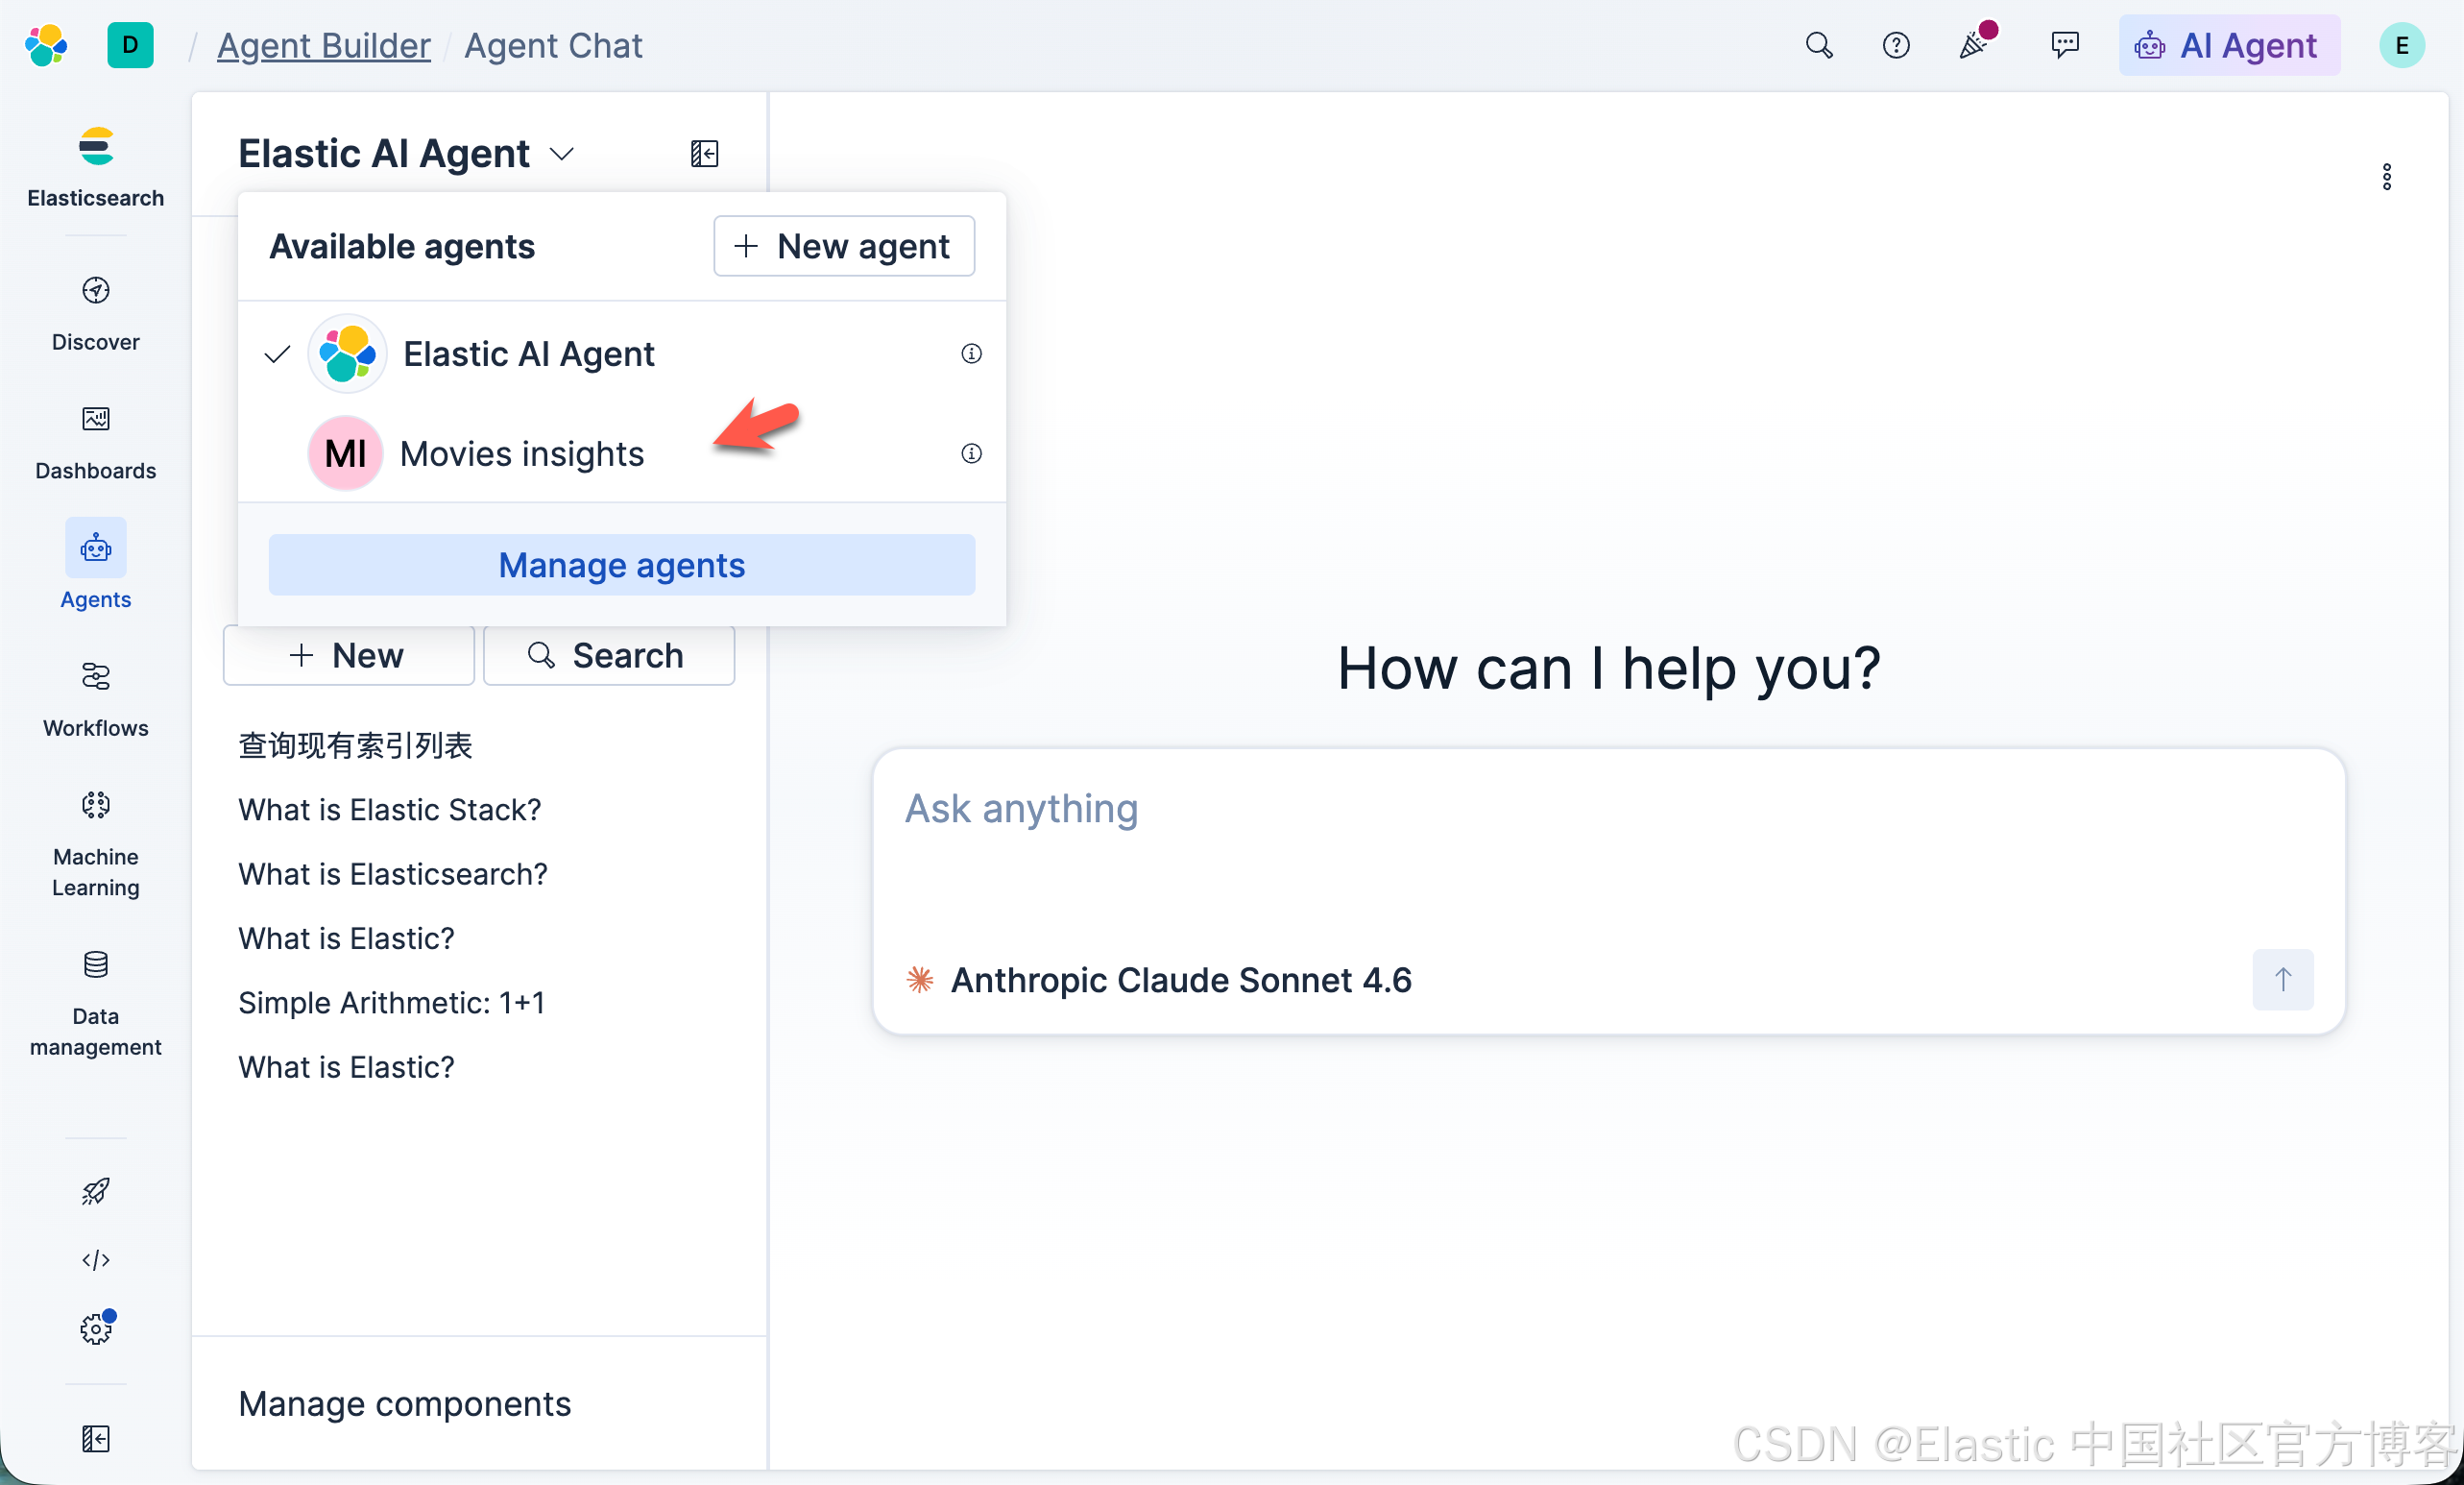
这样我们的 Mives insights Agent 就创建好了。
使用创建的 Agent
我们接下来使用我们刚才已经创建好的 Agent:
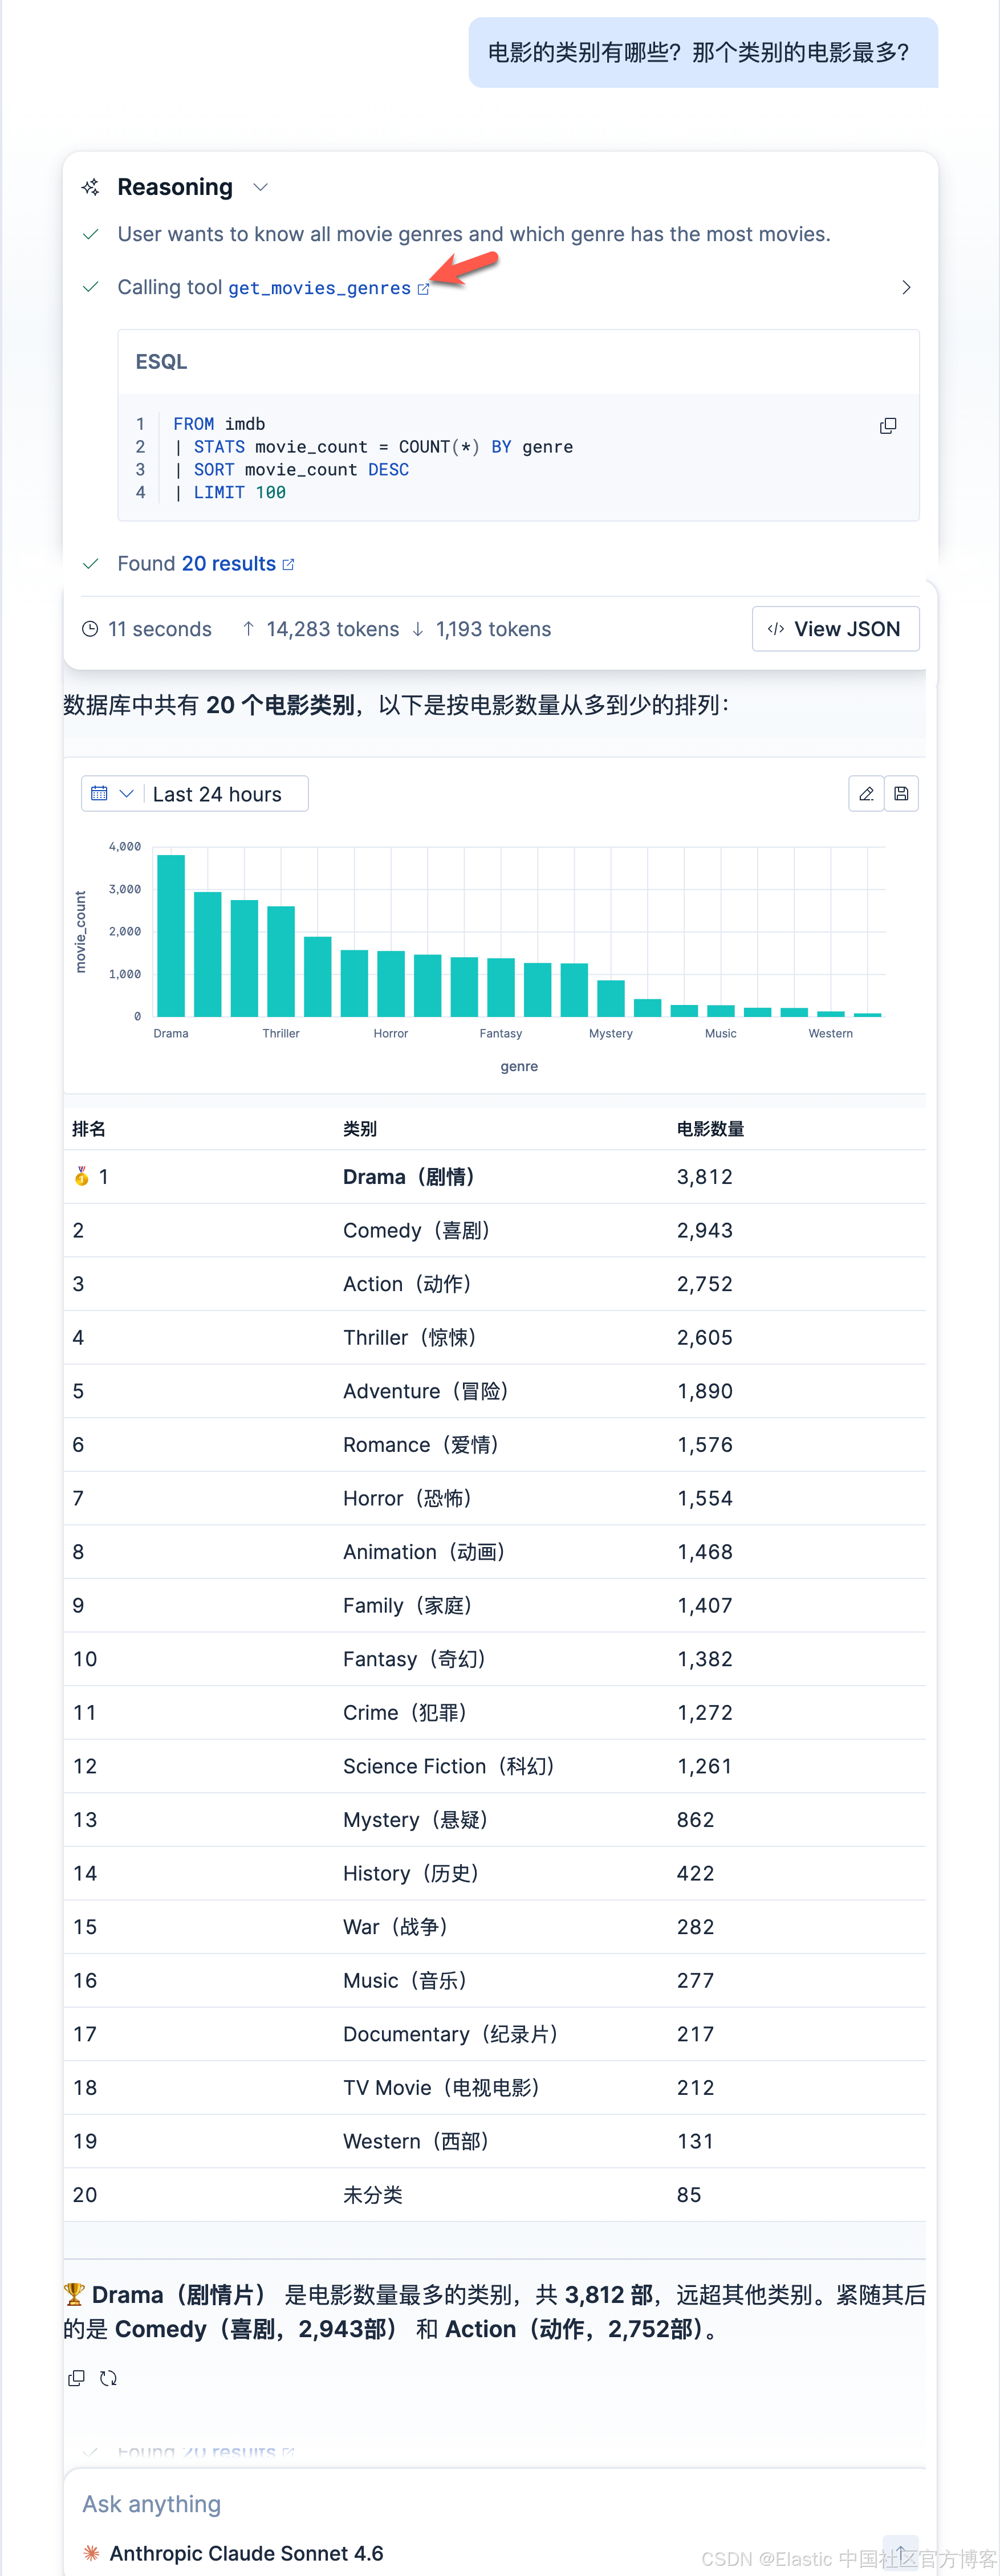
这次我们问了同样的问题。我们可以看到在我们的 agent 调用中,它直接使用了 get_movis_genres 来完成相应的查询,而不是需要 LLM 来重新思考,并推理一个相应的 ES|QL 查询语句来完成的。这样做的好处是:
- 速度快。不需要 LLM 来推理
- 节省 tokens。因为每次推理都需要大量的 token 来完成
- 一致性。一旦验证我们的 ES|QL 是正确的,每次调用都会使用一致的 ES|QL 查询,而不是每次让 LLM 来推理完成的。LLM 每次推理的查询有可能会不一致,从而导致查询的结果不一致。
- 提高可信性。我们可以调整 ES|QL 查询的语句,根据我们人类理解的方式来书写,而不是直接由 LLM 来书写,尽管 LLM 在很多情况下能帮助我们书写非常合理而且有用的推理语句。在有些情景中特别有用,比如我们可以通过 ES|QL 的 join 的方式把不同的索引进行 join,再提供给大模型进行推理。详细例程:你的第一个 Elastic Agent:从单个查询到 AI 驱动的聊天(二)
你如果想定制自己的 Agents,那么你可以参考我之前的系列文章:
好了。今天的文章就写到这里。祝大家学习愉快!

Agent 垂直技术社区,欢迎活跃、内容共建。
更多推荐

 19
19 0
0- 0


 已为社区贡献38条内容

所有评论(0)