Python agent-control-layer 包:功能、安装与实战案例详解
1. 引言
agent-control-layer 是一个用于构建和管理 AI Agent 行为控制层的 Python 包。它提供了一套标准化的接口和工具,帮助开发者对 Agent 的决策过程进行约束、监控和干预,确保 Agent 在复杂任务中按照预期规则运行。本文将详细介绍该包的核心功能、安装方法、语法参数,并通过 8 个实际案例展示其应用场景,最后总结常见错误与使用注意事项。
2. 核心功能
agent-control-layer 主要提供以下功能:
- 行为约束:定义 Agent 允许执行的操作范围,防止越权行为。
- 规则引擎:支持自定义规则,对 Agent 的输入输出进行校验。
- 监控与日志:记录 Agent 的每一步决策过程,便于调试和审计。
- 安全沙箱:限制 Agent 对系统资源的访问权限。
- 策略注入:动态调整 Agent 的行为策略,无需修改核心代码。
- 多 Agent 协调:管理多个 Agent 之间的通信与协作规则。
3. 安装方法
agent-control-layer 支持通过 pip 直接安装:
pip install agent-control-layer如果需要安装最新开发版本,可以从 GitHub 仓库安装:
pip install git+https://github.com/your-repo/agent-control-layer.git安装完成后,可以通过以下命令验证安装是否成功:
import agent_control_layer
print(agent_control_layer.__version__)
4. 语法与参数详解
4.1 核心类:ControlLayer
ControlLayer 是包的核心类,用于创建和管理控制层实例。主要参数如下:
| 参数名 | 类型 | 说明 | 默认值 |
|---|---|---|---|
| rules | list | 规则列表,每个规则是一个 Rule 对象 | [] |
| sandbox | SandboxConfig | 沙箱配置,限制 Agent 的权限 | None |
| logger | Logger | 日志记录器 | None |
| strategy | str | 策略模式,可选 "strict" 或 "permissive" | "strict" |
4.2 规则定义:Rule
Rule 类用于定义具体的约束规则:
| 参数名 | 类型 | 说明 |
|---|---|---|
| name | str | 规则名称 |
| condition | callable | 条件函数,接收 action 和 context,返回 bool |
| action | str | 违反规则时的处理方式,"block" 或 "warn" |
| message | str | 规则触发时的提示信息 |
4.3 沙箱配置:SandboxConfig
| 参数名 | 类型 | 说明 | 默认值 |
|---|---|---|---|
| allowed_commands | list | 允许执行的系统命令列表 | [] |
| allowed_paths | list | 允许访问的文件路径列表 | [] |
| max_memory | int | 最大内存使用量(MB) | 512 |
| timeout | int | 单次操作超时时间(秒) | 30 |
5. 8 个实际应用案例
案例 1:基础行为约束
限制 Agent 只能执行读取操作,禁止写入文件:
from agent_control_layer import ControlLayer, Rule
def no_write_rule(action, context):
return "write" not in action.get("type", "")
control = ControlLayer(rules=[
Rule(name="no_write", condition=no_write_rule, action="block", message="写入操作被禁止")
])
result = control.check_action({"type": "write_file", "path": "/tmp/test.txt"})
print(result.allowed)  # False
案例 2:基于上下文的动态规则
根据当前环境动态调整规则:
def production_rule(action, context):
    if context.get("env") == "production":
        return "delete" not in action.get("type", "")
    return True
control = ControlLayer(rules=[
Rule(name="production_safe", condition=production_rule, action="block")
])
context = {"env": "production"}
result = control.check_action({"type": "delete_file"}, context)
print(result.allowed)  # False
案例 3:日志监控与审计
记录 Agent 的所有操作日志:
import logging
from agent_control_layer import ControlLayer
logger = logging.getLogger("agent_audit")
handler = logging.FileHandler("agent_audit.log")
logger.addHandler(handler)
control = ControlLayer(logger=logger)
control.check_action({"type": "read_file", "path": "/data/config.json"})
日志文件会记录本次操作详情
案例 4:安全沙箱限制
限制 Agent 只能访问特定目录:
from agent_control_layer import ControlLayer, SandboxConfig
sandbox = SandboxConfig(
allowed_paths=["/data/project"],
allowed_commands=["ls", "cat"],
max_memory=256,
timeout=10
)
control = ControlLayer(sandbox=sandbox)
result = control.check_action({"type": "execute_command", "command": "rm -rf /"})
print(result.allowed)  # False
案例 5:多 Agent 协调控制
管理两个 Agent 之间的通信规则:
from agent_control_layer import MultiAgentController
controller = MultiAgentController()
def agent_a_rule(action, context):
return action.get("target") != "agent_b" or action.get("type") == "query"
controller.add_agent("agent_a", rules=[
Rule(name="a_to_b", condition=agent_a_rule, action="block")
])
result = controller.check_cross_action("agent_a", {"type": "command", "target": "agent_b"})
print(result.allowed)  # False
案例 6:策略动态切换
根据任务类型切换控制策略:
control = ControlLayer(strategy="permissive")
在严格模式下重新初始化
strict_control = ControlLayer(strategy="strict")
动态切换策略
control.set_strategy("strict")
result = control.check_action({"type": "network_request"})
print(result.allowed)  # 取决于规则配置
案例 7:自定义规则链
组合多个规则形成规则链:
from agent_control_layer import RuleChain
chain = RuleChain([
Rule(name="check_path", condition=lambda a, c: "/safe/" in a.get("path", "")),
Rule(name="check_size", condition=lambda a, c: a.get("size", 0) < 1024)
])
control = ControlLayer(rules=chain)
result = control.check_action({"type": "read_file", "path": "/safe/data.txt", "size": 500})
print(result.allowed)  # True
案例 8:集成到 LangChain Agent
将控制层集成到 LangChain 的 Agent 中:
from langchain.agents import AgentExecutor
from agent_control_layer import ControlLayer, Rule
control = ControlLayer(rules=[
Rule(name="safe_tools", condition=lambda a, c: a.get("tool") in ["search", "calculate"])
])
class ControlledAgentExecutor(AgentExecutor):
def _take_next_step(self, *args, **kwargs):
action = super()._take_next_step(*args, **kwargs)
result = control.check_action(action)
if not result.allowed:
raise PermissionError(f"操作被拒绝: {result.message}")
return action
使用受控的 Agent 执行器
agent = ControlledAgentExecutor.from_agent_and_tools(...)
6. 常见错误与使用注意事项
6.1 常见错误
- 规则条件函数返回类型错误:condition 函数必须返回 bool 类型,返回 None 或 int 会导致校验失败。
- 沙箱配置过于严格:allowed_paths 和 allowed_commands 设置过少会导致 Agent 无法正常工作。
- 日志级别设置不当:未正确配置日志级别可能导致关键操作未被记录。
- 策略模式混淆:在 strict 模式下未定义规则时,所有操作默认被拒绝。
6.2 使用注意事项
- 规则顺序:规则按添加顺序执行,应将最严格的规则放在前面。
- 性能影响:大量复杂规则可能影响 Agent 的响应速度,建议对规则进行缓存优化。
- 版本兼容性:agent-control-layer 依赖 Python 3.8+,与 LangChain 0.1.0+ 兼容。
- 测试覆盖:在生产环境部署前,务必对规则进行充分的单元测试和集成测试。
- 安全审计:定期审查规则配置和日志记录,确保控制层未被绕过。
7. 总结
agent-control-layer 为 AI Agent 的开发提供了强大的行为控制能力。通过合理配置规则、沙箱和策略,开发者可以构建安全、可控的 Agent 系统。本文介绍的 8 个案例覆盖了从基础约束到高级集成的常见场景,建议读者根据实际需求灵活组合使用。
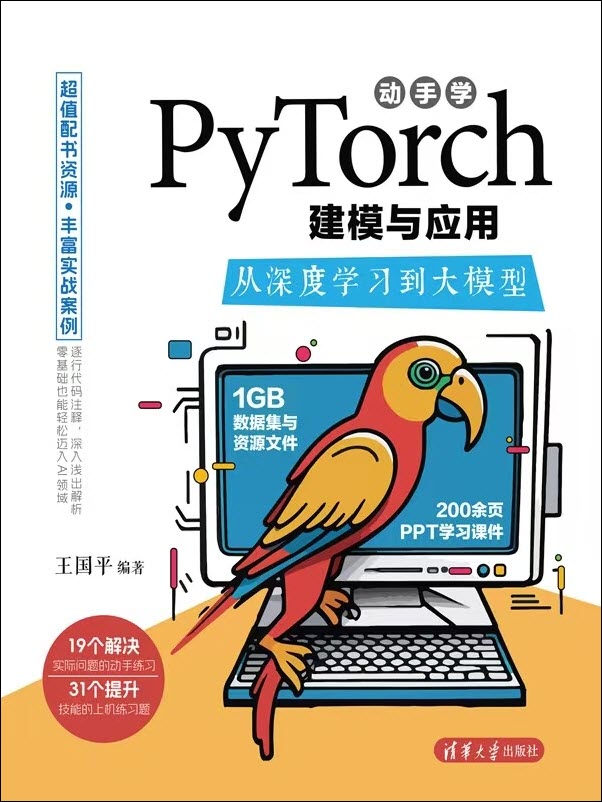
《动手学PyTorch建模与应用:从深度学习到大模型》是一本从零基础上手深度学习和大模型的PyTorch实战指南。全书共11章,前6章涵盖深度学习基础,包括张量运算、神经网络原理、数据预处理及卷积神经网络等;后5章进阶探讨图像、文本、音频建模技术,并结合Transformer架构解析大语言模型的开发实践。书中通过房价预测、图像分类等案例讲解模型构建方法,每章附有动手练习题,帮助读者巩固实战能力。内容兼顾数学原理与工程实现,适配PyTorch框架最新技术发展趋势。

Agent 垂直技术社区,欢迎活跃、内容共建。
更多推荐


 0
0 0
0- 0


 已为社区贡献34条内容

所有评论(0)