uniapp 支付宝小程序map地图以及map高级定制渲染开发指南
·
uniapp 支付宝小程序map地图以及map高级定制渲染开发指南
在支付宝小程序中,地图(Map)组件提供了强大的地图展示和交互能力。本文将基于实际项目代码,深入解析如何实现地图标记点的高级定制渲染。
初始化状态点位样式自定义 气泡自定义
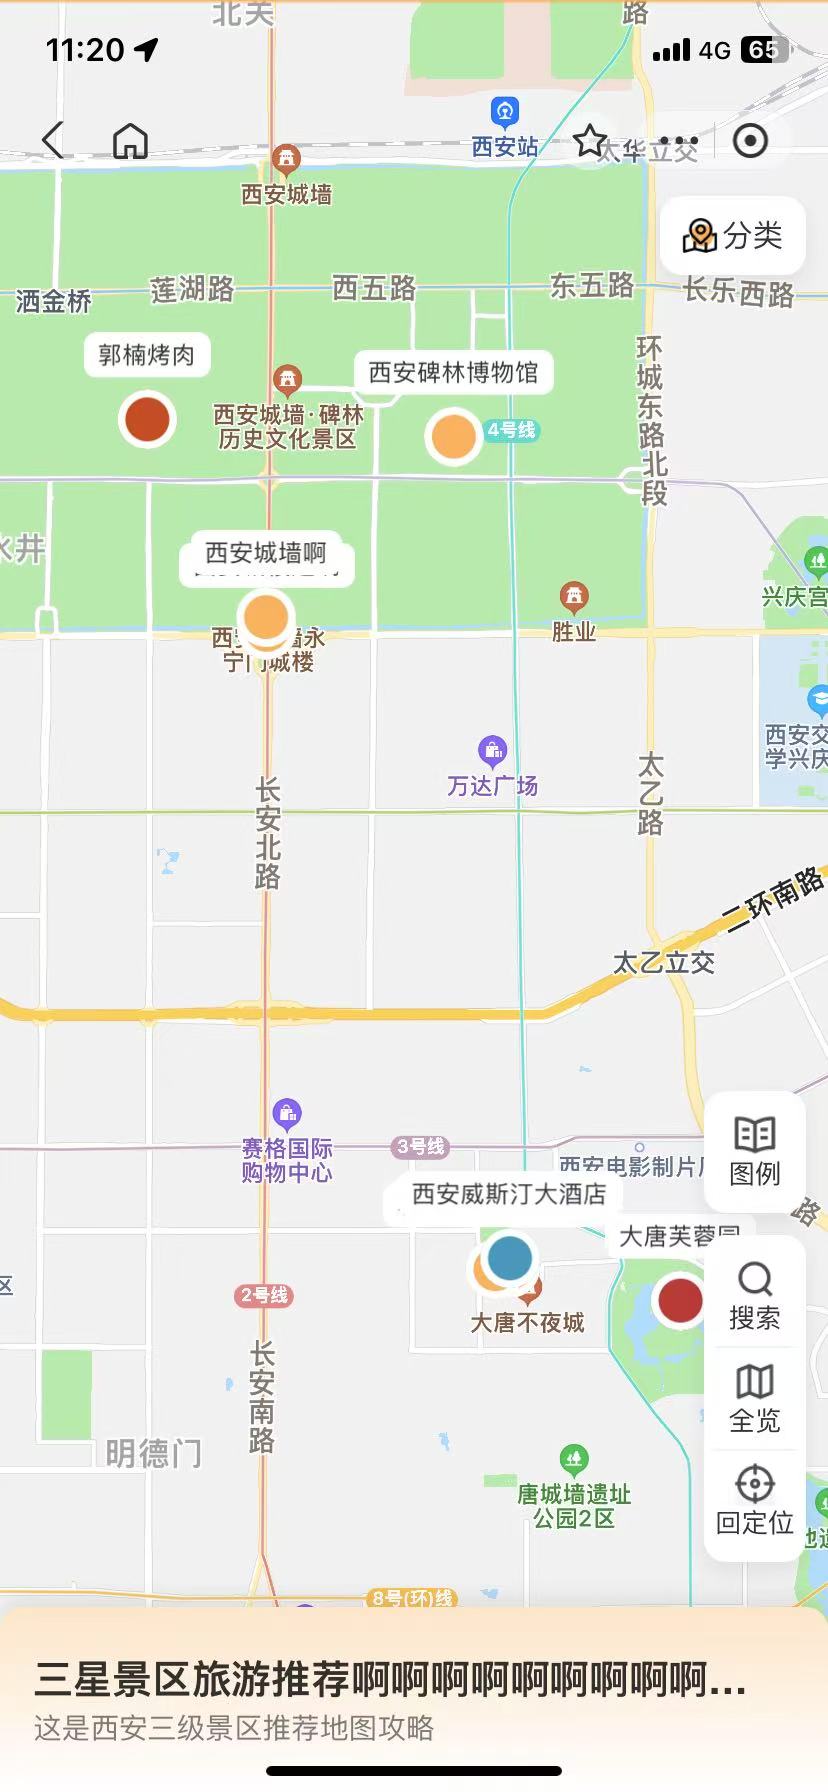
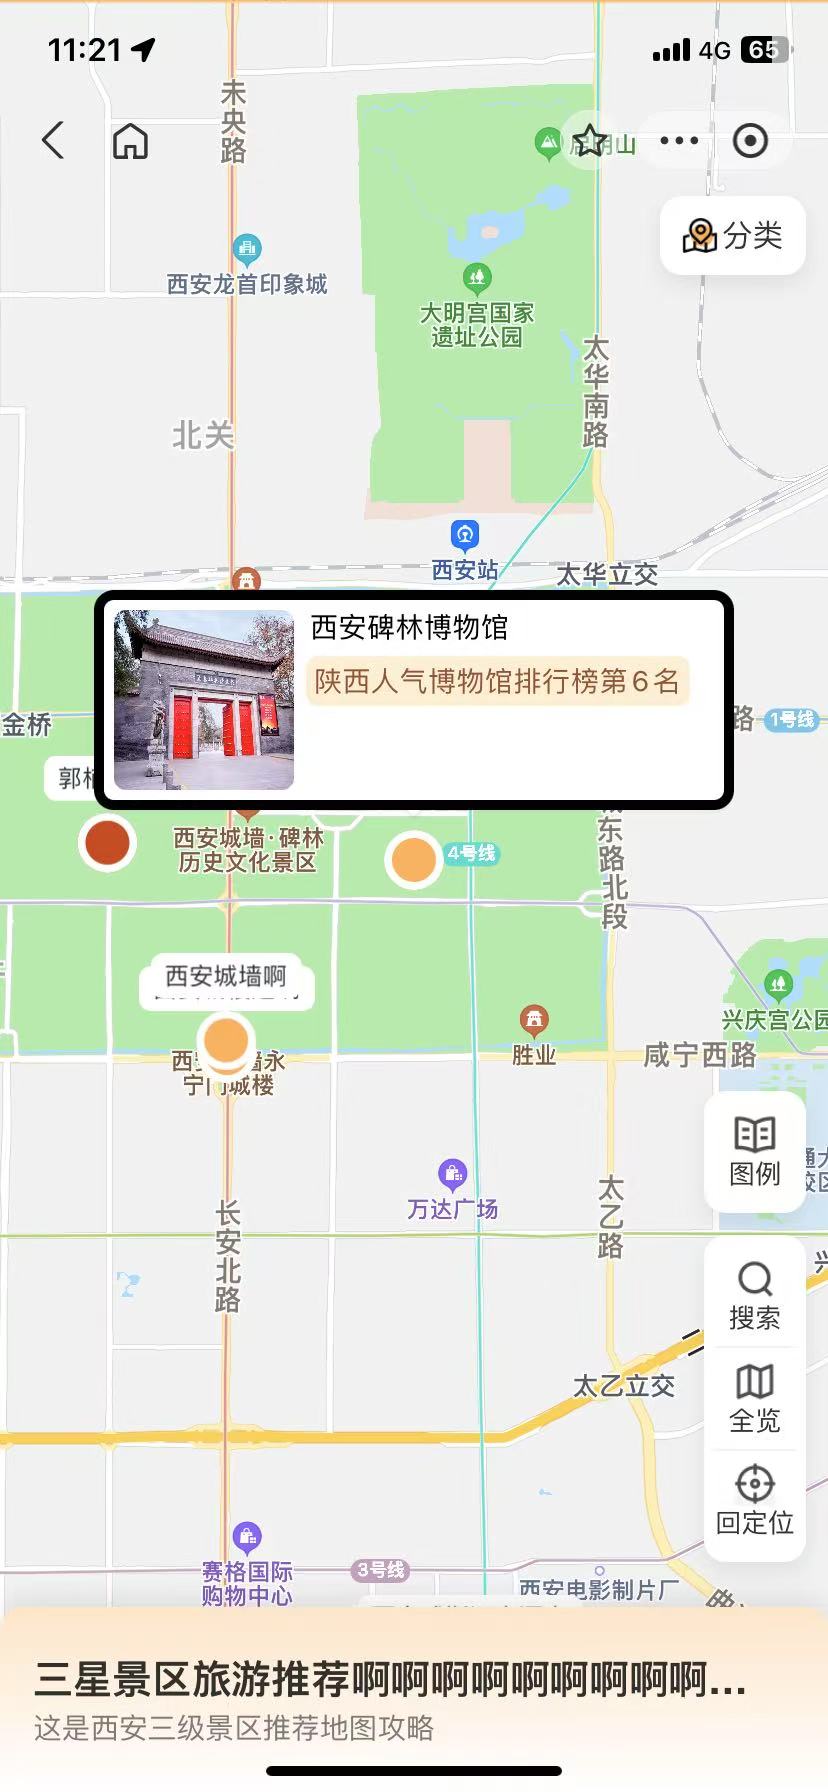
点击状态点位点击后切换详情气泡
官网文档
map 地图
map 高级定制渲染主要api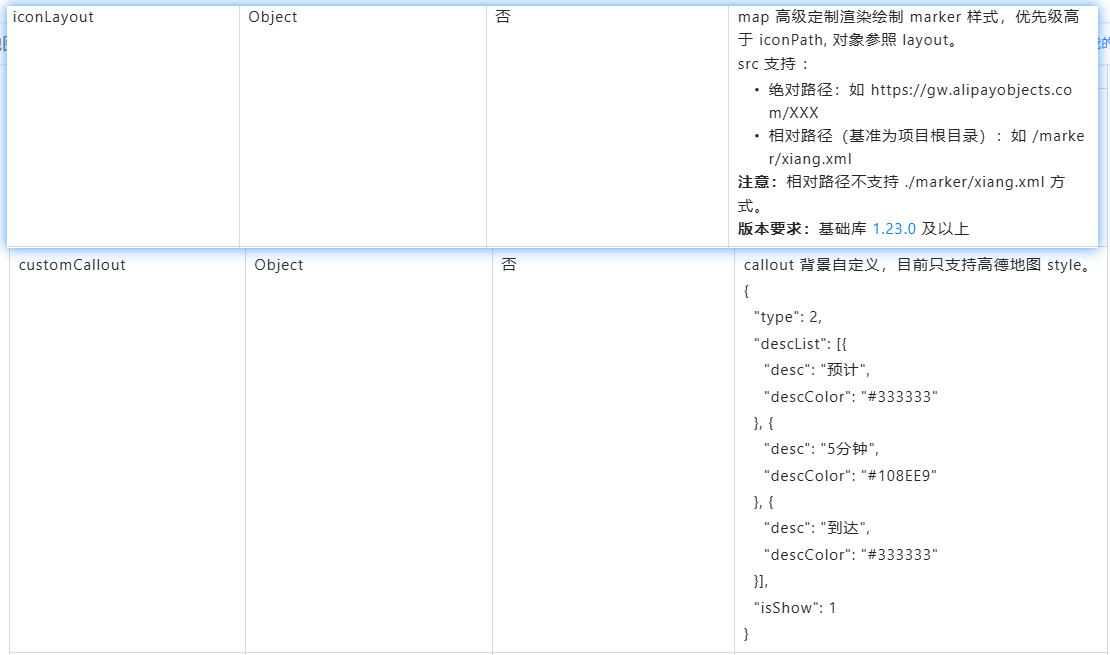
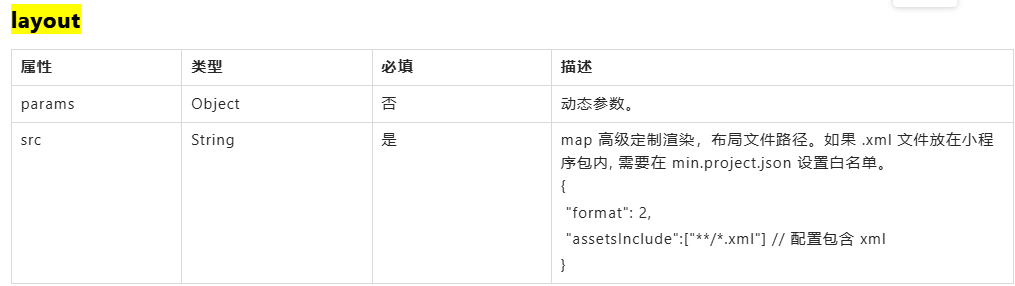
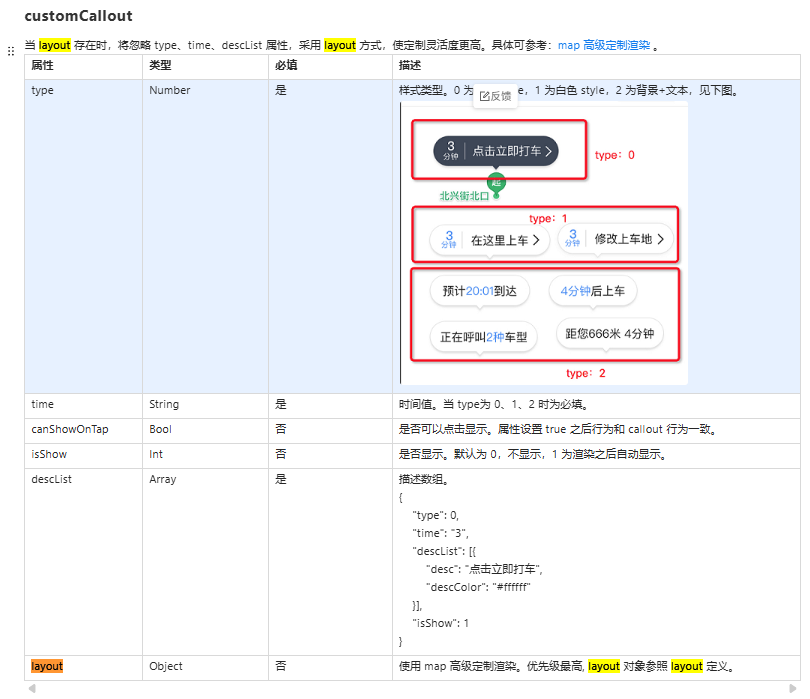
一、基础地图配置
<map id="map" style="width: 100%;height: 100%;"
	:longitude="map.longitude" :latitude="map.latitude"
	:markers="markers" :include-points="allLocations" :enable-rotate="false"
	theme="satellite"
	:show-location="true"
	@markerTap="calloutTap"
	@tap="mapClick"
	@calloutTap="calloutTapFun"
	@regionchange="regionchange"
	scale='14'
	:circles="circles">
</map>
- longitude/latitude :地图中心点坐标
- markers :地图标记点数组
- include-points :显示所有标记点的视野范围
- 事件监听:标记点点击、地图点击、区域变化等
二、标记点(Marker)高级定制
支付宝地图支持通过XML模板对标记点进行高度自定义渲染。我们主要使用了三种XML模板:
1. 基础标记点模板(mapMoer.xml) 初始化点位样式模板
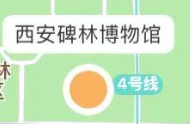
<box layout="vertical" horizontal-align="middle">
   <box layout="vertical" horizontal-align="middle" background-color="#FFFFFF" border-radius="6" padding="4 8" bottom="6">
    <text text='${name}' color='#333333' font-size='12'/>
   </box>
   <box layout="vertical" width="30" height="30" background-color="${borderColor}" border-radius="15" border-width="4" border-color="#ffffff"></box>
</box>
2. 选中状态模板(mapMoerNo.xml)
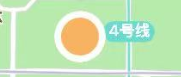
<box layout="vertical" width="30" height="30" background-color="${borderColor}" border-radius="15" border-width="4" border-color="#ffffff"></box>
3. 气泡弹窗模板(marker_customcallout.xml)
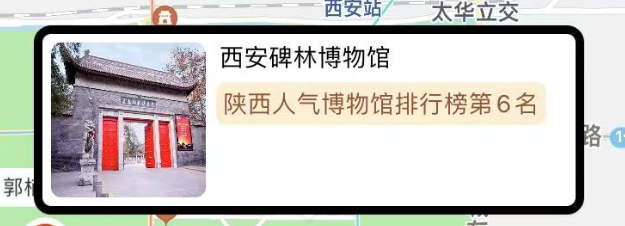
<box layout='horizontal' border-color='${borderColor}' padding='10' border-width='5' border-radius='10' width='300' background-color='#FFFFFF'>
  <image width='90' height='90' src='${coverPic}' border-radius='6' />
  <box layout='vertical'>
    <text text='${name}' color='#000000' font-size='14'/>
    <text text='${rankingNameTetx}' color='#945430' font-size='14' background-color='#ffefd5'/>
    <text text='${tag}' color='#9E9E9E' font-size='14'/>
    <box layout='horizontal'>
      <text text='${ticketDing}' color='#fff' font-size='14' background-color='#FE581E' />
      <text text='${ticketNameInfos}' color='#c3c3c3' font-size='14'/>
      <text text='${ticketName}' color='#c3c3c3' font-size='14'/>
    </box>
    <text text='${selectedScenic}' color='#c3c3c3' font-size='14'/>
  </box>
</box>
点击后样式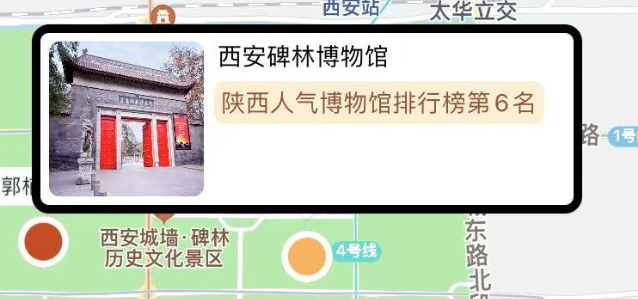
三,流程详解
- 地图标签
      <map id="map" style="width: 100%;height: 100%;"
            :longitude="map.longitude" :latitude="map.latitude" :markers="markers" :include-points="allLocations" :enable-rotate="false" theme="satellite" :show-location="true"
             @markerTap="calloutTap" @tap="mapClick" @calloutTap="calloutTapFun" @regionchange="regionchange" scale='14' :circles="circles"></map>
- 变量声明
      /** 地图中心点 */
      map: {
             longitude: 108.939621, //经度
             latitude: 34.343147, //纬度
         },
      /** 标记点 */
      markers: [],
     allLocations: [],
     circles: [],
     _mapContext :null
- 初始化地图
	onReady() {
		this._mapContext = my.createMapContext("map");
	},
        /** 获取地图maker信息 */
        getMapDetail(records,type) {
            // records 为接口返回的数据[{},{}]
			this.allLocations = []
            let data = records
			data.forEach(item => {
				this.allLocations.push({longitude: Number(item.longitude), latitude: Number(item.latitude)})
			})
            this.markers = data.map((item, index) => {
                return {
					id: index+1,
					latitude: item.latitude,
					longitude: item.longitude,
                    title: item.name,
					scenicId: item.pointId,
					coverPic: item.coverPic, // 业务数据 根据自己情况配置
					tag: item.tag, // 业务数据 根据自己情况配置
					borderStyle: item.borderStyle, // 业务数据 根据自己情况配置
					borderColor: item.borderColor, // 业务数据 根据自己情况配置
					coverPic: item.coverPic, // 业务数据 根据自己情况配置
					nameText: item.name, // 业务数据 根据自己情况配置
					scenicType: item.type, // 业务数据 根据自己情况配置
					markerLevel: index+1,
					iconLayout:{  // 初始化点位以及气泡样式
						params: {
							name: item.name,
							borderColor:item.borderColor || '#ffb25b',
						},
						src:'/static/mapMoer.xml',
					},
					customCallout: {  // 点击后点位以及气泡样式
					// canShowOnTap: true,
					isShow:false,
					layout: {
						params: {  // 这些数据为 marker_customcallout.xml 内部用到的数据
							id:Math.random(),
							coverPic:item.coverPic,
							name:  item.name?item.name.length>10?item.name.slice(0,10)+'...':item.name:'',
							tag:(!item.scenicCard || !item.scenicCard.rankingName) && item.tag?item.tag.length>10?item.tag.slice(0,10)+'...':item.tag:'',
							tagp:(!item.scenicCard || !item.scenicCard.rankingName) && item.tag?'0 8':0,
							selectedScenic:item.scenicCard&&this.spotContent(item.scenicCard)?this.spotContent(item.scenicCard):'',
							selectedScenicp:item.scenicCard&&this.spotContent(item.scenicCard)?'0 8':0,
							rankingNameTetx:item.scenicCard&&item.scenicCard.rankingName?`${ item.scenicCard.rankingName }第${ item.scenicCard.indexInRanking }名`:'',
							rankingNameTetxp:item.scenicCard&&item.scenicCard.rankingName?'4 10':0,
							ticketDing:item.scenicCard&&item.scenicCard.ticketName?"订":'',
							ticketDingp:item.scenicCard&&item.scenicCard.ticketName?2:0,
							ticketNameInfos:item.scenicCard&&item.scenicCard.ticketName?item.scenicCard.price == 0 ? '免费' : '¥' + item.scenicCard.price :'',
							borderColor:item.borderColor,
							ticketName:item.scenicCard && item.scenicCard.ticketName?item.scenicCard.ticketName.length>10?item.scenicCard.ticketName.slice(0,10)+'...':item.scenicCard.ticketName:'',
						},
						src: '/static/marker_customcallout.xml',
					},
					layoutBubble: {
						style: 'bubble',
						bgColor: '#ffffff',
						borderRadius: 6,
					}
				},
				content:{
					content: item.name,
				}
                }
            })
			if(type == 'onLoad'){
				this.allMapPoint = JSON.parse(JSON.stringify(this.markers))
			}
			this._mapContext.getScale({
				success: res=>{
					this.zoom = res.scale
				}
			})
			this.$forceUpdate()
        },
- 事件处理
@markerTap=“calloutTap” @tap=“mapClick” @calloutTap=“calloutTapFun”
        /** 点击标记点切换气泡 */
		calloutTap(e) {
			if(this.inViewTouch) return
			console.log(e)
			let index = e.detail.markerId - 1; // 支付宝markerId从1开始,需要减1
			// 确保marker数据存在
			if(!this.markers[index]) return;
			// 强制更新视图
			this.$nextTick(() => {
				this.oldMarkesIndex = index
				// 下面是切换气泡的逻辑
				this.markers.forEach((item,i)=>{
					item.markerLevel = i - 1
					item.customCallout.isShow = false
					item.iconLayout.src = '/static/mapMoer.xml'
				})
				this.markers[index].iconLayout.src = '/static/mapMoerNo.xml'
				this.markers[index].markerLevel = 99
				this.selectScenicId = this.markers[index].scenicId
				this.selectedScenic = ''
				this.markers[index].customCallout.isShow = true
				this.mapMoveToLocation(this.markers[index])
			});
		},
		/** 点击标记点以外的地图需要切换回初始化的气泡 */
		mapClick(e){
			this.selectScenicId = ''
			this.selectedScenic = ''
			this.markers.forEach((item,i)=>{
				item.markerLevel = i - 1
				item.customCallout.isShow = false
				item.iconLayout.src = '/static/mapMoer.xml'
			})
		},
		regionchange(e){
			if(!e || !e.detail || e.detail.scale === undefined) return;
			if(e.causedBy == "scale" && e.type == 'end'){
				this.zoom = e.detail.scale
			}
		},

		/** 点击了气泡卡片的操作  */
		calloutTapFun(e){
			console.log(e,'点击了卡片')
			let index = e.detail.markerId - 1; // 支付宝markerId从1开始,需要减1
			if(!this.markers[index]) return;
			// 去做你自己的操作  跳转等
		},
      /** 点击点位移动到地图中心  */
		mapMoveToLocation(data){
			this._mapContext.moveToLocation({
				latitude: data.latitude,
				longitude: data.longitude,
			});
		},
四、## 总结
支付宝小程序地图组件配合XML模板系统,能够实现高度定制化的地图标记点效果。通过本文介绍的三种XML模板和交互逻辑,开发者可以:
- 实现基础标记点显示
- 创建丰富的交互效果
- 展示复杂的气泡弹窗内容
- 优化地图渲染性能
这种方案既保持了支付宝原生地图的高性能,又提供了媲美自定义实现的灵活度,是地图类小程序开发的优选方案。

Agent 垂直技术社区,欢迎活跃、内容共建。
更多推荐
 10
10 0
0- 0


 已为社区贡献3条内容

所有评论(0)