【SpringBoot】SpringBoot Web项目开发 员工管理系统(No Database)
文章目录
准备工作
- 新建项目
- 导入组件
- lombok
- SpringWebMVC
- thymeleaf
- 导入静态资源
- JQuery
- bootstarp
- index,login,dashboard,error
- 新建资源路径
- 静态资源:static
- 公共访问资源路径:public
- 上传下载资源模版路径:resources
- 控制器:controller
- 数据持久层:dao/mapper
- 业务逻辑层:service
- 实体类:pojo/entity
- 新建实体类
- 部门类:Department
package com.demo.pojo;

import lombok.AllArgsConstructor;
import lombok.Data;
import lombok.NoArgsConstructor;

@Data
@AllArgsConstructor
@NoArgsConstructor
public class Department {
    private Integer id;
    private String departmentName;
}
2. 员工类:Employee
package com.demo.pojo;

import lombok.AllArgsConstructor;
import lombok.Data;
import lombok.NoArgsConstructor;

import java.util.Date;

@Data
@AllArgsConstructor
@NoArgsConstructor
public class Employee {
    private Integer id;

    private String lastName;

    private String email;

    private Integer gender; //1 male, 0 female

    private Department department;

    private Date birth;
}
- 新建持久层方法
- 部门:DepartmentDao
package com.demo.dao;

import com.demo.pojo.Department;
import org.springframework.stereotype.Component;
import org.springframework.stereotype.Repository;

import java.util.Collection;
import java.util.HashMap;
import java.util.Map;

@Repository
public class DepartmentDao {

    private static Map<Integer, Department> departments = null;

    static {
        departments = new HashMap<Integer, Department>(); // 创建一个部门表
        departments.put(101, new Department(101, "开发部"));
        departments.put(102, new Department(102, "测试部"));
        departments.put(103, new Department(103, "财务部"));
        departments.put(104, new Department(104, "销售部"));
//        departments = Map.of(
//            1, new Department(1, "开发部"),
//            2, new Department(2, "测试部"),
//            3, new Department(3, "财务部"),
//            4, new Department(4, "销售部")
//        );
    }

    // 获得所有部门信息
    public Collection<Department> getDepartments() {
        return departments.values();
    }

    // 通过id得到部门
    public Department getDepartmentById(Integer id) {
        return departments.get(id);
    }


}
2. 员工:Employee
package com.demo.dao;

import com.demo.pojo.Department;
import com.demo.pojo.Employee;
import org.springframework.beans.factory.annotation.Autowired;
import org.springframework.stereotype.Component;
import org.springframework.stereotype.Repository;

import java.util.Collection;
import java.util.HashMap;
import java.util.Map;

@Repository
public class EmployeeDao {

    private static Map<Integer, Employee> employeeMap = null;

    @Autowired
    private DepartmentDao departmentDao;

    // 模拟数据库中的数据,自增主键
    private static Integer initId = 1006;

    static {
        employeeMap = new HashMap<Integer, Employee>();
        employeeMap.put(1001, new Employee(1001, "Tom", "tom@163.com", 1, new Department(101,
                "开发部"), null));
        employeeMap.put(1002, new Employee(1002, "Jerry", "jerry@163.com", 1, new Department(101,
                "开发部"), null));
        employeeMap.put(1003, new Employee(1003, "Mike", "mike@163.com", 0, new Department(102,
                "开发部"), null));
        employeeMap.put(1004, new Employee(1004, "Mary", "mary@163.com", 0, new Department(102,
                "测试部"), null));
        employeeMap.put(1005, new Employee(1005, "Bob", "bob@163.com", 1, new Department(103,
                "财务部"), null));
    }


    // 增加员工,保存员工
    public void save(Employee employee) {
        if (employee.getId() == null) {
            employee.setId(initId++);
        }

        employee.setDepartment(departmentDao.getDepartmentById(employee.getDepartment().getId()));
//        employee.setBirth(new Date());
        employeeMap.put(employee.getId(), employee);
    }

    // 查询所有员工
    public Collection<Employee> getAll() {
        return employeeMap.values();
    }

    // 通过id查询员工
    public Employee getEmployeeById(Integer id) {
        return employeeMap.get(id);
    }

    // 删除员工
    public void deleteEmployeeById(Integer id) {
        employeeMap.remove(id);
    }


}
报错的话注意下错误原因,有事lombok不好用,重新生成下Getter/Setter方法,检查下有参构造;
首页
模板:https://getbootstrap.com/docs/4.0/examples/dashboard/#
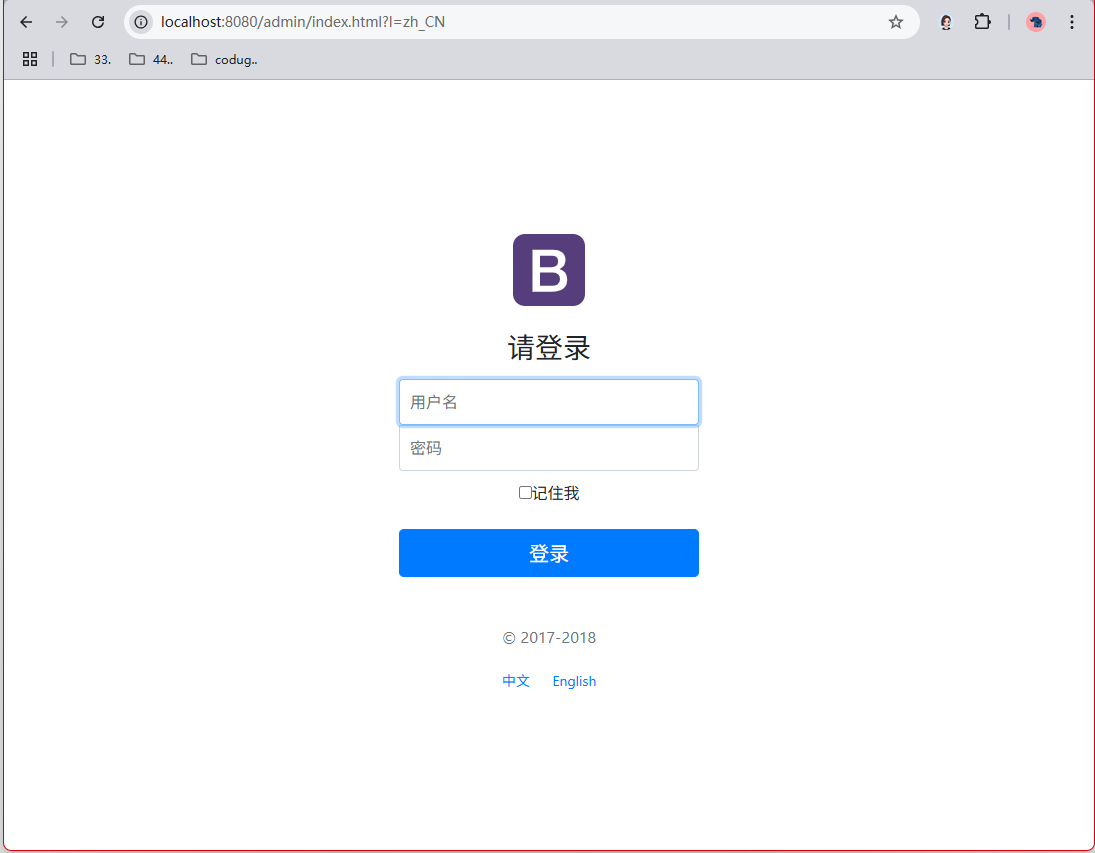
将index.html,导入到 templates下,启动,从gitee上找了个,显示这个样子,是配置了国际化…
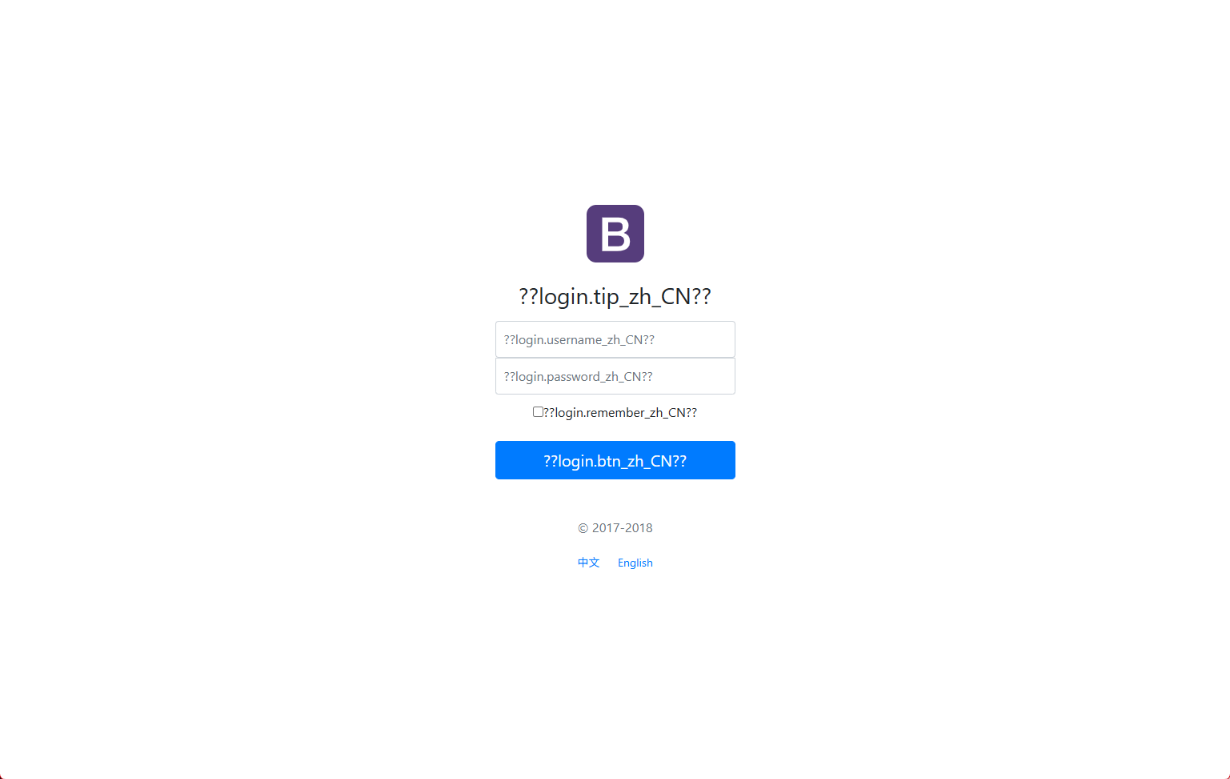
启动页面跳转的方法有三种:
- 直接将index.html放到加载资源路径的根目录下,ps:当时那四个目录下,一般放到templates下就可以;
- 在Controller中配置页面跳转,
{"/","/index.html"}两种方式访问都会到index;
@RequestMapping({"/","/index.html"})
public String index() {
    return "index";
}
- 使用自己配置接管下SpringMVC;
@Configuration
public class MyConfig implements WebMvcConfigurer {

    @Override
    public void addViewControllers(ViewControllerRegistry registry) {
        registry.addViewController("/").setViewName("index");
        registry.addViewController("/index.html").setViewName("index");
    }
}
配置thymeleaf
- 先把那些国际化显示的东西删一下,大概都是些静态值,根据页面显示内容;去
i18n中去获取Properties; - 页面大体正常;
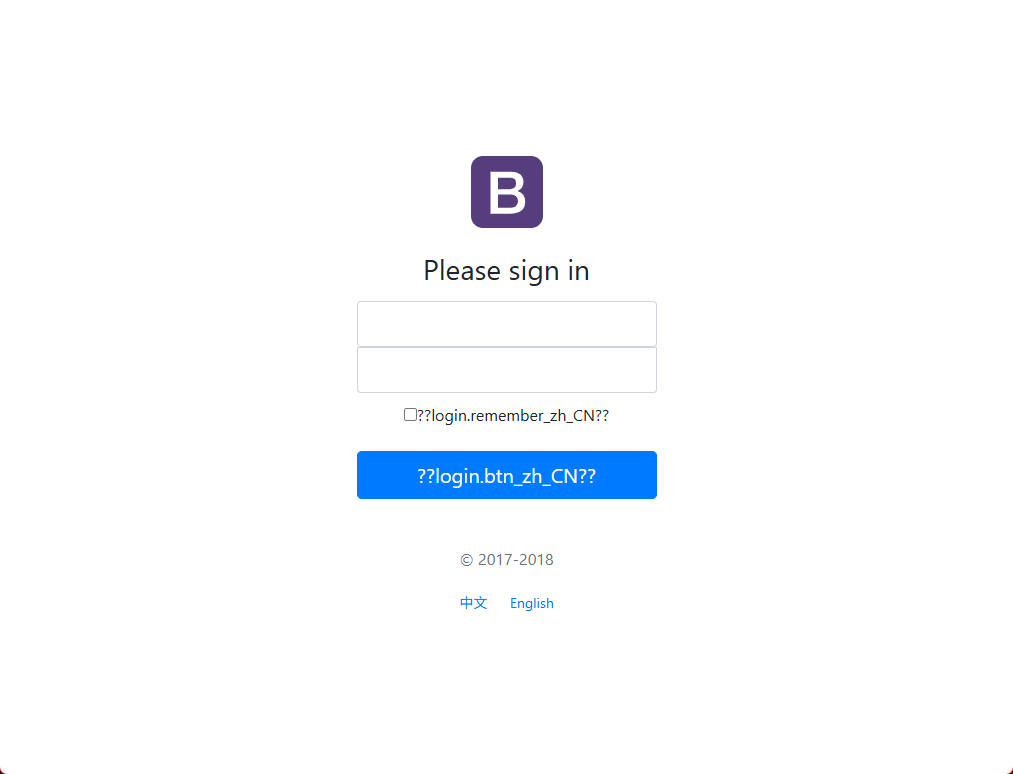
- 关闭thymeleaf的模版引擎:
spring.thymeleaf.enabled=false;- 后面使用前后端分离(Vue。React),不用thymeleaf,记得关掉;
- 返回json数据,通过前端处理;
- 关闭模版引擎后发现报错
404,检查问题原因,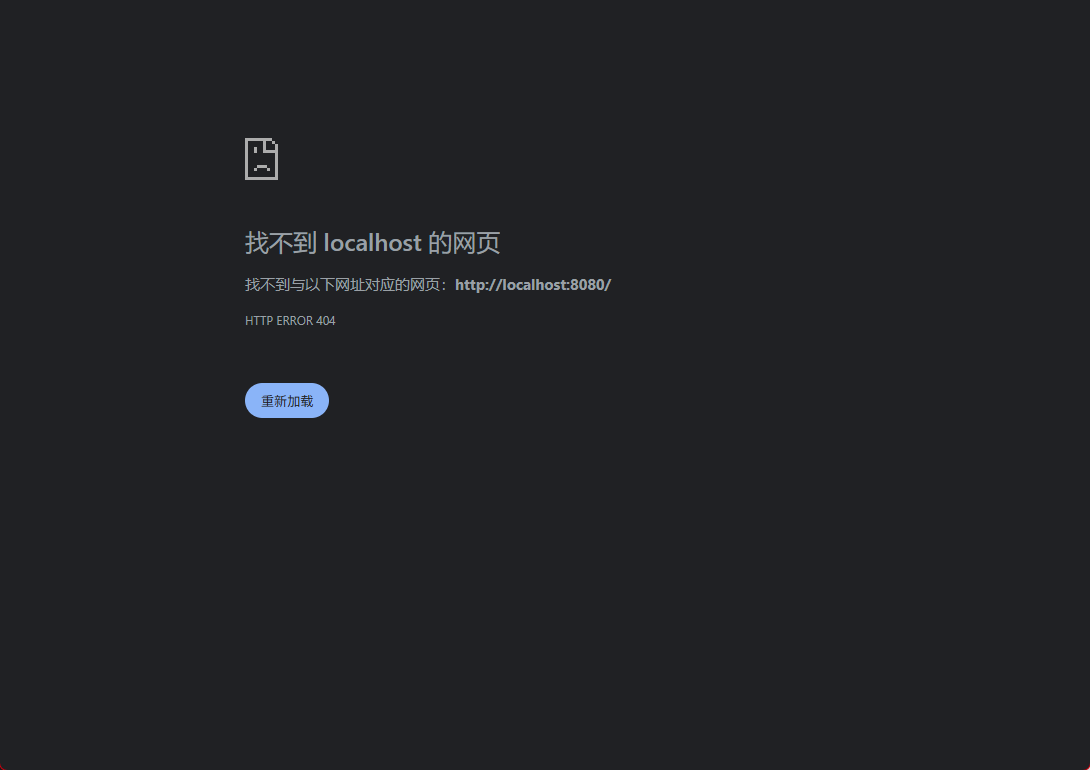
- 发现属性设置错了应该是关闭缓存,让直接加载,我直接把模版引擎给关闭了;换成
spring.thymeleaf.cache=false,重启,页面正常显示;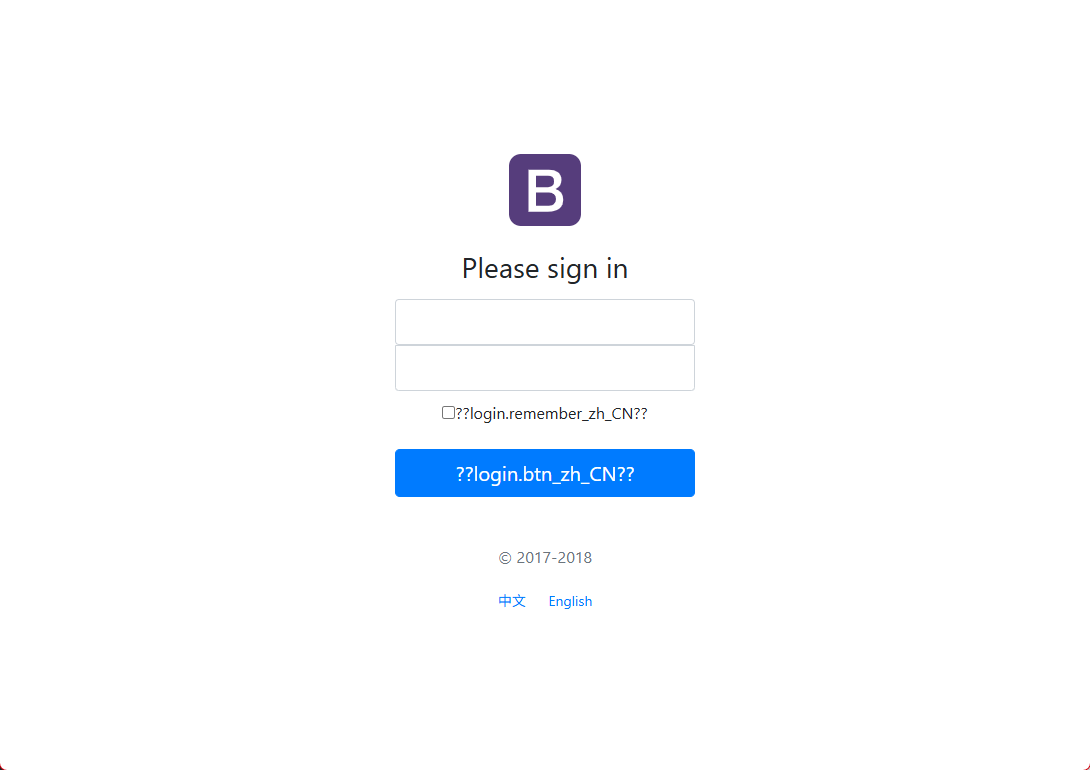
- thymeleaf引用使用
@{}来管理代码,使用@管理@{/}的/可以适应项目的任何class目录可以万能匹配; - 配置首页生效
server.servlet.context-path=/admin
所有HTTP请求的URL路径都会以/admin作为前缀
例如:原访问路径为/user/list,配置后需通过/admin/user/list访问
所有页面的静态资源使用thymeleaf接管,使用url的统一使用@接管;
国际化操作
国际化内容:https://springdoc.cn/spring-boot/features.html#features.internationalization
准备工作
- 先在IDEA中统一设置properties的编码问题!
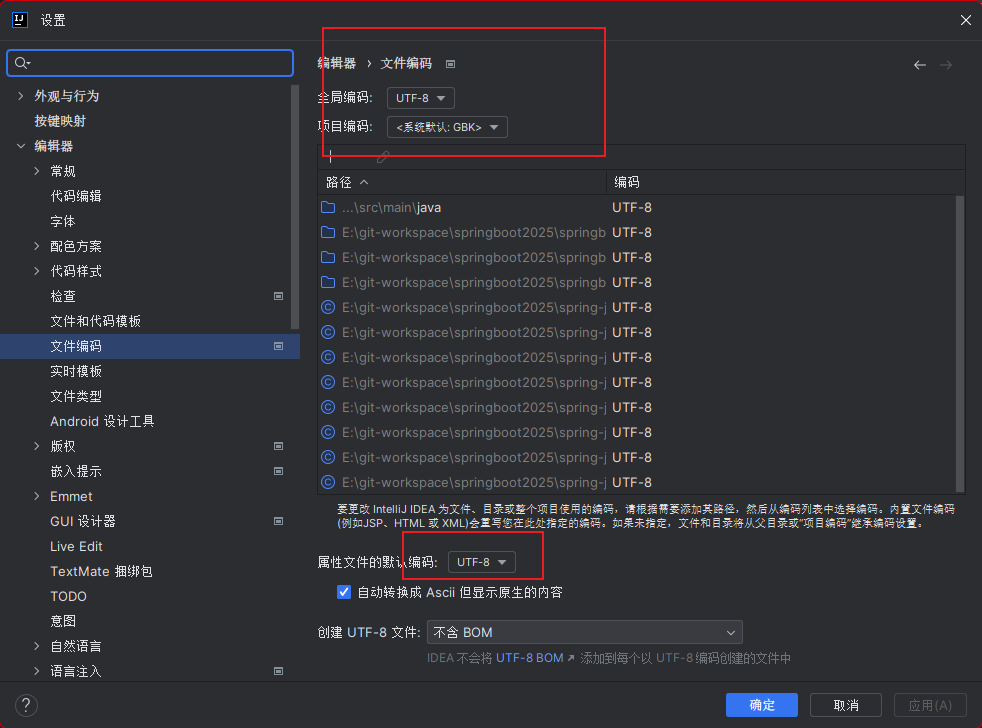
- 建一个目录为
i18n``-->international的缩写 - 建一个
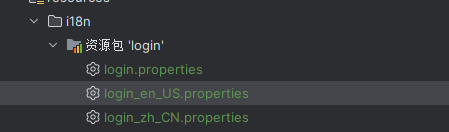
login.properties,login_en_US.properties,login_zh_CN.properties,idea自动识别生成一个resources资源包;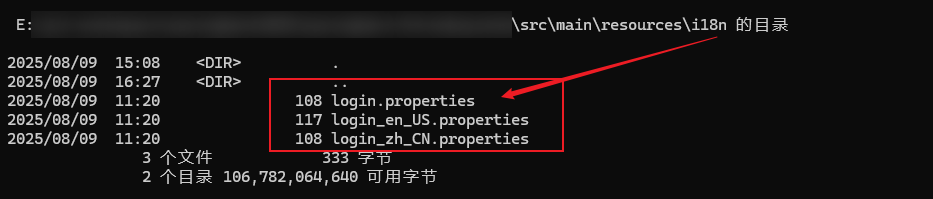
配置国际化
- 安装idea的插件包之后,可以可视化显示
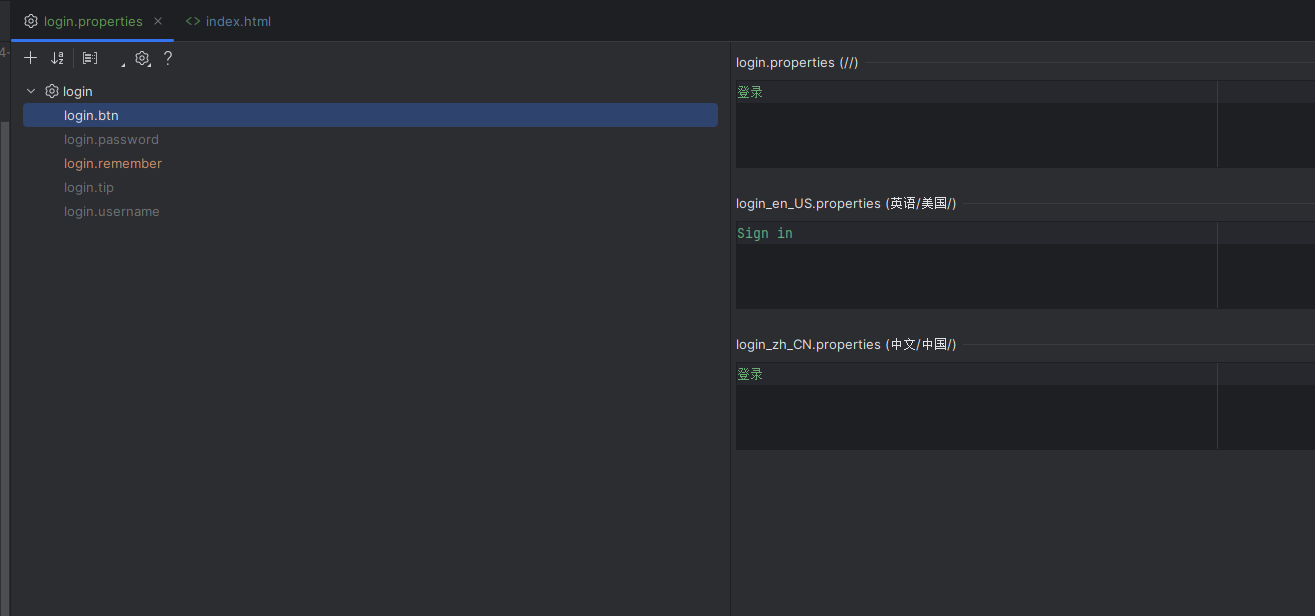
- 看
MessageAutoConfiguration,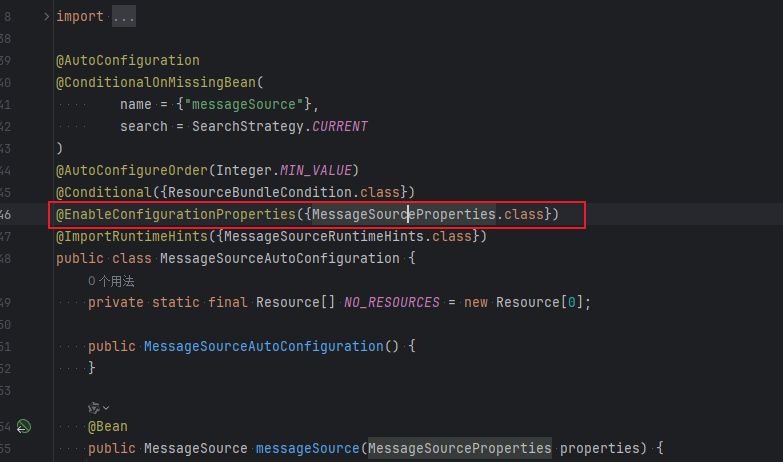
SpringBoot已经自动配置好了管理我们国际化资源文件的组件ResourceBundleMessageSource
// 获取 properties 传递过来的值进行判断
@Bean
public MessageSource messageSource(MessageSourceProperties properties) {
    ResourceBundleMessageSource messageSource = new ResourceBundleMessageSource();
    if (StringUtils.hasText(properties.getBasename())) {
        // 设置国际化文件的基础名(去掉语言国家代码的)
        messageSource.setBasenames(
            StringUtils.commaDelimitedListToStringArray(
                                       StringUtils.trimAllWhitespace(properties.getBasename())));
    }
    if (properties.getEncoding() != null) {
        messageSource.setDefaultEncoding(properties.getEncoding().name());
    }
    messageSource.setFallbackToSystemLocale(properties.isFallbackToSystemLocale());
    Duration cacheDuration = properties.getCacheDuration();
    if (cacheDuration != null) {
        messageSource.setCacheMillis(cacheDuration.toMillis());
    }
    messageSource.setAlwaysUseMessageFormat(properties.isAlwaysUseMessageFormat());
    messageSource.setUseCodeAsDefaultMessage(properties.isUseCodeAsDefaultMessage());
    return messageSource;
}
- 看
MessageSourceProperties
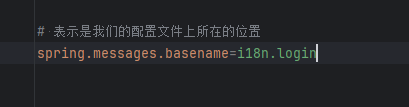
- 配置属性:
application.properties
- 国际化消息使用
#去取
- 测试页面显示
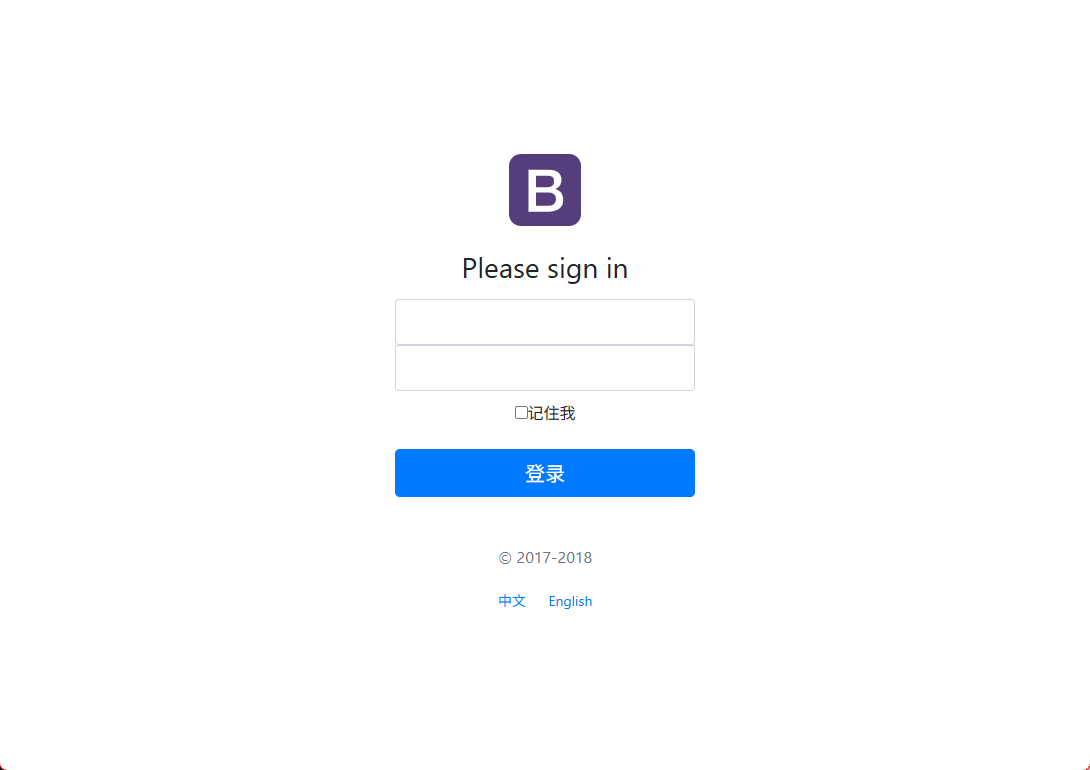
- 逐步完善,二次测试
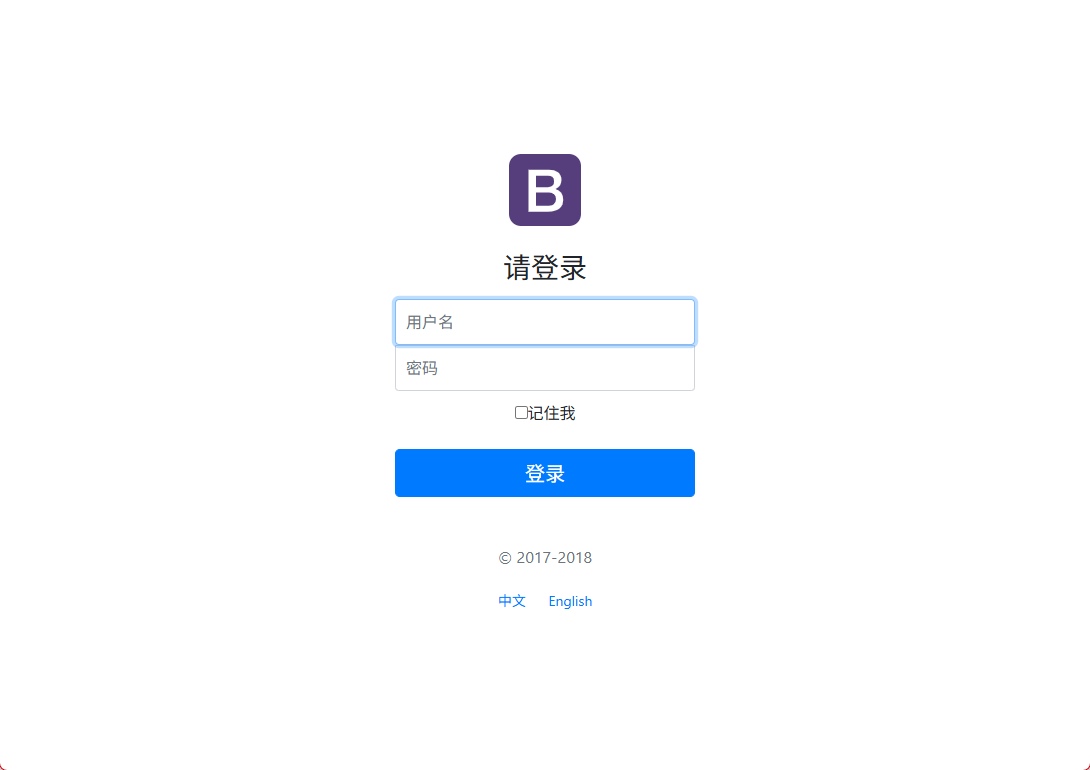
- 请求使用的是中文,所以显示的时候是中文;
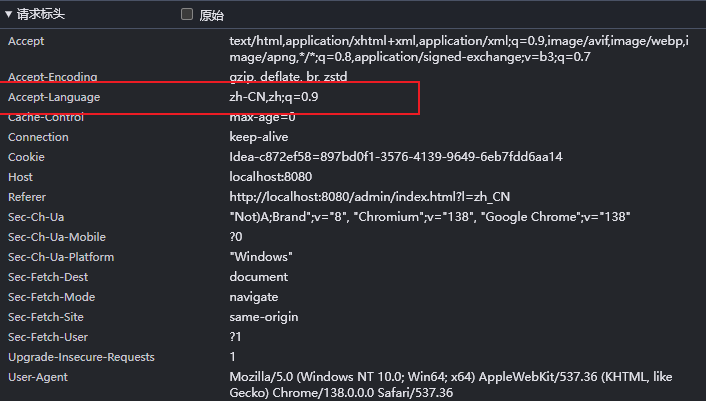
自定义配置页面国际化值 :配置国际化解析
- 看
WebMvcAutoConfiguration,发现容器中 不存在localeResolver是才创建,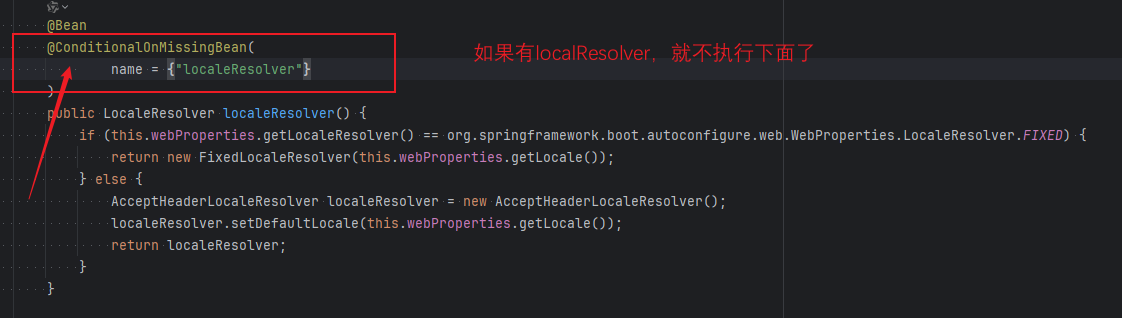
- 我们自己写一个
localResolver,之后再在前端设置属性;
//可以在链接上携带区域信息
public class MyLocaleResolver implements LocaleResolver {

    //解析请求
    @Override
    public Locale resolveLocale(HttpServletRequest request) {

        String language = request.getParameter("l");
        Locale locale = Locale.getDefault(); // 如果没有获取到就使用系统默认的
        //如果请求链接不为空
        if (!StringUtils.isEmpty(language)){
            //分割请求参数
            String[] split = language.split("_");
            //国家,地区
            locale = new Locale(split[0],split[1]);
        }
        return locale;
    }

    @Override
    public void setLocale(HttpServletRequest httpServletRequest, HttpServletResponse httpServletResponse, Locale locale) {

    }
}
<a class="btn btn-sm" th:href="@{/index.html(l='zh_CN')}">中文</a>
<a class="btn btn-sm" th:href="@{/index.html(l='en_US')}">English</a>
- 在自己前面定义的
MyConfig将这个bean注入进去
    @Bean
    public LocaleResolver localeResolver(){
        return new MyLocaleResolver();
    }
- 重启测试
默认进入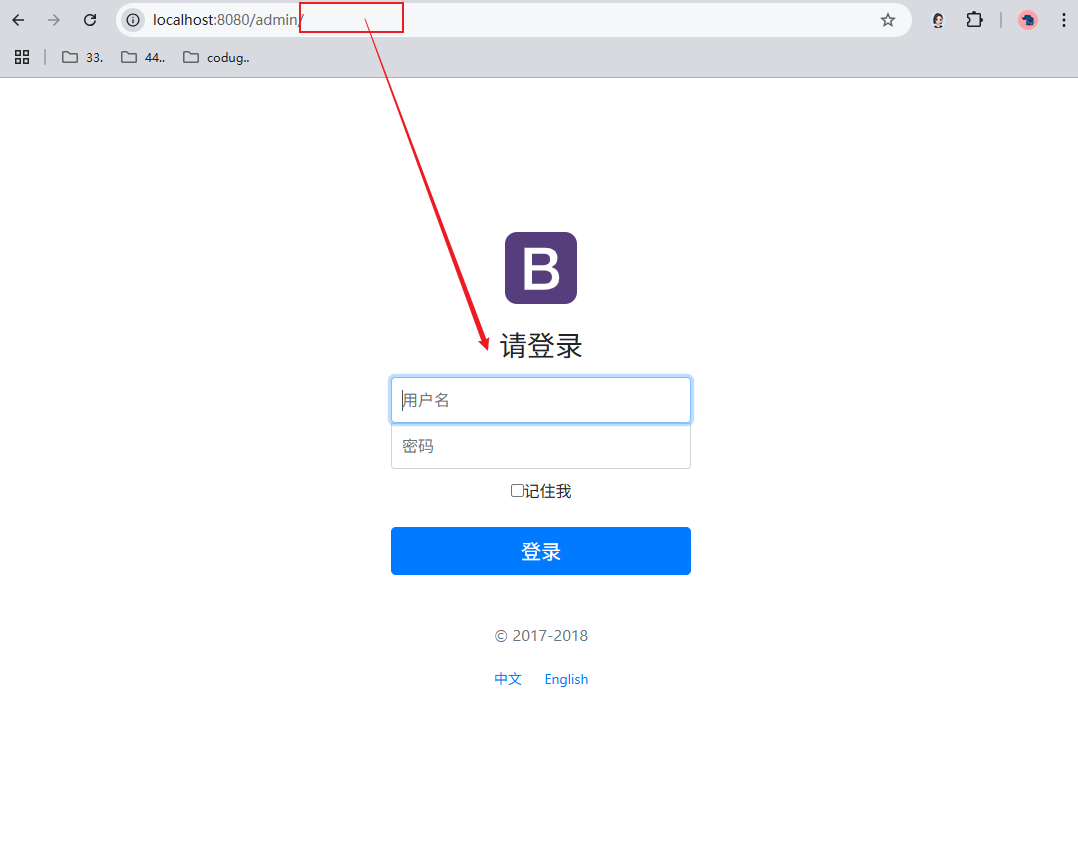
按下【English】的a标签
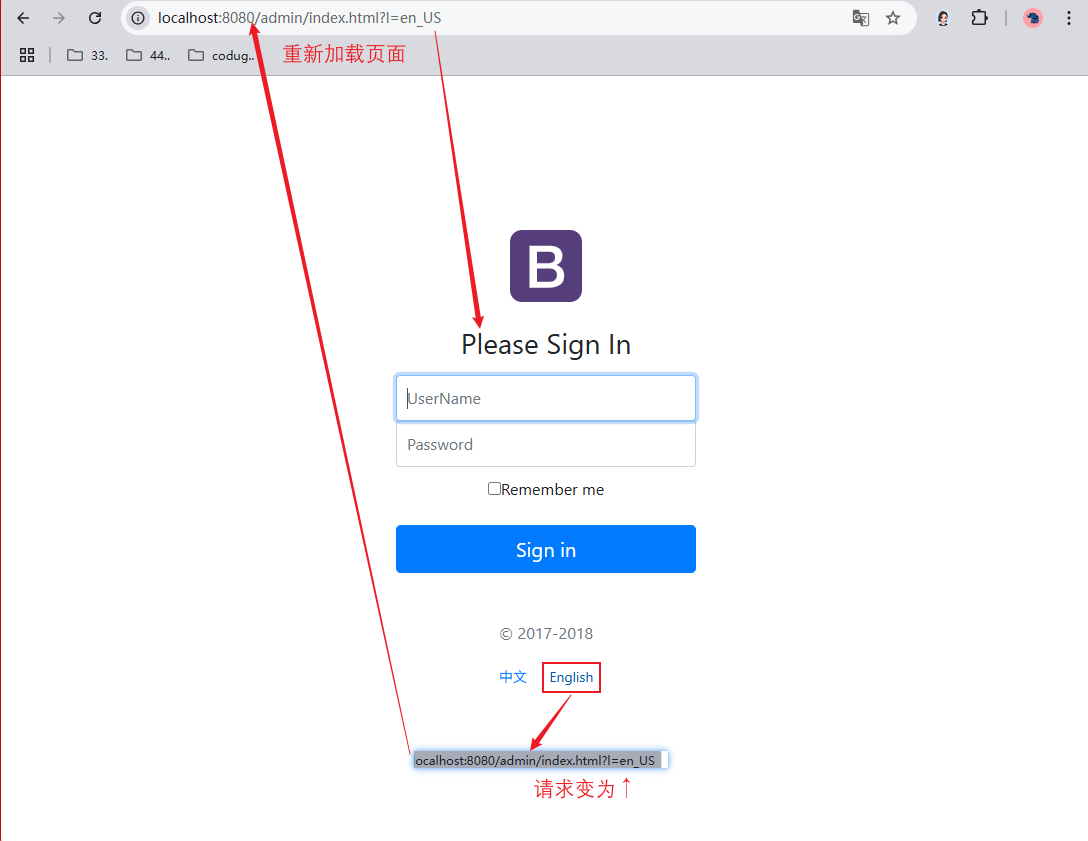
按下【中文】的a标签,同理
总结
- 配置i18n文件;
- 如果需要有按钮自动切换需要自定义组件;
- 将自己写的组件配置大棚Spring容器中去;
登录功能
实现登录跳转
- 逻辑校验
@RequestMapping("/user/login")
// @ResponseBody
public String login(@RequestParam("username") String username, @RequestParam("password") String password , Model  model) {

    if (StringUtils.hasLength(username) || StringUtils.hasLength(password)){
        return "dashboard.html";
    } else {
        model.addAttribute("msg","用户名密码不能为空");
        return "index";
    }

}
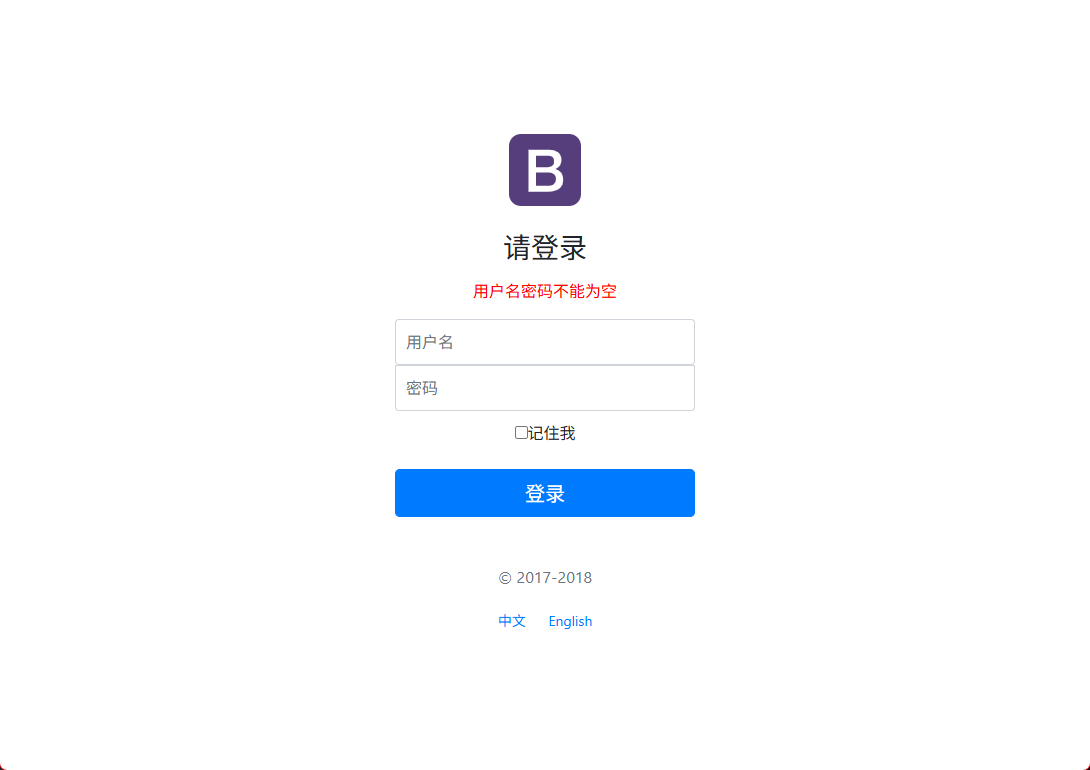
- 把前端必须输入的
required去掉,测试
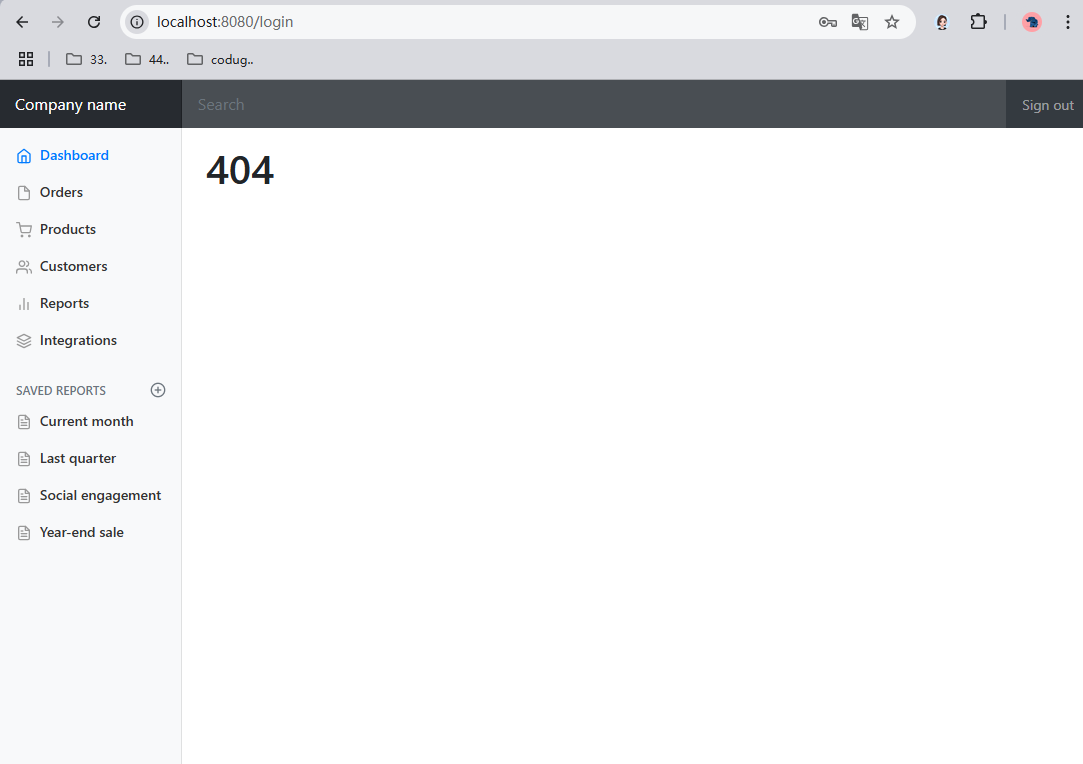
- 输入为空的情况
<!-- 如果msg的值为空就不显示这条消息-->
<p style="color: red" th:if="${not #strings.isEmpty(msg)}" th:text="${msg}"></p>
实现登录拦截
- 写一个拦截器
public class LoginHandleInterceptor implements HandlerInterceptor {

    @Override
    public boolean preHandle(HttpServletRequest request, HttpServletResponse response, Object handler) throws Exception {

        // 获取session,判断Session是否正常登录
        Object  username =  request.getSession( ).getAttribute("UserSession");
        if(username == null){
            request.setAttribute("msg","请先登录");
            request.getRequestDispatcher("/login").forward(request, response);
            return false;
        } else {
            return true;
        }
    }
}
- 配置到bean中进行注册
@Override
public void addInterceptors(InterceptorRegistry registry) {
    // 注册一个拦截器,添加一个拦截器,拦截所有请求,除了excludePathPatterns指定的请求路径
    registry.addInterceptor(new LoginHandleInterceptor())
        .addPathPatterns("/**")
        .excludePathPatterns("/", "/index.html", "/user/login", "/css/*", "/js/*", "/fonts/*", "/img/*");
}
- Controller把Session设置进去
@RequestMapping("/login")
public String login(@RequestParam("username") String username, @RequestParam("password") String password , Model  model, HttpSession session) {
    if (StringUtils.hasLength(username) && StringUtils.hasLength(password)){
        session.setAttribute("UserSession",username);
        return "dashboard";
    } else {
        model.addAttribute("msg","用户名密码不能为空");
        return "index";
    }
}
- 测试,显示正常
- 注意事项:
- 请求地址是否一致
- 拦截的地址是不是有请求地址
- 是否有进行bean注入
- 检查请求的时候Form表单的action地址,拦截器之后返回的页面地址请求,拦截器去除之后跳转的地址;
数据查询
三件套:Dao,View,Controller
- 写一个Controller
    @Autowired
    EmployeeDao employeeDao;

    @Autowired
    DepartmentDao departmentDao;
    @RequestMapping("/emps")
    private String getList(Model model) {
        Collection<Employee> employeeDaoAll = employeeDao.getAll();

        model.addAttribute("emps", employeeDaoAll);

        return "emp/list";
    }
- 在View端接收,使用thymeleaf语法
<div class="table-responsive">
  <table class="table table-striped table-sm">
    <thead>
      <tr>
        <th>工号</th>
        <th>姓名</th>
        <th>邮箱</th>
        <th>性别</th>
        <th>部门</th>
        <th>出生日期</th>
        <th>操作</th>
      </tr>
    </thead>
    <tbody>
      <tr th:each="emp:${emps}">

        <td th:text="${emp.getId()}"></td>
        <td>[[${emp.getLastName()}]]</td>
        <td th:text="${emp.getEmail()}"></td>
        <td th:text="${emp.getGender()==0 ? '女' : '男'}"></td>
        <td th:text="${emp.department.getDepartmentName()}"></td>
        <td th:text="${#dates.format(emp.getBirth(),'yyyy-MM-dd HH:mm:ss')}"></td>
        <td>
          <a class="btn btn-sm btn-primary" th:href="@{'/emp/'+${emp.getId()}}">编辑</a>
          <a class="btn btn-sm btn-danger" th:href="@{'/delemp/'+${emp.getId()}}">删除</a>
        </td>
      </tr>
    </tbody>
  </table>
</div>
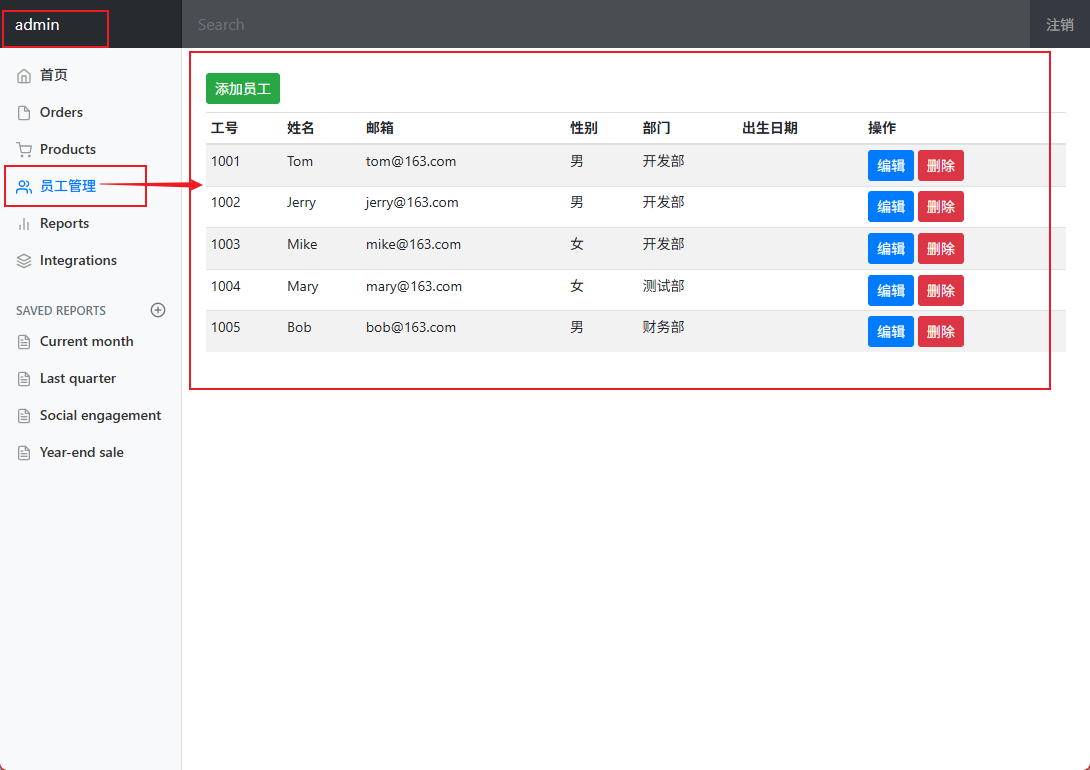
- 页面显示
数据添加
- 添加需要再添加页面查找下部门信息,需要和员工关联,所以需要先去取一下 部门的数据、
- 依旧是三件套,多一个跳转到add页面的Controller;
- Controller
@RequestMapping("/emp")
private String toAddPage(Model model) {
    model.addAttribute("departments", departmentDao.getDepartments());
    return "emp/add";
}

@RequestMapping("/addEmp")
private String addEmp(Employee employee) {
    employeeDao.save(employee);
    return "redirect:emps";
}
- View

<h2><a class="btn btn-sm btn-success" th:href="@{/emp}">添加员工</a></h2>
<form th:action="@{/emp}" method="post">
  <div class="form-group">
    <label>工号</label>
    <input type="text" name="emp_code" class="form-control" placeholder="hxl">
  </div>
  <div class="form-group">
    <label>姓名</label>
    <input type="text" name="emp_name" class="form-control" placeholder="嗷嗷嗷">
  </div>
  <div class="form-group">
    <label>邮箱</label>
    <input type="email" name="email" class="form-control" placeholder="111@qq.com">
  </div>
  <div class="form-group">
    <label>性别</label><br>
    <div class="form-check form-check-inline">
      <input class="form-check-input" type="radio" name="gender" value="1">
      <label class="form-check-label">男</label>
    </div>
    <div class="form-check form-check-inline">
      <input class="form-check-input" type="radio" name="gender" value="0">
      <label class="form-check-label">女</label>
    </div>
  </div>
  <div class="form-group">
    <label>部门编码</label>
    <!--我们在controller中接受的是一个 Employee 所以我们需要提交的是其中一个属性	-->
    <select class="form-control" name="dept_code">
      <option th:each="dept:${departments}" th:text="${dept.getDepartmentName()}" th:value="${dept.getId()()}"></option>
    </select>
  </div>
  <div class="form-group">
    <label>出生年月</label>
    <input type="date"  name="birth" class="form-control">
  </div>
  <button type="submit" class="btn btn-primary">添加</button>
</form>
- Dao数据处理
package com.demo.dao;

import com.demo.pojo.Department;
import com.demo.pojo.Employee;
import org.springframework.beans.factory.annotation.Autowired;
import org.springframework.stereotype.Repository;

import java.util.Collection;
import java.util.HashMap;
import java.util.Map;

@Repository
public class EmployeeDao {

    private static Map<Integer, Employee> employeeMap = null;

    static {
        employeeMap = new HashMap<Integer, Employee>();
        employeeMap.put(1001, new Employee(1001, "Tom", "tom@163.com", 1, new Department(101,
                                                                                         "开发部"), null));
        employeeMap.put(1002, new Employee(1002, "Jerry", "jerry@163.com", 1, new Department(101,
                                                                                             "开发部"), null));
        employeeMap.put(1003, new Employee(1003, "Mike", "mike@163.com", 0, new Department(102,
                                                                                           "开发部"), null));
        employeeMap.put(1004, new Employee(1004, "Mary", "mary@163.com", 0, new Department(102,
                                                                                           "测试部"), null));
        employeeMap.put(1005, new Employee(1005, "Bob", "bob@163.com", 1, new Department(103,
                                                                                         "财务部"), null));
    }

    // 模拟数据库中的数据,自增主键
    private static Integer initId = 1006;

    @Autowired
    private DepartmentDao departmentDao;


    // 增加员工,保存员工
    public void save(Employee employee) {
        if (employee.getId() == null) {
            employee.setId(initId++);
        }

        employee.setDepartment(departmentDao.getDepartmentById(employee.getDepartment().getId()));
        //        employee.setBirth(new Date());
        employeeMap.put(employee.getId(), employee);
    }

    // 查询所有员工
    public Collection<Employee> getAll() {
        return employeeMap.values();
    }

    // 通过id查询员工
    public Employee getEmployeeById(Integer id) {
        return employeeMap.get(id);
    }

    // 删除员工
    public void deleteEmployeeById(Integer id) {
        employeeMap.remove(id);
    }


}
- 页面显示
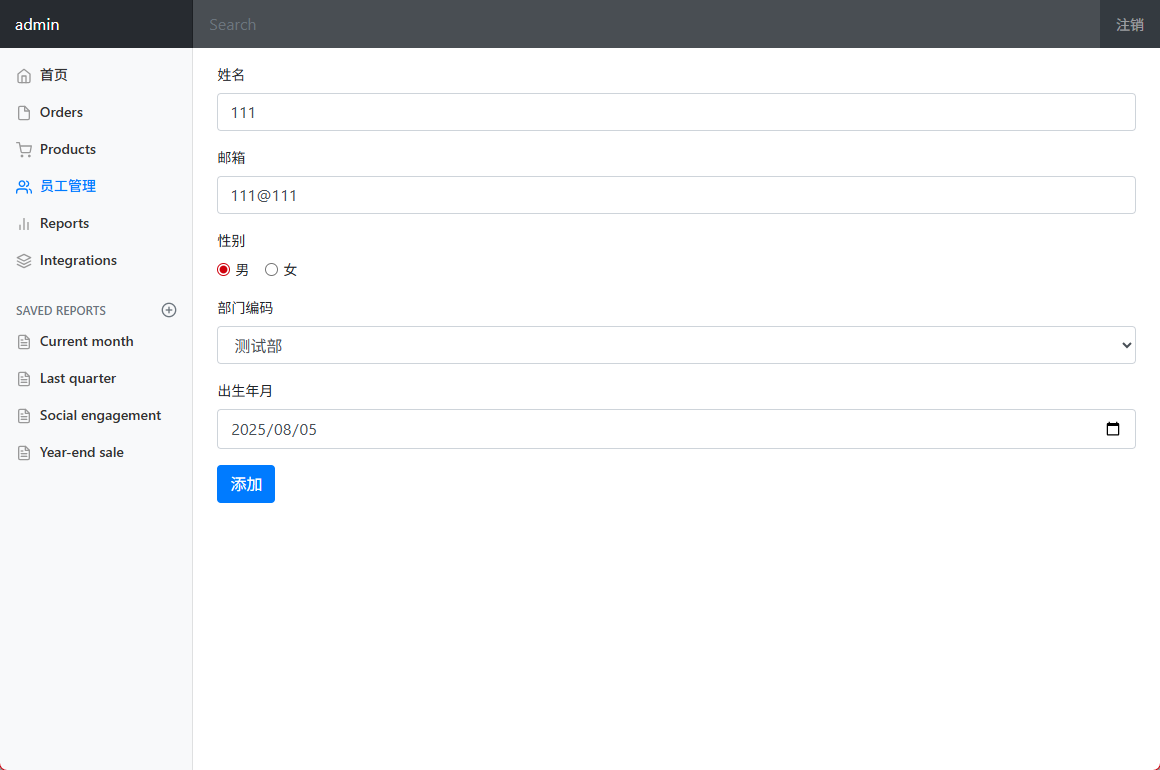
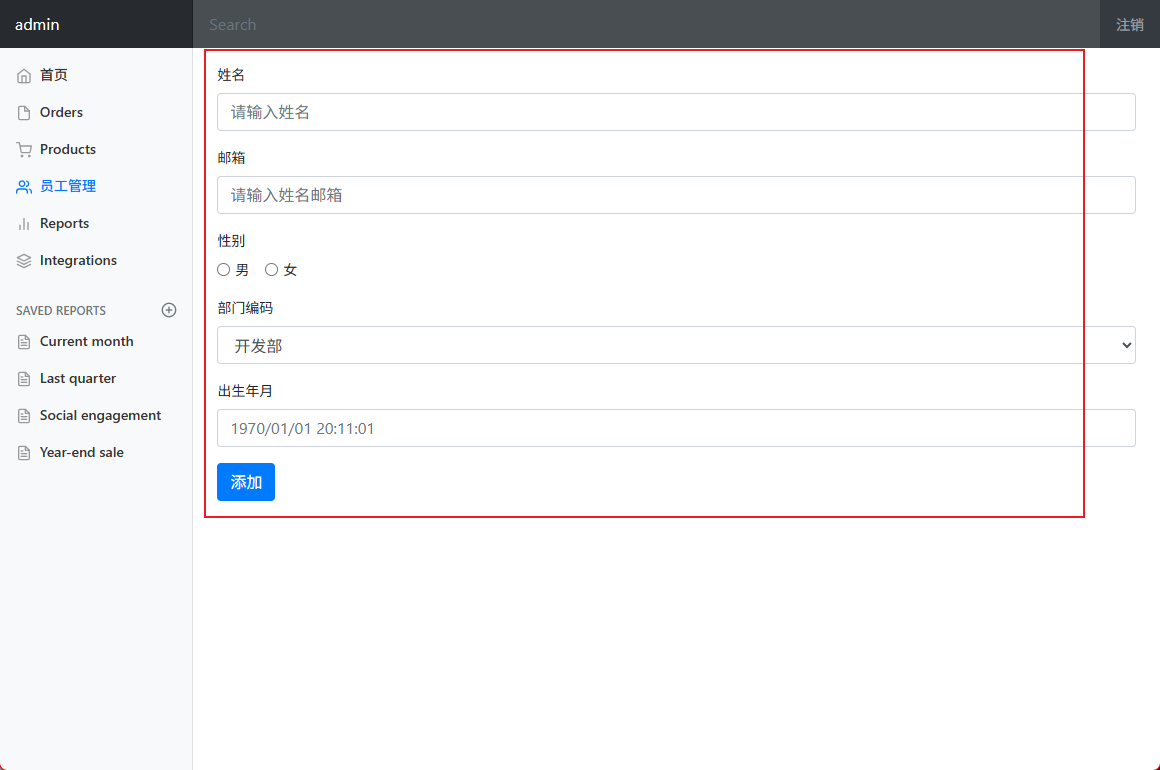
- 出现一个bug点,使用日期选择器选择的日期的格式不是Date类型,是LocalDate类型,并且不能输入只能选择,于是变为text框,设置
formatter和placeholder,后台也将只设置一致,最后显示内容如下:
- 又出现一个bug点,一直提示报错,显示
NullPointExcepftion,页面到这里就404,断点发现Employee,一直是空,检查后发现传值的地方写的不对。把form表单中关于部门的内容改了下,传的是部门对象的id,这样就对应完了。
java.lang.NullPointerException: Cannot invoke "com.demo.pojo.Department.getId()" because the return value of "com.demo.pojo.Employee.getDepartment()" is null
<div class="form-group">
  <label>部门编码</label>
  <!--我们在controller中接受的是一个 Employee 所以我们需要提交的是其中一个属性 -->
  <select class="form-control" name="department.id">
    <option th:each="dept:${departments}" th:text="${dept.getDepartmentName()}" th:value="${dept.getId()}"></option>
  </select>
</div>
数据修改

修改使用的action是/emp/{emp.getId()},对应写一个请求 ,查询数据 并挑战到另一个add页面;
在add页面增加;
内容如下:
- Controller
    @GetMapping("/emp/{id}")
    private String toModifyPage(@PathVariable("id") Integer id, Model model) {
        Employee employee = employeeDao.getEmployeeById(id);
        model.addAttribute("emp", employee);
        Collection<Department> departments = departmentDao.getDepartments();
        model.addAttribute("departments", departments);
        return "emp/update";
    }

    @PostMapping("/updateEmp")
    private String modifyEmp(Employee employee) {
        employeeDao.save(employee);
        return "redirect:emps";
    }
- view
<form method="post" th:action="@{/emp}">
  <!--						<div class="form-group">-->
  <!--							<label>工号</label>-->
  <!--							<input type="text" name="emp_code" class="form-control" placeholder="hxl">-->
  <!--						</div>-->
  <!--						<div class="form-group">-->
  <!--							<label>密码</label>-->
  <!--							<input type="password" name="pwd" class="form-control">-->
  <!--						</div>-->
  <div class="form-group">
    <label>姓名</label>
    <input class="form-control" name="emp_name" placeholder="请输入姓名" type="text">
  </div>
  <div class="form-group">
    <label>邮箱</label>
    <input class="form-control" name="email" placeholder="请输入姓名邮箱" type="email">
  </div>
  <div class="form-group">
    <label>性别</label><br>
    <div class="form-check form-check-inline">
      <input class="form-check-input" name="gender" type="radio" value="1">
      <label class="form-check-label">男</label>
    </div>
    <div class="form-check form-check-inline">
      <input class="form-check-input" name="gender" type="radio" value="0">
      <label class="form-check-label">女</label>
    </div>
  </div>
  <div class="form-group">
    <label>部门编码</label>
    <!--我们在controller中接受的是一个 Employee 所以我们需要提交的是其中一个属性	-->
    <select class="form-control" name="department.id">
      <option th:each="dept:${departments}" th:text="${dept.getDepartmentName()}"
        th:value="${dept.getId()}"></option>
    </select>
  </div>
  <div class="form-group">
    <label>出生年月</label>
    <input class="form-control" dataformatas="yyyy-MM-dd" name="birth" placeholder="1970/01/01 20:11:01"
      type="text">
  </div>
  <button class="btn btn-primary" type="submit">添加</button>
</form>
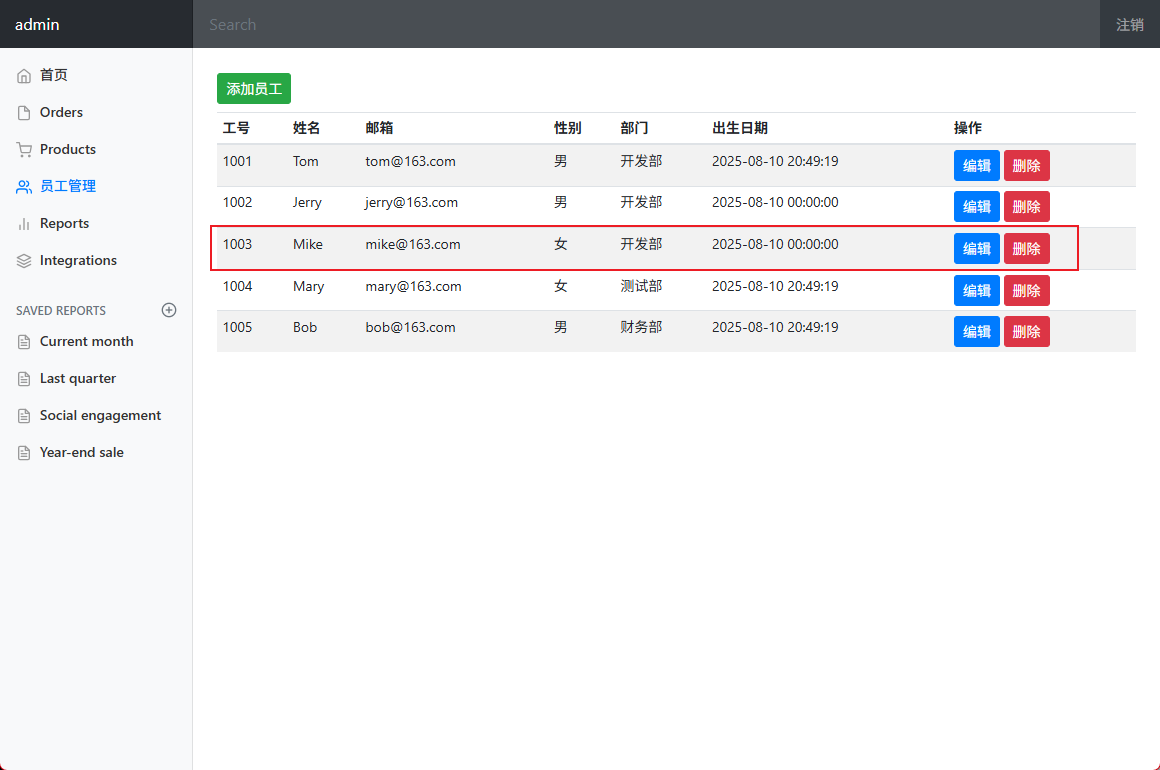
- 测试页面
Before
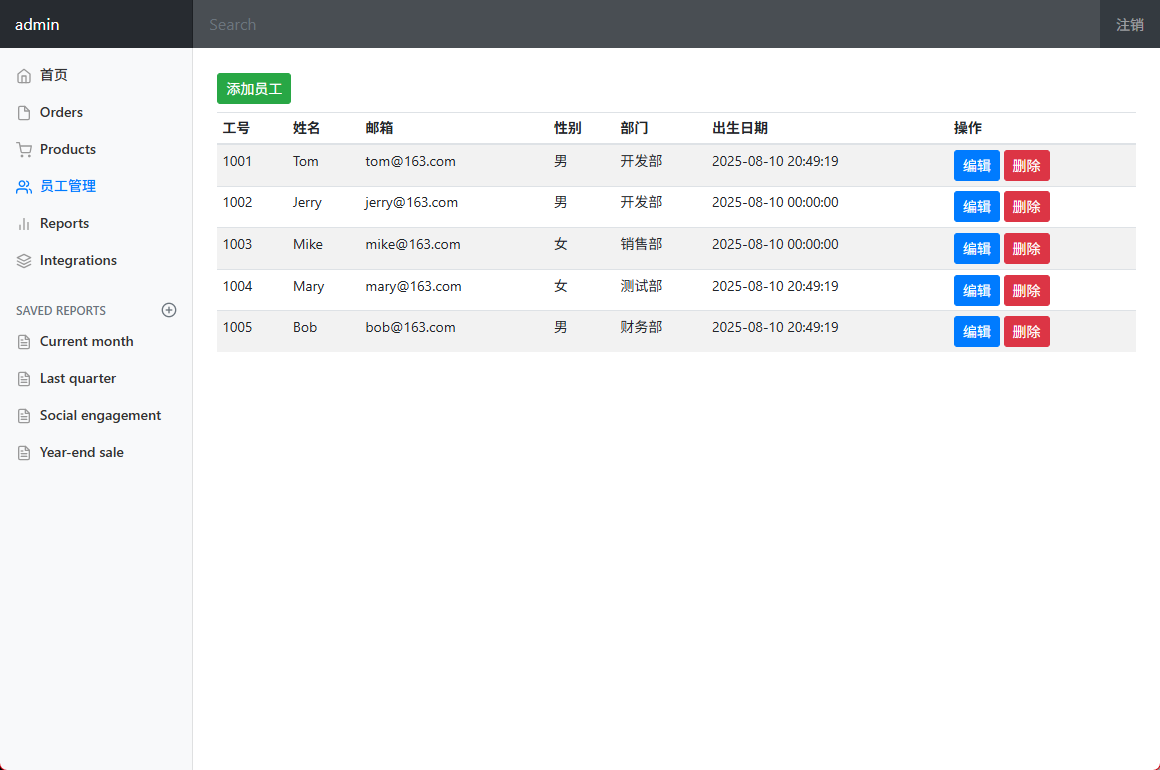
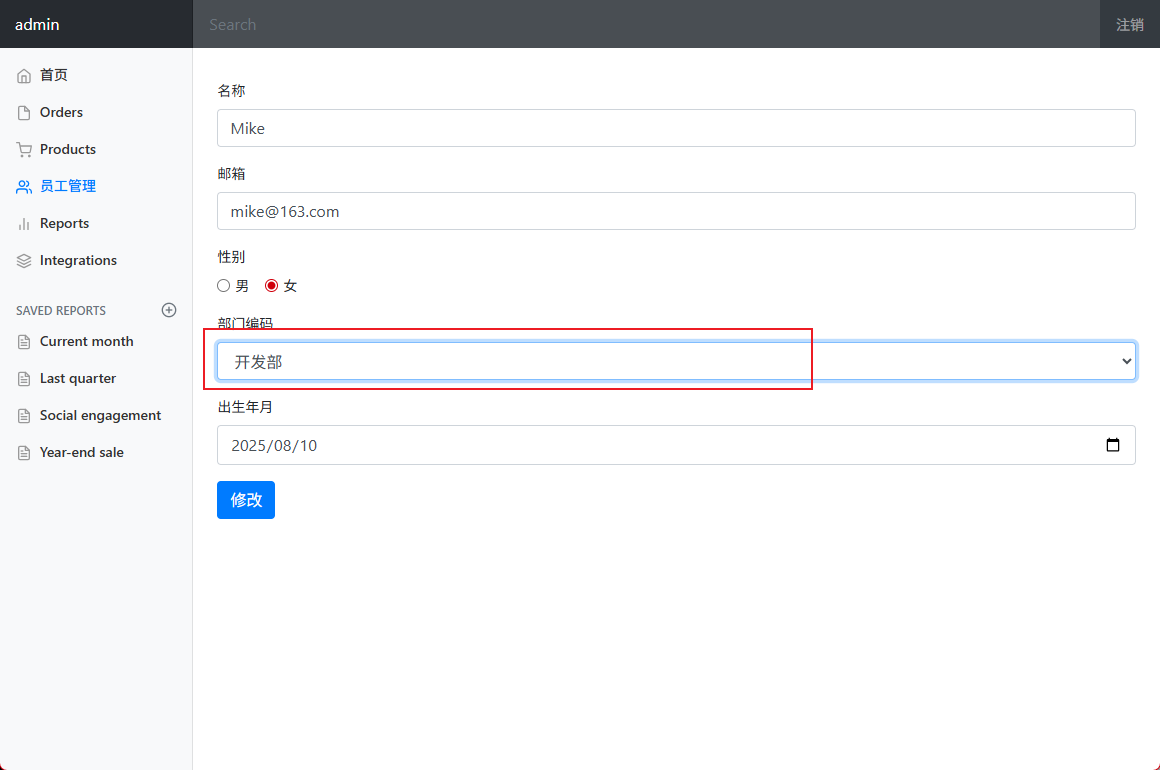
After
数据删除
使用 同上所述,删除不会打开新的页面,只会删除数据,数据删除完 重新加载明细页面显示数据
- Controller
@GetMapping("/delEmp/{id}")
private String deleteEmp(@PathVariable("id") Integer id) {
    employeeDao.deleteEmployeeById(id);
    return "redirect:emps";
}
- Model
    // 模拟的数据,对于模拟的Map,使用remove移除元素,static 是默认加载的数据,模拟原有数据

    private static Map<Integer, Employee> employeeMap = null;

    static {
        employeeMap = new HashMap<Integer, Employee>();
        employeeMap.put(1001, new Employee(1001, "Tom", "tom@163.com", 1, new Department(101,
                "开发部")));
        employeeMap.put(1002, new Employee(1002, "Jerry", "jerry@163.com", 1, new Department(101,
                "开发部")));
        employeeMap.put(1003, new Employee(1003, "Mike", "mike@163.com", 0, new Department(102,
                "开发部")));
        employeeMap.put(1004, new Employee(1004, "Mary", "mary@163.com", 0, new Department(102,
                "测试部")));
        employeeMap.put(1005, new Employee(1005, "Bob", "bob@163.com", 1, new Department(103,
                "财务部")));
    }


    // 删除员工
    public void deleteEmployeeById(Integer id) {
        employeeMap.remove(id);
    }
- 测试
Before:
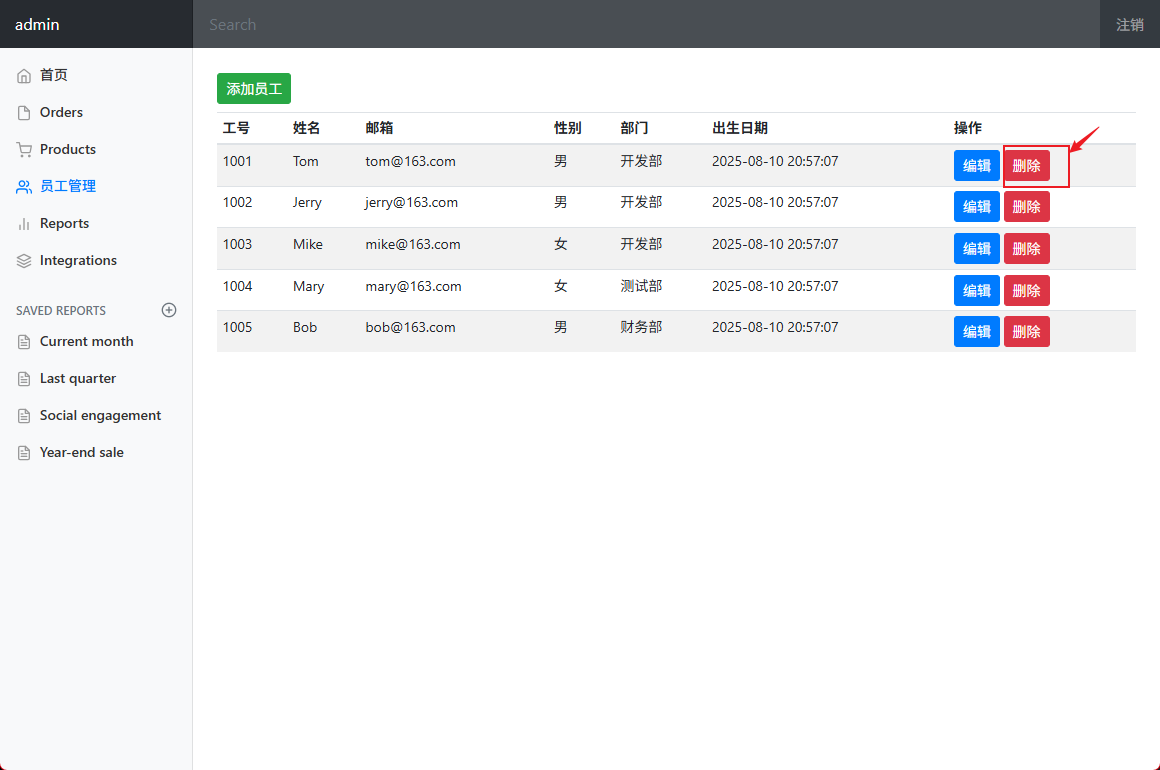
After:
w.s.m.s.DefaultHandlerExceptionResolver : Resolved [org.springframework.web.method.annotation.MethodArgumentTypeMismatchException: Method parameter 'id': Failed to convert value of type 'java.lang.String' to required type 'java.lang.Integer'; For input string: "emps"]
显示报错:检查Controller没有问题,突然想到 可能是/的问题,加上斜杠看看
    @GetMapping("/delEmp/{id}")
    private String deleteEmp(@PathVariable("id") Integer id) {
        employeeDao.deleteEmployeeById(id);
        System.out.println("删除员工id:"+id);
        return "redirect:/emps";
    }
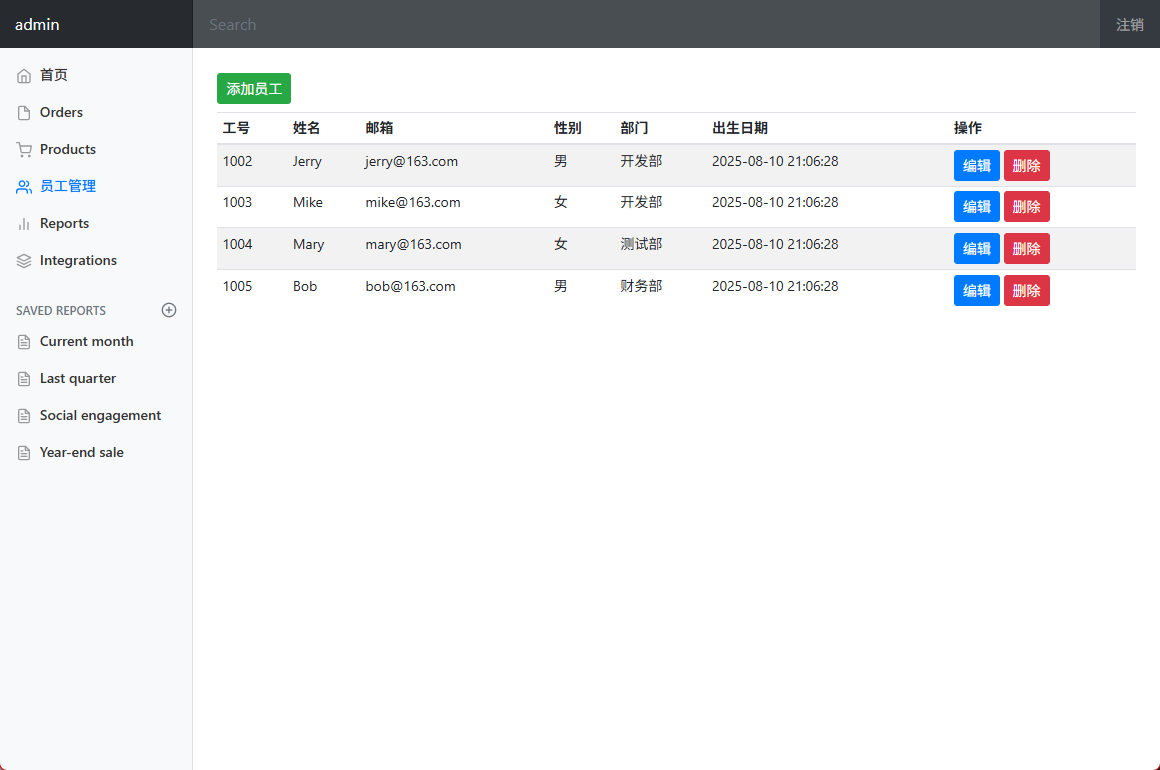
页面显示:
404异常页面
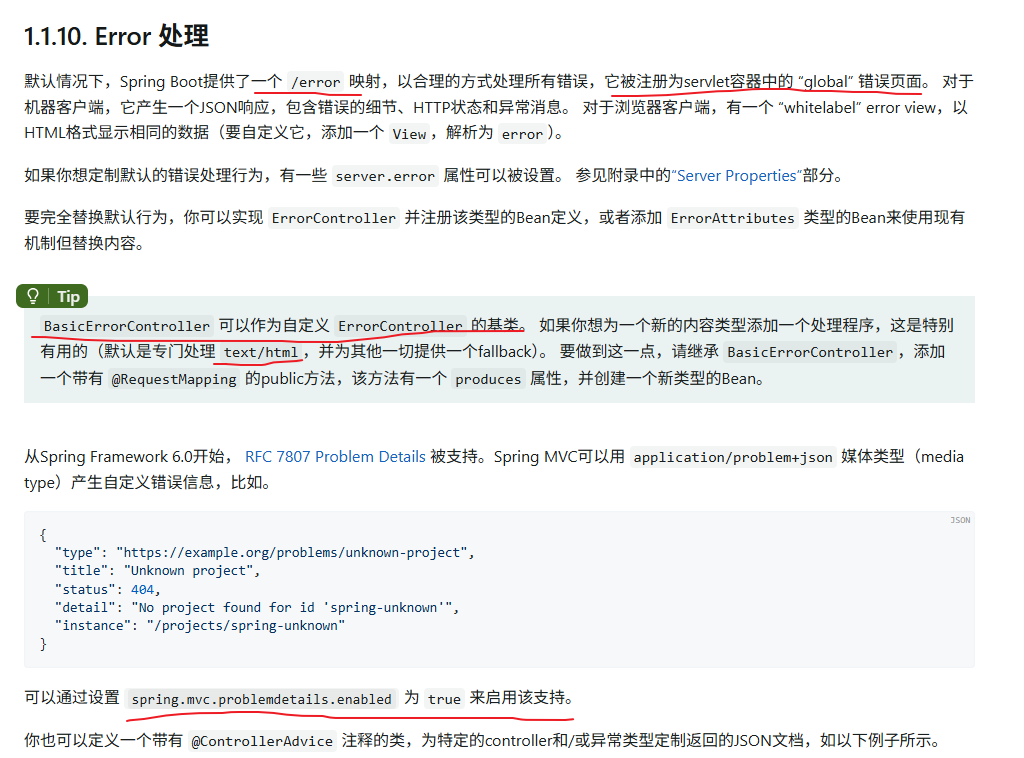
在template下面建一个error文件夹目录,在这个目录里放进去404.html就可以了
详细见:Web
退出登录
1、在<font style="color:rgb(64, 72, 91);">commons.html</font>中修改注销按钮
<a class="nav-link" th:href="@{/user/logout}">注销</a>
2、在<font style="color:rgba(0, 0, 0, 0.8);background-color:rgb(247, 247, 249);">LoginController.java</font>中编写注销页面代码
@RequestMapping("/user/logout")
public String logout(HttpSession session) {
session.invalidate();
return "redirect:/index.html";
}
清除Session的数据就把缓存清楚了,Session没有数据不论如何都会返回开始页面
写网站
- 前端搞定:页面长什么样子
- 设计数据库(数据库设计难点)
- 前端让他能够自动运行,独立化工程
- 数据接口如何对接:json,对象,all in one!
- 前后端联调测试
前端
- 页面式样
- index:首页
- about:信息关联页面
- blog:博客信息显示
- post:提交页面
- user:用户管理页面
- 前端独立化
- 模版
- 开源模版
- 熟系一套自己的模版
- 组件
- BootStrap
- Layui
- ElementUI
后端
- 业务逻辑
- 数据取得
- 数据对接
数据库
- 数据存储
- 数据结构

Agent 垂直技术社区,欢迎活跃、内容共建。
更多推荐

 13
13 0
0- 0


 已为社区贡献5条内容

所有评论(0)