python numpy.random的基础教程(附opencv 图片转数组、数组转图片)
目录
NumPy(Numerical Python)是一个开源的科学计算库,专门用于高效处理多维数组(ndarray)和数值运算。它是 Python 生态中数据科学、机器学习、工程计算等领域的核心工具之一,提供了比原生 Python 列表更高效、更便捷的数组操作能力。
在 NumPy 中,numpy.random 是一个子模块,专门用于生成伪随机数(即基于算法生成的、看似随机但可复现的数值序列)。它提供了丰富的函数,可以生成不同分布的随机数(如均匀分布、正态分布、泊松分布等),并支持随机数组的生成、随机采样、打乱数据等操作。
1.在区间[a,b)随机生成n个整数。
np.random.randint
import numpy as np
x = np.random.randint(5, 10, 1)#在[5,10)中随机生成1个整数
y = np.random.randint(3, 15, 4)#在[3,15)中随机生成4个整数
print(x)
print(y)
print(type(x))
print(type(x))
z = np.random.randint(5, 10)#在[5,10)中随机生成1个整数
print(z)
print(type(z))
输出
[8]
[12 7 12 9]
<class 'numpy.ndarray'>
<class 'numpy.ndarray'>
6
<class 'int'>
可以看到随机数是numpy数组的格式<class 'numpy.ndarray'>
===========================补充==============================
opencv 读取的图片,本质上也是numpy 数组的形式。
对于一个彩色图像RGB来说,是一个三维的数组。
通过.flatten()可分离为3个一维的数组。
import numpy as np
import cv2

#图片变数组
img = cv2.imread("MN.png")
print(type(img))
print(img.shape)
height, width = img.shape[:2]

# 提取三个通道并展平为一维数组
lst1 = img[:, :, 0].flatten()  # Blue 通道
lst2 = img[:, :, 1].flatten()  # Green 通道
lst3 = img[:, :, 2].flatten()  # Red 通道

print("Blue 通道 (lst1):", len(lst1))
print("Green 通道 (lst2):", len(lst2))
print("Red 通道 (lst3):", len(lst3))
输出:
<class 'numpy.ndarray'>
(387, 688, 3)
Blue 通道 (lst1): 266256
Green 通道 (lst2): 266256
Red 通道 (lst3): 266256
当然,数组也能反过来变成图片。
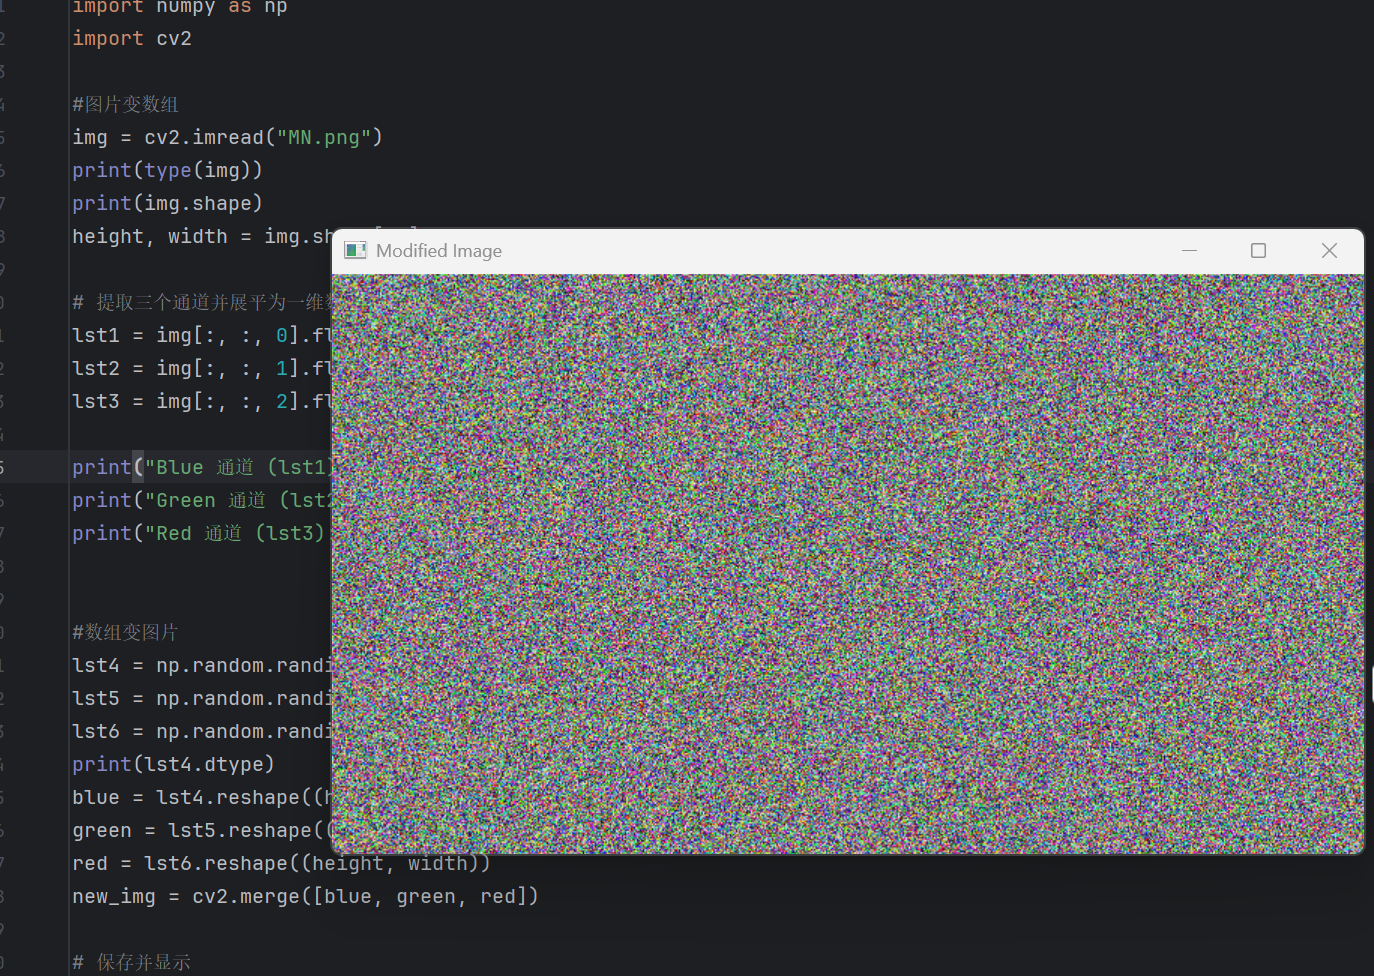
通过np.random.randint随机生成3个数组,三合1,变成一张彩色图像。
import numpy as np
import cv2

#图片变数组
img = cv2.imread("MN.png")
print(type(img))
print(img.shape)
height, width = img.shape[:2]

# 提取三个通道并展平为一维数组
lst1 = img[:, :, 0].flatten()  # Blue 通道
lst2 = img[:, :, 1].flatten()  # Green 通道
lst3 = img[:, :, 2].flatten()  # Red 通道

print("Blue 通道 (lst1):", len(lst1))
print("Green 通道 (lst2):", len(lst2))
print("Red 通道 (lst3):", len(lst3))


#数组变图片
lst4 = np.random.randint(0,256,266256).astype(np.uint8)
lst5 = np.random.randint(0,256,266256).astype(np.uint8)
lst6 = np.random.randint(0,256,266256).astype(np.uint8)
print(lst4.dtype)
blue = lst4.reshape((height, width))
green = lst5.reshape((height, width))
red = lst6.reshape((height, width))
new_img = cv2.merge([blue, green, red])


cv2.imshow("Modified Image", new_img)
cv2.waitKey(0)
cv2.destroyAllWindows()
注意:
lst4 = np.random.randint(0,256,266256).astype(np.uint8)
np.random.randint中的元素是int32格式,要改为opencv所用的np.uint8格式。
运行后,得到杂乱无章的雪花图。
=================补充的补充======================
当你有很多张yellow图,但无法通过审核来发送给你的好兄弟时。
是否可以通过这种方法(图像转数组,存入txt,发送。收到后在转图像),来实现呢?
代码中的MN.png(尺寸:(387, 688, 3)):

图片转数组并存入txt,代码如下:
import numpy as np
import cv2


#图片变数组
img = cv2.imread("MN.png")
print(img.shape)
height, width = img.shape[:2]

# 提取三个通道并展平为一维数组
lst1 = img[:, :, 0].flatten()  # Blue 通道
lst2 = img[:, :, 1].flatten()  # Green 通道
lst3 = img[:, :, 2].flatten()  # Red 通道

# 保存到txt文件(每个通道占一行,空格分隔)
combined = np.array([lst1, lst2, lst3])
np.savetxt("img_data.txt", combined, fmt="%d")
txt中提取数组,并数组转图片,代码如下:
import numpy as np
import cv2
height= 387
width = 688


# 读取文件内容
data = np.loadtxt("img_data.txt", dtype=int)
# 提取三个通道
blue = data[0].reshape(height, width).astype(np.uint8)
green = data[1].reshape(height, width).astype(np.uint8)
red = data[2].reshape(height, width).astype(np.uint8)
new_img = cv2.merge([blue, green, red])


cv2.imshow("Modified Image", new_img)
cv2.waitKey(0)
cv2.destroyAllWindows()
img_data.txt:
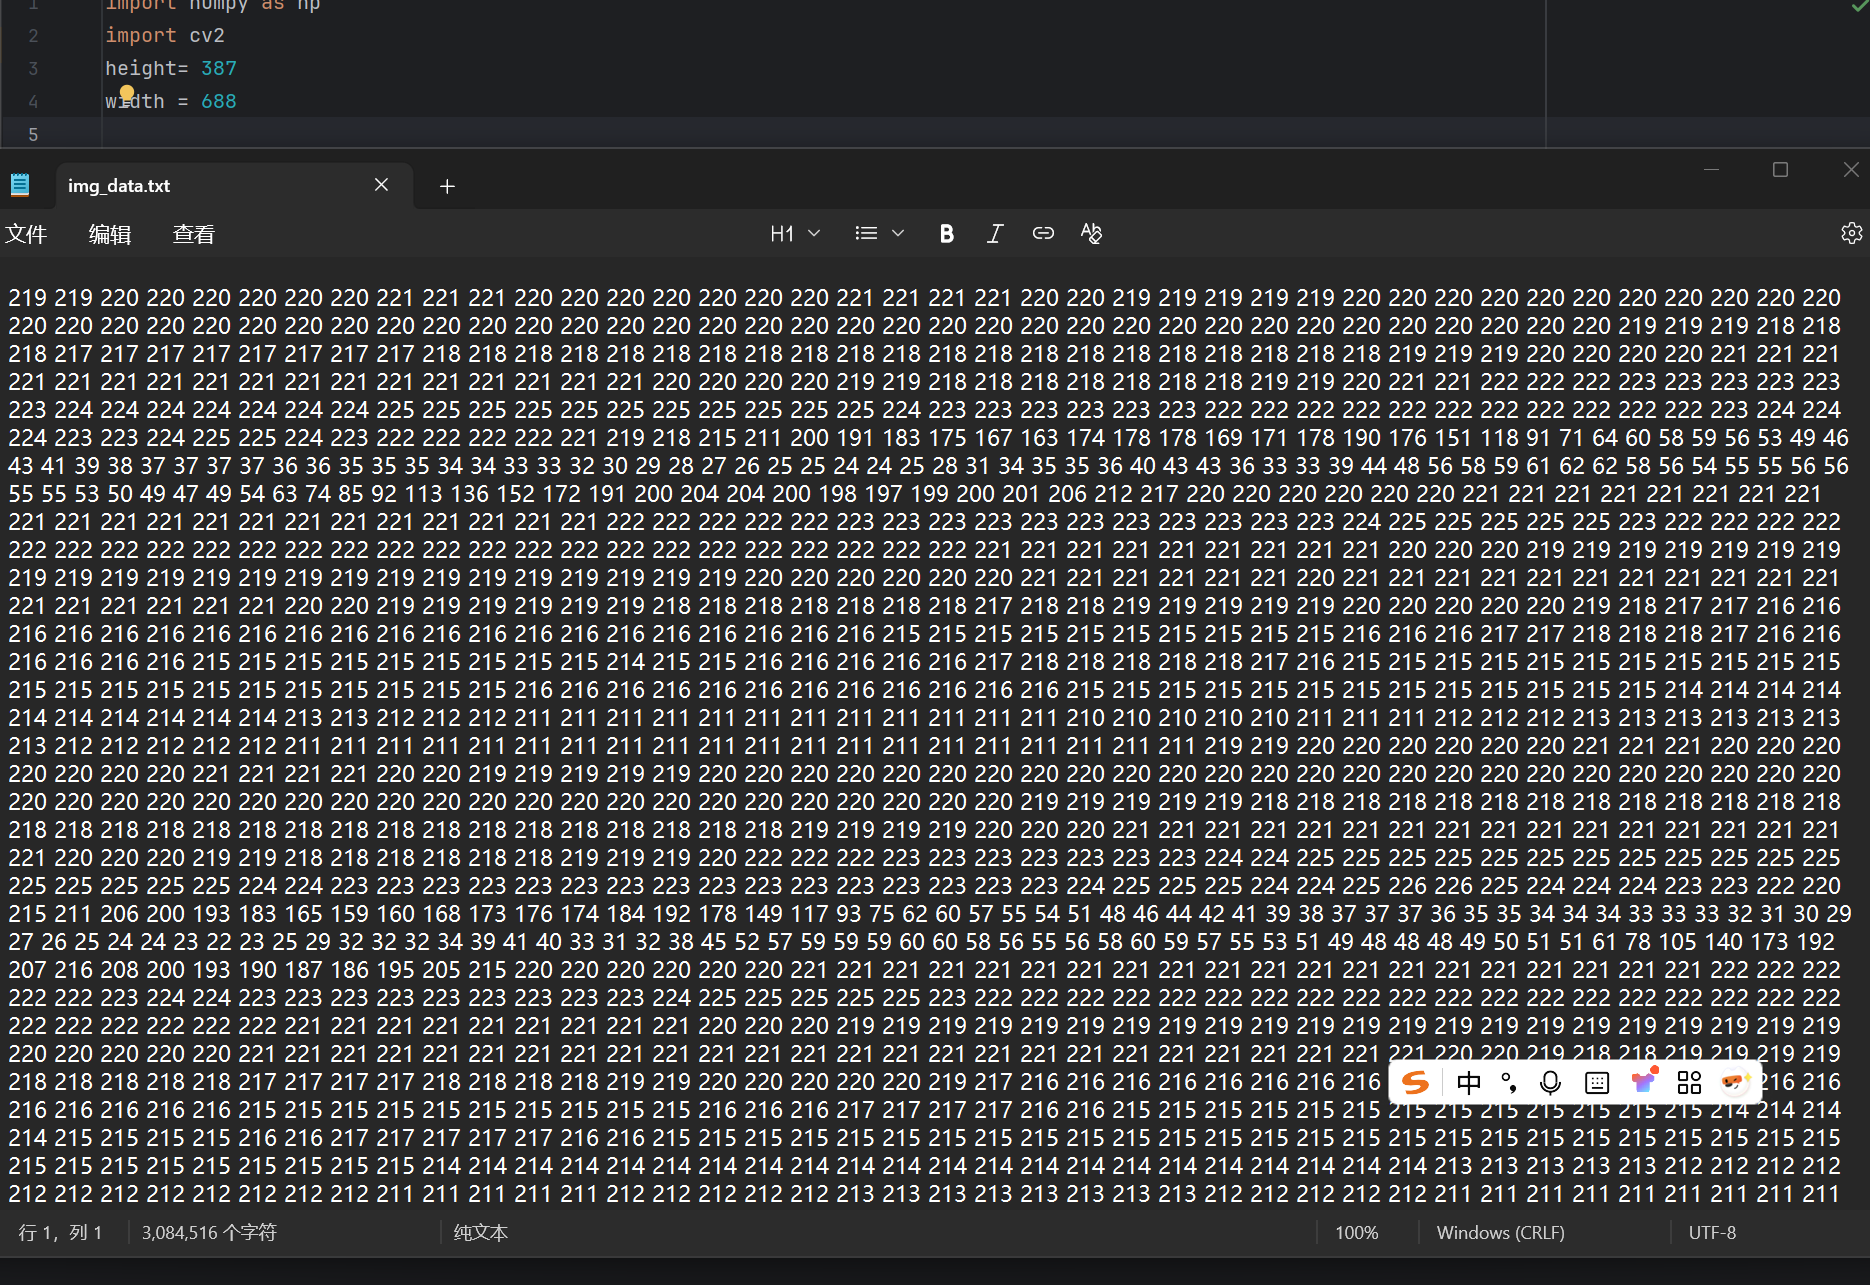
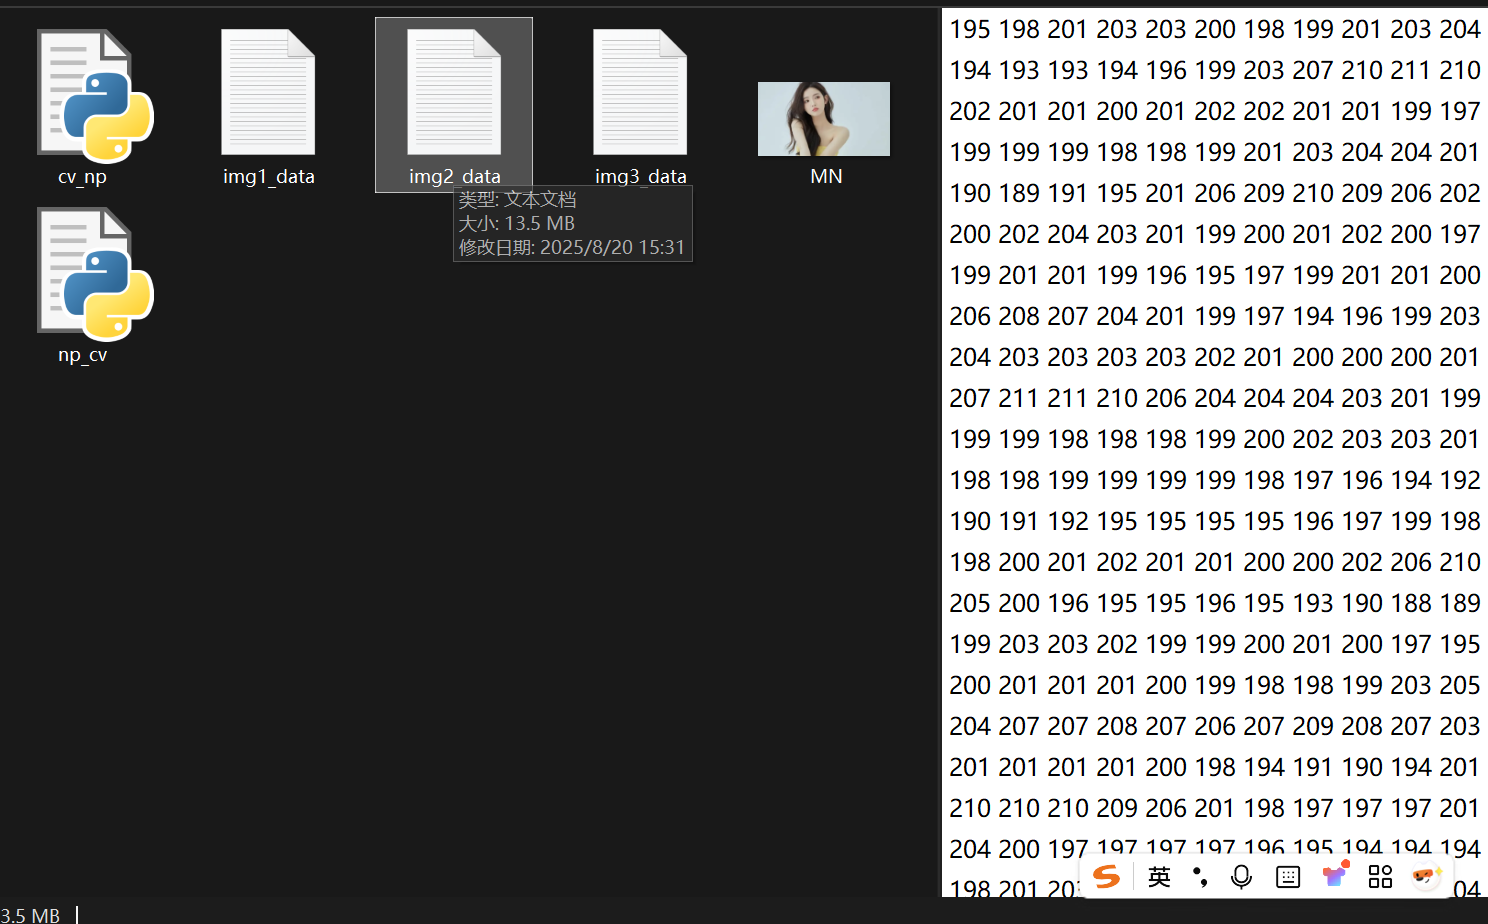
(为什么图片转数组后,txt比图片大这么多。。。)
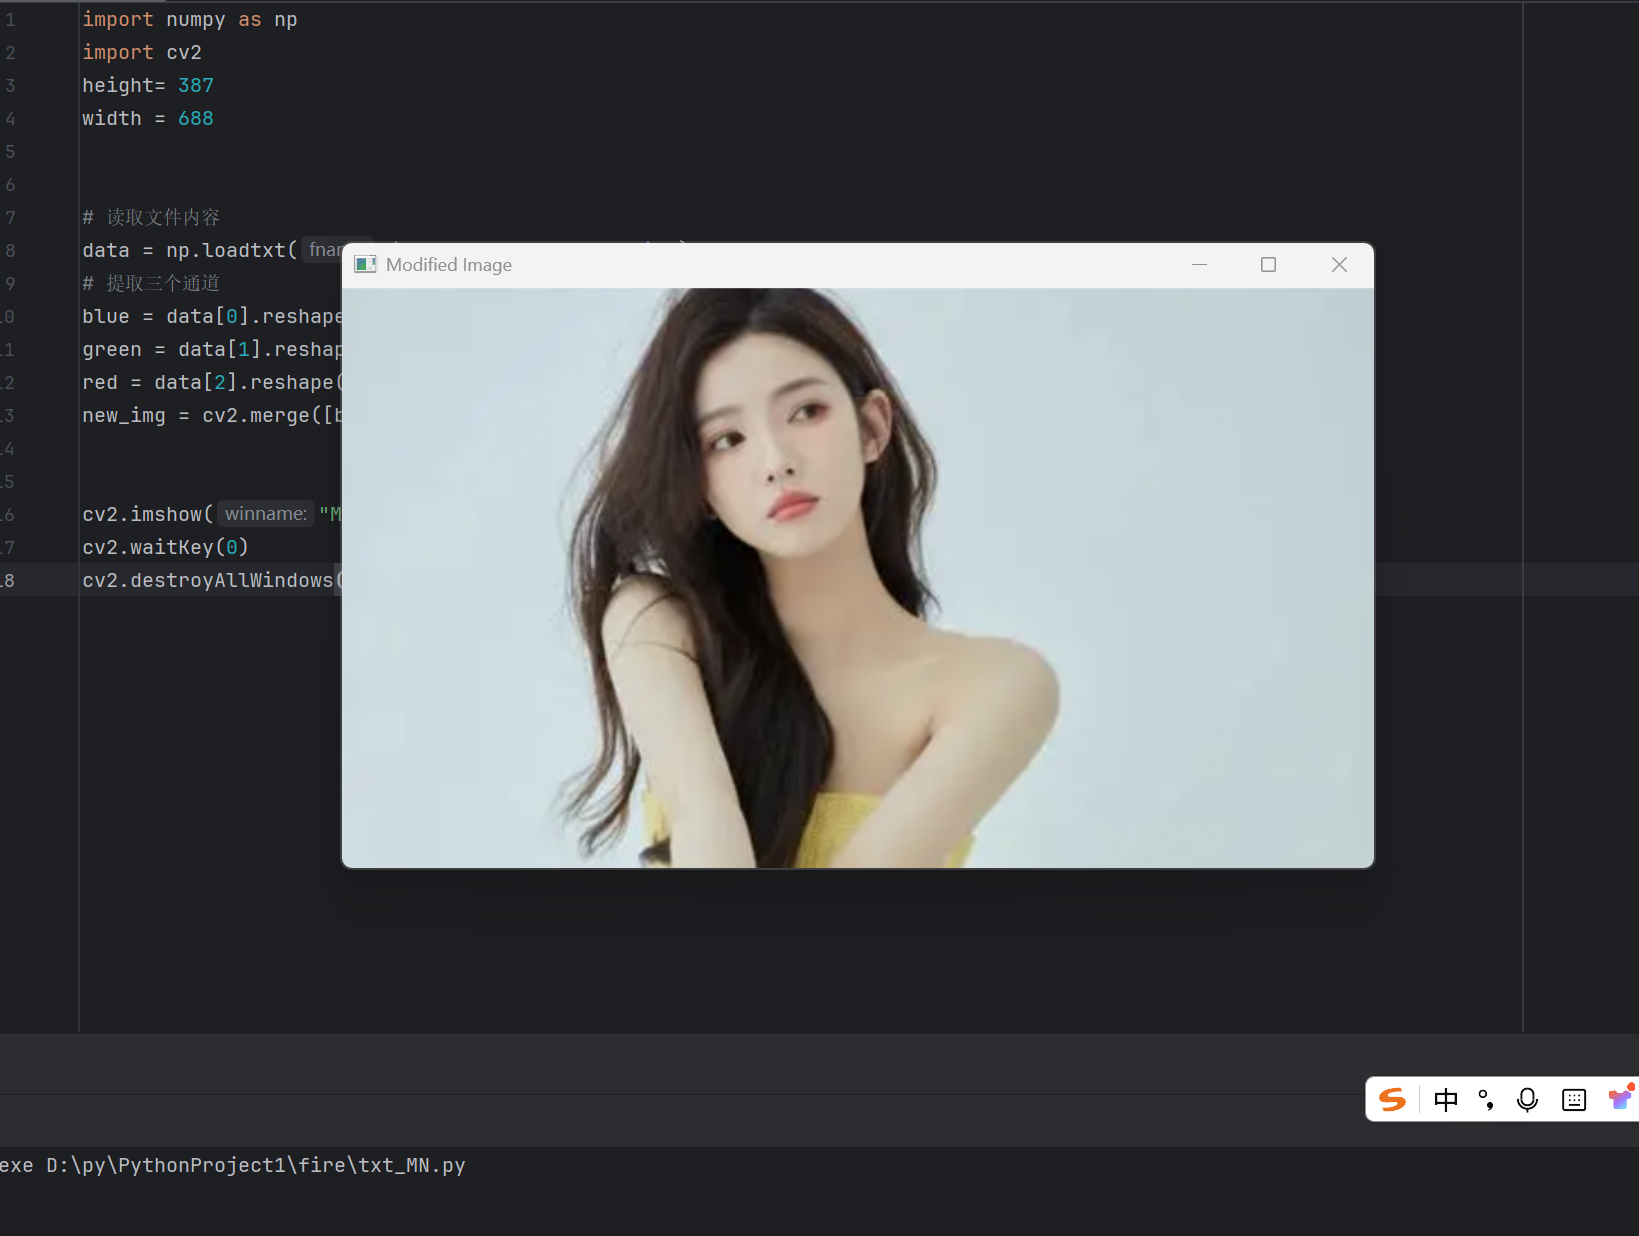
运行后:非常清晰
完整代码:
里面放了很多 比较得劲的 img_data.txt ,自己转了看把 =-=。
通过网盘分享的文件:test_np_cv
链接: https://pan.baidu.com/s/1y9YDJWw9xvG6AakM5X4GUA
提取码: ebtg
==============================================================
2.在区间[a,b)随机生成n个数。
np.random.uniform
import numpy as np
x = np.random.uniform(5, 10, 1)#在[5,10)中随机生成1个数
y = np.random.uniform(3, 15, 4)#在[3,15)中随机生成4个数
print(x)
print(y)
print(type(x))
print(type(x))
z = np.random.uniform(5, 10)#在[5,10)中随机生成1个数
print(z)
print(type(z))
3.在区间[0,1)生成随机数
rand 与 randn
import numpy as np

# 平均数
def average(lst):
    sum_lst = 0
    for n in lst:
        sum_lst = sum_lst+n
    return sum_lst/len(lst)

X = np.random.rand(100)#随机生成100个数
Y = np.random.randn(100)#随机生成100个数

print(average(X))
print(average(Y))
运行多次后发现,
average(X) = 0.5
average(Y) = 0
rand是[0, 1) 均匀分布随机数
randn标准正态分布随机数,范围是 (-∞, +∞),但大部分值落在 [-3, +3] 之间。
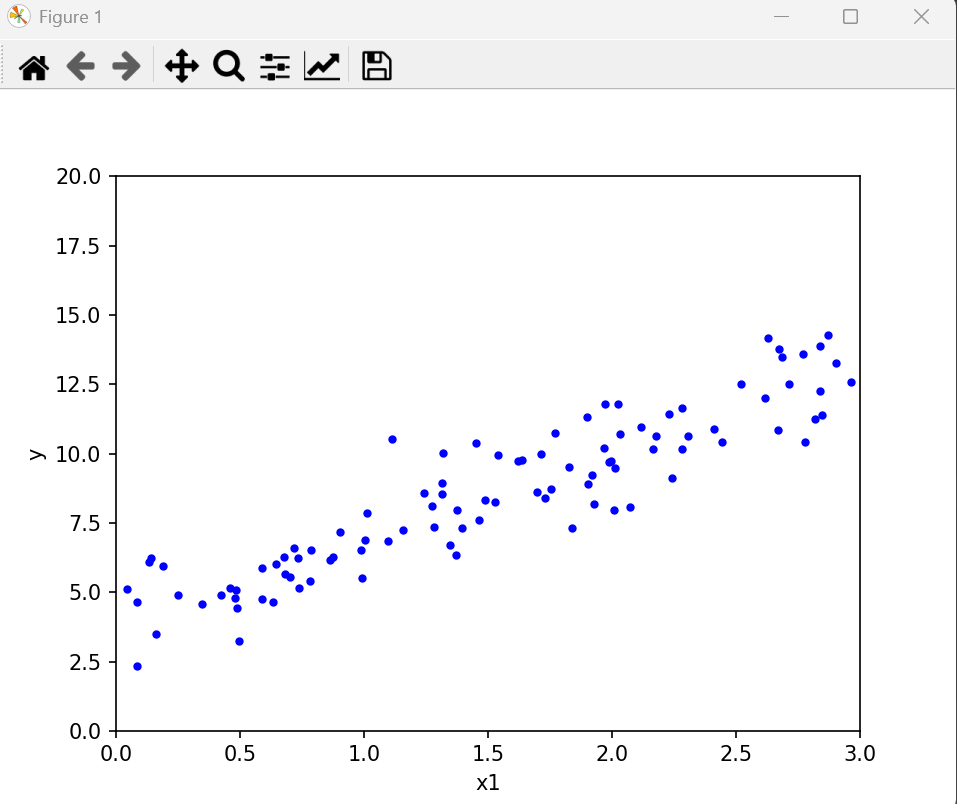
rand 与 randn可用于模拟数据,例如:y = 3x + 4 ,x在[0,3)上的近似数据。
import numpy as np
import matplotlib.pyplot as plt
# 平均数
def average(lst):
    sum_lst = 0
    for n in lst:
        sum_lst = sum_lst+n
    return sum_lst/len(lst)


# 生成特征数据 X:100个 [0,3) 区间的均匀分布随机数
x = 3 * np.random.rand(100)  # np.random.rand生成[0,1)均匀分布,乘以3扩展到[0,3)

# 生成目标数据 y:线性关系 y = 4 + 3X + 高斯噪声
y = 4 + 3 * x + np.random.randn(100)  # np.random.randn生成标准正态分布噪声

# 可视化原始数据
plt.plot(x, y, 'b.')  # 蓝色点图
plt.xlabel('x1')  # x轴标签
plt.ylabel('y')  # y轴标签
plt.axis([0, 3, 0, 20])  # 设置坐标范围:x[0,3], y[0,20]
plt.show()
运行后:
4.打乱顺序
shuffle
import numpy as np
lst = [ 1,2,3,4,5,6]
np.random.shuffle(lst)#打乱数组
print(lst)
输出[4, 2, 1, 5, 6, 3]
====================
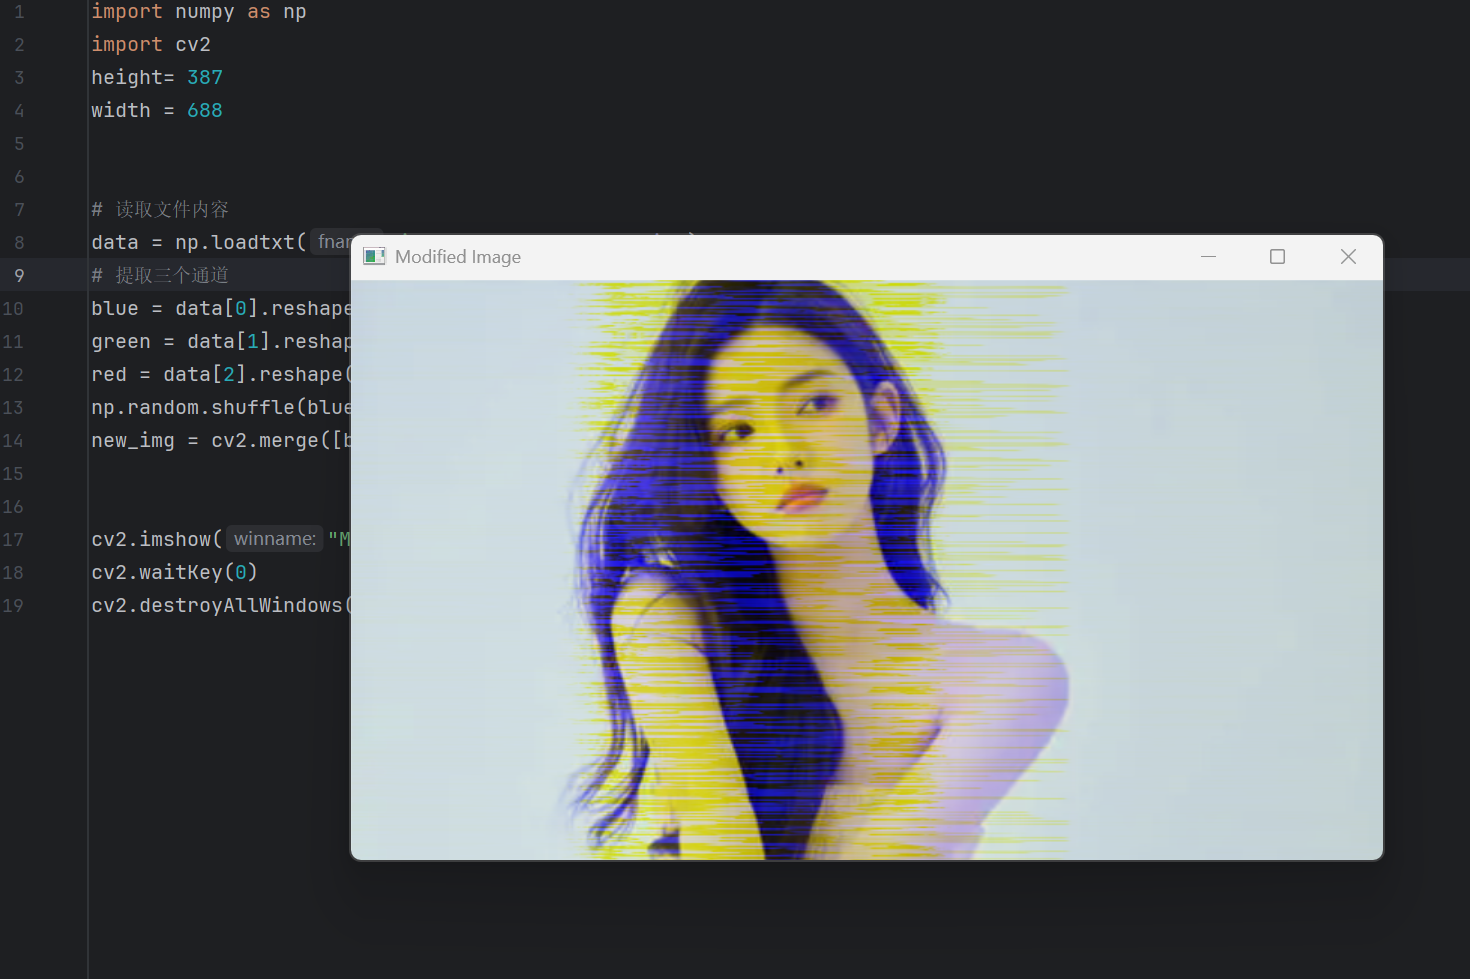
在第一节的补充的补充中,数组转图片中
打乱一维的数组后,
产生了噪音:
代码:
import numpy as np
import cv2
height= 387
width = 688


# 读取文件内容
data = np.loadtxt("img_data.txt", dtype=int)
# 提取三个通道
blue = data[0].reshape(height, width).astype(np.uint8)
green = data[1].reshape(height, width).astype(np.uint8)
red = data[2].reshape(height, width).astype(np.uint8)
np.random.shuffle(blue)
new_img = cv2.merge([blue, green, red])


cv2.imshow("Modified Image", new_img)
cv2.waitKey(0)
cv2.destroyAllWindows()
5.从指定的列表中选择
np.random.choice
import numpy as np


lst1 = [1,2,3,5,8,9,15,21]
print(np.random.choice(lst1))

lst2 = ["一等奖","二等奖","三等奖","谢谢惠顾"]
print(np.random.choice(lst2))
修改各个选项的概率:
import numpy as np
lst2 = ["一等奖","二等奖","三等奖","谢谢惠顾"]
lst2_weight = [0.1, 0.2, 0.3,0.4]
result = np.random.choice(lst2, p=lst2_weight)
print(result)
概率为0.1,0.2,0.3,0.4
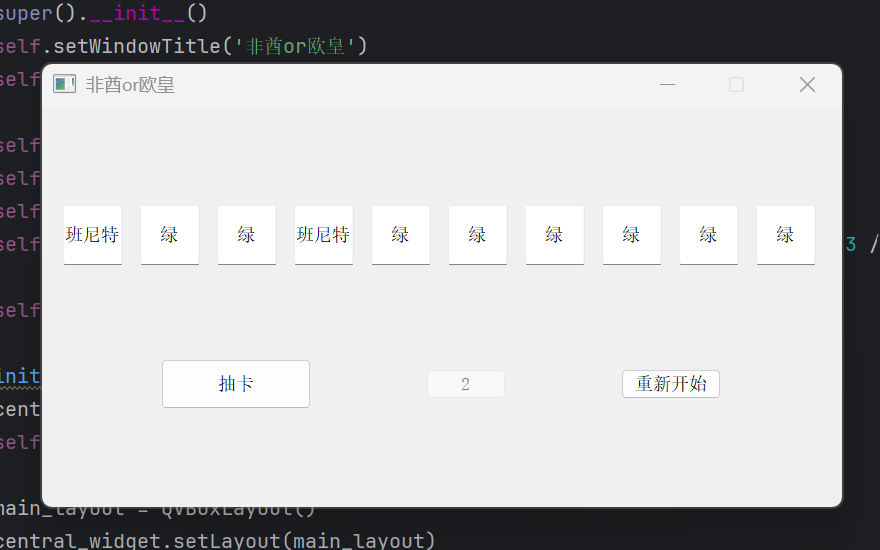
动态概率:模拟原神抽卡
lst = ['绿', '班尼特','芭芭拉','七七','刻晴','钟离']
lst_probabilities = [90 / 100, 4.5 / 100, 4.5 / 100, 0.3 / 100, 0.3 / 100, 0.4 / 100]
不断抽奖中,随着count的增加
count += 1
lst_probabilities跟着改变
lst_probabilities = [90 / 100-6*int(count2)/1000, 4.5 / 100, 4.5 / 100, 0.3 / 100+2*int(count2)/1000, 0.3 / 100+2*int(count2)/1000, 0.4 / 100+2*int(count2)/1000]
运行后:
完整代码
import sys
import numpy as np
from PyQt5.QtWidgets import (QApplication, QMainWindow, QWidget, QVBoxLayout,
                             QHBoxLayout, QLineEdit, QPushButton)
from PyQt5.QtCore import Qt


class GachaApp(QMainWindow):
    def __init__(self):
        super().__init__()
        self.setWindowTitle('非酋or欧皇')
        self.setFixedSize(800, 400)

        self.count = 0
        self.count2 = 0
        self.lst = ['绿', '班尼特', '芭芭拉', '七七', '刻晴', '钟离']
        self.lst_probabilities = [90 / 100, 4.5 / 100, 4.5 / 100, 0.3 / 100, 0.3 / 100, 0.4 / 100]

        self.initUI()

    def initUI(self):
        central_widget = QWidget()
        self.setCentralWidget(central_widget)

        main_layout = QVBoxLayout()
        central_widget.setLayout(main_layout)

        # 输入框网格
        self.input_boxes = []
        grid_layout = QHBoxLayout()

        for i in range(10):
            input_box = QLineEdit()
            input_box.setAlignment(Qt.AlignCenter)
            input_box.setFixedSize(60, 60)
            input_box.setReadOnly(True)
            self.input_boxes.append(input_box)
            grid_layout.addWidget(input_box)

        main_layout.addLayout(grid_layout)

        # 抽卡按钮
        self.gacha_btn = QPushButton('抽卡')
        self.gacha_btn.setFixedSize(150, 50)
        self.gacha_btn.clicked.connect(self.gacha)

        # 计数器
        self.count_btn = QPushButton("0")
        self.count_btn.setFixedSize(80, 30)
        self.count_btn.setEnabled(False)

        # 重新开始按钮
        self.reset_btn = QPushButton('重新开始')
        self.reset_btn.setFixedSize(100, 30)
        self.reset_btn.clicked.connect(self.reset)

        # 按钮布局
        btn_layout = QHBoxLayout()
        btn_layout.addWidget(self.gacha_btn)
        btn_layout.addWidget(self.count_btn)
        btn_layout.addWidget(self.reset_btn)

        main_layout.addLayout(btn_layout)

    def gacha(self):
        self.count += 1
        self.count_btn.setText(f"{self.count}")

        # 更新概率(根据你的原始逻辑)
        self.lst_probabilities = [
            90 / 100 - 3 * self.count2 / 1000,
            4.5 / 100,
            4.5 / 100,
            0.3 / 100 + 1 * self.count2 / 1000,
            0.3 / 100 + 1 * self.count2 / 1000,
            0.4 / 100 + 1 * self.count2 / 1000
        ]

        # 归一化处理(确保概率总和为1)
        prob_sum = sum(self.lst_probabilities)
        self.lst_probabilities = [p / prob_sum for p in self.lst_probabilities]

        # 抽卡并显示结果
        for i in range(10):
            result = np.random.choice(self.lst, p=self.lst_probabilities)
            self.input_boxes[i].setText(result)

            if result in ['七七', '钟离', '刻晴']:
                self.show_popup(f"恭喜你 抽到了 {result}")
                self.count2 = 0
            else:
                self.count2 += 1

    def reset(self):
        self.count = 0
        self.count2 = 0
        self.count_btn.setText(f"{self.count}")
        for box in self.input_boxes:
            box.clear()

    def show_popup(self, message):
        from PyQt5.QtWidgets import QMessageBox
        msg = QMessageBox()
        msg.setIcon(QMessageBox.Information)
        msg.setText(message)
        msg.setWindowTitle("恭喜")
        msg.setStandardButtons(QMessageBox.Ok)
        msg.exec_()


if __name__ == '__main__':
    app = QApplication(sys.argv)
    ex = GachaApp()
    ex.show()
    sys.exit(app.exec_())
Agent 垂直技术社区,欢迎活跃、内容共建。
更多推荐
 62
62 0
0- 0


 已为社区贡献2条内容

所有评论(0)