Vue3》》基础,setup nextTick
·
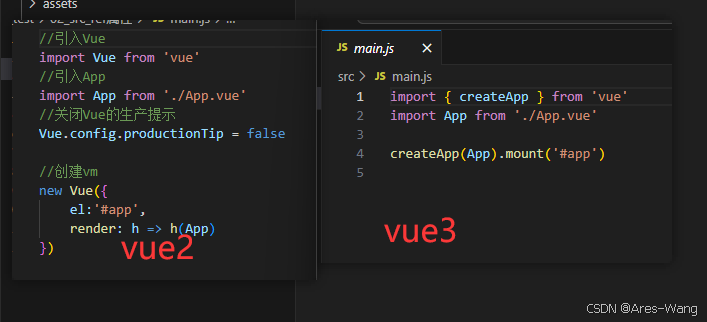
通过Vue-Cli 创建 vue3 项目
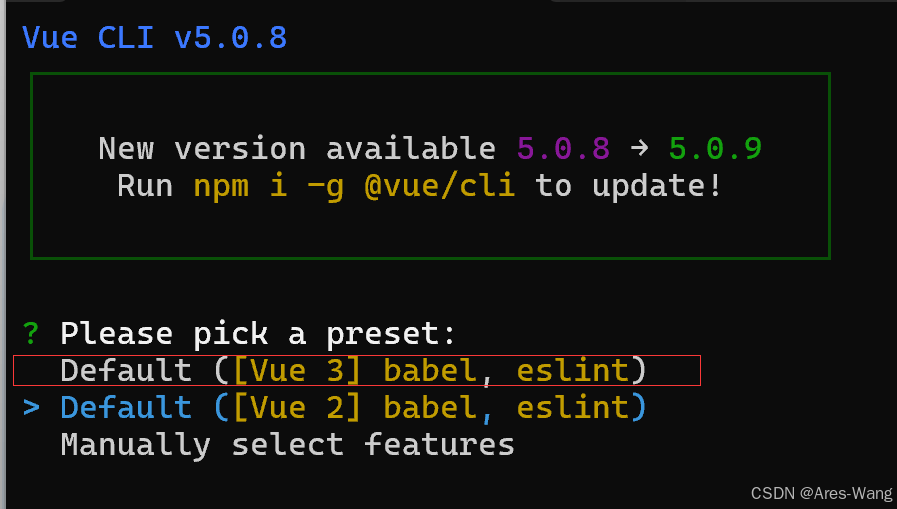
//  进入 某某目录
#  vue create 项目名
#  选择 vue3
#  等待
#  运行  npm run serve
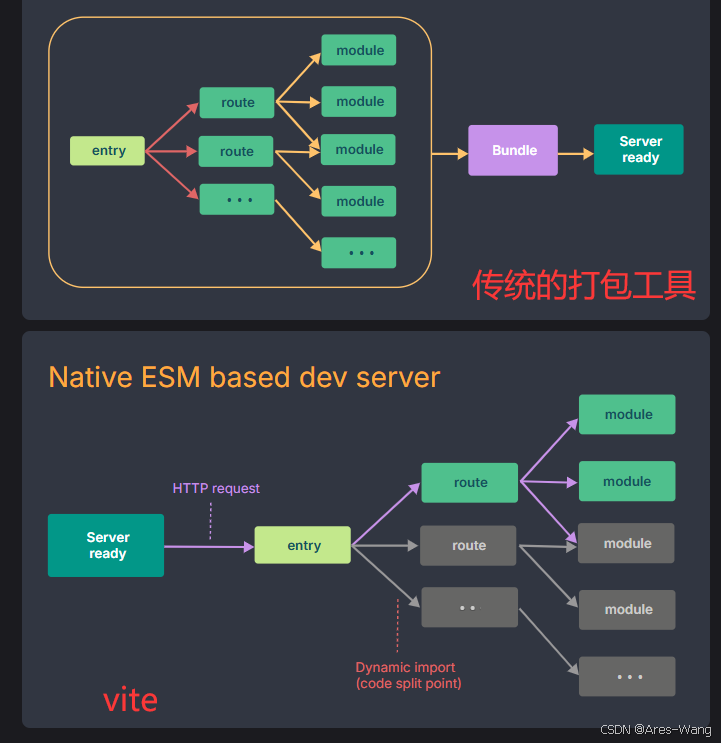
通过Vite 创建 vue3
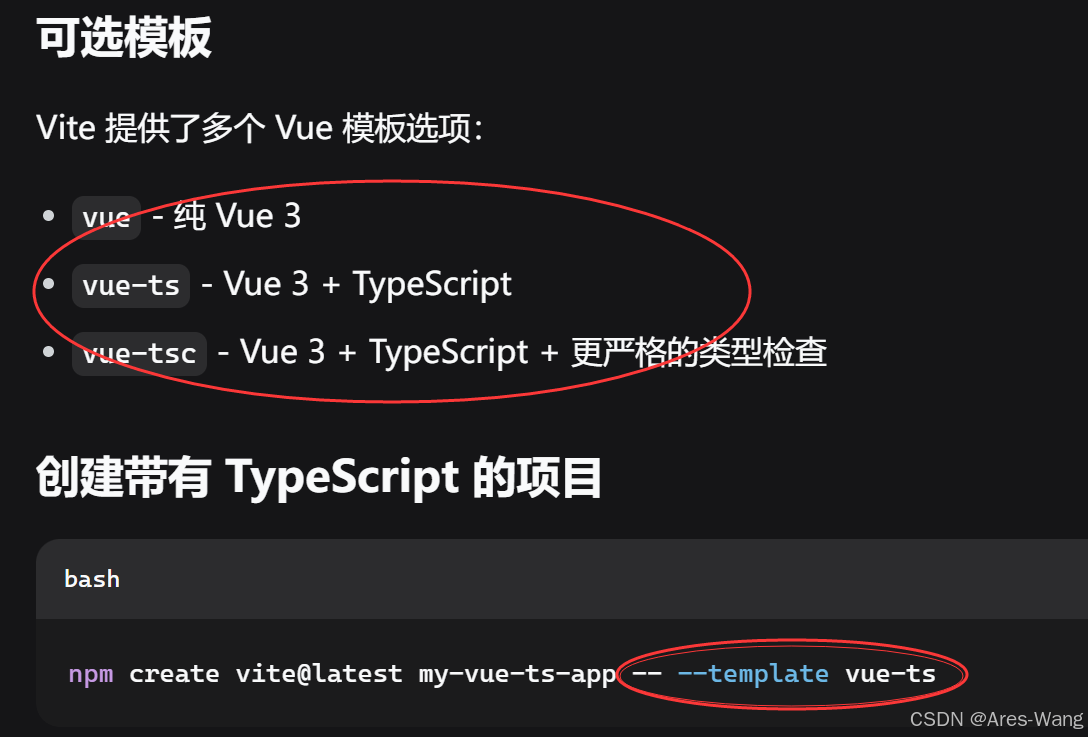
#  npm create vite@latest 项目名 -- --template vue
#  后面跟着提示一步步操作就可以了
#     1、 进入工程目录    cd 项目名
#     2、 安装依赖       npm install
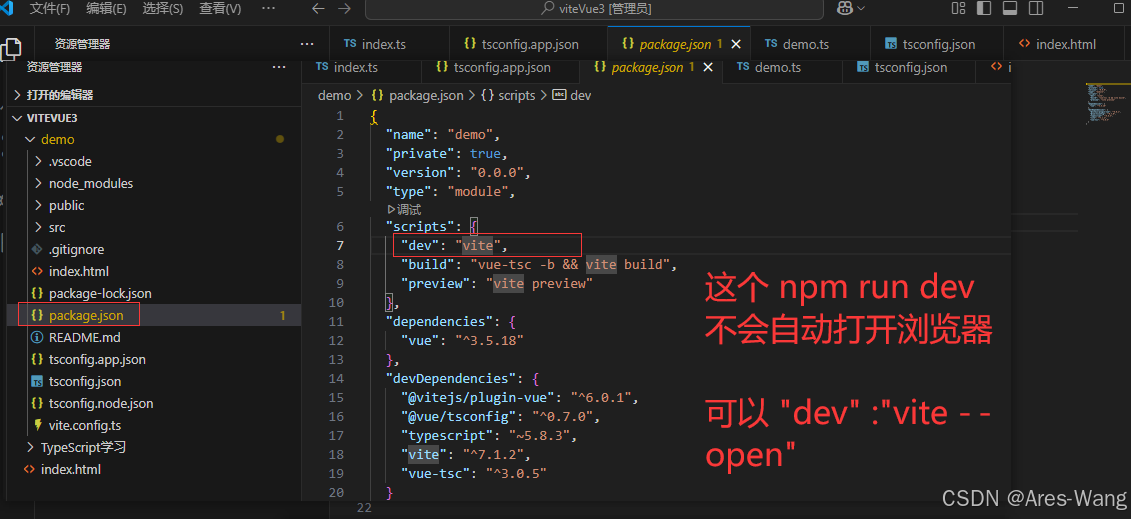
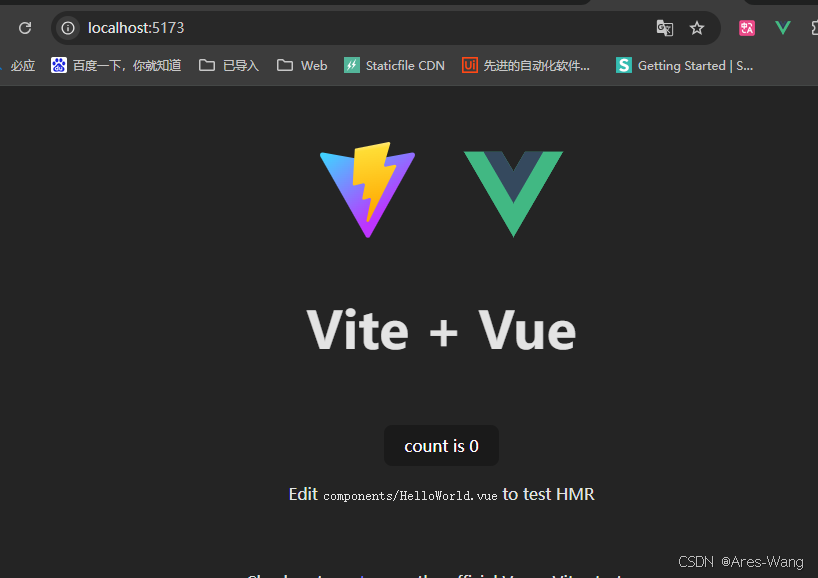
#     3、 运行          npm run  dev
setup 语法糖
》》传统写法
<template></template>
<script>
import { ref } from 'vue'

export default {
  setup() {
    const count = ref(0)
    const increment = () => count.value++
    return {
      count,
      increment
    }
  }
}
</script>
<style></style>
》》 混合使用 Options API 和 Composition API 不推荐
<template>
  <div>
    <p>Options: {{ optionsCount }}</p>
    <p>Composition: {{ compositionCount }}</p>
    <button @click="incrementBoth">同时增加</button>
  </div>
</template>

<script>
import { ref } from 'vue'

export default {
  // Vue 2 Options API
  data() {
    return {
      optionsCount: 0
    }
  },
  methods: {
    incrementOptions() {
      this.optionsCount++
    }
  },

  // Vue 3 Composition API
  setup() {
    const compositionCount = ref(0)

    const incrementComposition = () => {
      compositionCount.value++
    }

    const incrementBoth = () => {
      // 注意:这里不能直接访问 this.optionsCount
      incrementComposition()
      // Options API 的数据需要在 methods 中处理
    }

    return {
      compositionCount,
      incrementBoth,
      incrementComposition
    }
  }
}
</script>
》》
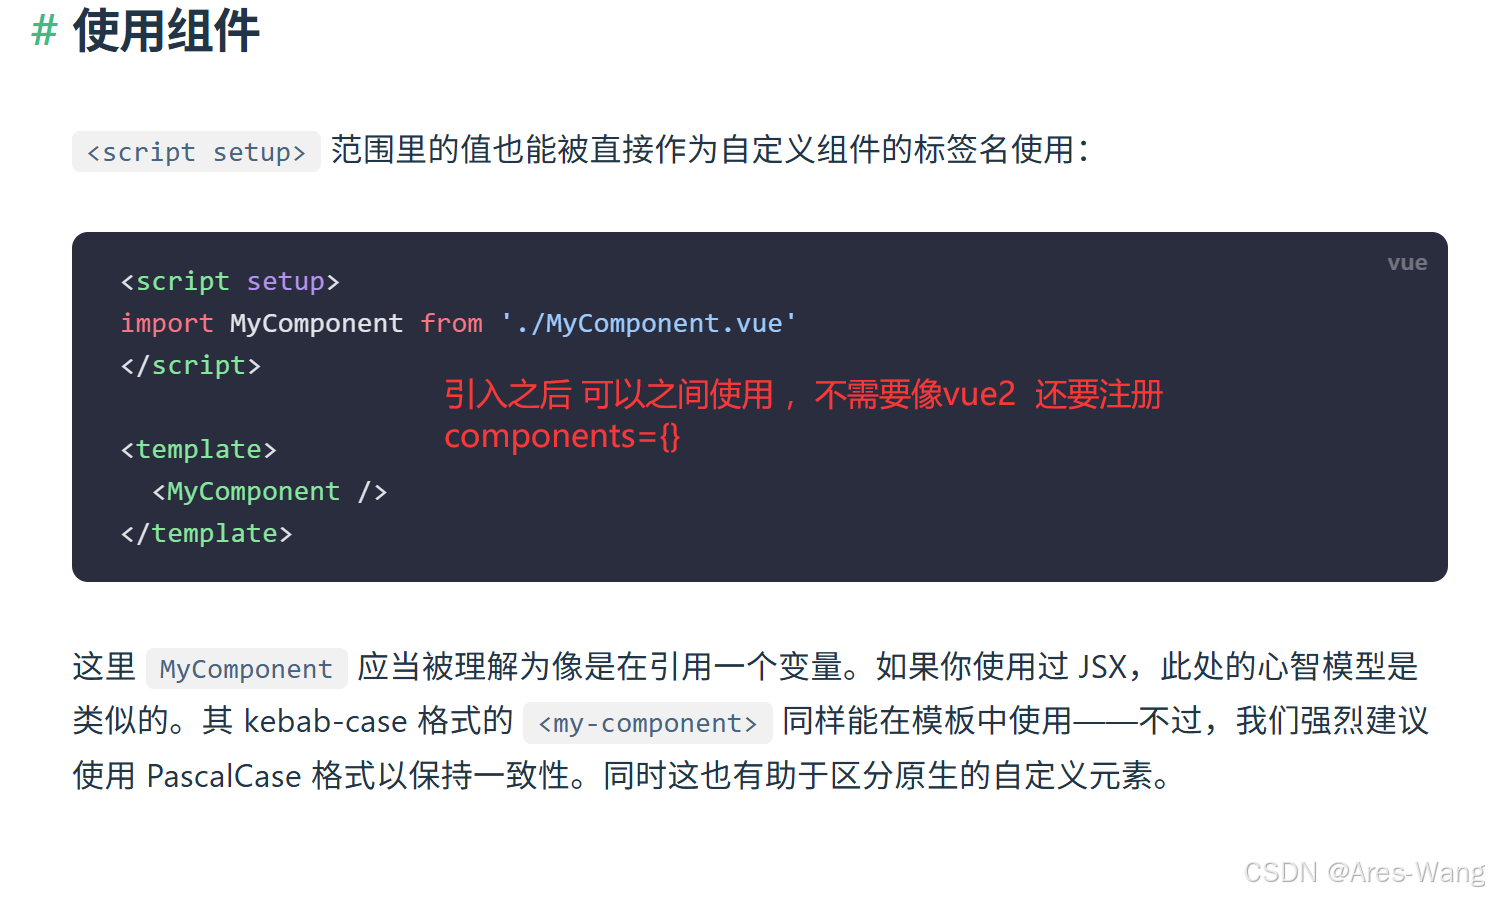
- 自动导出
- 组件导入自动注册
<template>
	<div>
    <Button />
    <Modal />
    <UserCard />
  </div>
</template>
<script setup>
// 导入的组件自动注册,无需 components 选项
import Button from './Button.vue'
import Modal from './Modal.vue'
import UserCard from './UserCard.vue'
import { ref } from 'vue'
const count = ref(0)
const increment = () => count.value++
</script>
<style></style>

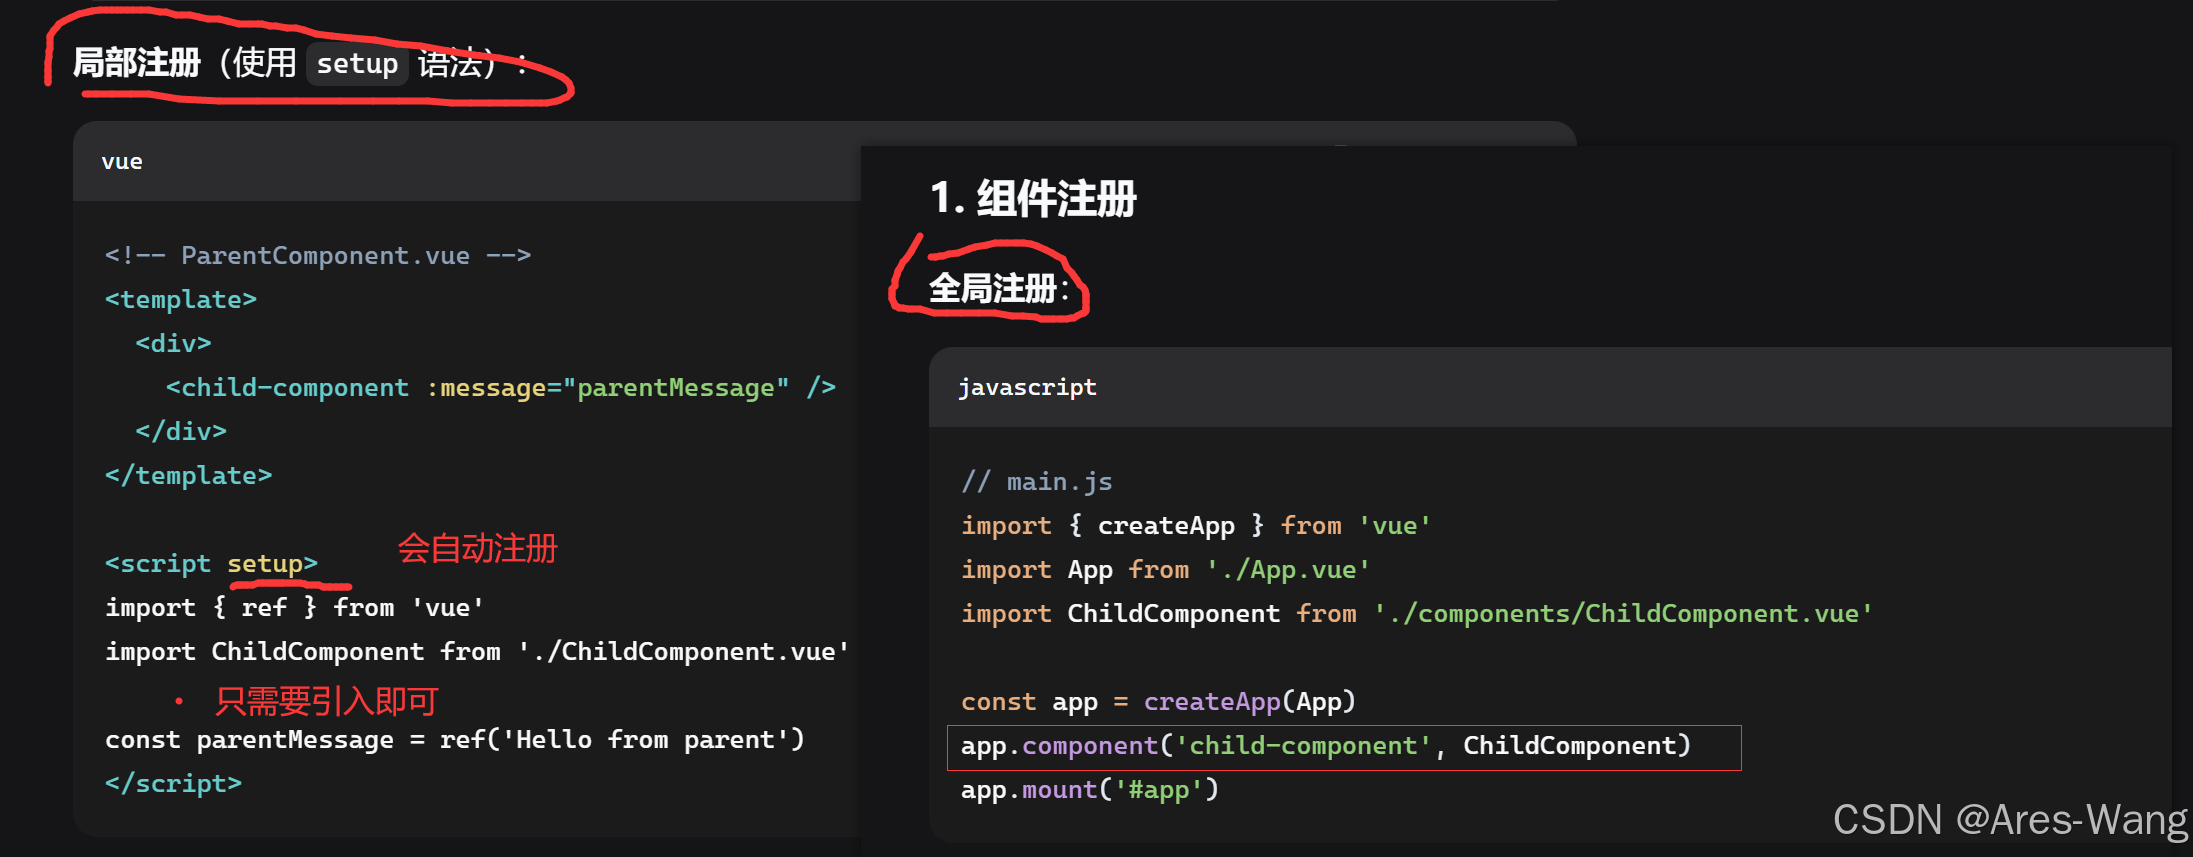
全局注册组件
v-meno
nextTick
vue2
vue3 跟vue2 中 nextTick 功能一样
nextTick 的核心用法在 Vue 2 和 Vue 3 中没有变化,它的目的都是在下次 DOM 更新循环结束之后执行延迟回调,用于获取更新后的 DOM
<template>
  <div>
    <p>{{ message }}</p>
    <button @click="changeMessage">changeMessage</button>
  </div>
</template>

<script setup lang="ts">
import { ref, nextTick } from "vue";

const message = ref("Hello, world!");

const changeMessage = () => {
  message.value = "Hello, nextTick!";
  nextTick(() => {
    console.log(document.querySelector("p")!.textContent); // 'Hello, nextTick!'
  });
  //或者
  //await nextTick();
 // console.log(document.querySelector("p")!.textContent); // 'Hello, nextTick!'
 //或者
 nextTick().then(() => {
  // console.log(document.querySelector("p")!.textContent); // 'Hello, nextTick!'
});
};
</script>

<style scoped></style>


Agent 垂直技术社区,欢迎活跃、内容共建。
更多推荐


 2
2 0
0- 0


 已为社区贡献23条内容

所有评论(0)