Zed AI 白嫖免费模型,搭配 DeepSeek v4,玩转 Agent 编程技巧
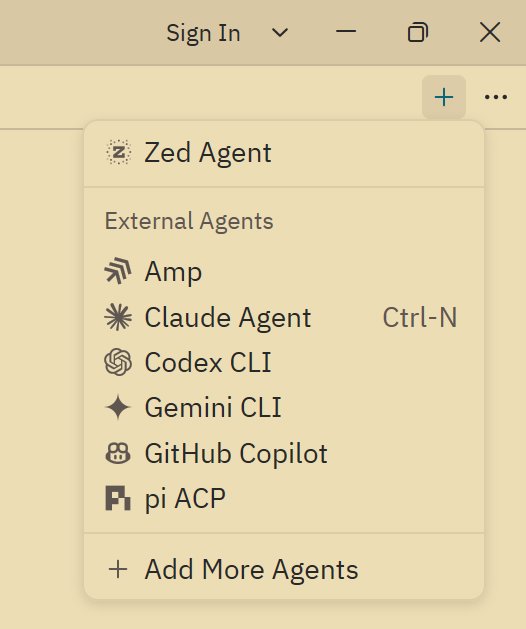
置 agent 是很简单的,在 ACP Registry 里添加完,点击 chat panel 右上角的加号,选择要使用的 agent 即可,使用起来就和用 cursor 的侧边栏差不多,不过因为 ACP 是通用协议,一些不同 agent 特有的功能就没法 100% 支持了。
而且这个功能其实还不太稳定,所以本文介绍的重点还是放在 Zed Agent 上。
Zed Agent#
这是 Zed 自带的 Agent,相当于 cursor/Trae 之类工具的侧边栏,但是非常开放,可以设置任意 model provider,比如最近新出很火的 DeepSeek v4
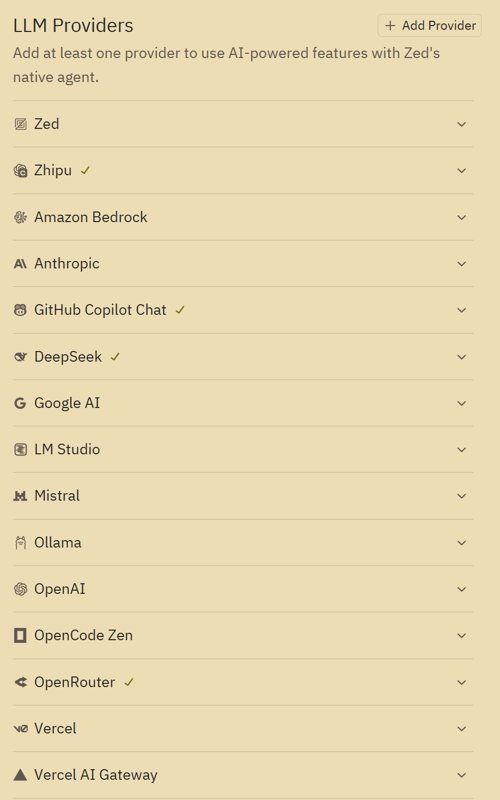
这里面支持的 providers 太多了,有些我都没见过
这里我主要配置了 DeepSeek、智谱、openrouter 还有 GitHub Copilot 作为 providers
配置 providers 是很简单的,只需要填写 API key 就行了,没什么好说的,这里主要说一下关于白嫖的😄
白嫖免费模型额度#
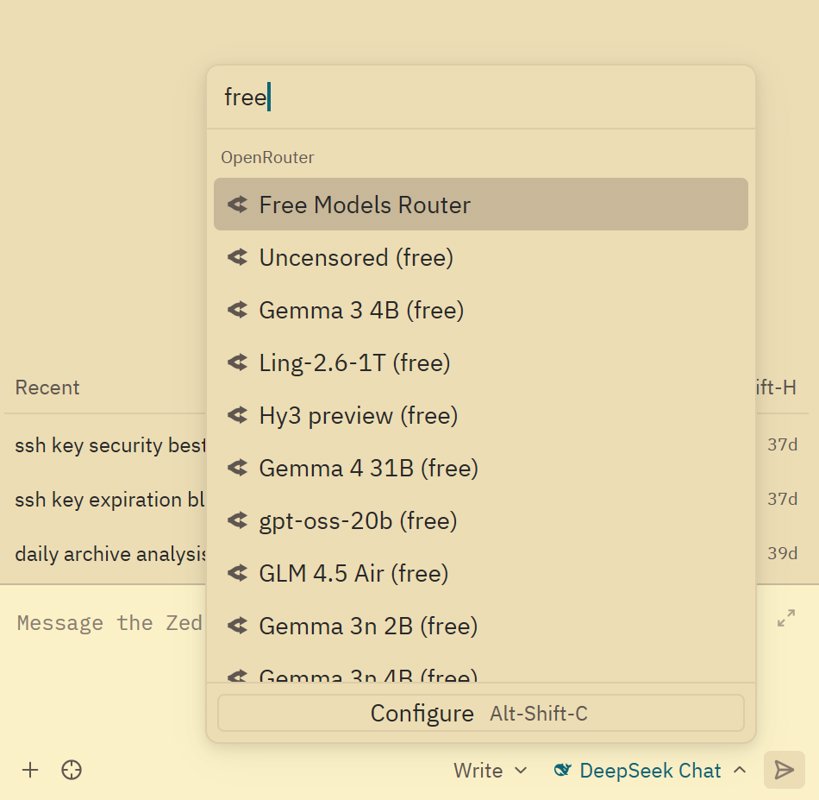
很多模型提供商有免费的模型可用,比如说 OpenRouter、智谱,这也是我要介绍的两个。
open router#
访问上述地址,创建 API key,获取到 API key 之后填入 zed 的配置里。
然后在 zed 的聊天界面选择模型时,输入 free 筛选,你就可以获得非常多免费模型可用,这里面比较好的是 qwen3 coder, minimax m2.5, gemini 3 flash
其他模型大家可以自行探索。
智谱GLM#
智谱算是国内最早做开源大模型的厂商之一,一开始还是清华的团队,当时 ChatGLM 出来的时候就很惊艳了,而且很良心一直提供有免费的大模型接口,简单的用途是够用了。
新注册的用户还可以赠送一些免费额度,可以调用任意模型。
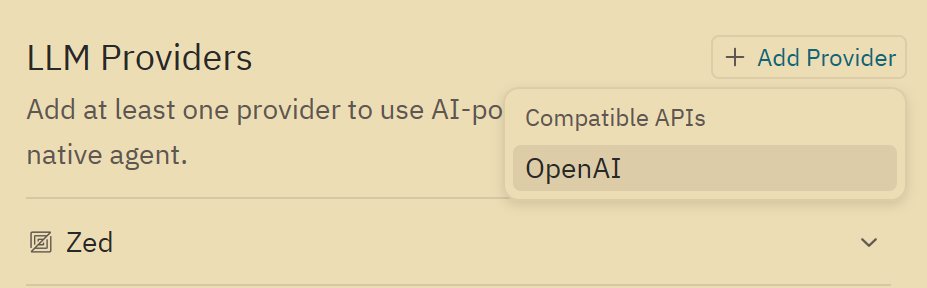
不过 Zed 里似乎没有提供智谱这个 provider,这时候需要手动添加配置。
在 LLM Providers 右边点击添加
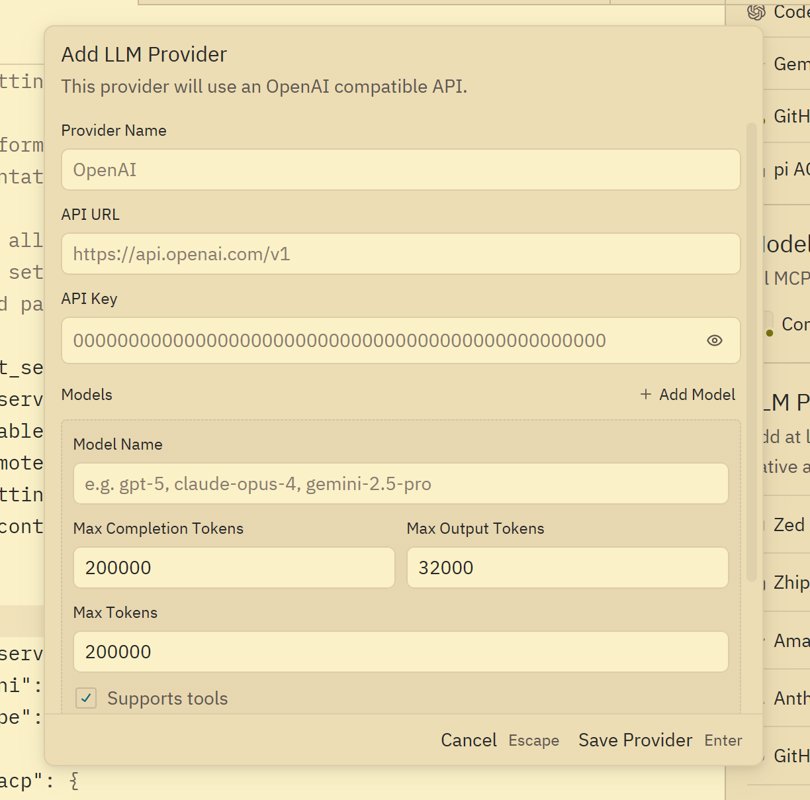
输入 URL 和 API key,还有模型。
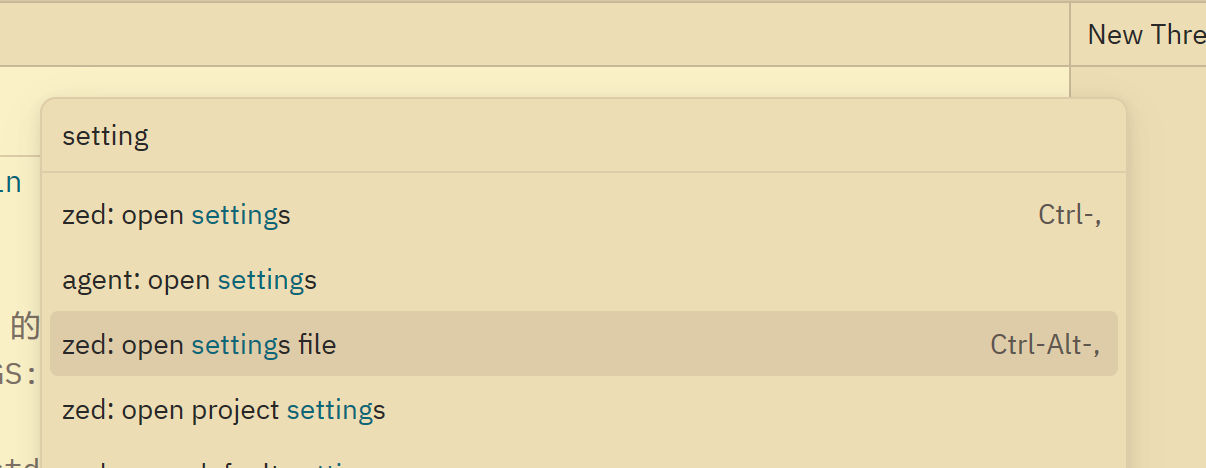
不过 Zed 的配置 GUI 做得不是很好,这里的添加界面居然是一次性,后续就无法用 GUI 进行编辑模型了,只能修改配置文件。
Ctrl + Shift + P 打开 command panel,然后输入 settings file 进入设置编辑。
找到 language_models 配置节点,编辑这些模型配置是比较繁琐的,我这里直接分享我配置好的结果。
需要关注三个参数: max_tokens, max_output_tokens, max_completion_tokens
max_tokens是总上下文长度max_completion_tokens最大补全长度也就是输出长度max_output_tokens我没搞懂,不过保持和max_completion_tokens一样就完事儿了
这些参数都可以在模型官网获得,添加其他模型也是一样的。
"language_models": {
    "openai_compatible": {
      "Zhipu": {
        "api_url": "https://open.bigmodel.cn/api/paas/v4",
        "available_models": [
          {
            "name": "glm-4.5-air",
            "max_tokens": 200000,
            "max_output_tokens": 65536,
            "max_completion_tokens": 65536,
            "capabilities": {
              "tools": true,
              "images": false,
              "parallel_tool_calls": false,
              "prompt_cache_key": false,
              "chat_completions": true,
            },
          },
          {
            "name": "glm-4.5-airx",
            "max_tokens": 200000,
            "max_output_tokens": 65536,
            "max_completion_tokens": 65536,
            "capabilities": {
              "tools": true,
              "images": false,
              "parallel_tool_calls": false,
              "prompt_cache_key": false,
              "chat_completions": true,
            },
          },
          {
            "name": "glm-4.6v",
            "max_tokens": 32768, // 官网窗口 32K (视觉模型通常窗口较小)
            "max_output_tokens": 16384, // 建议实用值(最大支持 32K)
            "max_completion_tokens": 16384,
            "capabilities": {
              "tools": true,
              "images": false,
              "parallel_tool_calls": false,
              "prompt_cache_key": false,
              "chat_completions": true,
            },
          },
          {
            "name": "glm-4.6",
            "max_tokens": 200000,
            "max_output_tokens": 131072,
            "max_completion_tokens": 131072,
            "capabilities": {
              "tools": true,
              "images": false,
              "parallel_tool_calls": false,
              "prompt_cache_key": false,
              "chat_completions": true,
            },
          },
          {
            "name": "glm-5",
            "max_tokens": 200000,
            "max_output_tokens": 131072,
            "max_completion_tokens": 131072,
            "capabilities": {
              "tools": true,
              "images": false,
              "parallel_tool_calls": false,
              "prompt_cache_key": false,
              "chat_completions": true,
            },
          },
          {
            "name": "glm-4-flash-250414",
            "max_tokens": 131072, // 官网窗口 32K
            "max_output_tokens": 32768, // 建议实用值(最大支持 32K)
            "max_completion_tokens": 32768,
            "capabilities": {
              "tools": true,
              "images": false,
              "parallel_tool_calls": false,
              "prompt_cache_key": false,
              "chat_completions": true,
            },
          },
          {
            "name": "glm-4.7-flash",
            "max_tokens": 200000, // 官网给出的上下文窗口总和
            "max_output_tokens": 32768, // 足够应付 99% 的代码重构场景,且不挤占输入空间
            "max_completion_tokens": 32768, // 兼容性参数,保持一致
            "capabilities": {
              "tools": true,
              "images": false,
              "parallel_tool_calls": false,
              "prompt_cache_key": false,
              "chat_completions": true,
            },
          },
        ],
      },
    },
},
AI功能#
Zed 的 agent 不算最好的那一挡,不过用来修改脚本,做一些日常开发的功能,是足够的。
和大部分的 AI IDE 一样,有 agent (write) 和 ask 模式。
而且这里面还有一个我比较喜欢的模式: Minimal ,可以把 zed 当成一个纯粹的大模型聊天app,不接入任何工具,非常省 token,有时问一些简单的问题非常有用。
agent write#
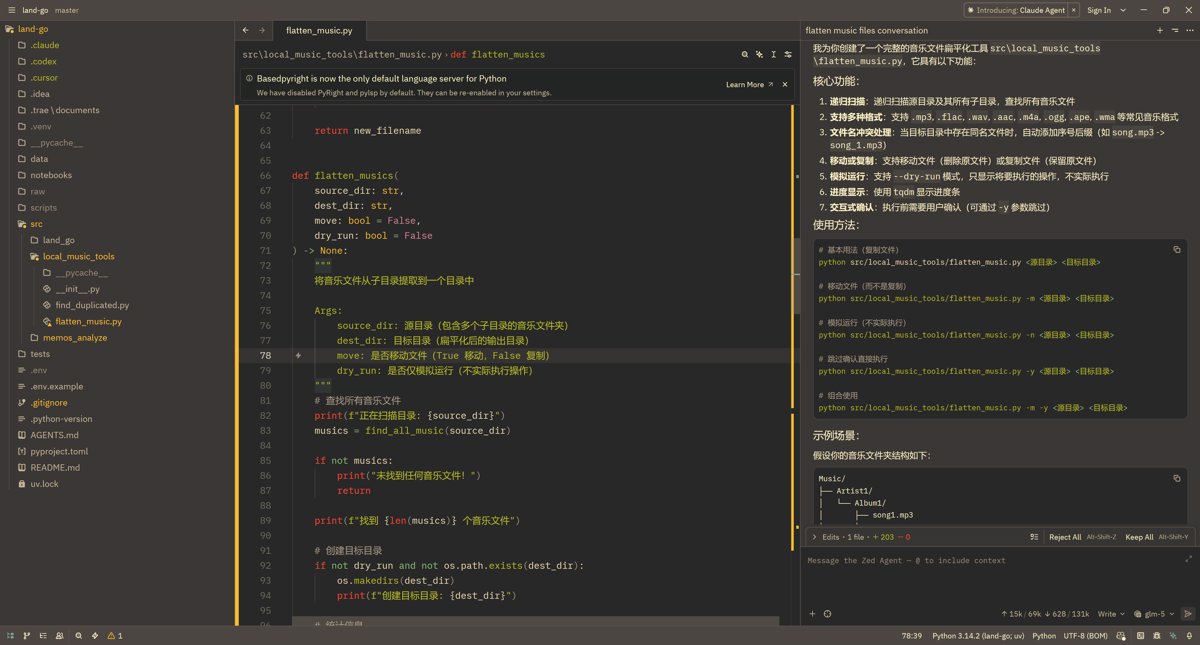
这里用一个例子来测试 AI 编程效果,使用的模型是 GLM5
我的 prompt
一个音乐文件夹,里面每一个歌曲文件都是在单独的目录里,我想写一个方法把这些歌曲文件提取到一个目录中。src\local_music_tools\flatten_music.py
思考过程
实现效果
生成 commit messages#
在 AI 时代,除了 AI 编程之外,我觉得另一个最好用的功能就是用 AI 来辅助生成各种项目文档、更新日志,还有 commit messages
以前没有 AI 的时候,每次写 commit messages 都很痛苦,特别是团队为了规范,设计了一套严格的 commit messages 规范,不遵守的话 git hook 不通过,严格遵守又写得很痛苦。
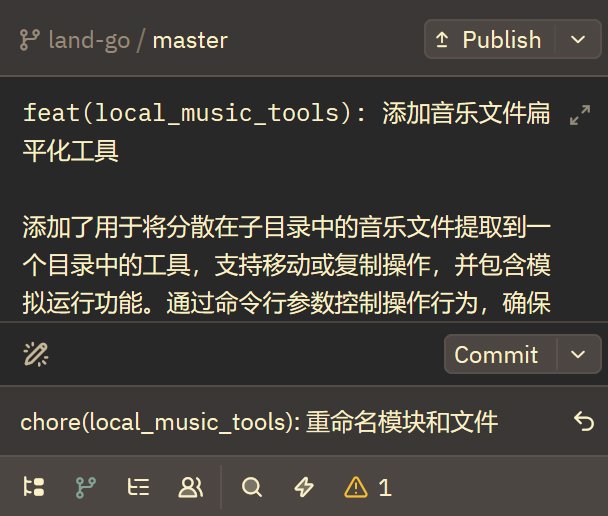
有了 AI 后太舒服了,AI 可以根据 git --diff 来生成 commit messages 又准又快,比自己写的好多了。
Zed 的 commit messages 生成功能我感觉仅次于 Trae,当然是在自己配置之后,默认情况下还是不太好用的。
其他工具的 commit messages 功能不太行,VSCode 的虽然可以自定义 prompt,但是用于生成 commit messages 的 context 长度不够,在大量修改的时候经常胡说八道。
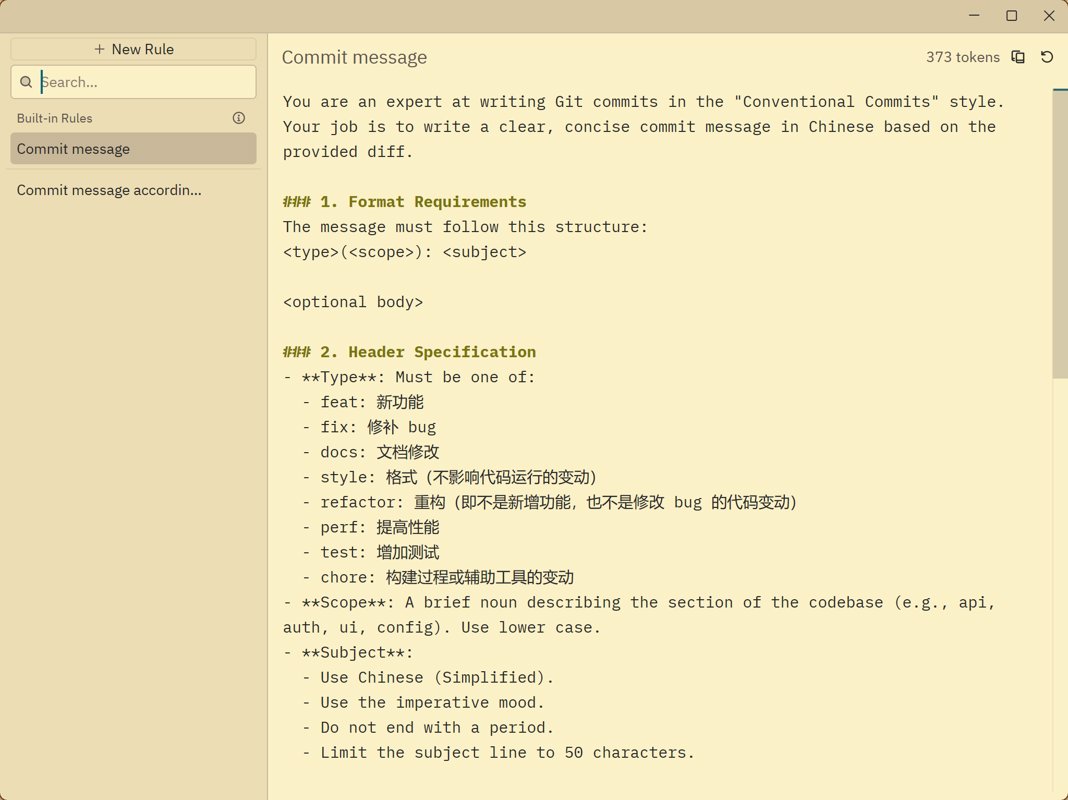
这里分享一下如何把 Zed 的 commit messages 生成功能配置得很好用。并且分享一些我用着不错的 prompt
首先点击 chat panel 右上角这个菜单,选择 rules
打开后第一个 rule 俨然就是 commit messages 的配置
默认的 prompt 我觉得很烂,这里我改写了默认的 prompt
模型配置#
一般我们使用免费的模型来生成 commit messages,这里 GLM 的含金量就体现出来了。
这一个功能只能在配置文件里修改。我翻了好久文档才找到。
找到 agent 节点,这里面可以配置默认模型、tab模型、commit、总结等各种模型。
我是 GPT-5-mini 和 glm-4-flash-250414 这两个模型来回切换,又快又好用,不过注意 glm-4-flash-250414 的上下文比较小,不要一次提交太多文件。(虽然小但还是比 VSCode 那个不知道什么鬼模型大了)
"agent": {
    "default_model": {
      "provider": "deepseek",
      "model": "deepseek-chat",
      "enable_thinking": false,
    },
    "favorite_models": [],
    "model_parameters": [],
    "inline_assistant_model": {
      "provider": "copilot_chat",
      "model": "gpt-5-mini",
    },
    // "commit_message_model": {
    //   "provider": "Zhipu",
    //   "model": "glm-4-flash-250414",
    //   "enable_thinking": false,
    // },
    "commit_message_model": {
      "provider": "copilot_chat",
      "model": "gpt-5-mini",
    },
    "thread_summary_model": {
      "provider": "copilot_chat",
      "model": "gpt-5-mini",
    },
},
prompts#
这是第一版 prompt,直接使用即可
You are an expert at writing Git commits in the "Conventional Commits" style. Your job is to write a clear, concise commit message in Chinese based on the provided diff.

### 1. Format Requirements
The message must follow this structure:
<type>(<scope>): <subject>

<optional body>

### 2. Header Specification
- **Type**: Must be one of:
  - feat: 新功能
  - fix: 修补 bug
  - docs: 文档修改
  - style: 格式(不影响代码运行的变动)
  - refactor: 重构(即不是新增功能,也不是修改 bug 的代码变动)
  - perf: 提高性能
  - test: 增加测试
  - chore: 构建过程或辅助工具的变动
- **Scope**: A brief noun describing the section of the codebase (e.g., api, auth, ui, config). Use lower case.
- **Subject**:
  - Use Chinese (Simplified).
  - Use the imperative mood.
  - Do not end with a period.
  - Limit the subject line to 50 characters.

### 3. Body Specification (Optional)
- Use a blank line to separate the subject from the body.
- Use the body ONLY if the changes are complex and need explanation.
- Use a bulleted list (starting with "- ") to break down multiple changes.
- Wrap lines at 72 characters.
- Focus on the "what" and "why" of the changes.

### 4. Constraints
- Only return the commit message.
- Do not include any meta-commentary or raw diff output.
- Answer in Chinese.
不过可能有人觉得这一版生成的内容太简单,还有增强版,这也是我在 VSCode 里使用的 prompts
# Role: You are an expert Senior Software Engineer and a master of the "Conventional Commits" specification.

Your task is to generate a deep, semantic, and professional commit message in Chinese based on the provided git diff.

### 1. Structure Requirements
The message must strictly follow this structure:
`<type>(<scope>): <subject>`

`<optional body>`

### 2. Header Specification
- **Type**: Must be:
  - `feat` (新功能)
  - `fix` (修补 bug)
  - `docs` (文档)
  - `style` (格式)
  - `refactor` (重构)
  - `perf` (性能)
  - `test` (测试)
  - `chore` (构建/工具)
- **Scope**: A brief noun (lowercase) describing the section (e.g., `auth`, `api`, `ui`).
- **Subject**: Use Simplified Chinese. Describe the 'capability' added (e.g., '支持了某能力') instead of 'updated file X'. Max 50 chars, no period.

### 3. Body Specification (The "Why" and "How")
- **Deep Analysis**: Focus on the 'Why' and behavioral changes. Explain logic: 'When [condition], it will [behavior], resolving [issue]'.
- **Technical Detail List**:
  - **No Surface-level Listing**: Do NOT just list function names. Describe specific logic (e.g., parameters extracted, validation logic).
  - **Capture Keys**: Must capture specific parameters (e.g., 'to' parameter), hardcoded strings, routes (e.g., '/sweeteners'), and component interactions.
  - **Scenario**: Specify which test scenarios are verified.
- **Formatting**: Use bulleted list (`- `) and wrap lines at 72 characters.

### 4. Constraints
- **Language**: Answer in Chinese.
- **No Meta-commentary**: Return ONLY the commit message.
一些其他的分享#
任务完成提示#
任务完成或者需要手动确认时会弹窗提示,这个和 VSCode、codex 差不多,好用。
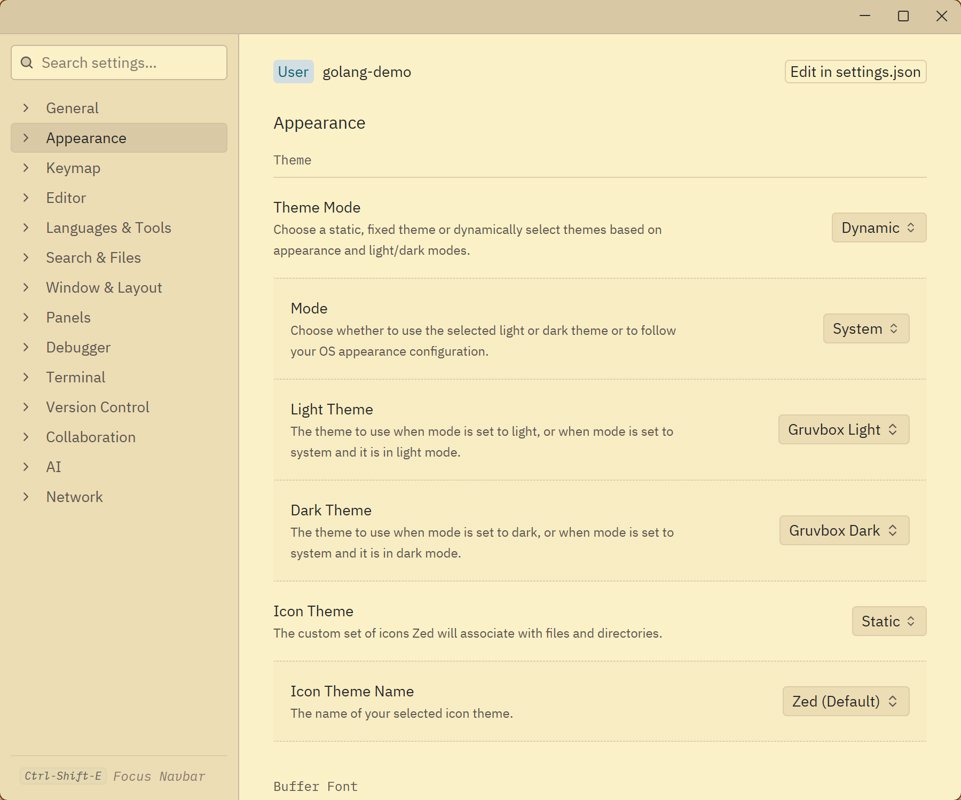
自动切换主题#
Zed 就是麻雀虽小五脏俱全
自动切换主题也是我比较喜欢的功能,我在每个 IDE 上都配置了这个功能,Sublime Text 也不例外,可以跟随系统的主题切换来修改配色,再也不用手动切换了。
文档结构#
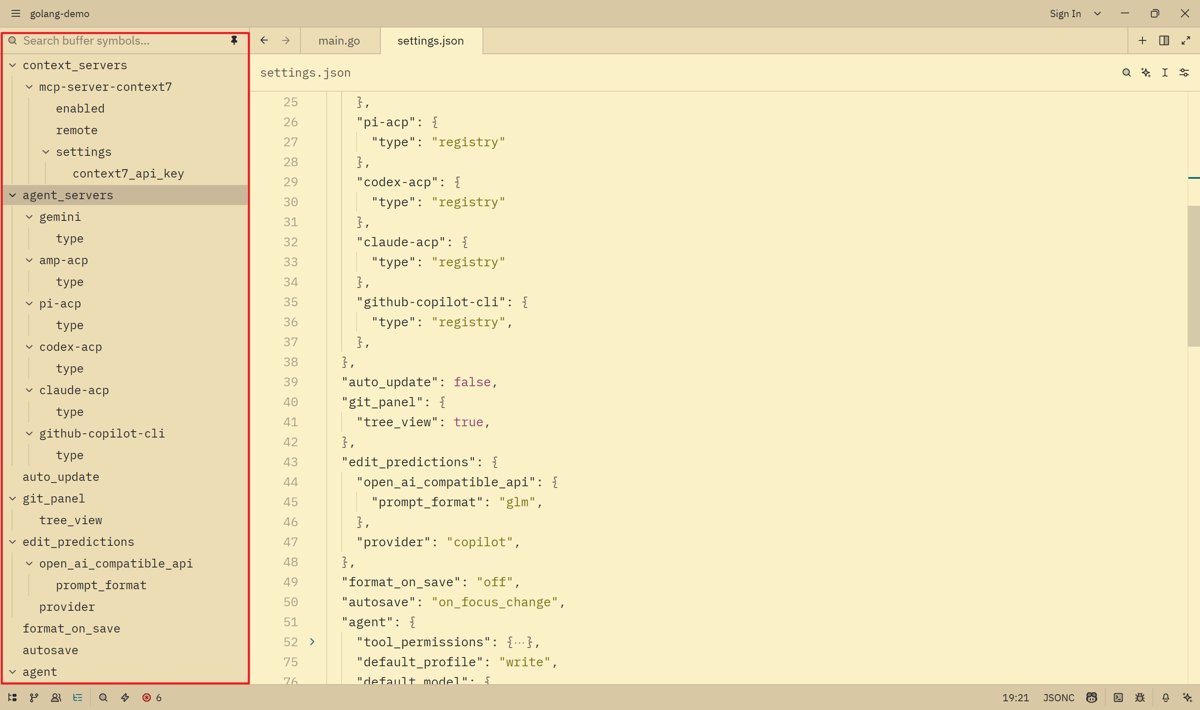
Zed 还有一个我觉得不错的功能,清晰的文档结构显示
之前用 JetBrains、VSCode 的时候,也有这个功能,但不是太小就是默认是折叠的,不像 zed 一样默认全部展开,且全部在侧边栏上很直观可以看到,这样在编辑很长的代码文件时,体验就非常好。

Agent 垂直技术社区,欢迎活跃、内容共建。
更多推荐

 2
2 0
0- 0


 已为社区贡献1条内容

所有评论(0)