【openclaw】Windows安装openclaw配置阿里云Token Plan 团队版教程
本文介绍了OpenClaw的安装和配置流程:1)需Node.js 22+环境,通过PowerShell或npm安装;2)运行配置向导时选择快速启动模式,跳过初始模型和渠道设置;3)修改配置文件添加百炼Token Plan团队版API密钥,配置多个AI模型参数;4)保存后重启网关服务,即可通过本地端口18789访问对话界面。主要步骤包括环境检查、软件安装、基础配置、模型密钥设置和网关重启。
一、安装openclaw
1、检查node版本
OpenClaw 需要 Node.js 22 或更高版本。可通过以下命令检查 Node.js 版本:
node -v2、安装下载
在 PowerShell 中执行:
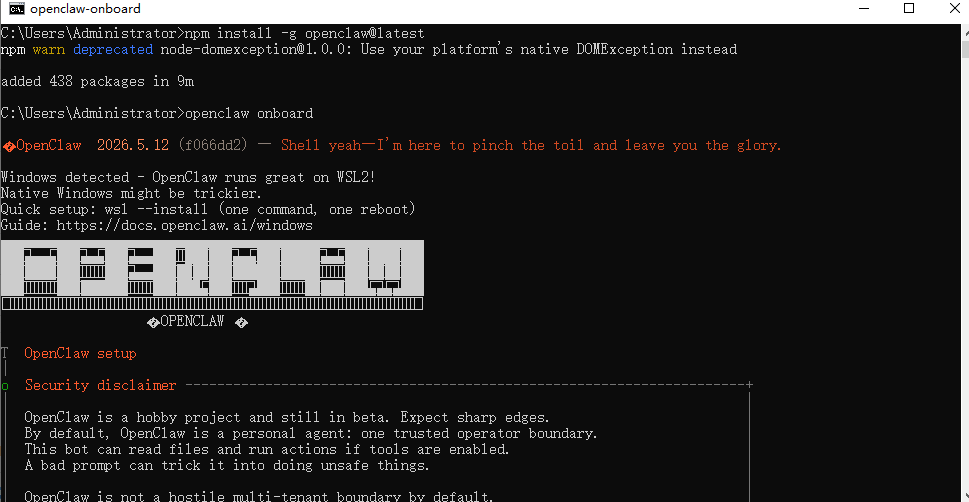
iwr -useb https://openclaw.ai/install.ps1 | iex或者npm安装
npm install -g openclaw@latest3、进行配置
黑窗口中继续执行openclaw onboard命令进行配置。
|
配置项 |
建议配置 |
|
I understand this is powerful and inherently risky. Continue? |
选择 Yes |
|
Onboarding mode |
选择 QuickStart |
|
Model/auth provider |
选择 Skip for now(稍后配置百炼模型) |
|
Filter models by provider |
选择 All providers |
|
Default model |
选择 Keep current |
|
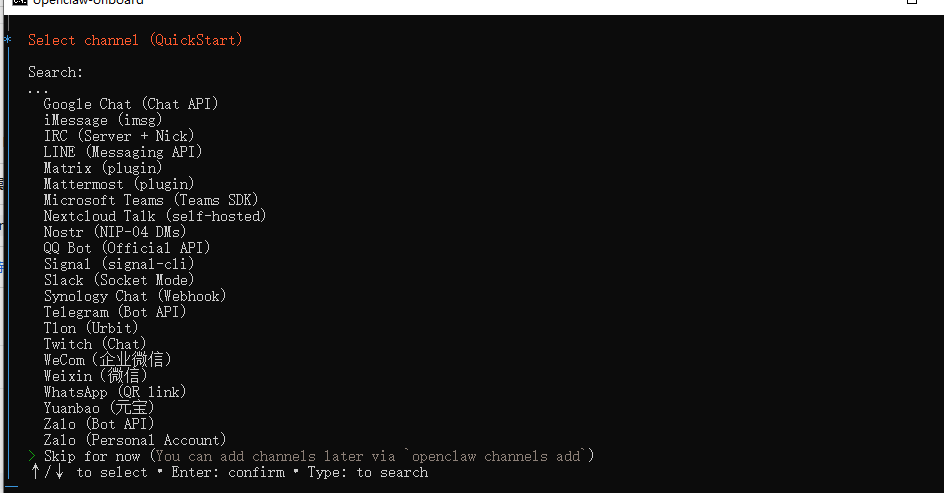
Select channel (QuickStart) |
选择 Skip for now(稍后配置渠道) |
|
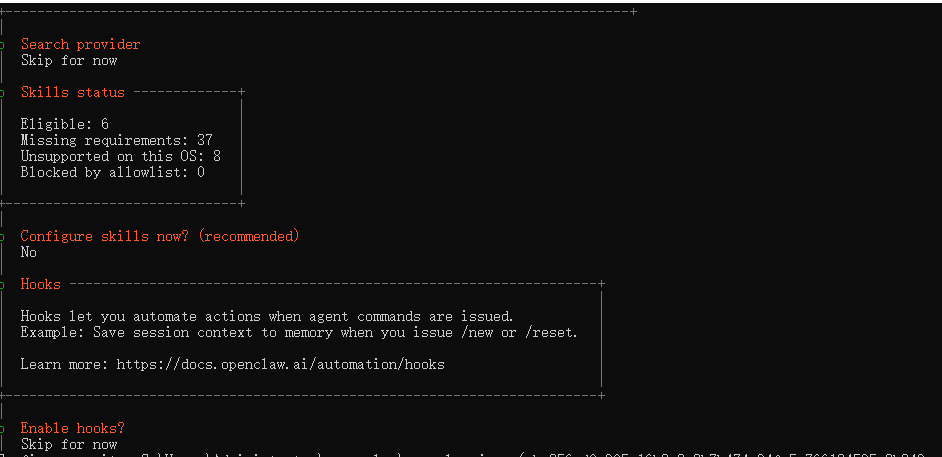
Configure skills now? (recommended) |
选择 No |
|
Enable hooks? |
按空格键选中选项,按回车键进入下一步 |
|
How do you want to hatch your bot? |
选择 hatch this later |
接下来就是配置项的选择

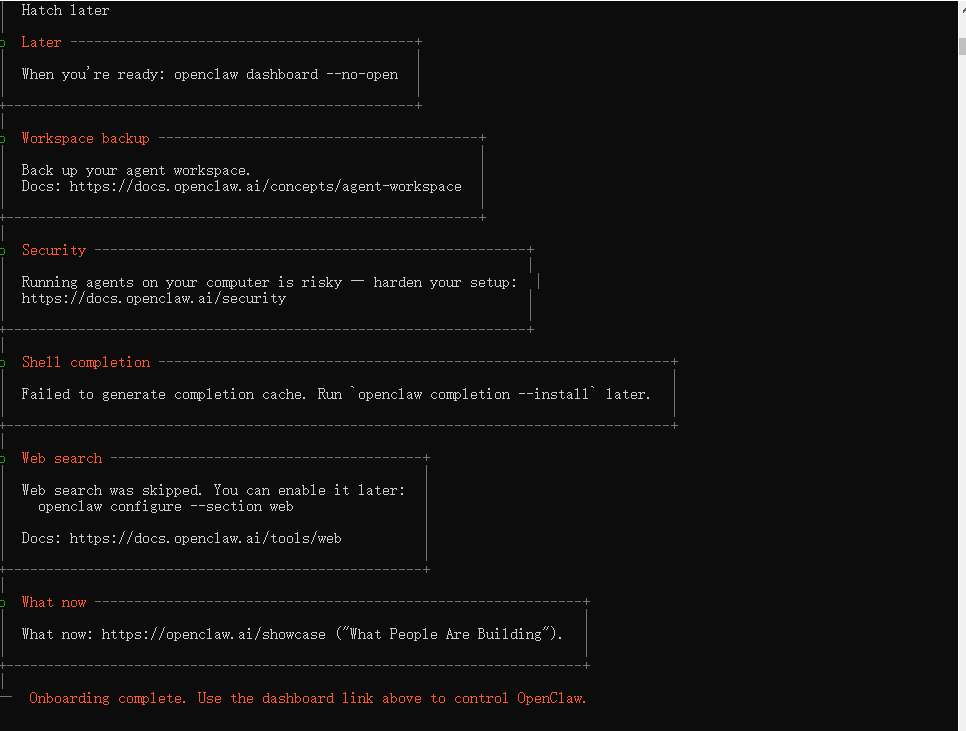
一直到最后出现complete就成功了(会弹出一个新的黑窗口),先不要关闭!!!
二、配置Token Plan 团队版
1、打开配置文件openclaw.json,默认路径是:C:\Users\Administrator\.openclaw
2、添加models和agents中的model、models,并将apiKey改成你的key
"models": {
    "mode": "merge",
    "providers": {
      "bailian-token-plan": {
        "baseUrl": "https://token-plan.cn-beijing.maas.aliyuncs.com/compatible-mode/v1",
        "apiKey": "YOUR_API_KEY",
        "api": "openai-completions",
        "models": [
          {
            "id": "qwen3.6-plus",
            "name": "qwen3.6-plus",
            "reasoning": false,
            "input": ["text", "image"],
            "contextWindow": 1000000,
            "maxTokens": 65536,
            "cost": { "input": 0, "output": 0, "cacheRead": 0, "cacheWrite": 0 },
            "compat": { "thinkingFormat": "qwen" }
          },
          {
            "id": "qwen3.6-flash",
            "name": "qwen3.6-flash",
            "reasoning": false,
            "input": ["text", "image"],
            "contextWindow": 1000000,
            "maxTokens": 32768,
            "cost": { "input": 0, "output": 0, "cacheRead": 0, "cacheWrite": 0 },
            "compat": { "thinkingFormat": "qwen" }
          },
          {
            "id": "deepseek-v4-pro",
            "name": "deepseek-v4-pro",
            "reasoning": false,
            "input": ["text"],
            "contextWindow": 163840,
            "maxTokens": 32768,
            "cost": { "input": 0, "output": 0, "cacheRead": 0, "cacheWrite": 0 }
          },
          {
            "id": "deepseek-v4-flash",
            "name": "deepseek-v4-flash",
            "reasoning": false,
            "input": ["text"],
            "contextWindow": 163840,
            "maxTokens": 16384,
            "cost": { "input": 0, "output": 0, "cacheRead": 0, "cacheWrite": 0 }
          },
          {
            "id": "deepseek-v3.2",
            "name": "deepseek-v3.2",
            "reasoning": false,
            "input": ["text"],
            "contextWindow": 163840,
            "maxTokens": 16384,
            "cost": { "input": 0, "output": 0, "cacheRead": 0, "cacheWrite": 0 },
            "compat": { "thinkingFormat": "qwen" }
          },
          {
            "id": "kimi-k2.6",
            "name": "kimi-k2.6",
            "reasoning": false,
            "input": ["text", "image"],
            "contextWindow": 262144,
            "maxTokens": 32768,
            "cost": { "input": 0, "output": 0, "cacheRead": 0, "cacheWrite": 0 },
            "compat": { "thinkingFormat": "qwen" }
          },
          {
            "id": "kimi-k2.5",
            "name": "kimi-k2.5",
            "reasoning": false,
            "input": ["text", "image"],
            "contextWindow": 262144,
            "maxTokens": 32768,
            "cost": { "input": 0, "output": 0, "cacheRead": 0, "cacheWrite": 0 },
            "compat": { "thinkingFormat": "qwen" }
          },
          {
            "id": "glm-5.1",
            "name": "glm-5.1",
            "reasoning": false,
            "input": ["text"],
            "contextWindow": 202752,
            "maxTokens": 16384,
            "cost": { "input": 0, "output": 0, "cacheRead": 0, "cacheWrite": 0 },
            "compat": { "thinkingFormat": "qwen" }
          },
          {
            "id": "glm-5",
            "name": "glm-5",
            "reasoning": false,
            "input": ["text"],
            "contextWindow": 202752,
            "maxTokens": 16384,
            "cost": { "input": 0, "output": 0, "cacheRead": 0, "cacheWrite": 0 },
            "compat": { "thinkingFormat": "qwen" }
          },
          {
            "id": "MiniMax-M2.5",
            "name": "MiniMax-M2.5",
            "reasoning": false,
            "input": ["text"],
            "contextWindow": 196608,
            "maxTokens": 32768,
            "cost": { "input": 0, "output": 0, "cacheRead": 0, "cacheWrite": 0 }
          }
        ]
      }
    }
  },
"model": {
"primary": "bailian-token-plan/qwen3.6-plus"
},
"models": {
"bailian-token-plan/qwen3.6-plus": {},
"bailian-token-plan/qwen3.6-flash": {},
"bailian-token-plan/deepseek-v4-pro": {},
"bailian-token-plan/deepseek-v4-flash": {},
"bailian-token-plan/deepseek-v3.2": {},
"bailian-token-plan/kimi-k2.6": {},
"bailian-token-plan/kimi-k2.5": {},
"bailian-token-plan/glm-5.1": {},
"bailian-token-plan/glm-5": {},
"bailian-token-plan/MiniMax-M2.5": {}
}添加位置如下: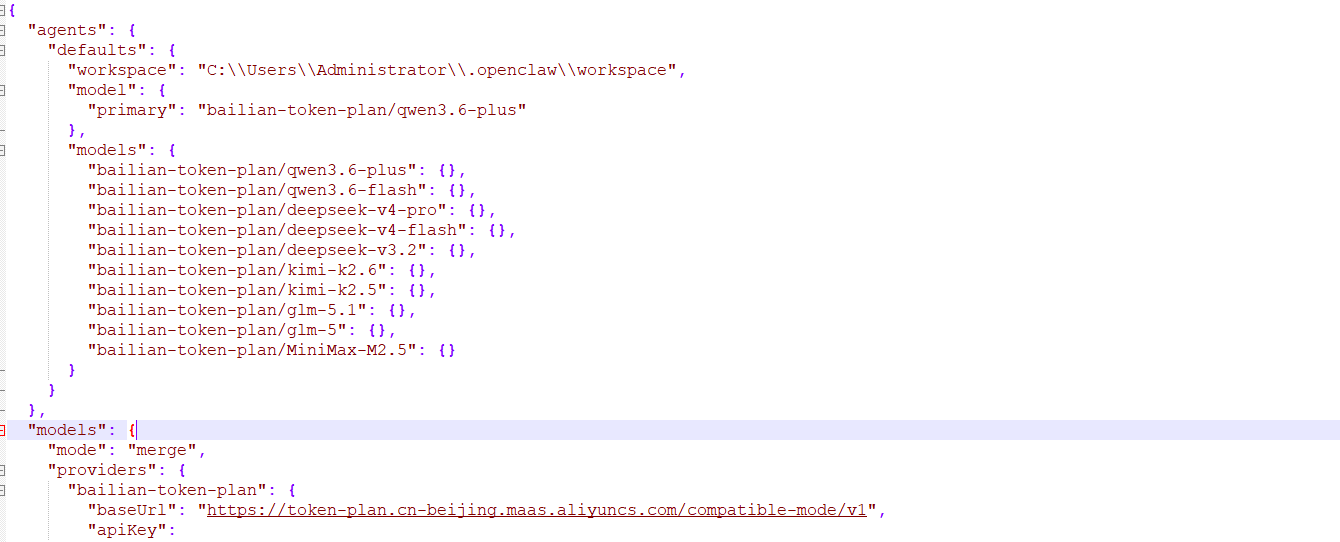
3、保存修改内容
4、运行以下命令重启网关,使配置生效
openclaw gateway restart此时会打开一个新的窗口
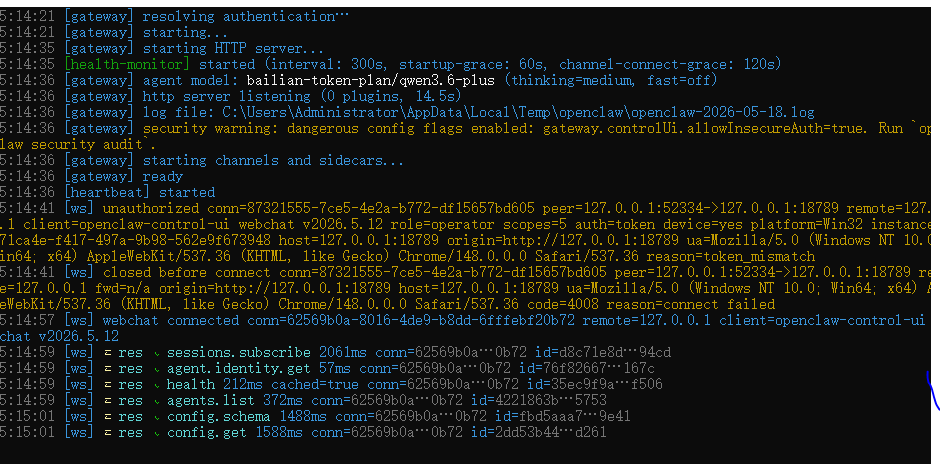
5、此时在浏览器中输入http://127.0.0.1:18789/就可以进行对话了。

Agent 垂直技术社区,欢迎活跃、内容共建。
更多推荐
 5
5 0
0- 0


 已为社区贡献1条内容

所有评论(0)