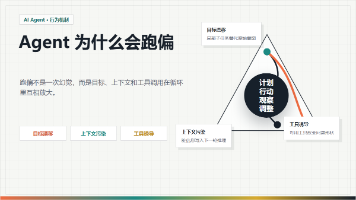
如何让多个AI Agent高效协作?手把手教你构建企业级AI智能体系统,大模型入门到精通,收藏这篇就足够了!
本文将深入探讨LangGraph中的两个核心概念:Handoffs(交接)和Supervisor(主管) 模式,通过详细的技术分析和代码示例,帮助你掌握构建生产级多智能体系统的关键技术。
在AI技术快速发展的今天,多智能体系统(Multi-Agent Systems)被称为"AI的第三波浪潮",而LangGraph作为新一代的智能体编排框架,为构建复杂的多智能体系统提供了强大的基础设施。
本文将深入探讨LangGraph中的两个核心概念:Handoffs(交接)和Supervisor(主管) 模式,通过详细的技术分析和代码示例,帮助你掌握构建生产级多智能体系统的关键技术。
一、LangGraph多智能体架构概述
1.1 什么是多智能体系统?
在多智能体架构中,智能体可以被表示为图节点。每个智能体节点执行其步骤并决定是完成执行还是路由到另一个智能体,包括可能路由到自己(例如,在循环中运行)。这种设计使得系统能够动态地在不同专业化的智能体之间协调任务。
1.2 LangGraph的核心优势
LangGraph基于Google的Pregel系统设计理念,采用事件驱动架构,提供了以下关键特性:
- 状态管理:内置的状态持久化和管理机制
- 流式处理:原生支持token级别的流式输出
- Human-in-the-loop:支持人工干预和审批流程
- 灵活的控制流:支持单智能体、多智能体、层级式等多种架构模式
二、Handoffs(交接)机制详解
2.1 Handoffs的核心概念
Handoffs是多智能体交互中的常见模式,其中一个智能体将控制权移交给另一个智能体。Handoffs允许你指定:destination(目标智能体)和payload(要传递给该智能体的信息)。
2.2 Command原语的引入
2024年12月,LangGraph引入了Command原语,这是一个革命性的改进。Command是LangGraph中的一种特殊类型,当从节点返回时,它不仅指定状态更新(如常规),还指定接下来要去的节点。
2.3 实现Handoffs的核心代码
from
 typing
import
 Literal, Annotated


from
 langchain_core.tools
import
 tool


from
 langgraph.types
import
 Command


from
 langgraph.graph
import
 StateGraph, MessagesState


from
 langgraph.prebuilt
import
 InjectedState


# 创建handoff工具的函数


def

create_handoff_tool
(*, agent_name: str, description: str = None)
:


    name =
f"transfer_to_
{agent_name}
"


    description = description
or
f"Ask
{agent_name}
 for help."


    @tool(name, description=description)


def

handoff_tool
(


        task_description: Annotated[


            str,


"Description of what the next agent should do"


        ],


        state: Annotated[MessagesState, InjectedState],


    )
 -> Command:


# 创建任务描述消息


        task_message = {
"role"
:
"user"
,
"content"
: task_description}


# 准备下一个智能体的输入


        agent_input = {**state,
"messages"
: [task_message]}


return
 Command(


            goto=agent_name,
# 指定下一个智能体


            update=agent_input,
# 传递的状态更新


            graph=Command.PARENT
# 在父图中导航


        )


return
 handoff_tool
2.4 智能体节点中使用Command
def

agent_node
(state: MessagesState)
 -> Command[Literal["agent_a", "agent_b", "END"]]:


# 智能体逻辑处理


    messages = state[
"messages"
]


# 基于某种条件决定路由


if
 need_expert_help(messages):


return
 Command(


            goto=
"agent_b"
,
# 路由到agent_b


            update={
"messages"
: messages + [new_message]}


        )


elif
 task_completed(messages):


return
 Command(


            goto=
"END"
,


            update={
"messages"
: messages + [final_message]}


        )


else
:


# 继续当前智能体的处理


return
 Command(


            goto=
"agent_a"
,
# 路由回自己


            update={
"messages"
: messages + [processing_message]}


        )
三、Supervisor(主管)模式深度剖析
3.1 Supervisor架构设计
supervisor模式中,各个智能体由中央主管智能体协调。主管控制所有通信流和任务委派,根据当前上下文和任务要求决定调用哪个智能体。
3.2 使用langgraph-supervisor库
LangGraph提供了预构建的langgraph-supervisor库,简化了主管系统的创建:
from
 langgraph_supervisor
import
 create_supervisor


from
 langchain.chat_models
import
 init_chat_model


# 初始化模型


supervisor_model = init_chat_model(
"openai:gpt-4"
)


# 创建专业智能体


research_agent = create_react_agent(


    model=
"openai:gpt-4"
,


    tools=[web_search_tool, document_reader_tool],


    prompt=
"You are a research expert. Focus on finding accurate information."
,


    name=
"research_expert"


)


math_agent = create_react_agent(


    model=
"openai:gpt-4"
,


    tools=[calculator_tool, equation_solver_tool],


    prompt=
"You are a mathematics expert. Solve complex calculations."
,


    name=
"math_expert"


)


# 创建主管系统


supervisor_app = create_supervisor(


    agents=[research_agent, math_agent],


    model=supervisor_model,


    prompt=(


"You are a supervisor managing two agents:\n"


"- a research agent for information gathering\n"


"- a math agent for calculations\n"


"Assign work to one agent at a time based on the task."


    ),


    add_handoff_back_messages=
True
,


    output_mode=
"full_history"


).compile()
3.3 自定义Handoff工具
默认情况下,主管使用预构建的create_handoff_tool创建的交接工具。你也可以创建自己的自定义交接工具:
from
 typing
import
 Annotated


from
 langchain_core.tools
import
 tool, BaseTool, InjectedToolCallId


from
 langchain_core.messages
import
 ToolMessage


from
 langgraph.types
import
 Command


from
 langgraph.prebuilt
import
 InjectedState


def

create_custom_handoff_tool
(


    *,


    agent_name: str,


    name: str = None,


    description: str = None


)
 -> BaseTool:


    @tool(name, description=description)


def

handoff_to_agent
(


# LLM填充的任务描述


        task_description: Annotated[


            str,


"Detailed description of the task including context"


        ],


# 可以添加额外的参数


        priority: Annotated[


            str,


"Priority level: high, medium, low"


        ],


# 注入的状态


        state: Annotated[dict, InjectedState],


        tool_call_id: Annotated[str, InjectedToolCallId],


    )
:


# 创建工具消息


        tool_message = ToolMessage(


            content=
f"Successfully transferred to
{agent_name}
 with priority
{priority}
"
,


            name=name,


            tool_call_id=tool_call_id,


        )


# 更新状态并路由


return
 Command(


            goto=agent_name,


            update={


"messages"
: state[
"messages"
] + [tool_message],


"current_task"
: task_description,


"priority"
: priority


            },


            graph=Command.PARENT


        )


return
 handoff_to_agent
四、高级特性与最佳实践
4.1 状态管理与持久化
from
 langgraph.checkpoint.memory
import
 InMemorySaver


from
 langgraph.store.memory
import
 InMemoryStore


# 短期记忆(对话状态)


checkpointer = InMemorySaver()


# 长期记忆(知识存储)


store = InMemoryStore()


# 编译时添加持久化支持


app = supervisor_app.compile(


    checkpointer=checkpointer,


    store=store


)
4.2 输出模式控制
LangGraph提供了灵活的输出模式控制:
# 创建主管时指定输出模式


supervisor = create_supervisor(


    agents=[agent1, agent2],


    model=model,


    output_mode=
"last_message"
,
# 只返回最后的消息


# output_mode="full_history"  # 返回完整历史


)
4.3 消息转发工具
你可以为主管配备一个工具,直接将从工作智能体收到的最后一条消息转发到图的最终输出:
from
 langgraph_supervisor.handoff
import
 create_forward_message_tool


# 创建转发工具


forwarding_tool = create_forward_message_tool(
"supervisor"
)


# 在创建主管时添加


workflow = create_supervisor(


    [research_agent, math_agent],


    model=model,


    tools=[forwarding_tool]
# 添加转发工具


)
4.4 处理复杂的多智能体工作流
class

MultiAgentState
(TypedDict)
:


    messages: Annotated[list, add_messages]


    current_agent: str


    task_queue: list


    results: dict


def

create_complex_workflow
()
:


    workflow = StateGraph(MultiAgentState)


# 添加智能体节点


    workflow.add_node(
"supervisor"
, supervisor_agent)


    workflow.add_node(
"researcher"
, research_agent)


    workflow.add_node(
"analyst"
, data_analyst_agent)


    workflow.add_node(
"writer"
, content_writer_agent)


# 使用Command进行动态路由


def

supervisor_agent
(state: MultiAgentState)
 -> Command:


        task = state[
"task_queue"
][
0
]
if
 state[
"task_queue"
]
else
None


if
not
 task:


return
 Command(goto=
"END"
, update=state)


# 基于任务类型分配给不同智能体


if
 task[
"type"
] ==
"research"
:


return
 Command(


                goto=
"researcher"
,


                update={**state,
"current_agent"
:
"researcher"
}


            )


elif
 task[
"type"
] ==
"analysis"
:


return
 Command(


                goto=
"analyst"
,


                update={**state,
"current_agent"
:
"analyst"
}


            )


# ... 更多路由逻辑


return
 workflow.compile()
五、Swarm模式vs Supervisor模式
5.1 Swarm模式特点
在Swarm架构中,智能体基于其专业化动态地相互传递控制权。系统会记住哪个智能体最后处于活动状态,确保在后续交互中,对话从该智能体恢复。
5.2 选择合适的模式
- Supervisor模式适用于:
- 需要集中控制和决策的场景
- 任务分配规则明确的系统
- 需要严格的执行顺序控制
- Swarm模式适用于:
- 智能体间平等协作的场景
- 需要更灵活的动态路由
- 去中心化的决策制定
六、性能优化与注意事项
6.1 避免状态膨胀
在长对话中,消息历史可能变得非常大。考虑实施消息摘要或选择性传递:
def

selective_handoff
(state: MessagesState)
 -> Command:


# 只传递最近的N条消息


    recent_messages = state[
"messages"
][
-10
:]


# 创建摘要


    summary = create_summary(state[
"messages"
][:
-10
])


return
 Command(


        goto=
"next_agent"
,


        update={
"messages"
: [summary] + recent_messages}


    )
6.2 错误处理与恢复
def

robust_agent
(state: MessagesState)
 -> Command:


try
:


# 智能体逻辑


        result = process_task(state)


return
 Command(goto=
"success_handler"
, update={
"result"
: result})


except
 Exception
as
 e:


# 错误恢复


return
 Command(


            goto=
"error_handler"
,


            update={
"error"
: str(e),
"fallback_agent"
:
"supervisor"
}


        )
七、实战案例:构建智能客服系统
让我们通过一个完整的例子来展示如何使用LangGraph构建一个多智能体客服系统:
from
 langgraph_supervisor
import
 create_supervisor


from
 langgraph.prebuilt
import
 create_react_agent


import
 os


# 设置API密钥


os.environ[
"OPENAI_API_KEY"
] =
"your-api-key"


# 1. 创建专业智能体


# FAQ智能体


faq_agent = create_react_agent(


    model=
"openai:gpt-3.5-turbo"
,


    tools=[search_faq_tool, get_product_info_tool],


    prompt=
"You handle frequently asked questions about products and services."
,


    name=
"faq_specialist"


)


# 技术支持智能体


tech_agent = create_react_agent(


    model=
"openai:gpt-4"
,


    tools=[diagnose_issue_tool, check_system_status_tool],


    prompt=
"You are a technical support specialist. Help users solve technical problems."
,


    name=
"tech_specialist"


)


# 订单处理智能体


order_agent = create_react_agent(


    model=
"openai:gpt-3.5-turbo"
,


    tools=[check_order_status_tool, process_return_tool],


    prompt=
"You handle order-related inquiries and returns."
,


    name=
"order_specialist"


)


# 2. 创建主管系统


customer_service_system = create_supervisor(


    agents=[faq_agent, tech_agent, order_agent],


    model=
"openai:gpt-4"
,


    prompt=
"""


    You are a customer service supervisor managing three specialists:


    - FAQ specialist: handles general questions


    - Tech specialist: handles technical issues


    - Order specialist: handles order and shipping issues


    Analyze the customer's query and delegate to the appropriate specialist.


    If the query spans multiple areas, handle them sequentially.


    """
,


    add_handoff_back_messages=
True
,


    output_mode=
"last_message"
# 返回最终响应


)


# 3. 编译并运行


app = customer_service_system.compile(


    checkpointer=InMemorySaver()
# 添加对话记忆


)


# 4. 处理客户查询


async
def

handle_customer_query
(query: str, thread_id: str)
:


    config = {
"configurable"
: {
"thread_id"
: thread_id}}


    result =
await
 app.ainvoke(


        {
"messages"
: [{
"role"
:
"user"
,
"content"
: query}]},


        config=config


    )


return
 result[
"messages"
][
-1
][
"content"
]


# 使用示例


response =
await
 handle_customer_query(


"My laptop won't turn on and I want to check if it's still under warranty"
,


    thread_id=
"customer_123"


)
八、最佳实践建议
- 始终为智能体定义清晰的职责边界
- 实施适当的错误处理和回退机制
- 使用checkpointer保持对话状态的连续性
- 监控和优化智能体间的交互效率
- 定期评估和调整智能体的提示词和工具配置
我们该怎样系统的去转行学习大模型 ?
很多想入行大模型的人苦于现在网上的大模型老课程老教材,学也不是不学也不是,基于此我用做产品的心态来打磨这份大模型教程,深挖痛点并持续修改了近100余次后,终于把整个AI大模型的学习门槛,降到了最低!
在这个版本当中:
第一您不需要具备任何算法和数学的基础第二不要求准备高配置的电脑第三不必懂Python等任何编程语言
您只需要听我讲,跟着我做即可,为了让学习的道路变得更简单,这份大模型教程已经给大家整理并打包分享出来, 😝有需要的小伙伴,可以 扫描下方二维码领取🆓↓↓↓

一、大模型经典书籍(免费分享)
AI大模型已经成为了当今科技领域的一大热点,那以下这些大模型书籍就是非常不错的学习资源。

二、640套大模型报告(免费分享)
这套包含640份报告的合集,涵盖了大模型的理论研究、技术实现、行业应用等多个方面。无论您是科研人员、工程师,还是对AI大模型感兴趣的爱好者,这套报告合集都将为您提供宝贵的信息和启示。(几乎涵盖所有行业)
三、大模型系列视频教程(免费分享)

四、2025最新大模型学习路线(免费分享)
我们把学习路线分成L1到L4四个阶段,一步步带你从入门到进阶,从理论到实战。

L1阶段:启航篇丨极速破界AI新时代
L1阶段:我们会去了解大模型的基础知识,以及大模型在各个行业的应用和分析;学习理解大模型的
核心原理、关键技术以及大模型应用场景。

L2阶段:攻坚篇丨RAG开发实战工坊
L2阶段是我们的AI大模型RAG应用开发工程,我们会去学习RAG检索增强生成:包括Naive RAG、Advanced-RAG以及RAG性能评估,还有GraphRAG在内的多个RAG热门项目的分析。

L3阶段:跃迁篇丨Agent智能体架构设计
L3阶段:大模型Agent应用架构进阶实现,我们会去学习LangChain、 LIamaIndex框架,也会学习到AutoGPT、 MetaGPT等多Agent系统,打造我们自己的Agent智能体。

L4阶段:精进篇丨模型微调与私有化部署
L4阶段:大模型的微调和私有化部署,我们会更加深入的探讨Transformer架构,学习大模型的微调技术,利用DeepSpeed、Lamam Factory等工具快速进行模型微调;并通过Ollama、vLLM等推理部署框架,实现模型的快速部署。

L5阶段:专题集丨特训篇 【录播课】

全套的AI大模型学习资源已经整理打包,有需要的小伙伴可以微信扫描下方二维码,免费领取

Agent 垂直技术社区,欢迎活跃、内容共建。
更多推荐
 5
5 0
0- 0


 已为社区贡献94条内容

所有评论(0)